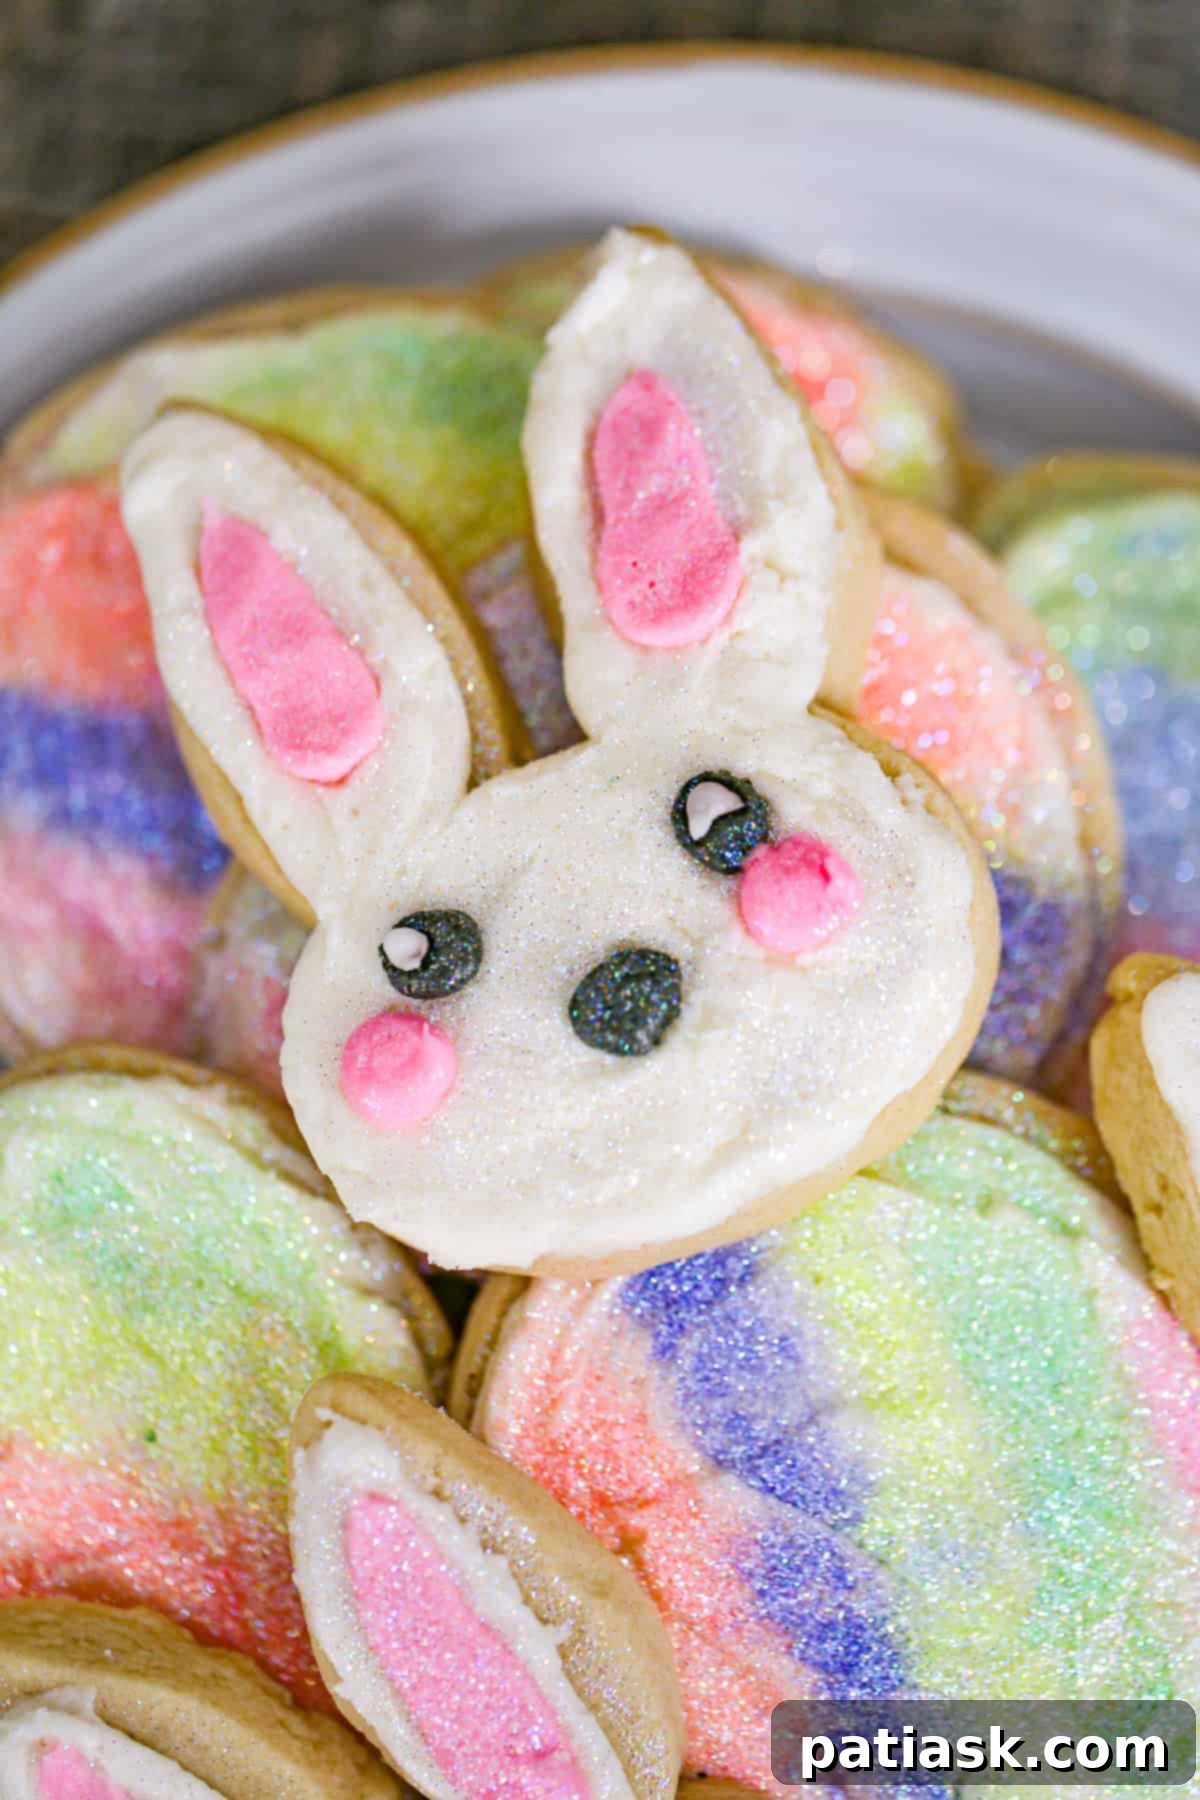
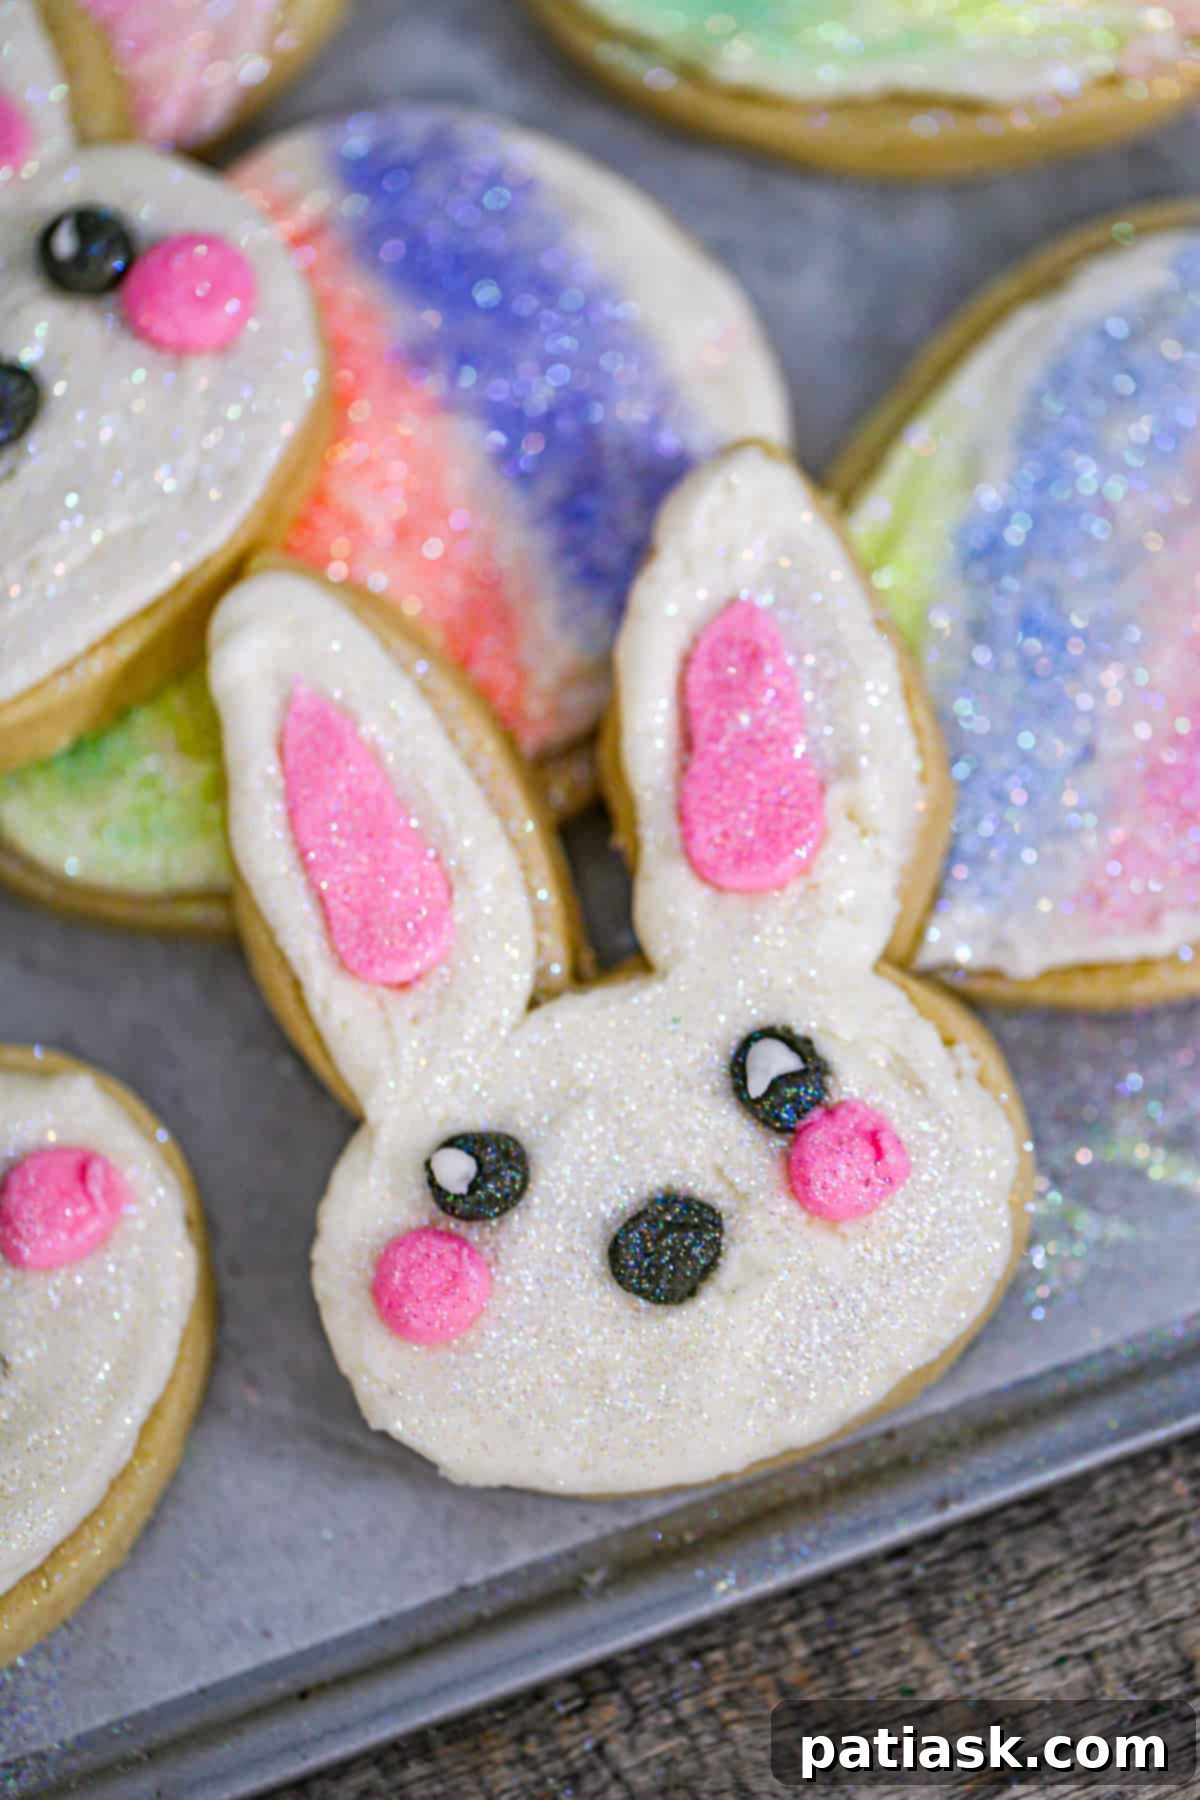
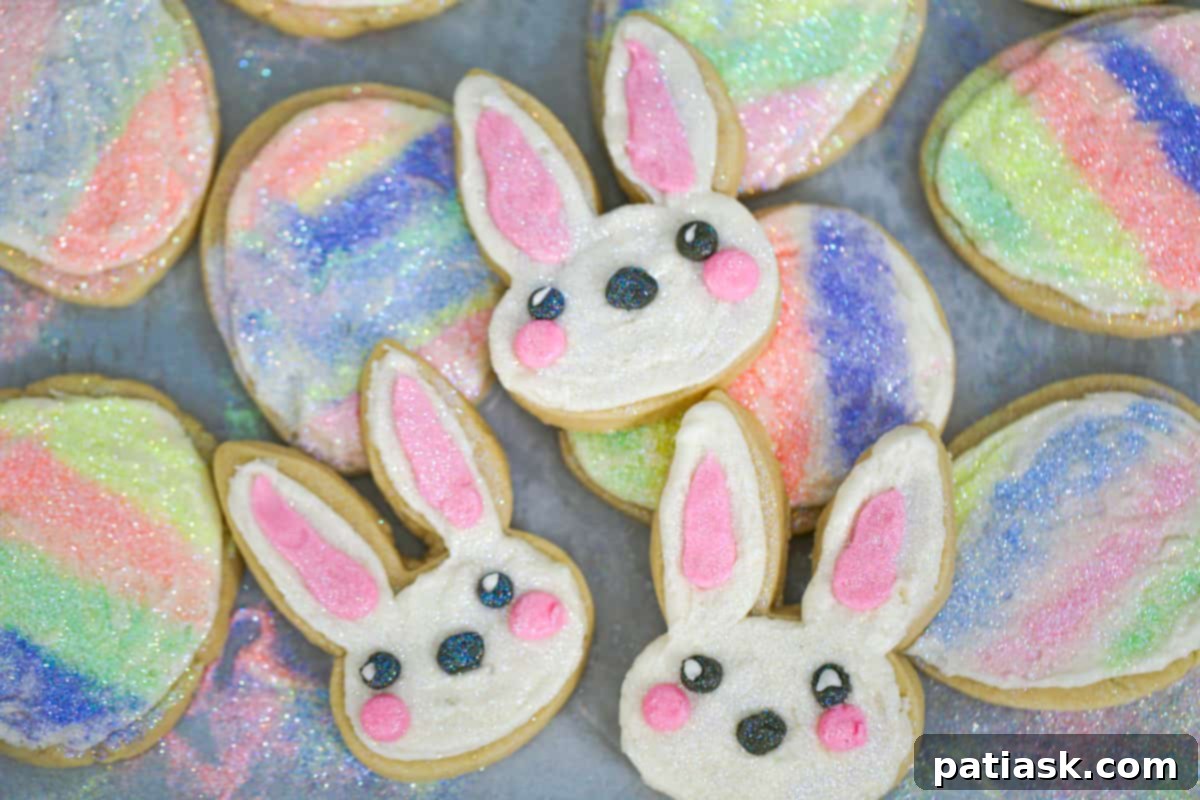
Calling all bakers and dessert enthusiasts! Get ready to elevate your Easter celebrations with the most adorable and delicious treats of the season: Cute Easter Bunny Sugar Cookies. These delightful sugar cookies, shaped like charming bunnies and adorned with simple yet captivating decorations, are an absolute must-have for any spring gathering or family festivity. They’re not just cookies; they’re tiny canvases of joy, perfect for spreading smiles and adding a touch of whimsy to your holiday table. Forget complex baking endeavors; this recipe focuses on simple ingredients and straightforward steps, ensuring even novice bakers can achieve show-stopping results.
This year, impress your friends and family with these festive sugar cookies that capture the essence of spring. While you’re at it, you might also enjoy exploring our popular
Easter Egg Sugar Cookies
and the playful
Easter Jelly Bean Cookies! Both utilize the same versatile cookie dough and luscious buttercream frosting, offering endless possibilities with just a change of cookie cutter shape.
Why These Easter Bunny Sugar Cookies Will Melt Your Heart
There’s something undeniably magical about a freshly baked batch of frosted Easter Bunny sugar cookies. Each cookie, with its sweet little ears, twinkling eyes, and delicate nose, evokes a sense of nostalgia and childlike wonder. These charming treats transcend mere dessert; they become edible symbols of springtime renewal, joyous family moments, and the simple pleasure of sharing something homemade with loved ones.
Whether you’re looking for a delightful activity to do with children during the Easter break or aiming to create a memorable dessert for your holiday feast, baking these sweet Easter Bunny sugar cookies is the perfect choice. This comprehensive guide will take you through every stage of the process, from preparing the ideal cookie dough and meticulously rolling out the perfect cutouts to the exciting final step of decorating each bunny with vibrant, creamy frosting.
With our expert tips and easy-to-follow instructions, you’ll effortlessly create a stunning assortment of gorgeous Easter Bunny face sugar cookies that will be adored by everyone, making your Easter celebrations extra special and deliciously unforgettable.
Gather Your Ingredients: The Foundation of Delicious Bunny Cookies
Crafting the perfect batch of Easter Bunny sugar cookies begins with a careful selection of fresh, high-quality ingredients. Our recipe calls for a balanced combination that yields tender, flavorful cookies that hold their shape beautifully during baking – a crucial factor for intricate cookie designs. For the irresistibly smooth buttercream frosting, you’ll need a few pantry staples that come together to create a light, creamy, and pipeable consistency, ideal for detailed decorating.
Easter Bunny Sugar Cookie Dough Essentials
- All-purpose flour: Crucial for structure. Remember to spoon and level it for accuracy, preventing a dense or dry cookie.
- Baking powder: Gives the cookies a slight lift and a tender crumb.
- Unsalted butter: Cold and cut into cubes. Using cold butter helps maintain the cookie’s shape during baking. If using salted butter, simply omit the extra salt from the recipe.
- Granulated sugar: Sweetens the dough and contributes to a crisp edge.
- Egg: Acts as a binder, adding richness and moisture to the dough.
- Salt: Balances the sweetness and enhances all the flavors.
- Vanilla extract: A classic flavor enhancer that gives the cookies a warm, inviting aroma.
- Almond extract: Adds a subtle, sophisticated depth of flavor that complements the vanilla beautifully.
Easy Buttercream Frosting Ingredients
- Unsalted butter: At room temperature for a smooth, creamy frosting.
- Powdered sugar: The base for buttercream, providing sweetness and body. Sift it for the smoothest results.
- Salt: Just a pinch to cut through the sweetness and highlight other flavors.
- Vanilla extract: Essential for that classic, delightful buttercream taste.
- Milk of choice or heavy cream: Used to achieve the perfect consistency for piping and spreading.
-
Assorted sparkling sand sugars
and/or shimmering sugar dust: These add a magical, celebratory sparkle to your bunny cookies. We recommend the
OH! SWEET ART – Easter Disco Cake SET
for its vibrant array of 7 colors (Baby Pink, Baby Blue, Baby Violet, Baby Yellow, Baby Green, Baby Orange). - Food coloring: Pink, brown/black for creating adorable bunny features. Gel food coloring works best for vibrant hues without thinning the frosting.
Essential Tools for Your Easter Cookie Baking Adventure
Having the right tools can make all the difference in your cookie baking and decorating experience. These items are designed to simplify the process, ensuring your Easter Bunny sugar cookies turn out perfectly shaped and beautifully adorned. Investing in quality baking tools will not only make this project more enjoyable but also serve you well for many baking endeavors to come.
-
Mixer
(Stand or Handheld): A powerful mixer is essential for creaming butter and sugar until light and fluffy, and for ensuring your buttercream frosting is smooth and lump-free. A stand mixer is particularly helpful for hands-free mixing. -
Rolling Pin
: For achieving an even dough thickness, which is key to consistent baking and professional-looking cookies. A rolling pin with adjustable guides can be particularly useful. -
Easter Cookie Cutters
: The stars of the show! To create perfect bunny shapes, a good set of cookie cutters is indispensable. We highly recommend the
Ann Clark 3-piece Easter Bunny cookie cutter set
, which includes a large egg, a cute bunny face, and a peep-inspired cutout. However, any bunny face cutters you have will work wonderfully. -
Sanding Sugar Sprinkles Or Disco Glitter
: These add a dazzling finish to your decorated cookies. You can find a wide variety in the baking aisle of your grocery store or online. For extra sparkle, consider these
sanding sugar sprinkles
or the vibrant
OH! SWEET ART – Easter Disco Cake SET. Using these simple sprinkles can save time and effort compared to coloring multiple batches of frosting, while still achieving a beautiful, colorful effect. -
Decorating Tools for Vanilla Buttercream:
To apply your delicious buttercream, you’ll need either a small knife or a
small icing spatula
for spreading. For more intricate details, a piping bag (reusable or disposable) or even a sturdy ziplock bag with a corner snipped off will work. If using a piping bag, a
medium-sized round tip
is great for outlining and filling. Remember, you can also use a different
sugar cookie icing
recipe if you prefer a harder, glossy finish. -
Baking Sheets and Parchment Paper:
Essential for preventing sticking and ensuring even baking. We highly recommend using
USA Pan half baking sheets
lined with
parchment paper
for the best results and easiest cleanup.
How to Bake Adorable Bunny Face Shaped Sugar Cookies
Baking these delightful bunny sugar cookies is a rewarding process that combines simple steps with a little bit of magic. Follow these instructions carefully to ensure your cookies are perfectly baked, tender, and ready for their adorable decorations. The key to perfectly shaped cut-out cookies is managing the dough’s temperature and not overworking it.
Step-by-Step for Bunny Shaped Sugar Cookies
- Prepare your baking sheets: Line two large baking sheets with parchment paper. This prevents sticking and makes transferring baked cookies much easier. Set them aside for later use.
- Whisk dry ingredients: In a medium bowl, thoroughly whisk together the all-purpose flour, salt, and baking powder. This step ensures that the leavening agent and salt are evenly distributed throughout the dough, leading to consistent results. Set this dry mixture aside.
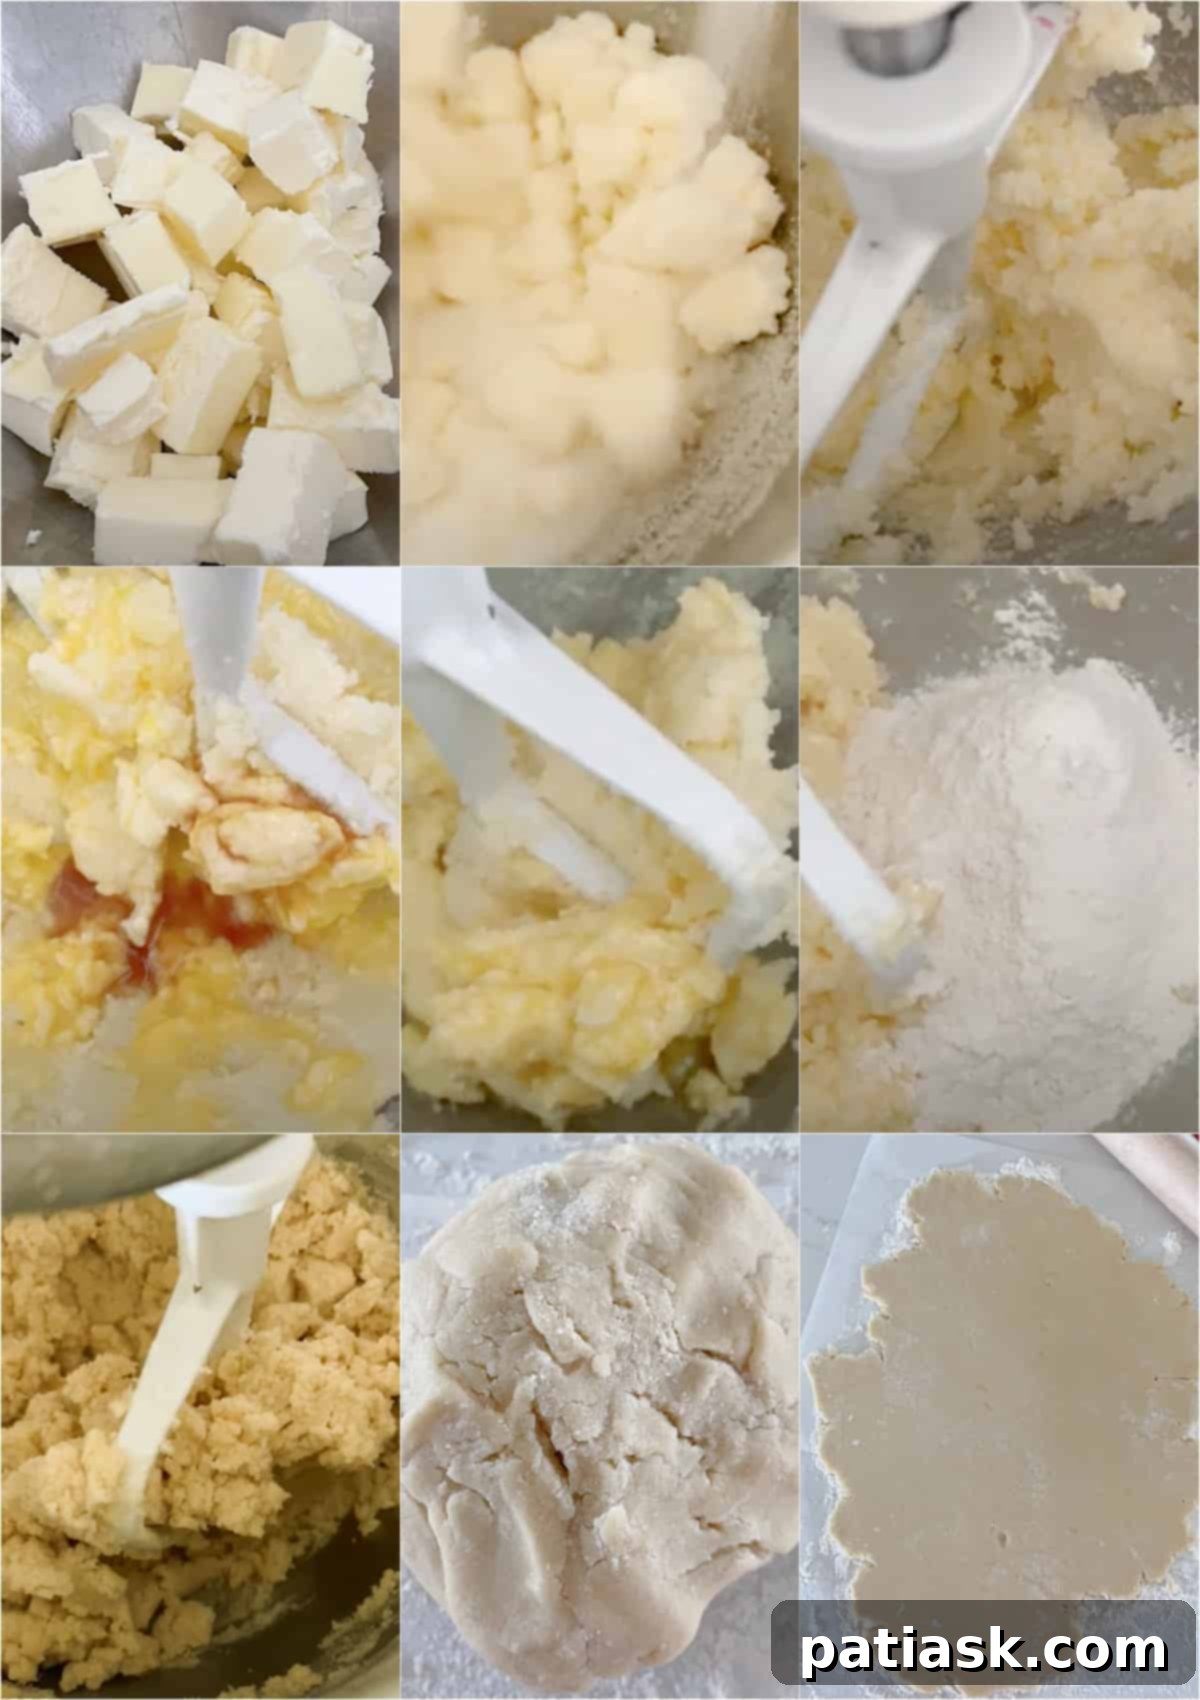
- Cream butter and sugar: In the bowl of a stand mixer fitted with the paddle attachment (or using a large bowl and a hand mixer), cream together the cold, cubed unsalted butter and granulated sugar on medium speed. Continue mixing until the mixture is light, fluffy, and smooth. This typically takes 2-3 minutes. Scrape down the sides of the bowl as needed.
- Add wet ingredients: Blend in the large egg, vanilla extract, and almond extract until just combined. Be careful not to overmix at this stage.
- Incorporate dry mixture: Gradually add the reserved flour mixture to the wet ingredients, beating on low speed until just combined. The dough will appear crumbly at first. Stop mixing as soon as no dry streaks of flour remain, scraping down the bottom and sides of the bowl to ensure everything is incorporated.
- Form the dough: The dough will be somewhat crumbly. Use your hands to gently knead it together as you scoop it out of the bowl, forming it into a cohesive ball. Divide the dough into two equal disks, wrap each tightly in plastic wrap, and refrigerate for at least 30 minutes, or up to 2 hours. Chilling is crucial for easy rolling and preventing spread.
- Roll and cut: On a lightly floured surface (or between two sheets of parchment paper to avoid extra flour), roll out one disk of chilled dough to your desired thickness, ideally between ⅓” to ⅜”. Using your chosen bunny-shaped cookie cutter, cut out shapes and carefully transfer them to the prepared baking sheets, spacing them about 2 inches apart. Re-roll scraps gently, without overworking, and cut more cookies.
- Flash freeze: Once all cookies are on the baking sheets, transfer the sheets to the freezer for 10 minutes. While they chill, preheat your oven to 350 degrees F (175 degrees C). This flash freeze step is essential for helping the cookies hold their shape during baking.
- Bake: Bake the cookies for 10-12 minutes, or until the edges are just barely golden. The centers should still look pale. Be vigilant and avoid over-baking, as this will result in hard, brown cookies instead of soft, bakery-style treats.
- Cool: Let the cookies sit on the baking sheets for a few minutes after removing them from the oven to firm up. Then, carefully transfer them to a wire rack to cool completely. It’s vital that the cookies are fully cooled before you begin frosting them, otherwise, your beautiful buttercream will melt.
Pro Tips for Perfect Sugar Cookies Every Time
Achieving bakery-quality sugar cookies isn’t just about following the recipe; it’s also about understanding the nuances of baking. These tips will help you create flawless Easter bunny sugar cookies that are not only adorable but also perfectly tender and delicious.
- Keep your butter cold and cubed: This is a golden rule for cut-out cookies! Using cold butter prevents the dough from becoming too soft and sticky, which helps your bunny shapes maintain their sharp edges and prevents spreading in the oven. The small cubes also incorporate more easily into the sugar for a lighter crumb.
- Embrace the flash freeze technique: Once your bunny shapes are cut, a quick 10-minute flash freeze in the freezer before baking is a game-changer. This firming-up process significantly reduces cookie spread, ensuring your adorable bunnies emerge from the oven looking exactly as intended. If you’re baking in batches, keep unbaked cookies chilled in the refrigerator while one tray bakes.
- Master flour measurement: Accuracy is paramount in baking, especially with flour. Always “spoon and level” your flour: fluff up the flour in its container, then lightly spoon it into your dry measuring cup without packing it down. Use a straight edge (like the back of a knife) to level off any excess. This prevents adding too much flour, which can lead to dry, tough cookies.
- Avoid over-baking: This is another critical tip for soft, tender sugar cookies. Over-baked cookies will turn golden brown and lose their signature softness, becoming dry and crumbly. Watch them carefully; cookies are done when the edges are just barely set and light golden, while the centers still look slightly pale. They will continue to set as they cool on the baking sheet.
- Patience with frosting: Once your beautiful cookies are frosted, resist the urge to stack them immediately. Allow the frosting to set completely, ideally for at least 3 hours or even overnight, especially if you’re using a thicker buttercream. This prevents smudging and ensures your decorations remain pristine.
- Shortcut for frosting: While homemade buttercream is undeniably delicious, don’t hesitate to use good quality store-bought buttercream frosting for an easy shortcut. It’s a fantastic way to save time without sacrificing the fun of decorating, making your Easter baking experience even more stress-free.
Crafting the Perfect Easy Buttercream Frosting for Your Cute Bunny Cookies
A truly great sugar cookie deserves an equally great frosting. Our easy buttercream frosting recipe is wonderfully versatile, offering a smooth, creamy texture that’s perfect for both spreading and piping. It’s designed to be simple to make, ensuring you spend less time on preparation and more time on the fun part: decorating!
- Combine initial ingredients: In a large bowl, using either a stand mixer with the paddle attachment or a hand mixer, begin by mixing the room temperature unsalted butter until creamy, about 1-2 minutes. Then, add about half of the powdered sugar, the vanilla extract, salt, and half of your chosen milk or heavy cream. Mix on low speed until combined, then increase to medium-high and beat until smooth and fluffy. Scrape down the sides of the bowl as needed.
- Achieve desired consistency: Gradually add the remaining powdered sugar, alternating with small amounts of milk/cream, beating after each addition. Continue adding powdered sugar and milk/cream until you reach your desired frosting consistency. For piping intricate details, you’ll want a slightly stiffer frosting, while for spreading, a slightly softer consistency is ideal. Beat on medium-high for 2-3 minutes until very light and fluffy.
Creative Cookie Decorating Tips and Techniques
This is where your Easter Bunny sugar cookies truly come to life! Decorating is a chance to let your creativity shine and personalize each cookie. Whether you prefer a simple, elegant look or a whimsical, colorful design, these tips will guide you to create stunning edible art.
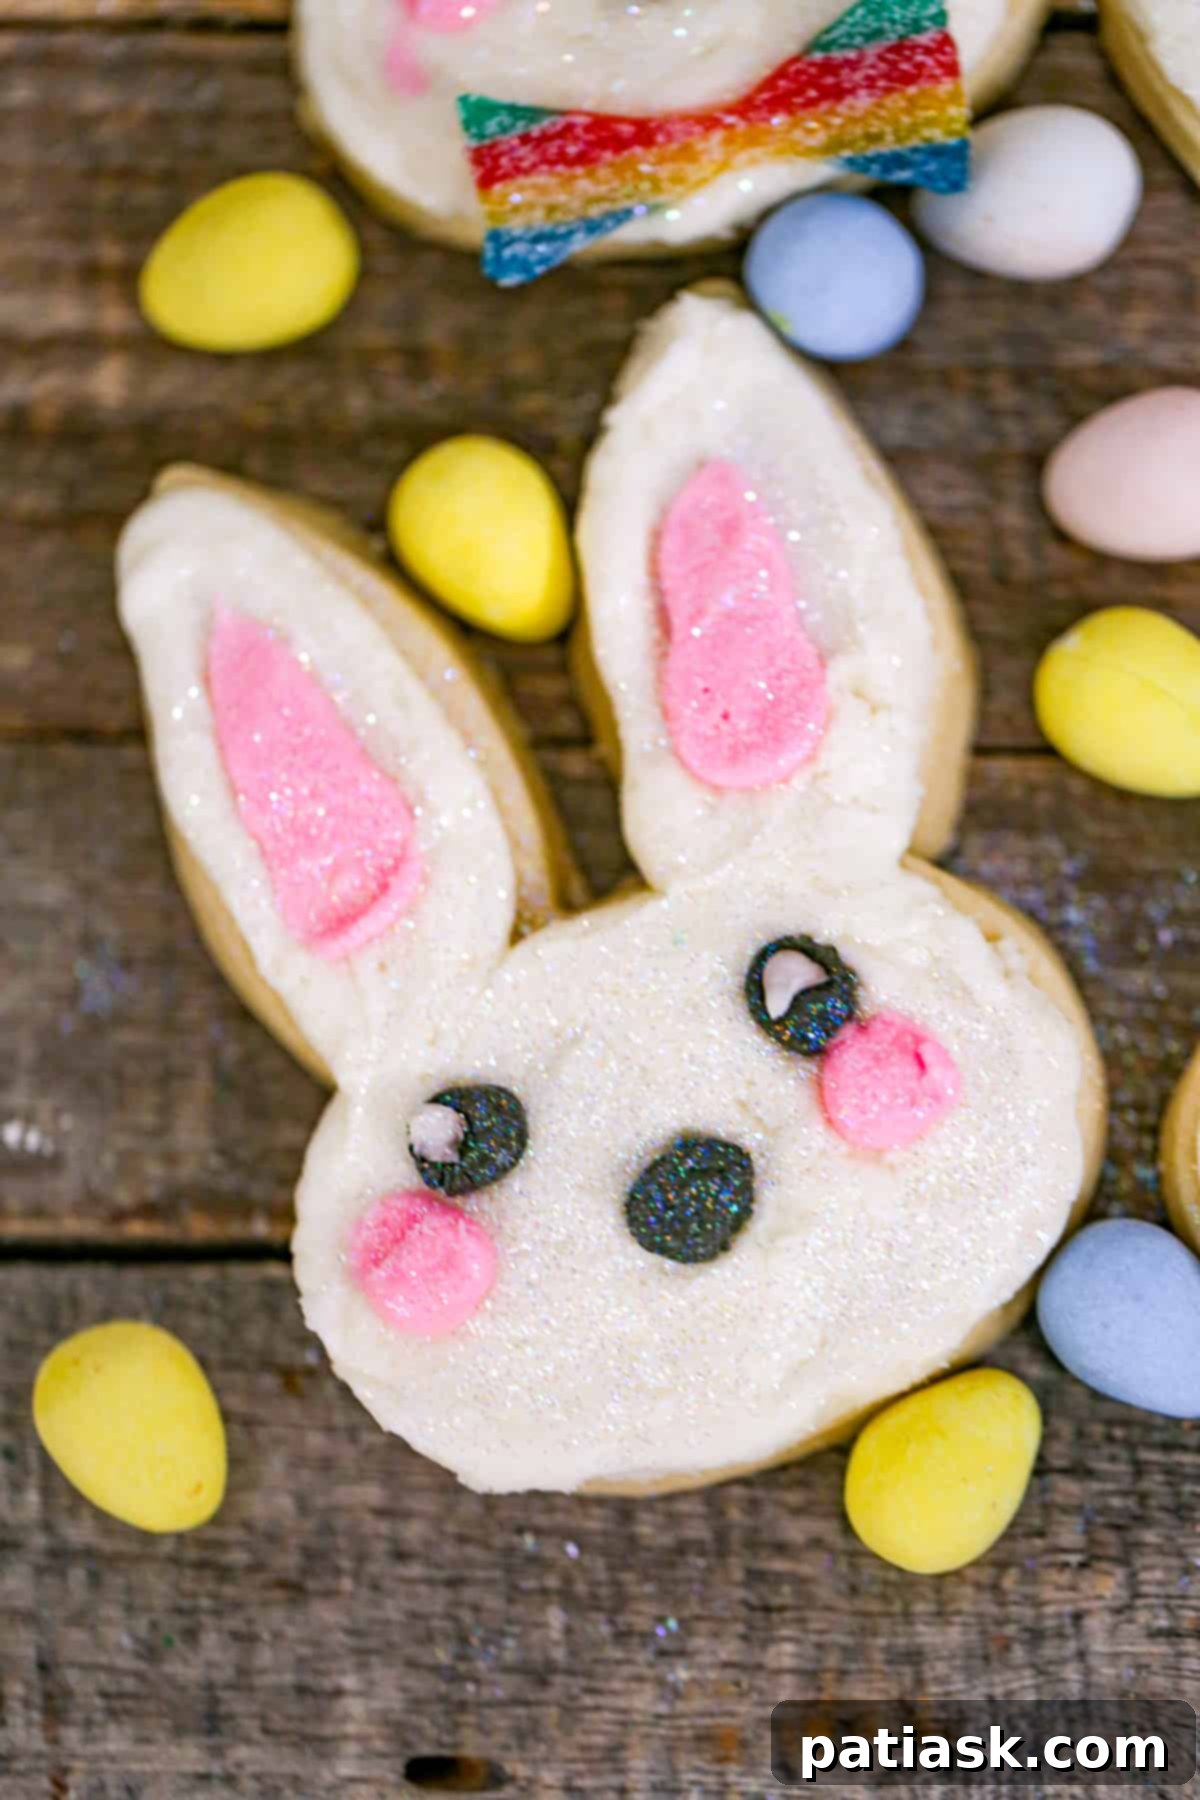
- Base layer application: Start by applying a smooth base layer of frosting to each cookie. You can do this with a small icing spatula or knife for a rustic, hand-frosted look. Alternatively, for a neater finish, fill a pastry bag fitted with a small or medium round tip, pipe an outline around the cookie’s edge, then fill in the center. Use a small spatula or the back of a spoon to gently smooth out the frosting.
- Prepare colored frostings: To create the cute bunny faces, you’ll need small amounts of pink and brown/black buttercream frosting. Divide a portion of your white buttercream into two separate small bowls. Use gel food coloring to tint one portion a soft pink for the cheeks and inner ears, and the other a dark brown or black for the eyes and nose. Remember, a little gel coloring goes a long way for vibrant colors. You’ll generally need more pink than brown/black.
- Piping eyes and nose: Transfer the brown/black frosting into a small pastry bag fitted with a very small round tip (like a Wilton #1 or #2). If you don’t have piping tips, a ziplock bag with a tiny corner snipped off will work just fine. Carefully pipe two dots for the eyes and a small triangle or “Y” shape for the nose. If you’re feeling ambitious, you can also pipe a small smile.
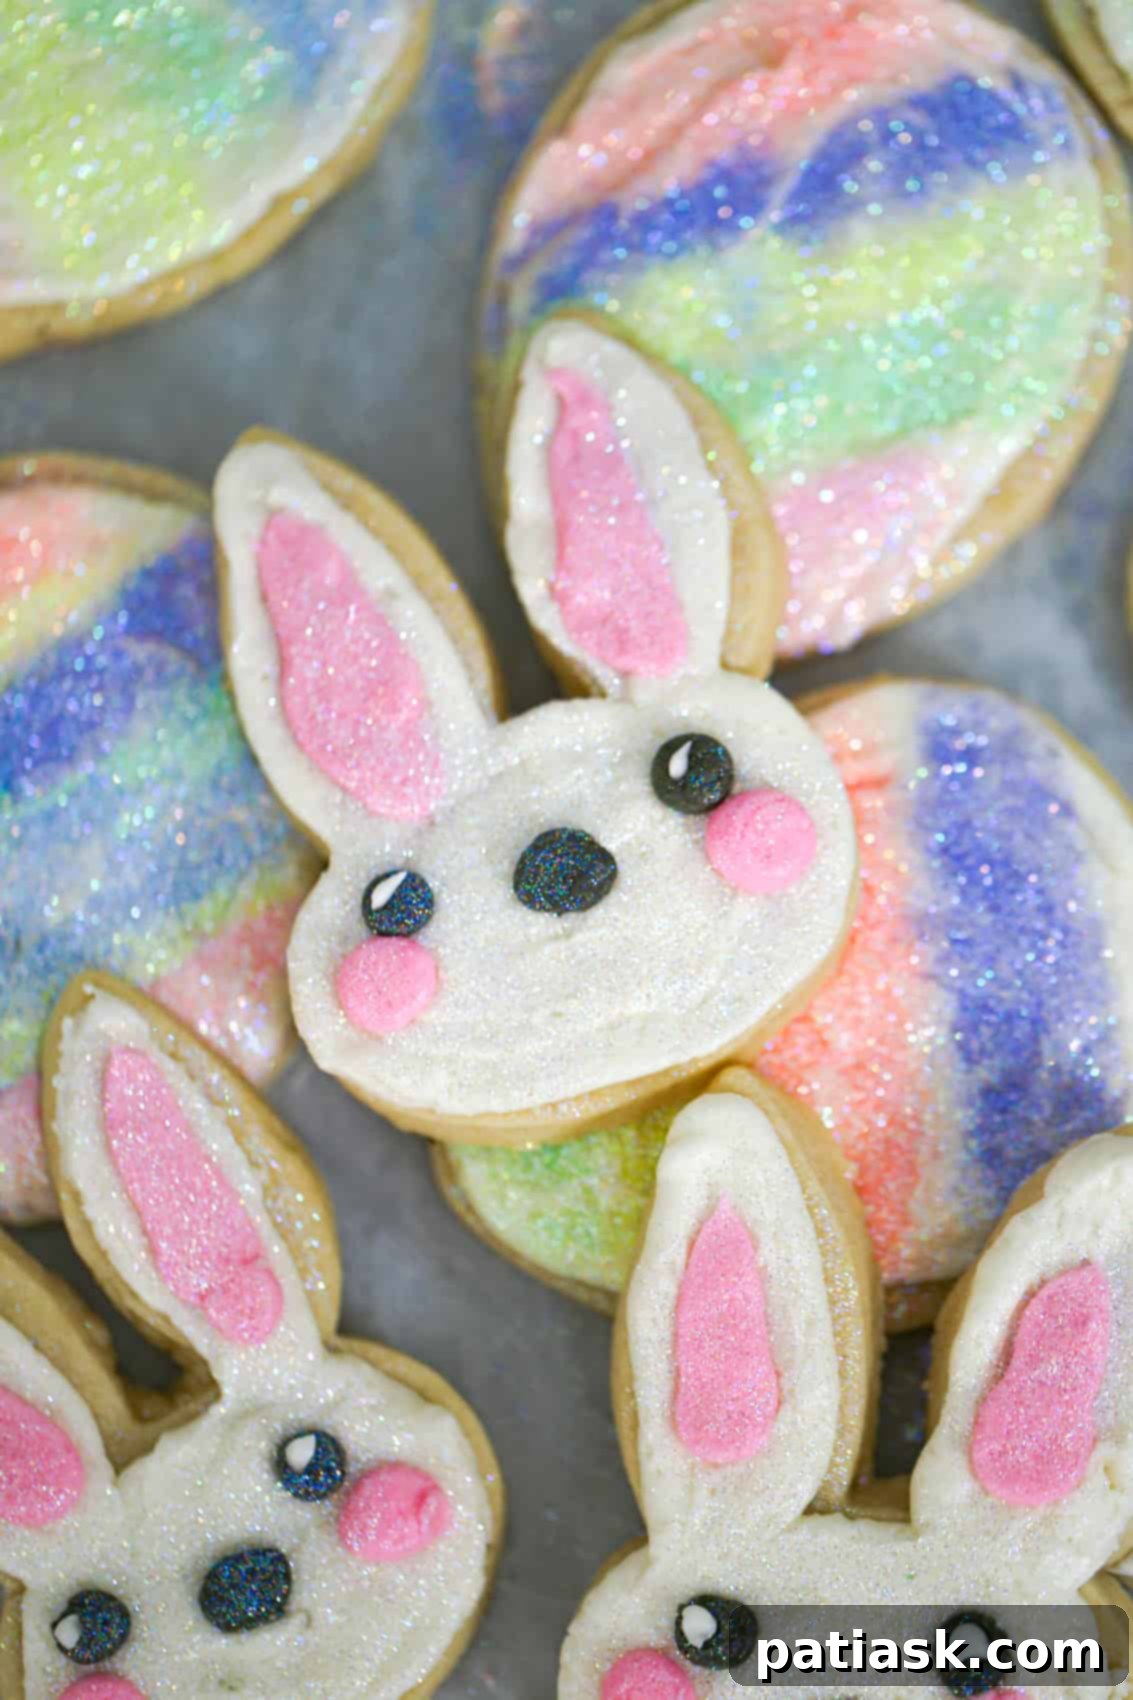
- Adding pink details: Similarly, transfer the pink frosting into another small pastry bag with a small round tip or a snipped ziplock bag. Pipe two small, rosy circles for the cheeks just below the eyes. Then, carefully fill in the inner ear areas of your bunny-shaped cookies with pink frosting.
- Sparkle and shine: To add an extra touch of magic, consider dusting your cookies with shimmering dusting powder (like the “rainbow” variety mentioned). This creates a beautiful, subtle sheen. If you prefer, you can also sprinkle on some shredded coconut for a fluffy tail effect, or clear sanding sugar for a simpler sparkle. The choice is yours – customize your bunnies to reflect your personal style!
-
Creative additions: Don’t be afraid to get creative with additional embellishments! For example, you can create colorful “bow ties” using small pieces of
rainbow candy
or use
mini M&M’s
for the eyes for a playful, textured look. Small edible pearls, edible glitter, or even tiny marshmallow bits can also enhance your designs. - Allow to set: After all the decorating is complete, place your Easter bunny cookies in a single layer on a cooling rack or baking sheet. Allow the frosting to set for at least 3 hours, or preferably overnight, before stacking them. This prevents smudging and ensures your beautiful designs remain intact.
Storing Your Irresistible Easter Bunny Sugar Cookies
Proper storage is key to keeping your Easter Bunny sugar cookies fresh and delicious for as long as possible. Follow these simple guidelines to ensure your hard work pays off, allowing you to enjoy your beautiful creations for days to come.
- Countertop storage: Once the frosting has fully set (at least 3 hours or overnight), store the decorated cookies in an airtight container at room temperature. They will stay fresh and delicious for 3-5 days. Lay them in a single layer or separate layers with parchment paper to prevent sticking and preserve their intricate decorations.
- Avoid refrigeration: We generally do not recommend refrigerating frosted sugar cookies. The cold temperature can dry them out faster and may cause the colors of the frosting to bleed or become dull.
Freezing Baked Cookies for Future Enjoyment
If you’re planning ahead or have extra cookies, freezing is an excellent option to extend their shelf life. This allows you to bake in advance and simply decorate closer to your event.
- Freezing unfrosted cookies: Bake the cookies as directed and let them cool completely. Once cooled, arrange the unfrosted cookies in a single layer on a baking sheet and flash freeze them for about 30 minutes until solid. Then, transfer them to an airtight freezer-safe container, layering them with parchment or waxed paper to prevent them from sticking together. They can be frozen for up to 2-3 months.
- Thawing and frosting: When you’re ready to enjoy them, simply remove the frozen cookies from the container and let them thaw at room temperature. Once fully thawed, you can proceed with frosting and decorating as usual. This method ensures you always have a fresh batch of cookies ready for any occasion.

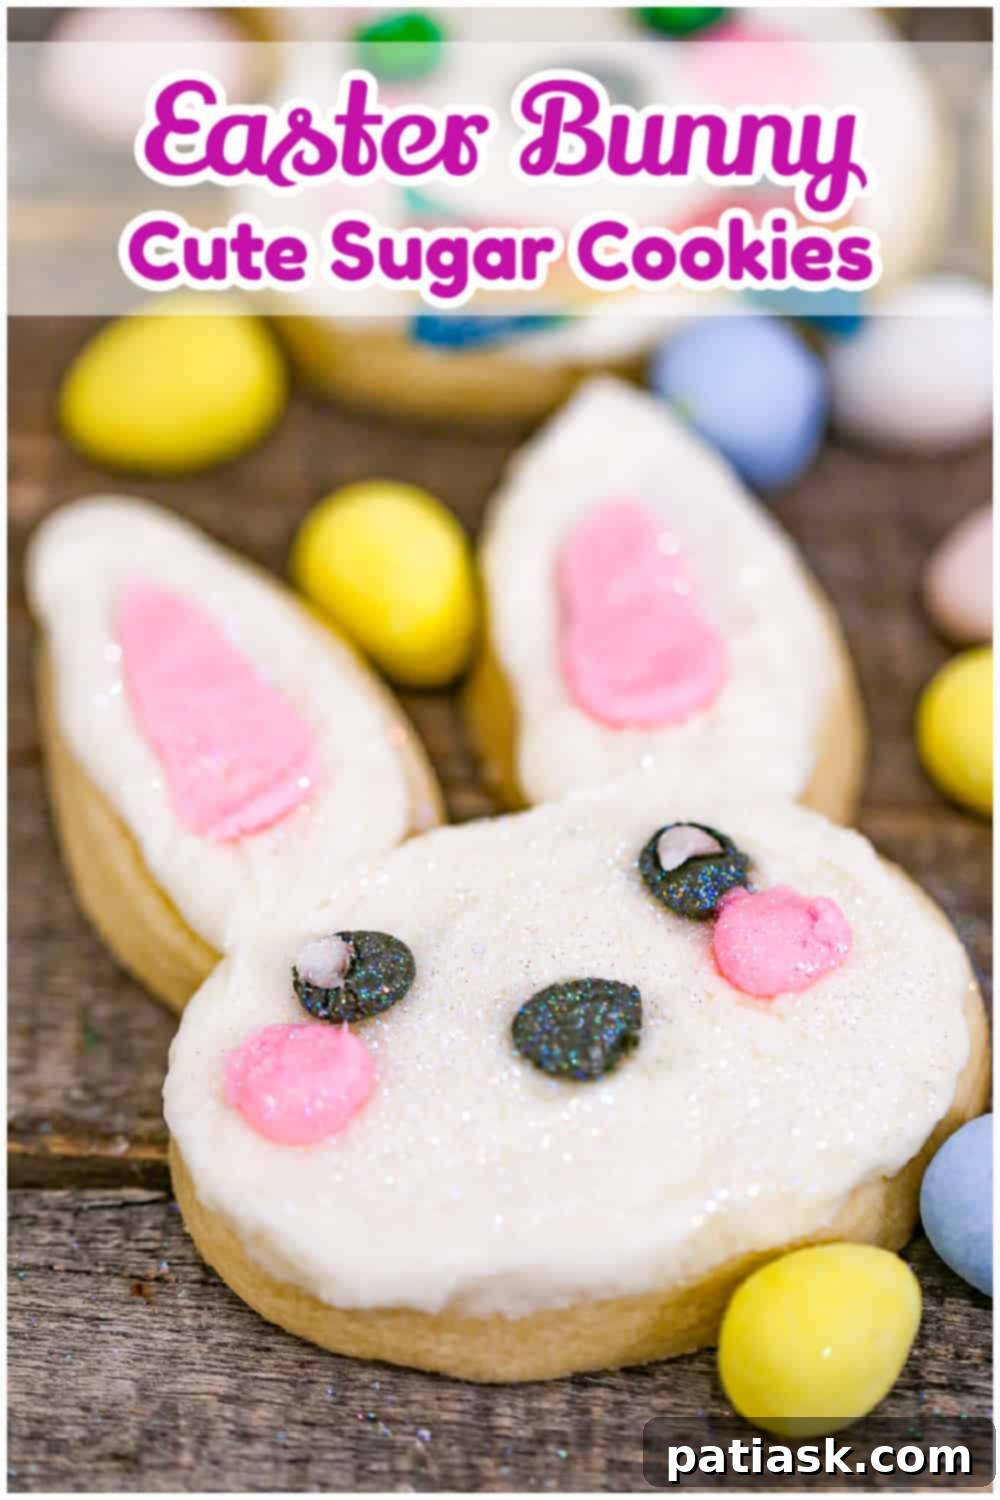
These Cute Easter Bunny Sugar Cookies are more than just a sweet treat; they’re a delightful invitation to celebrate the Easter season with creativity, joy, and delicious flavors. With simple ingredients and our detailed, friendly guide, you can easily create an enchanting batch of bunny cookies that will charm everyone at your table. Embrace the spirit of spring and get ready to impress with your baking prowess!
Don’t wait! Start baking your Easter Bunny Sugar Cookies today and make this Easter extra special. Share your delightful creations on
Pinterest,
Instagram, and
Facebook! We love to see your baking masterpieces.
Explore More Fun & Festive Holiday Dessert Ideas!
Looking for more sweet inspiration? Dive into our collection of holiday desserts that are perfect for any festive occasion.
- Easy To Decorate Easter Bunny Cake
- 12 Hoppin’ Easter Potluck Dessert Ideas
- Homemade Chocolate Peanut Butter Eggs
- 25 Quick and Easy Easter Peep Dessert Treats
- Easter Bunny Peep Cupcakes
- Halloween Ghost Rice Krispies
Cute Easter Bunny Sugar Cookies
By Kim Lange
Take your Easter cookie recipes up a notch this year with these Cute Easter Bunny Sugar Cookies! Fun & creative treats perfect for Spring celebrations.
10 mins
12 mins
10 mins
Dessert
16 Large Cookies
Ingredients
Bunny Shaped Sugar Cookies
- 3 cups all-purpose flour (spooned and leveled)
- 2 teaspoons baking powder
- 1 cup unsalted butter (cold & cut into cubes, can also use salted butter, omit salt)
- 1 cup granulated sugar
- 1 large egg
- ½ teaspoon salt
- 2 teaspoons vanilla extract
- ¼ teaspoon almond extract
Easy Buttercream Frosting & Edible Glitter/Sanding Sugar
- 1 cup unsalted butter (room temperature)
- 3 – 4 cups powdered sugar
- ¼ teaspoon salt
- 2 teaspoons vanilla extract
- 2-4 tablespoons milk of choice or heavy cream
- Assorted sparkling sand sugars and/or shimmering sugar dust (I used OH! SWEET ART – Easter Disco Cake SET with 7 colors: Baby Pink, Baby Blue, Baby Violet, Baby Yellow, Baby Green, Baby Orange)
- Food coloring (Pink, Brown/Black food coloring)
Instructions
Easter Bunny Sugar Cookies
- Line baking sheets with parchment paper, set aside.
- Whisk together the flour, salt and baking powder, set aside.
- Using mixer, cream together the cold, cubed butter and sugar until smooth and creamy. Blend in the egg and both extracts. Gradually add the flour mixture and beat until just combined, scraping down the bowl, as needed, including the bottom.
- The dough will be crumbly, so knead it together with your hands as you scoop it out of the bowl until it comes together.
- Roll dough on a floured surface to about ⅓” to ⅜” thickness preferred and cut into shapes using bunny shaped cookie cutter.
- Place cut out cookies on the prepared baking sheets 2 inches apart and then transfer to the freezer for 10 minutes, while you preheat the oven to 350 degrees F.
- Bake for 10-12 minutes until just barely golden on the bottoms, being careful to not over-bake.
- Let sit for a few minutes on the sheet, then transfer to a cooling rack to cool completely before frosting.
Easy Buttercream Frosting
- Using mixer, mix together the butter, ½ of the powdered sugar, vanilla, salt and ½ of the milk until mixed well. Add remaining powdered sugar and add more milk until you get the consistency you want for cookies. Beat until light and fluffy.
How to Decorate Bunny Faces
- To start decorating the cookies, use a spatula or knife to cover the cookies or add frosting to a pastry bag with a small or medium tip and pipe onto cookies, then smooth out the frosting on top a bit.
- To make the cute face, take some of the buttercream frosting and tint it pink and brown/black. You’ll need more pink than brown/black frosting.
- For the brown/black frosting, place it in a pastry bag with a small round tip (or a ziplock bag with a snipped corner) to pipe out eyes and nose, and a mouth if you wish.
- For the pink frosting, place it in a pastry bag with a small round tip (or a ziplock bag with a snipped corner) to pipe out cute little cheeks and fill in the bunny ears.
- I added some shimmery dusting powder (rainbow color) on top, but you can leave as is, or add some shredded coconut or clear sanding sugar if desired. Customize your bunnies to your liking!
- Add any other extras you wish; I used rainbow ties made from rainbow candy and mini M&M’s for some of the eyes.
- Allow cookies to set for about 3 hours or overnight before stacking to prevent smudging.
buttercream frosting, cookies, easter, sugar cookies
Tried This Recipe?
Let us know
how it was by commenting below!


