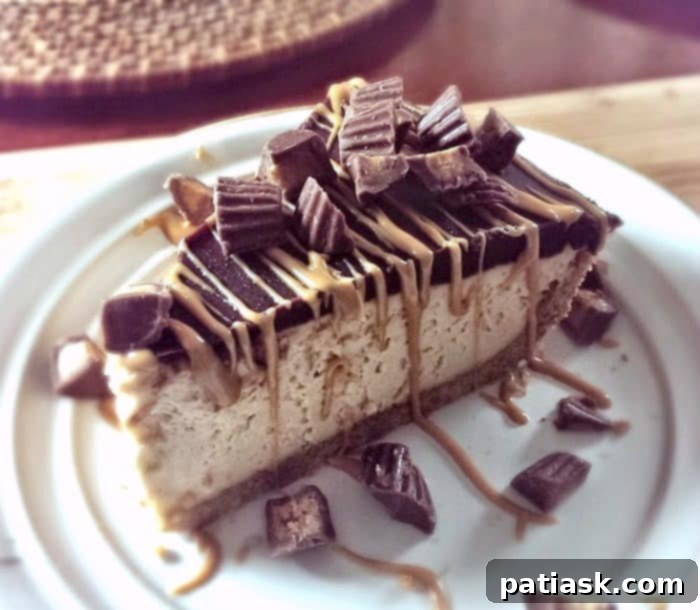
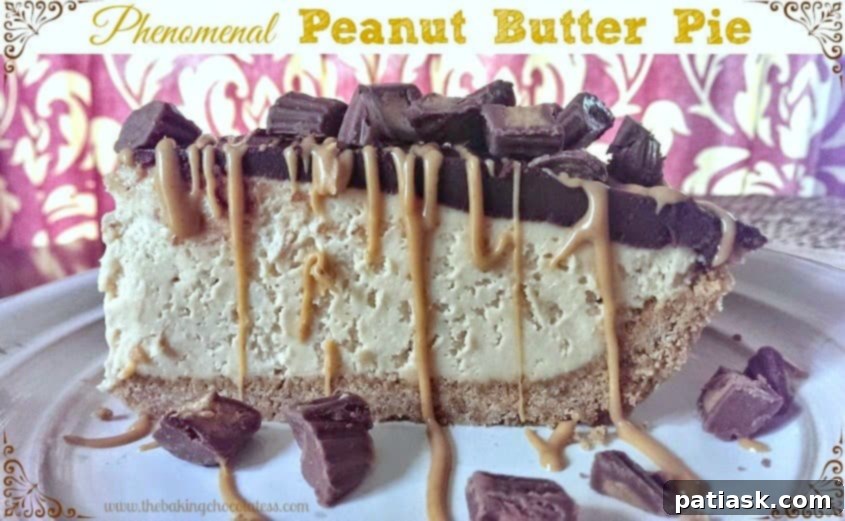
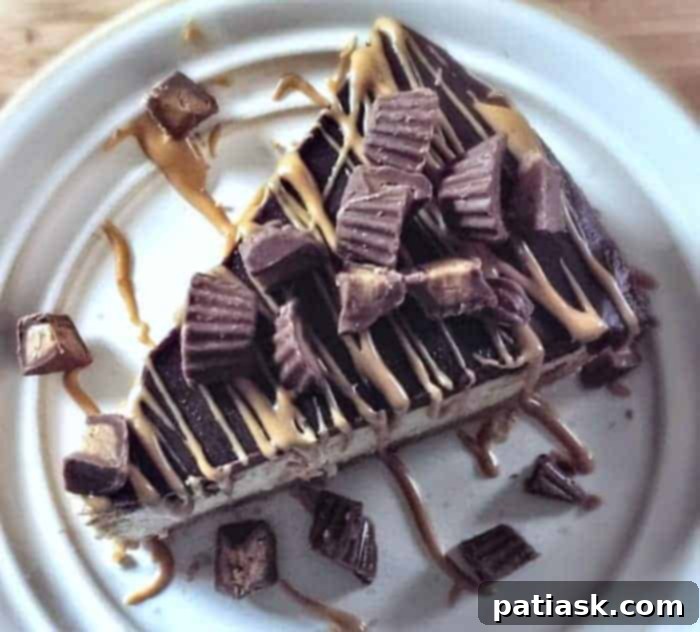
Prepare yourself for an unforgettable dessert experience. This isn’t just a pie; it’s a masterpiece of flavor and texture, a truly **phenomenal Reese’s Peanut Butter Pie**. Imagine layers of rich, creamy peanut butter filling, nestled in a thick, cinnamon-kissed graham cracker crust, all crowned with a glistening chocolate ganache, a generous scattering of Reese’s Peanut Butter Cups, and a final flourish of smooth peanut butter drizzle.
If you’re a fan of the classic peanut butter and chocolate combination, get ready for your new favorite indulgence. This no-bake (mostly!) sensation promises pure bliss with every single bite.
While you’re here, explore these other fantastic Peanut Butter & Candy Desserts and our popular Reese’s Chocolate Chip Cookie Bars for more delicious inspirations!

The Ultimate No-Bake Reese’s Peanut Butter Pie Recipe
Why This Reese’s Peanut Butter Pie Will Be Your New Obsession
There’s a reason why the combination of peanut butter and chocolate reigns supreme in the world of sweets, and this Reese’s Peanut Butter Pie takes that iconic duo to an unparalleled level. It’s more than just a dessert; it’s an experience that captivates your senses from the very first glance to the last delectable bite. This pie embodies everything you could wish for in a show-stopping sweet treat: it’s incredibly decadent, surprisingly easy to make, and guaranteed to be a crowd-pleaser.
What makes this specific Reese’s Peanut Butter Pie truly special? It starts with a foundation of perfection: a **graham cracker crust** that boasts a subtle hint of cinnamon, adding an unexpected warmth that perfectly complements the nutty and sweet layers above. Unlike many other pies, the filling requires no baking, making it a fantastic option for warmer months or when you simply prefer a quicker, fuss-free dessert prep. The only time your oven is needed is for a quick 10-minute bake of the crust, though a pre-made crust offers an even faster shortcut.
Beyond its convenience, the textural contrast is pure magic. The velvety smooth **peanut butter filling** is light yet incredibly rich, a dream against the crispness of the crust. Then comes the crowning glory: a **glossy, homemade chocolate ganache** that melts in your mouth, providing that intense chocolatey counterpoint. And, of course, no Reese’s pie would be complete without a generous topping of **chopped Reese’s Peanut Butter Cups** and a **creamy peanut butter drizzle**, turning each slice into an edible work of art.
Whether you’re hosting a gathering, celebrating a special occasion, or simply treating yourself and your family, this easy Reese’s Peanut Butter Pie recipe promises satisfaction that truly lives up to its “phenomenal” reputation. Prepare for compliments, and possibly even requests for seconds!
Crafting Perfection: The Layers of Your Reese’s Peanut Butter Pie
1. The Cinnamon-Kissed Graham Cracker Crust
Every great pie starts with a stellar crust, and ours is no exception. This homemade graham cracker crust is buttery, slightly crisp, and features a secret ingredient: a whisper of ground cinnamon. This subtle spice elevates the classic graham cracker flavor, adding a warm, inviting note that pairs beautifully with the peanut butter and chocolate. While the recipe suggests a quick 10-minute bake for optimal crispness, you can also opt for a no-bake crust by simply freezing it to firm up. For those truly short on time, a store-bought graham cracker crust works perfectly well as an easy shortcut.
2. The Velvety Peanut Butter Filling
This is the heart of our Reese’s Peanut Butter Pie. The filling is a harmonious blend of softened cream cheese, creamy peanut butter, confectioners’ sugar, and a touch of vanilla extract, all lightened with gently folded whipped cream. The cream cheese adds a delightful tang and stability, ensuring the filling is both rich and airy. The result is a smooth, luscious peanut butter layer that’s incredibly satisfying without being overly heavy, reminiscent of a thick, spreadable cookie dough before the whipped cream is incorporated.
3. The Luxurious Chocolate Ganache
What’s peanut butter without chocolate? Our rich chocolate ganache is the perfect complement. Made with just two main ingredients – whipping cream and semi-sweet chocolate chips – plus a touch of butter for extra shine, this ganache creates a smooth, melt-in-your-mouth topping. It’s poured warm over the chilled peanut butter filling, then sets to a soft, fudge-like consistency that contrasts beautifully with the creamy interior. The deep chocolate flavor balances the sweetness of the peanut butter, making each bite incredibly well-rounded.
4. The Iconic Reese’s Peanut Butter Cup Toppings
No Reese’s Peanut Butter Pie would be complete without its namesake! We generously adorn this pie with chopped mini Reese’s Peanut Butter Cups, adding an extra layer of peanut butter and chocolate goodness, along with a delightful textural crunch. A final drizzle of warmed peanut butter ties all the flavors together, creating a visually stunning and utterly irresistible dessert. These toppings are not just decorative; they enhance the overall Reese’s experience, making it truly authentic.
Ingredients You’ll Need for Your Decadent Pie
Homemade Graham Cracker Crust
- 1 & 1/2 cups graham cracker crumbs
- ⅓ cup granulated sugar
- ½ cup unsalted butter, melted
- Optional: 1/2 teaspoon ground cinnamon (highly recommended for that special touch!)
Creamy Peanut Butter Filling
- 8 ounces cream cheese, softened
- 1 cup creamy peanut butter (your favorite brand!)
- 1 cup confectioners’ sugar
- 1 teaspoon vanilla extract
- 1 & 1/2 cups cold whipping cream
Rich Chocolate Ganache
- 1 cup cold whipping cream
- 1 cup semi-sweet chocolate chips or finely chopped premium chocolate
- 1 tablespoon unsalted butter
Signature Toppings
- Mini Reese’s Peanut Butter Cups, chopped (as many as your heart desires!)
- Extra creamy peanut butter for drizzle
Step-by-Step: How to Make This Incredible Reese’s Peanut Butter Pie
Homemade Graham Cracker Crust Instructions
- Preheat your oven to 350°F (175°C). This is for the quick bake option, ensuring a crisp crust.
- In a medium-sized bowl, combine the graham cracker crumbs, granulated sugar, melted unsalted butter, and the optional (but recommended!) ground cinnamon. Blend these ingredients thoroughly until the mixture resembles wet sand.
- Press this mixture firmly and evenly onto the bottom and up the sides of a 9-inch pie plate. Use the back of a spoon or the bottom of a glass to get a compact, uniform crust.
- Bake for 10 minutes. This quick bake helps the crust set and achieve a lovely golden hue and a crisper texture. If you prefer a no-bake crust, skip this step and freeze the crust for at least 30 minutes until firm. Allow to cool completely if baked before adding the filling.
Peanut Butter Filling Instructions
- In a large mixing bowl, beat together the softened cream cheese, peanut butter, confectioners’ sugar, and vanilla extract until the mixture is completely smooth and creamy. It should be thick, similar to a soft cookie dough consistency.
- In a separate, chilled bowl, whip the cold whipping cream until soft peaks form. Ensure your bowl and beaters are very cold for best results – you can place them in the freezer for 10-15 minutes beforehand. The cream will significantly increase in volume when whipped.
- Gently fold the whipped cream into the peanut butter mixture using a spatula. Be careful not to overmix, as this can deflate the cream and make the filling less airy. Fold until just combined and no streaks of cream remain.
- Pour the luscious peanut butter filling into your prepared and cooled graham cracker crust. Spread it out evenly with a spatula. Place the pie in the refrigerator while you prepare the ganache.
Chocolate Ganache, Peanut Butter Drizzle & Peanut Butter Cups
- Place the semi-sweet chocolate chips (or finely chopped premium chocolate) into a heatproof glass bowl.
- In a small saucepan or microwave-safe container, heat the cold whipping cream until it just begins to simmer or starts to boil around the edges. Be careful not to let it boil vigorously.
- Pour the hot whipping cream directly over the chocolate chips. Let it rest undisturbed for one to two minutes. This allows the heat from the cream to soften and melt the chocolate.
- After resting, gently stir the cream and chocolate mixture with a whisk or spatula, starting from the center and working your way outwards. Continue stirring until the ganache is completely smooth, shiny, and lump-free.
- Add the tablespoon of butter into the warm ganache and stir until it’s fully melted and incorporated. This butter will give your ganache a beautiful, glossy shine.
- Allow the ganache to cool for about 15-20 minutes, or until it’s slightly thickened but still pourable. It should not be hot when poured onto the pie.
- Pour the cooled ganache evenly over the peanut butter filling, spreading it gently to the edges of the crust.
- Refrigerate the pie for at least 4 hours, or preferably overnight, to allow all the layers to set completely. This is crucial for a clean slice and a firm, stable pie. Keep the pie refrigerated until serving.
- To serve, make your peanut butter drizzle: heat a couple of tablespoons of peanut butter in the microwave for 20-30 seconds until it’s warm and runny enough to drizzle. Drizzle this over each slice of pie. Finally, generously sprinkle chopped mini Reese’s Peanut Butter Cups on top. Enjoy your masterpiece!
Essential Tips for the Best Reese’s Peanut Butter Pie
Whipping Cream vs. Heavy Cream: What’s the Difference?
You might wonder about the difference between whipping cream and heavy cream, as they are often used interchangeably in recipes. Both are dairy products that can be whipped, but they have slightly different milk fat percentages:
- **Heavy Cream (or Heavy Whipping Cream):** Contains at least 36% milk fat. It whips up to a very stable, rich consistency and holds its shape well for a long time.
- **Whipping Cream (or Light Whipping Cream):** Contains 30% to 35% milk fat. It whips up lighter and softer than heavy cream and may not hold its peaks as long. It still works wonderfully for this pie filling, providing a lighter texture.
For best results with either, ensure your cream is very cold, and chill your mixing bowl and beaters in the freezer for 10-15 minutes before whipping. This significantly aids in achieving firm, stable peaks.
Make-Ahead and Storage Tips
This Reese’s Peanut Butter Pie is an excellent make-ahead dessert. You can prepare it a day or two in advance, allowing ample time for the flavors to meld and the layers to set perfectly. Store the finished pie, covered loosely with plastic wrap or foil, in the refrigerator for up to 3-4 days. For longer storage, you can freeze individual slices (or the whole pie, covered tightly) for up to 1-2 months. Thaw slices in the refrigerator before serving.
Customization and Variations
While the classic version is undeniably delicious, feel free to customize your pie to your liking:
- **Chocolate Lover’s Dream:** Fold chocolate chips or chopped chocolate bars into the peanut butter filling for an extra chocolatey punch.
- **Nutty Enhancements:** Add a layer of chopped roasted peanuts to the crust for added texture and flavor.
- **Different Toppings:** Instead of or in addition to Reese’s Cups, consider adding chopped pretzels for a salty-sweet crunch, chocolate shavings, a dusting of cocoa powder, or even a swirl of caramel sauce.
- **Lighter Option:** If you want to slightly lighten the dessert, use reduced-fat cream cheese, but note that the texture might be slightly less rich.

The Irresistible Magic of Chocolate and Peanut Butter
The culinary world has long celebrated certain flavor pairings, but few evoke as much universal delight as chocolate and peanut butter. This dynamic duo offers a perfect balance of sweet, salty, rich, and creamy. The earthy, nutty notes of peanut butter find their ideal counterpart in the deep, sometimes bittersweet, complexity of chocolate. This Reese’s Peanut Butter Pie perfectly encapsulates this magic, creating a dessert that is comforting, nostalgic, and utterly sophisticated all at once. It’s a flavor combination that transcends generations, making this pie a guaranteed hit for any occasion.
Explore More Luscious Pies and Peanut Butter Treats!
If you’ve fallen in love with this pie, you’re in for a treat! We have many more dessert recipes to satisfy your sweet tooth:
- 15 Popular Easy Cream Pies You’ll Love!
- Raspberry Vanilla Custard Pudding Pie
- Amish Peanut Butter Cream Pie
- 12 Delectable Pies for the Holidays!
- Amish Country Pumpkin Custard Pie
- Ultimate No Bake White Chocolate Cheesecake
And for those who simply can’t get enough peanut butter, don’t miss our amazing “Phenomenal” Milk Chocolate Chip Peanut Butter Cookies! They are definitely a winner!
Reese’s Peanut Butter Cup Pie Recipe Card

Reese’s Peanut Butter Cup Pie
Author: Kim Lange
This decadent and silky Peanut Butter Pie is topped with a rich, Chocolate Ganache, Reese’s Peanut Butter Cups and creamy Peanut Butter Drizzle, all sitting on top of a thick graham cracker crust with a hint of cinnamon.
Prep Time: 15 mins
Cook Time: 10 mins
Course: Dessert
Keyword: chocolate, peanut butter, peanut butter cup, pie
Ingredients
Crust
- 1 & 1/2 cups graham cracker crumbs
- ⅓ cup granulated sugar
- ½ cup unsalted butter, melted
- Optional: 1/2 teaspoon ground cinnamon
Peanut Butter Filling
- 8 ounces cream cheese, softened
- 1 cup peanut butter
- 1 cup confectioners’ sugar
- 1 teaspoon vanilla extract
- 1 & 1/2 cups whipping cream
Chocolate Ganache
- 1 cup whipping cream
- 1 cup semi-sweet chocolate chips or finely chopped premium chocolate
- 1 tablespoon butter
Toppings
- Mini Reese’s Peanut Butter Cups, chopped
- Peanut Butter Drizzle
Instructions
Crust
- Preheat oven to 350°F (175°C).
- In a medium bowl, combine all crust ingredients and blend well.
- Press mixture onto the bottom and up the sides of an ungreased 9-inch pie plate.
- Bake for 10 minutes. Let cool completely.
Peanut Butter Filling
- Mix the cream cheese, confectioners’ sugar, peanut butter and vanilla together until smooth. It will be like a thick cookie dough.
- In a separate bowl, whip the cream until soft peaks form. (Whipping cream will double in volume when whipped.)
- Gently fold the whipped cream into the peanut butter mixture using a spatula. (Do not over beat.)
- Pour filling into the baked and cooled crust. Refrigerate while preparing ganache.
Ganache, Peanut Butter Drizzle & Peanut Butter Cups
- Place the chocolate into a glass bowl.
- Heat the whipping cream until it starts to boil in the microwave or on the stovetop.
- Pour the hot whipping cream over the chocolate and let it rest for one to two minutes for the chocolate to soften and melt.
- Using a whisk or spatula, stir the whipping cream and chocolate mixture gently until it is smooth and glossy.
- Add the butter at the last minute and stir it in to add shine to the ganache.
- Cool the ganache for about 20 minutes (until slightly thickened but still pourable) and pour on top of peanut butter filling, spreading out to the edges.
- Refrigerate for about 4 hours, or until set, before serving. Keep pie refrigerated.
- To serve, top each pie slice with Peanut Butter Drizzle (heat a couple of tablespoons of peanut butter in the microwave for 30 seconds until runny) and drizzle on top of ganache, then add chopped mini Reese’s Peanut Butter Cups.
Notes
Is whipping cream and heavy cream the same thing? Heavy cream and heavy whipping cream are essentially the same thing: cream that contains 36 percent or more milk fat. Whipping cream is a bit lighter, with only 30 percent milk fat. There is also Light or Ultra light whipping cream. It whips fine if your bowl and beaters have been in the freezer for at least 10-15 minutes.
Tried This Recipe? Let us know how it was by commenting below!
