Easy No-Churn 3 Berry Cheesecake Ice Cream: Your Ultimate Summer Dessert
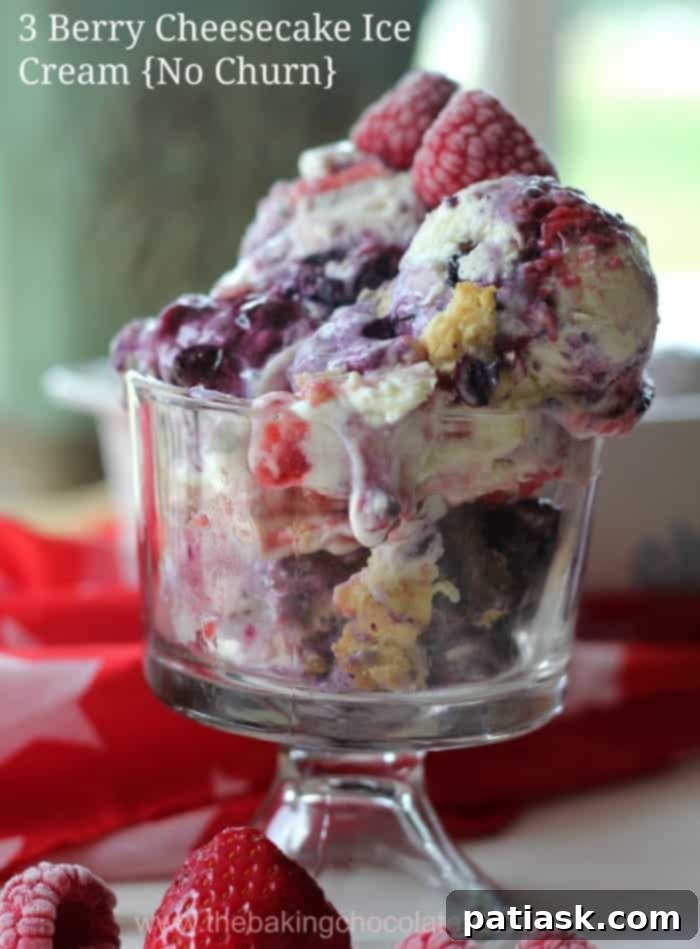
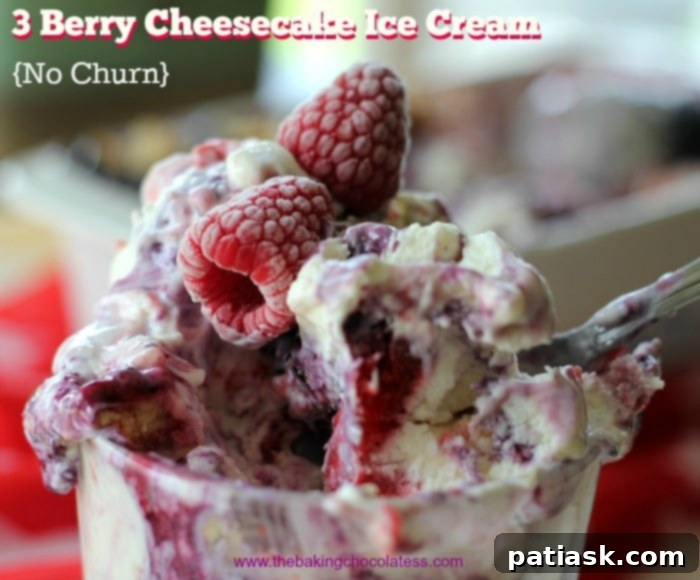
Prepare your taste buds for an extraordinary treat: our luscious, easy-to-make 3 Berry Cheesecake Ice Cream! This isn’t just any ice cream; it’s a symphony of flavors featuring vibrant blueberries, sweet raspberries, juicy strawberries, and a delightful crunch from vanilla Oreos. The best part? It’s completely no-churn, meaning you don’t need a fancy ice cream maker to achieve this perfectly creamy consistency. If you love the simplicity of recipes like our 12 No Churn Ice Cream Recipes, you’re in for a real treat!
Calling all cheesecake and berry enthusiasts! This recipe brings together the best of both worlds in a single, irresistible frozen dessert. We’ve packed it with three different succulent berries that create an explosion of fresh flavor with every spoonful. If you’re a devoted berry lover, you simply must try this Easy No-Bake Berry Cheesecake Delight Dessert and our Easiest No-Churn Strawberry Ice Cream. But for an ultimate indulgence, this 3 Berry Cheesecake Ice Cream stands alone.

Why You’ll Love This No-Churn Berry Cheesecake Ice Cream
Imagine the smooth, tangy taste of cheesecake perfectly blended with the sweet, tart burst of fresh berries, all encased in a rich, creamy ice cream. This isn’t just a dessert; it’s an experience. Our no-churn method makes it incredibly accessible for home cooks, eliminating the need for specialized equipment. This means less hassle and more time to enjoy the delightful process of creating something truly special.
The Magic of No-Churn: Effortless Creaminess
The secret to achieving such an incredibly creamy texture without an ice cream machine lies in just a few key ingredients: heavy whipping cream and sweetened condensed milk. When whipped together, the heavy cream incorporates air, providing that light, fluffy body, while the condensed milk adds sweetness and prevents the ice cream from freezing into an icy block. This combination creates a dense, luxurious base that perfectly cradles the rich cheesecake flavor and vibrant berry swirls. Forget the churning and embrace the simplicity of this fantastic technique!
A Patriotic Delight: Red, White, and Blue Perfection for Any Celebration
With its striking combination of red raspberries and strawberries, a creamy white base, and luscious blue blueberries, this 3 Berry Cheesecake Ice Cream is not just delicious but also visually stunning. It’s the perfect dessert to serve at any red, white, and blue holiday celebration, like the Fourth of July, Memorial Day, or even Labor Day. The vivid, patriotic colors make it a festive centerpiece that will surely impress your guests and bring a touch of celebratory cheer to any table, creating lasting memories with every bite.
Unleash Your Creativity: Customize Your Berry Bliss
While we adore the classic combination of blueberries, raspberries, and strawberries for their harmonious blend of sweet and tart, this recipe is wonderfully versatile, inviting you to experiment with your favorite fruits to create a truly unique flavor profile. Imagine adding juicy blackberries for a deeper tartness, or perhaps a swirl of tart cherries for a different kind of tang. You could even venture into tropical territory with a mango or passionfruit swirl! The possibilities are endless, making this recipe a fantastic canvas for your culinary imagination. This dessert is so decadent, lusciously creamy, perfectly sweet, and delightfully tart, with every spoonful bursting with intense berry flavor. It’s truly mind-blowing! The taste is beyond description – it’s simply amazing and will have everyone swooning and drooling for more. Each bite is an experience, a symphony of textures and tastes that will leave you craving another scoop.

Ingredients for Your Delectable 3 Berry Cheesecake Ice Cream
Creating this magnificent dessert begins with gathering a few simple yet essential ingredients. Most of these items are staples in any well-stocked pantry or readily available at your local grocery store, ensuring a hassle-free preparation process. We’ve thoughtfully categorized the ingredients to make your shopping and preparation as straightforward as possible.
Cheesecake Ice Cream Base
- Heavy whipping cream (the colder, the better for whipping!)
- Sweetened condensed milk (provides sweetness and prevents ice crystals)
- Cream cheese (ensure it’s softened to room temperature for a smooth, lump-free base)
- Vanilla extract (for that classic, comforting flavor)
Blueberry Swirl Ingredients
- Fresh blueberries (frozen can also work, just adjust microwave time)
- Granulated sugar (to sweeten the berries and create a syrup)
- Lemon juice (a touch of acidity brightens the berry flavor)
- Cornstarch (our secret weapon for thickening the swirl)
Strawberry-Raspberry Swirl Ingredients
- Fresh strawberries (hulled and finely chopped for easier squishing and swirling)
- Fresh raspberries (adds a lovely tartness and vibrant color)
- Granulated sugar
- Lemon juice
- Cornstarch
Optional Add-ins for Extra Texture and Flavor
- Vanilla Oreo Cookies (crushed into delightful, crunchy bits for an extra layer of indulgence)
How to Make Your Own No-Churn 3 Berry Cheesecake Ice Cream: A Step-by-Step Guide
Creating this magnificent dessert is simpler than you might imagine, promising gourmet results with minimal effort. Follow these detailed steps to achieve a beautifully swirled, rich, and creamy ice cream that will impress everyone, proving that homemade frozen treats don’t require an expensive ice cream maker.
Crafting the Vibrant Berry Swirls: The Heart of the Flavor
- Blueberry Swirl: In a medium-sized microwave-safe bowl, combine the fresh blueberries, granulated sugar, cornstarch, and a squeeze of fresh lemon juice. Mix these ingredients thoroughly until the sugar is somewhat dissolved and the cornstarch is evenly distributed. Microwave the mixture for approximately 3-5 minutes on high, stopping to stir every minute, until it comes to a gentle boil and visibly thickens into a syrupy consistency. The cornstarch will help create a beautiful, spoonable sauce. As it cooks, gently squish some of the blueberries with the back of a spoon or a fork to release more of their delicious juices, intensifying the flavor and color of your swirl. Once thickened, remove the bowl from the microwave and immediately place it in the refrigerator. Chilling the swirl thoroughly is a crucial step to prevent it from warming and melting your delicate ice cream base later.
- Strawberry-Raspberry Swirl: Repeat the exact same process for the strawberry-raspberry mixture. Combine the chopped strawberries, raspberries, granulated sugar, cornstarch, and lemon juice in another medium-sized microwave-safe bowl. Stir well, then microwave for 3-5 minutes, stirring periodically, until the mixture boils and thickens. Don’t forget to gently squish some of these berries too, ensuring a rich, concentrated berry flavor. Transfer this second vibrant swirl to the refrigerator to chill completely alongside your blueberry concoction. Both swirls should be cold before proceeding to the next steps.
Assembling the Luxurious Cheesecake Ice Cream Base: Creamy Perfection
- In a large mixing bowl, begin by beating the room-temperature cream cheese using an electric mixer until it is incredibly smooth, light, and fluffy, with no lumps remaining. This foundational step ensures a silky-smooth texture for your ice cream. Next, on a low speed setting, gradually add the sweetened condensed milk and vanilla extract to the cream cheese, mixing just until all ingredients are thoroughly combined. Be careful not to overmix at this stage; simply combine and set this creamy mixture aside.
- In a separate, very clean and preferably chilled large bowl, pour in the heavy cream. Using your electric mixer, beat the heavy cream on high speed until stiff peaks form. Stiff peaks are achieved when the cream holds its shape firmly and stands up straight when you lift the beaters. This step incorporates essential air, giving your no-churn ice cream its characteristic light and airy yet rich texture. Watch carefully to avoid overbeating, which can result in a granular texture.
- Now, gently fold the cream cheese mixture into the whipped heavy cream. Use a rubber spatula to incorporate them thoroughly but carefully, employing an upward motion to maintain as much of the air in the whipped cream as possible. The goal is a uniform, creamy base without deflating the volume you’ve created.
- Spoon approximately half of your combined whipped cream and cream cheese mixture into a standard-sized loaf pan (about 9×5 inches) or any other freezer-safe container. Spread it evenly to create the first smooth layer of your ice cream base.
- Remove both chilled berry sauces from the refrigerator. Spoon half of the blueberry swirl and half of the strawberry-raspberry swirl in generous dollops over the whipped cream mixture in the loaf pan. Aim for an even distribution of the berry sauces. If you’re including the optional vanilla Oreo cookies, now is the time to sprinkle half of the crushed bits evenly over the berry swirls, adding a delightful crunch and extra flavor.
- Carefully cover this vibrant layer with the remaining whipped cream and cream cheese mixture, gently spreading it out to completely encapsulate the berry swirls and cookie bits. Take your time to ensure an even coating.
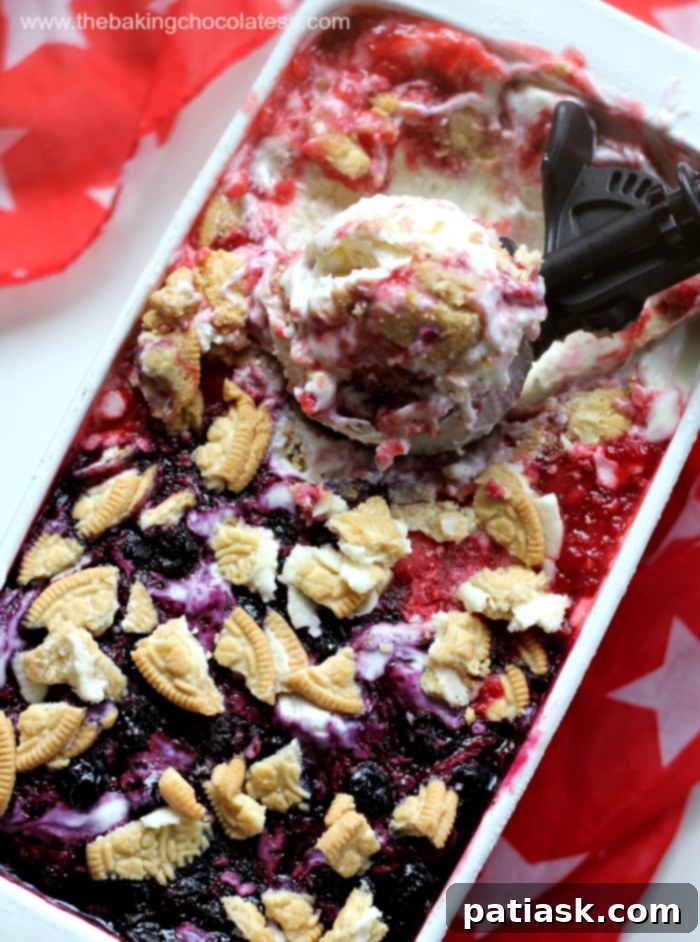
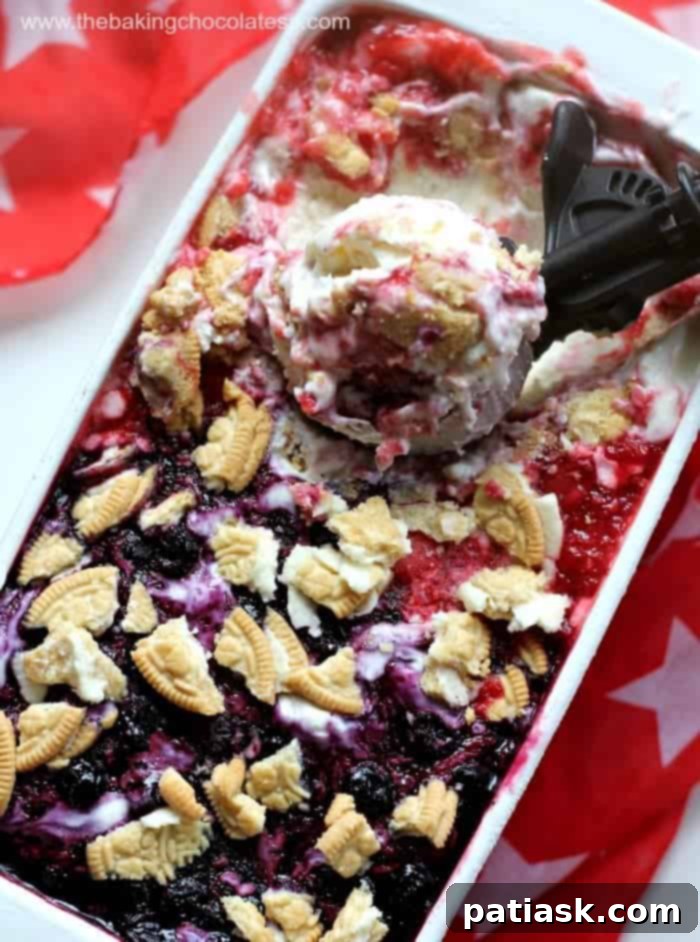
- Finally, top this final creamy layer with the remaining portions of both berry mixtures. Use a butter knife or a skewer to gently drag and swirl the blueberry and strawberry-raspberry mixtures through the top layer of the cream. This technique creates beautiful, enticing ribbons of color and flavor throughout the ice cream. Be mindful not to overmix; you want distinct swirls, not a uniformly colored blend. Finish by sprinkling the remaining half of the crushed Oreo cookie bits on top for a delightful garnish and an irresistible textural contrast.
- Cover the loaf pan tightly with aluminum foil or a fitted lid. This prevents ice crystals from forming on the surface. Place it in the freezer for a minimum of 6 hours to allow the ice cream to set completely and achieve its perfect scoopable consistency. For the absolute best results and a firmer set, we recommend freezing it overnight.

Tips for the Perfect No-Churn Berry Cheesecake Ice Cream: Ensuring Success Every Time
Achieving the perfect creamy texture and vibrant flavors in your no-churn ice cream is easy with a few expert tips. Follow these guidelines to ensure your dessert is nothing short of spectacular:
- Room Temperature Cream Cheese is Non-Negotiable: For a flawlessly smooth cheesecake base, it’s absolutely crucial that your cream cheese is at room temperature. If it’s too cold, it won’t beat smoothly and will leave lumps in your ice cream. Take it out of the fridge at least 30 minutes to an hour before you plan to start mixing.
- Avoid Overmixing Whipped Cream: Beat the heavy cream just until stiff peaks form. When you lift the beaters, the cream should hold its shape firmly. Overbeating can quickly turn the cream into a grainy, buttery texture, which will negatively impact the final consistency of your ice cream.
- Thoroughly Chill Your Berry Swirls: This tip is vital! Ensure that both berry mixtures are completely cold before you introduce them to the ice cream base. Warm swirls can melt your delicate whipped cream, leading to a less creamy and more icy final product. Prepare them in advance and let them cool down in the refrigerator for at least an hour.
- Gentle Swirling for Visual Appeal: When you’re incorporating the berry swirls into the ice cream base, remember to be gentle. Use a butter knife or skewer to create beautiful ribbons of color, rather than thoroughly mixing them in. The goal is distinct, vibrant streaks of berry, not a uniform pink or blue color throughout. This enhances both the visual appeal and the flavor experience.
- Patience with Freezing Time is a Virtue: The minimum 6 hours of freezing is essential for the ice cream to set firmly. However, for the absolute best texture and scoopability, we highly recommend freezing it overnight. A longer freeze allows the flavors to meld beautifully and the texture to become perfectly solid yet creamy.
- Optimal Storage for Freshness: To prevent ice crystals from forming and to maintain the creamy texture, always store your homemade ice cream in an airtight container in the freezer. A loaf pan covered tightly with foil is good for initial freezing, but transfer it to a more airtight container for longer storage. Properly stored, it will stay delicious for up to 2 weeks.
Serving Suggestions: Elevate Your Dessert Experience
Once your no-churn 3 Berry Cheesecake Ice Cream is perfectly frozen, the anticipation is often the hardest part! But rest assured, this sensational dessert is absolutely worth the wait. While it’s utterly delicious on its own, there are many creative ways to serve and enjoy it:
- Classic Scoop: A simple scoop (or two!) in a beautiful bowl allows the vibrant colors and complex flavors to shine through without distraction. It’s perfect just as it is.
- Decadent Brownie Companion: For an irresistible combination of warm and cold, creamy and fudgy, serve a generous scoop over some Rich Fudgy Flourless Brownies. The contrast of textures and temperatures is simply divine and creates an unforgettable dessert experience.
- Fun in Cones: Ideal for a hot summer day or a casual get-together, a scoop in a crispy waffle or sugar cone makes for a delightful and portable treat that guests of all ages will love.
- Versatile Dessert Topping: Get creative by using this ice cream as a topping for other desserts. It pairs beautifully with a slice of plain cheesecake, a warm fruit tart, or even as a luxurious addition to a stack of pancakes for a truly decadent breakfast or brunch twist.
- Elegant Garnish: Enhance the presentation with a few extra fresh berries on top, a sprig of fresh mint for a pop of green, or a drizzle of berry sauce for an added touch of sophistication.
No matter how you choose to enjoy it, this no-churn berry ice cream promises pure yumminess and a truly satisfying dessert experience. Get ready to dig in and savor every single spoonful – it’s a taste of summer paradise!
Explore More Delicious Frozen Treats! Expand Your Dessert Repertoire
If you’ve fallen in love with the incredible ease and sensational flavor of this no-churn recipe, you’ll undoubtedly want to explore our other fantastic ice cream creations. We offer a delightful variety of recipes designed to satisfy every craving, from intensely rich chocolate to refreshingly light fruit-based options. Expand your frozen dessert repertoire and discover new favorites with these tempting ideas:
- Supreme Chocolate Rolo S’mores Ice Cream
- Fresh Fruit Ice Cream
- Cookie Dough Ice Cream Pie!
- Reese’s Puffs Treat Ice Cream Sundae Cake
- No-Bake Strawberry Ice Box Cake
- Best No Churn Chocolate Ice Cream
- Peanut Butter Cookie Ice Cream Sandwiches
- Cinnamon Cheesecake Ice Cream {Cherry Pie Filling Allowed!}
- Healthy Reese’s Ice Cream
- Soft Serve Banana Nice Cream
- 20 Irresistible Strawberry Desserts That Are Sure To Impress
- 25 Rockin’ Chocolate Chip Cookie Recipes
3 Berry Cheesecake Ice Cream {No Churn}
By Kim Lange
Delicious strawberries, raspberries, and blueberries swirled into a creamy, decadent cheesecake ice cream. No ice cream maker necessary, making it an effortlessly delightful treat.
Prep Time: 20 mins
Course: Dessert
Keywords: berry, blueberry, cream cheese, ice cream, Oreos, raspberry, strawberry, summer desserts, sweetened condensed milk, whipped cream, no-churn
Print Recipe
Pin Recipe
Ingredients
Cheesecake Ice Cream Base
- 2 cups heavy whipping cream
- 1 can sweetened condensed milk (14 oz)
- 7 oz cream cheese, room temperature
- 2 teaspoons vanilla extract
Blueberry Swirl
- 1 cup fresh blueberries
- 1 ½ tablespoons sugar
- 1 tablespoon lemon juice
- 2 teaspoons cornstarch
Strawberry-Raspberry Swirl
- ½ cup strawberries
- ½ cup raspberries
- 1 ½ tablespoons sugar
- 1 tablespoon lemon juice
- 2 teaspoons cornstarch
Optional Add-ins
- 10 Oreo Vanilla Cookies, broken into bits
Instructions
Berry Swirl Preparation
- Blueberry Swirl: Combine blueberries, sugar, cornstarch, and lemon juice in a medium microwave-safe bowl. Microwave for 3-5 minutes until boiling and thickened. Gently squish some berries. Chill in the fridge.
- Strawberry-Raspberry Swirl: Combine strawberries, raspberries, sugar, cornstarch, and lemon juice in a medium microwave-safe bowl. Microwave for 3-5 minutes until boiling and thickened. Gently squish some berries. Chill in the fridge.
Cheesecake Ice Cream Assembly
- In a large bowl, beat cream cheese until smooth. On low speed, mix in condensed milk and vanilla. Set aside.
- In another bowl, beat heavy cream until stiff peaks form.
- Gently fold the cream cheese mixture into the whipped heavy cream until well incorporated.
- Spoon about half of the mixture into a standard loaf pan.
- Remove chilled berry sauces. Spoon half of each berry swirl over the cream mixture in the loaf pan. If using, sprinkle half of the Oreo cookie bits.
- Cover with the remaining whipped cream mixture.
- Top with the remaining berry mixtures. Use a butter knife to gently swirl the berry mixtures into the cream. Add the remaining Oreo cookie bits on top.
- Cover the pan tightly with aluminum foil and freeze for at least 6 hours, or until firm.
Tried This Recipe?
We’d love to hear about your experience! Share your thoughts and tell us how your 3 Berry Cheesecake Ice Cream turned out by commenting below. Your feedback helps us create more delicious recipes for everyone!
Leave a comment
