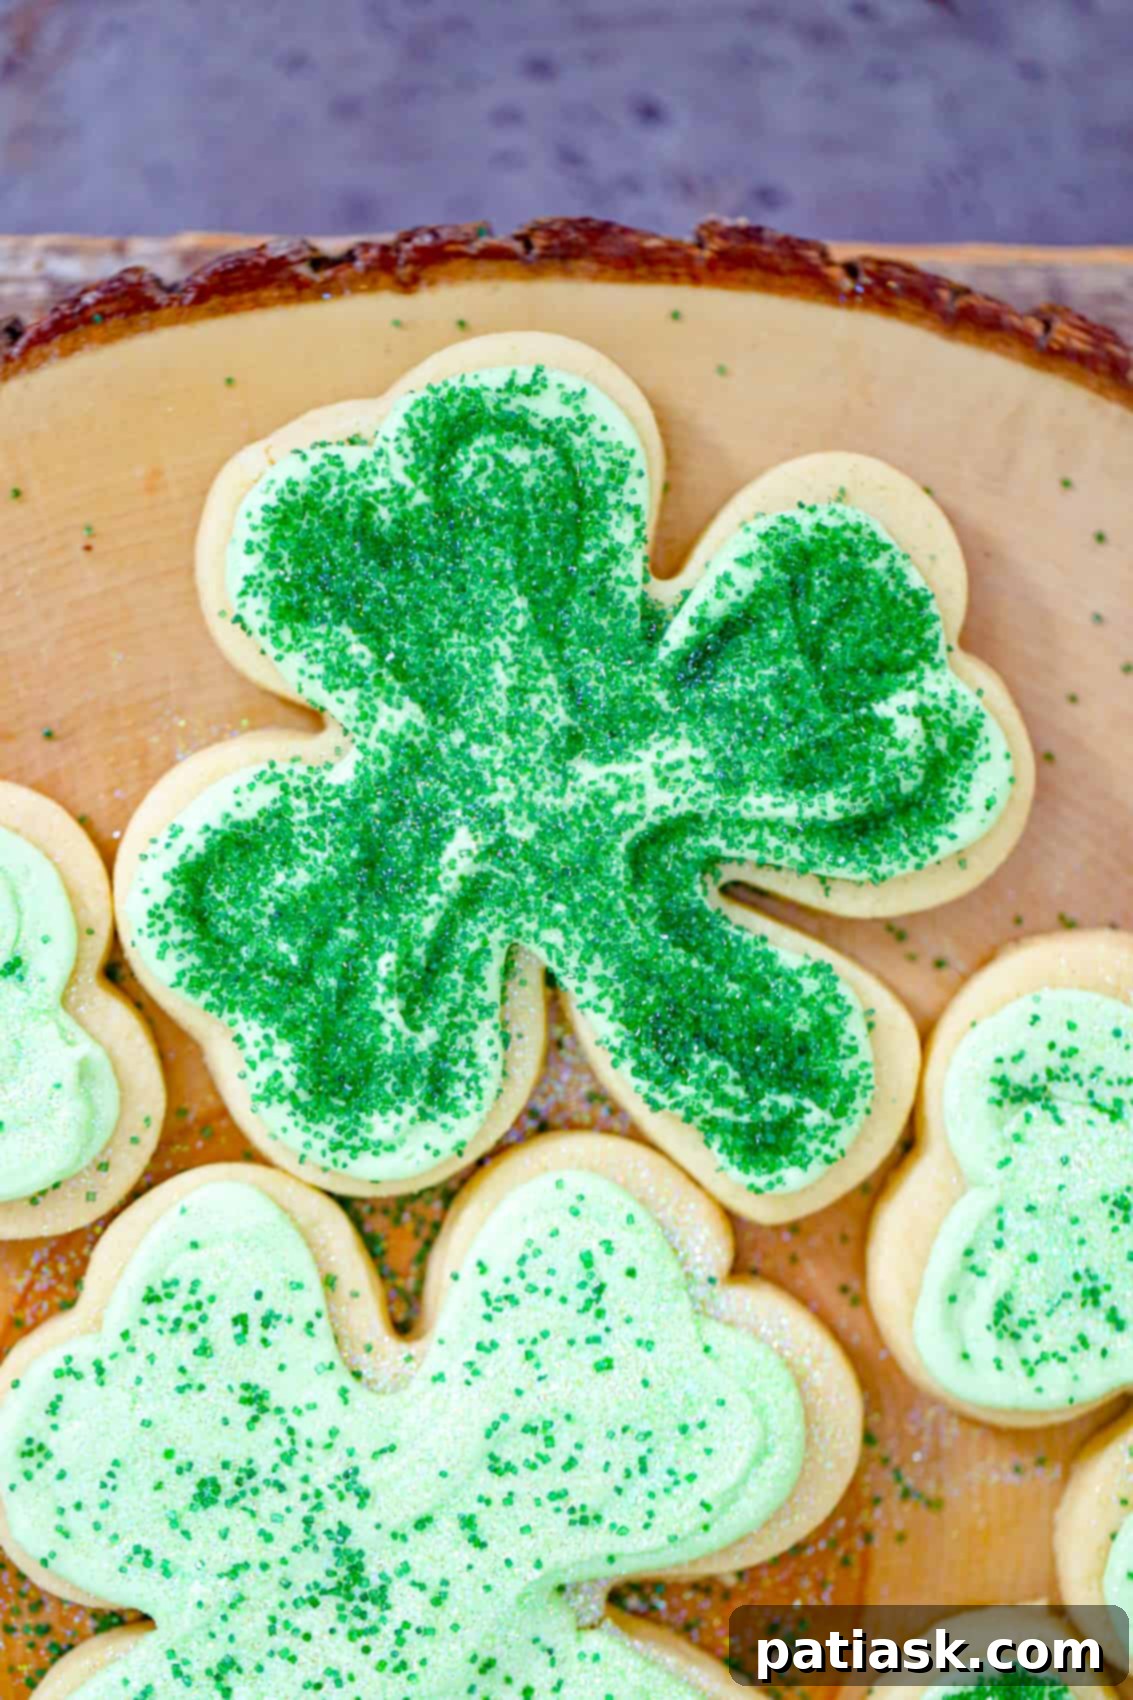
Shimmery Shamrock Sugar Cookies: Your Ultimate St. Patrick’s Day Recipe
Get ready to infuse your St. Patrick’s Day celebration with a sprinkle of magic and a dash of deliciousness! If you’re searching for an extraordinary cookie recipe that truly embodies the spirit of the Emerald Isle, look no further than our festive and delightfully easy Shimmery Shamrock Sugar Cut-Out Cookies. These vibrant green treats are perfect for any St. Paddy’s Day festivity, bringing cheer, sparkle, and a touch of Irish luck to every bite. Forget the everyday cookie; these shamrock-shaped beauties are designed to be the star of your holiday dessert table, much like a pot of gold at the end of a rainbow!
The combination of soft, buttery sugar cookies adorned with luscious buttercream frosting creates an irresistible confection. It’s more than just a dessert; it’s an experience, a charming nod to Irish traditions that will have everyone, Irish or not, feeling lucky. Imagine the delight on faces young and old as they discover these shimmering green masterpieces. They’re not just cookies; they’re edible pieces of St. Patrick’s Day joy, crafted to make your celebration unforgettable. So, gather your ingredients and prepare for a baking adventure that promises smiles, sweetness, and perhaps even a spontaneous jig!
Why These Shimmery Shamrock Sugar Cookies Are a St. Patrick’s Day Must-Have
Our Shimmery Shamrock Sugar Cookies aren’t just pretty faces; they’re packed with reasons to love them, making them an ideal choice for your St. Patrick’s Day baking. This recipe stands out for its simplicity, speed, and undeniable festive appeal, ensuring a delightful experience from kitchen to celebration.
- Effortless Elegance: Sugar cookies are inherently one of the most straightforward cookie recipes to master. Even if you’re a novice baker, this shamrock cookie recipe is incredibly easy to follow, guiding you to perfectly shaped, soft, and delicious sugar cookies every time. The beautiful results belie the minimal effort involved.
- No-Chill Dough, Instant Gratification: Say goodbye to hours of waiting! We utilize a ingenious 10-minute flash-freeze method that eliminates the need for lengthy dough chilling. This means you can go from mixing bowl to baked cookies in record time, making spontaneous baking sessions a breeze.
- Decadent, Simple Buttercream: The homemade buttercream frosting is wonderfully simple to prepare, yet yields a rich, creamy texture that complements the cookies perfectly. For an even quicker route, store-bought buttercream can be easily tinted with green food coloring, offering a convenient shortcut without compromising on flavor or festivity.
- The Perfect Festive Pairing: Frosted St. Patrick’s Day cookies are the ultimate party idea. The vibrant green frosting paired with the classic shamrock shape creates an instant festive atmosphere, making them an essential centerpiece for any gathering. They’re a feast for both the eyes and the palate!
- Pure Irish Joy in Every Bite: Beyond their delightful taste and soft texture, these shamrock sugar cookies evoke a sense of pure joy. Baking and sharing them might just inspire you to do an Irish jig – that’s how infectious their charm is! They capture the fun and merriment of St. Patrick’s Day in a truly delicious way.
- Versatile for Every Occasion: Whether you prefer small, delicate bites or larger, more substantial cookies, this recipe is adaptable. Arrange them beautifully on a platter to share with friends and family, bring them to a festive party, or simply enjoy them as a special treat at home. They’re perfect for any moment you’re celebrating the luck of the Irish.
The Magic of Shamrock Cut-Out Cookies: A Festive Tradition
Shamrock cut-out cookies are more than just a sweet treat; they are an edible symbol deeply rooted in St. Patrick’s Day traditions. The shamrock, a three-leaf clover, is synonymous with Ireland and holds significant cultural and religious importance. Legend has it that St. Patrick used the three leaves to explain the Holy Trinity, making it a powerful emblem of faith and good fortune. Incorporating this iconic shape into festive cookies allows us to celebrate this rich heritage in a delicious and memorable way.
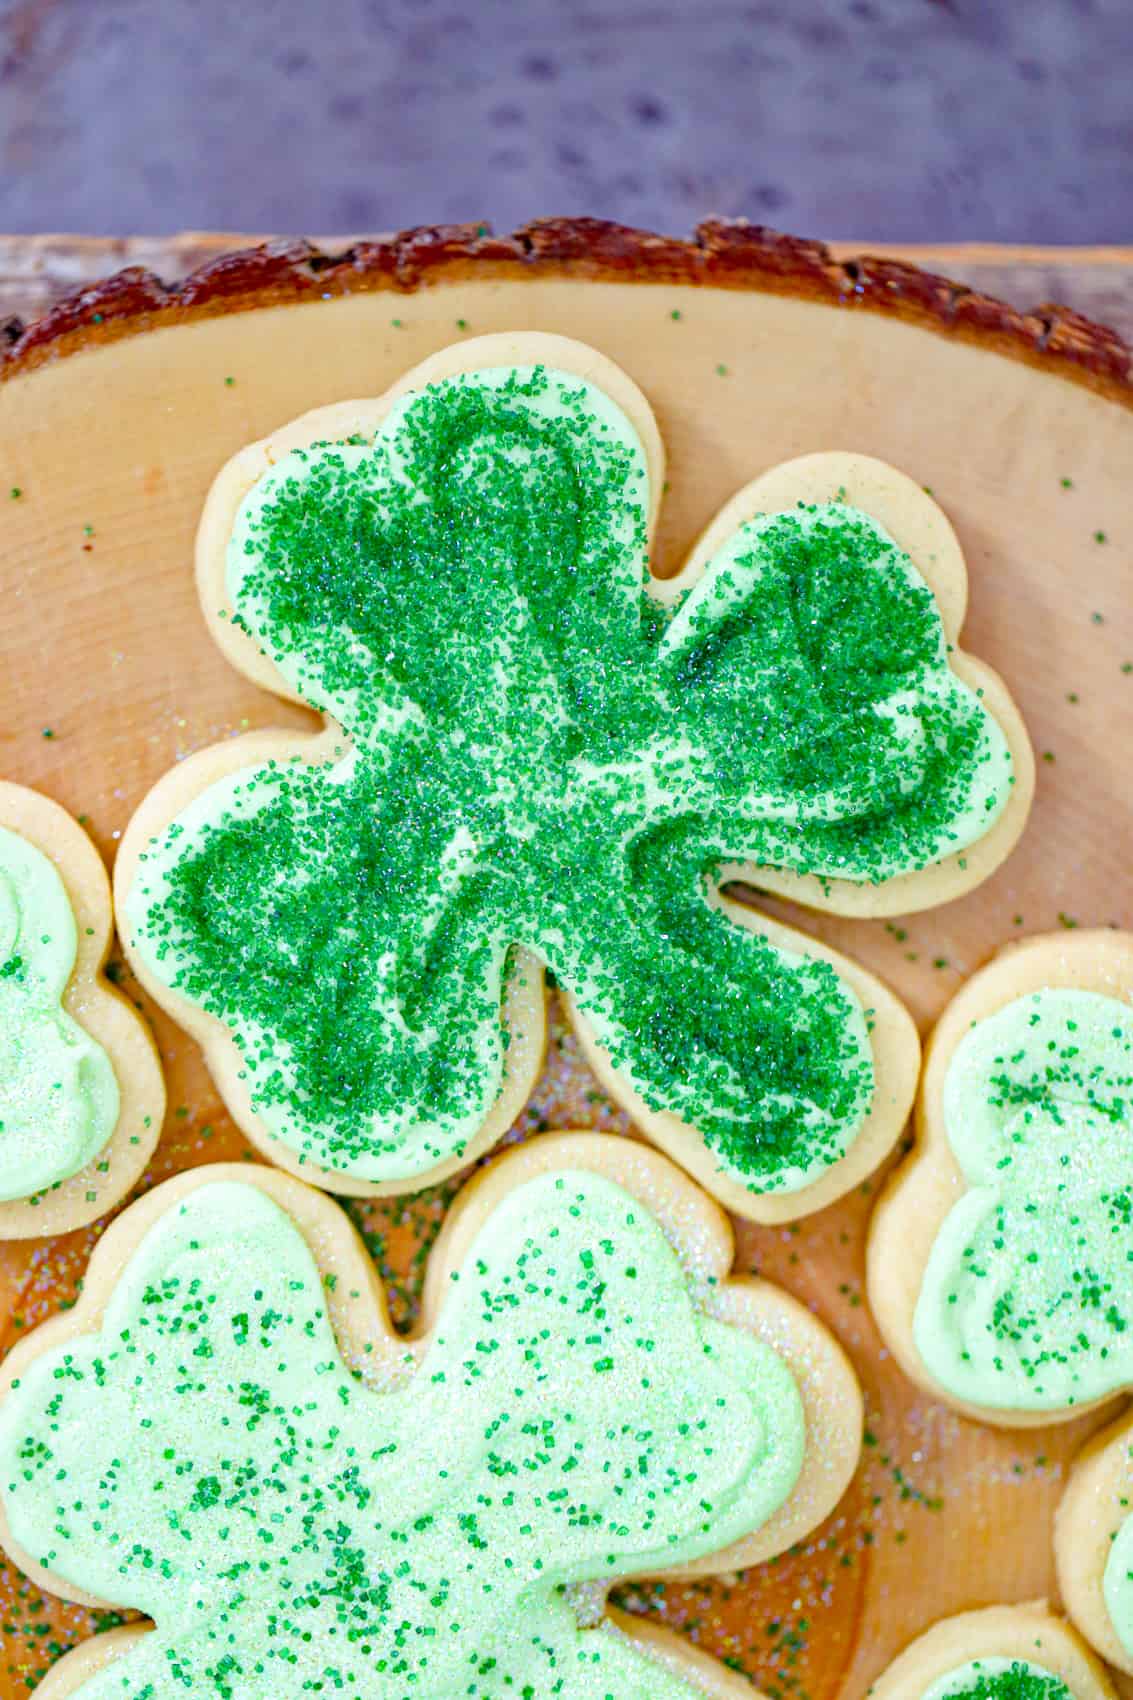
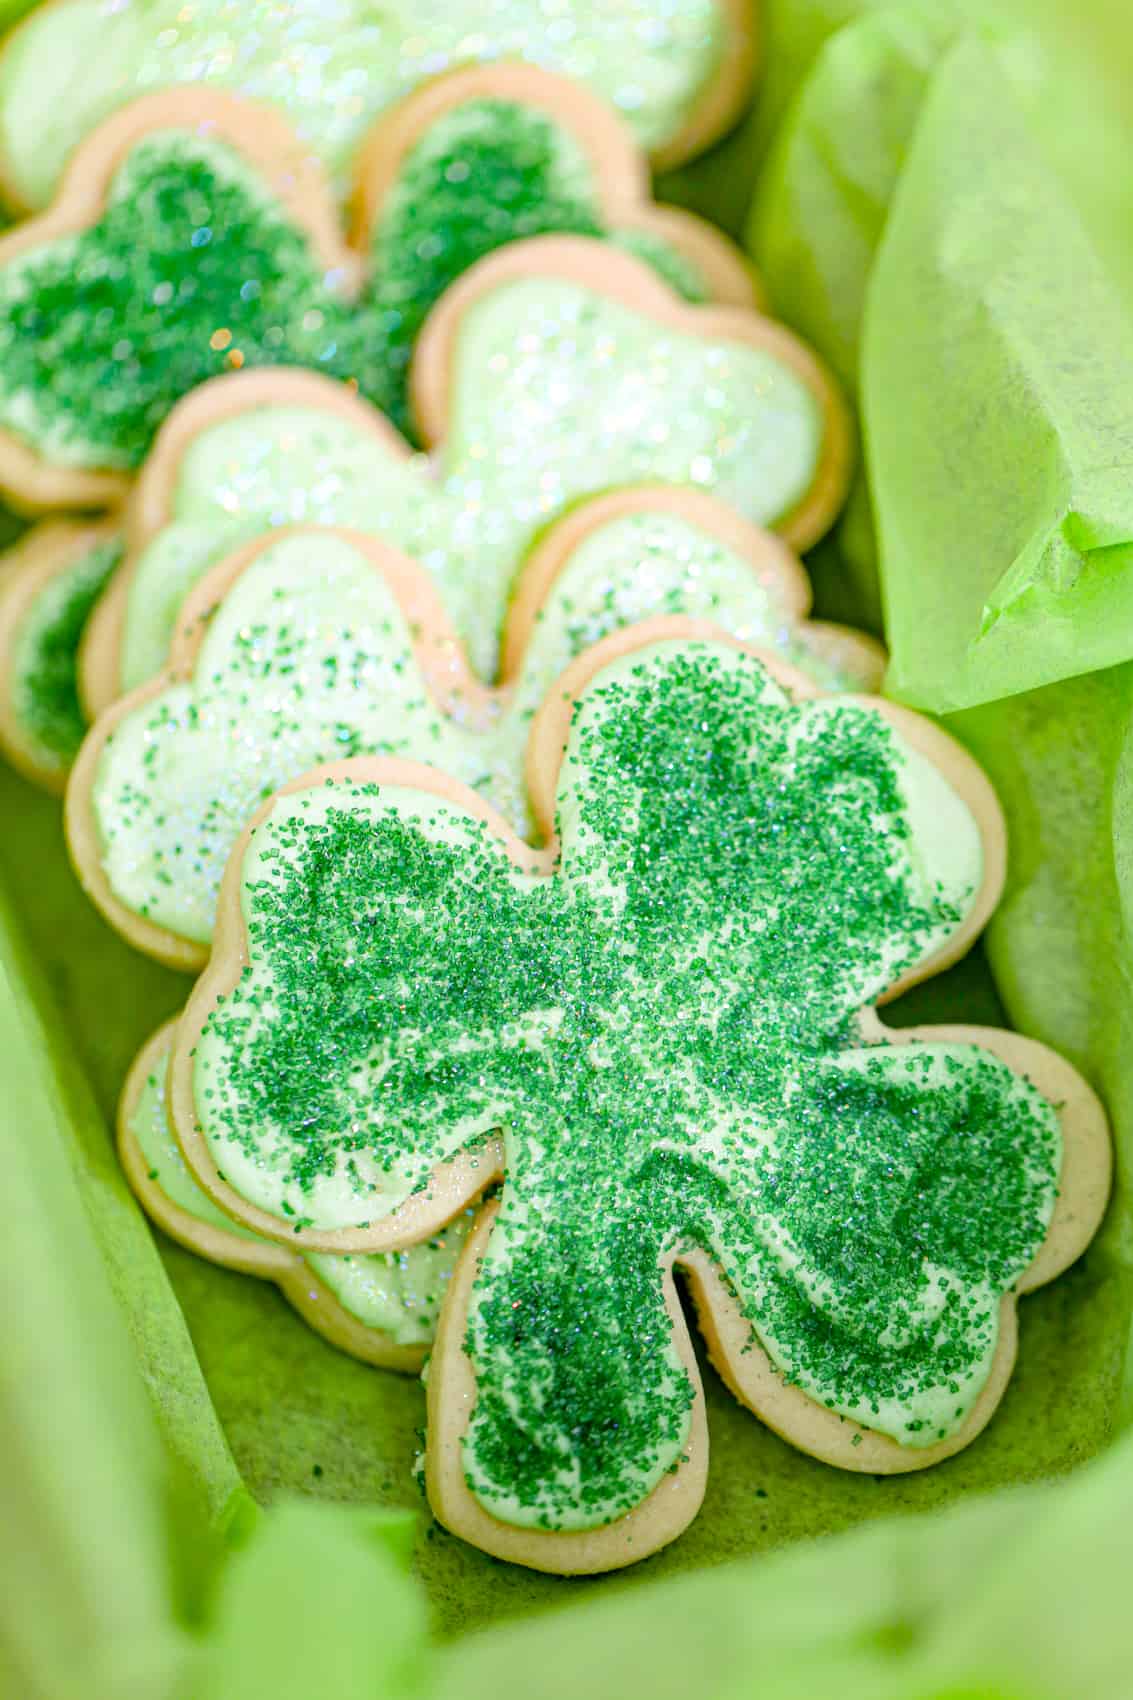
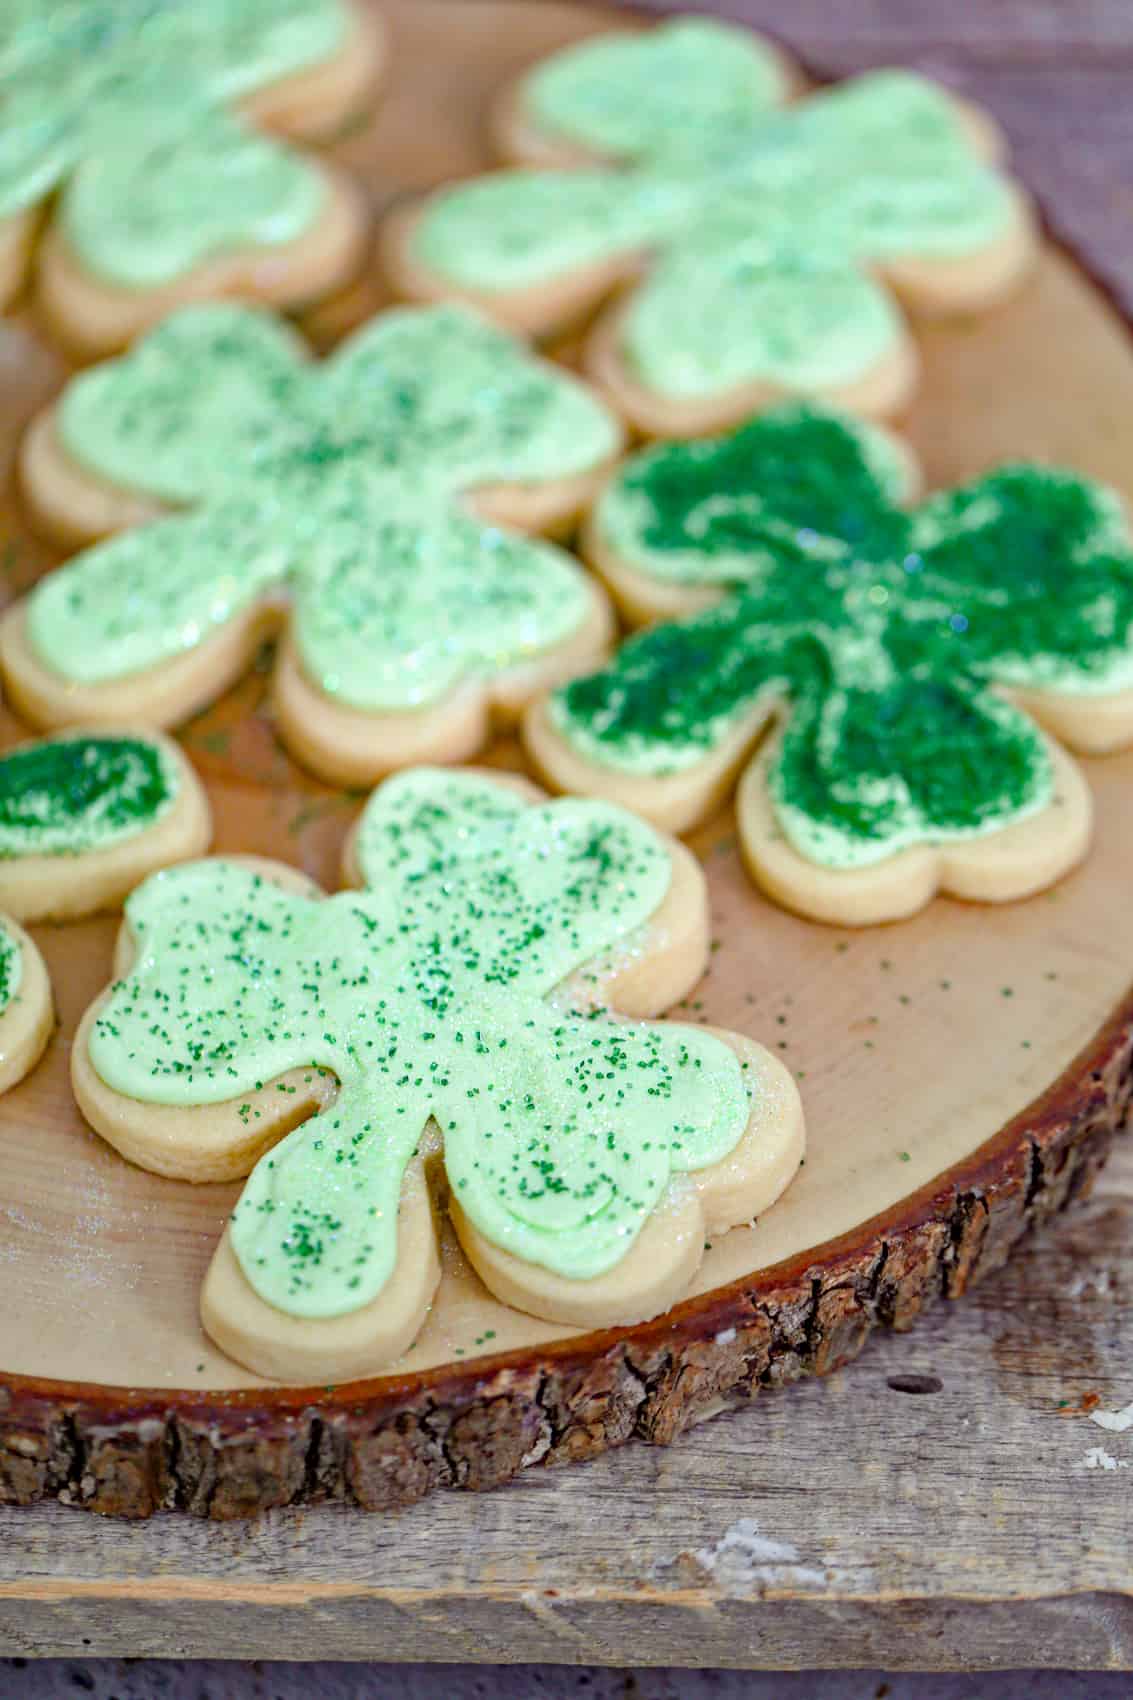
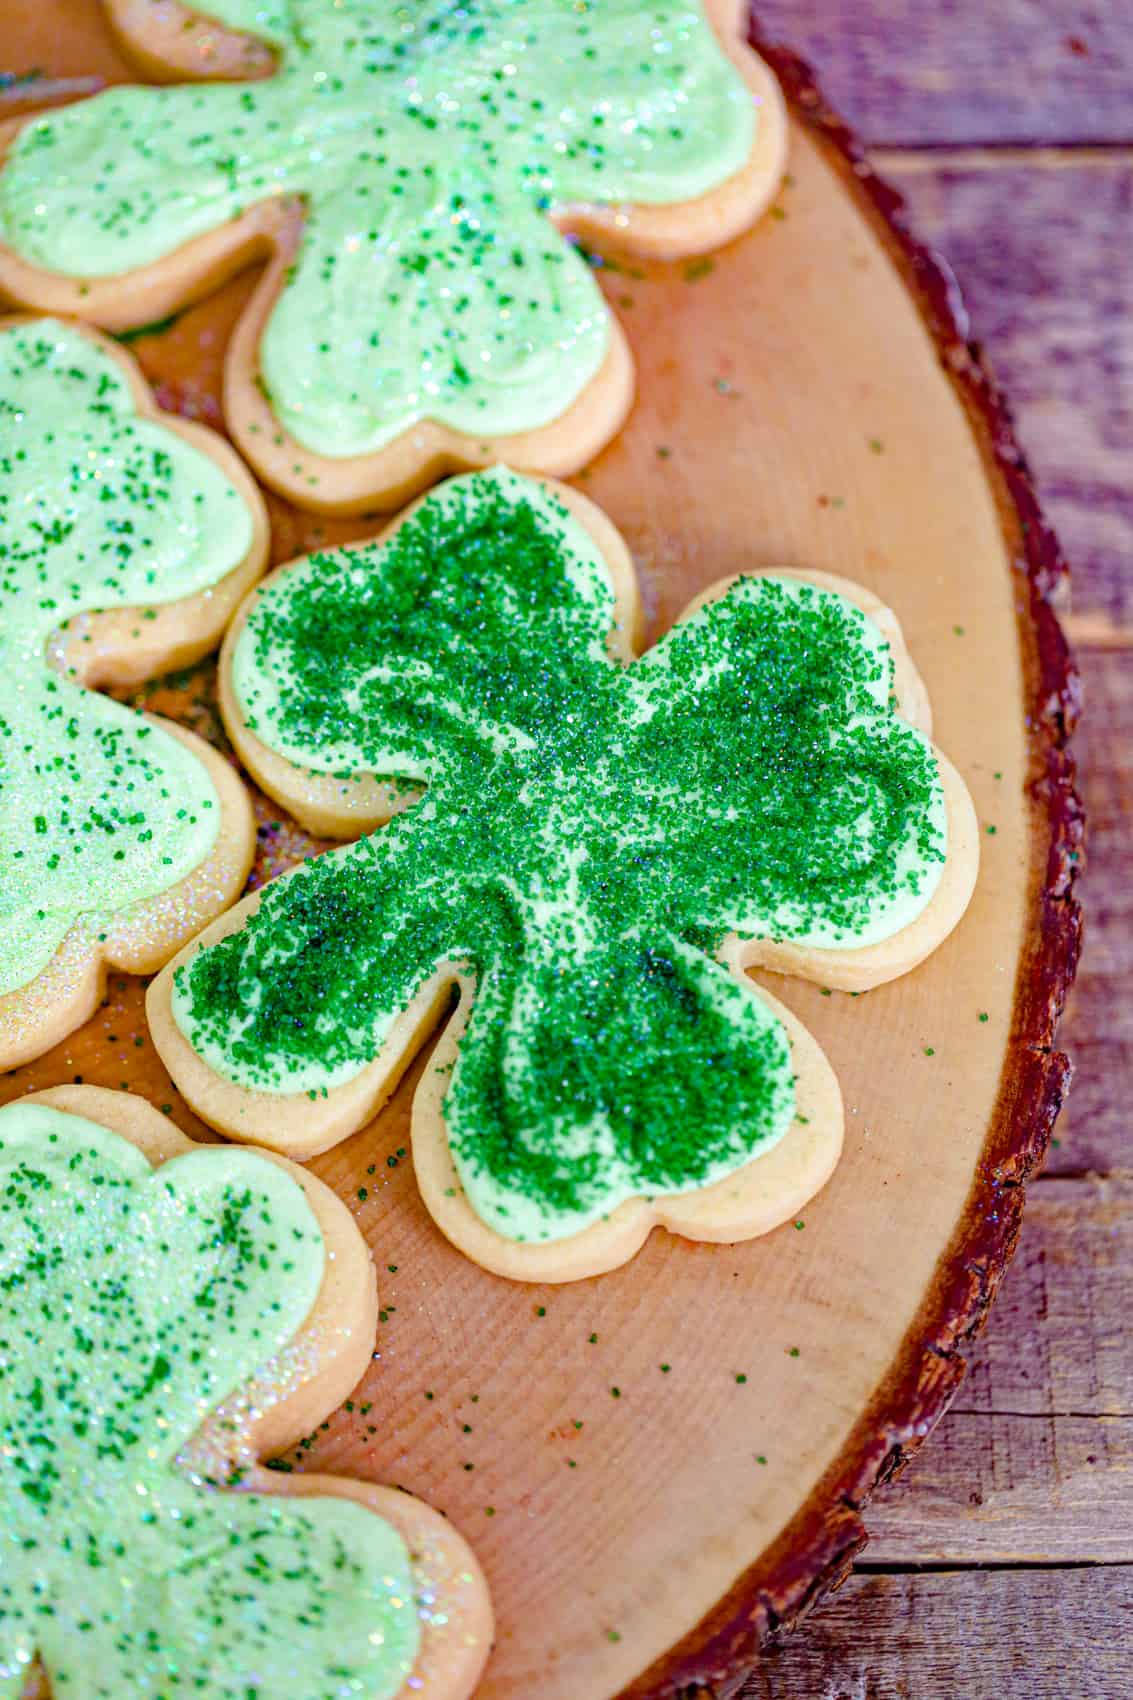
These soft, buttery sugar cookies, lovingly shaped like the iconic Irish shamrock, are guaranteed to bring a “wee bit o’ luck” to all who enjoy them. Each cookie is a miniature homage to Irish charm, perfect for sharing with all the lads and lassies in your life. The act of cutting out each shamrock shape is a joyous part of the baking process, transforming simple dough into festive art. Frosted with a light green buttercream and dusted with sparkling sugar and shimmering edible glitter, they add an undeniable twinkle that will make your Irish eyes (or honorary Irish eyes!) smile with delight. Even if you don’t have a drop of Irish blood, these cookies will instantly transport you to a festive St. Patrick’s Day party atmosphere!
What Makes Our Shamrock Cookies Special?
Beyond their symbolic shape, our shamrock cookies stand apart due to key elements that ensure a superior baking and eating experience. The foundation is a perfectly balanced sugar cookie dough that bakes up soft and holds its shape beautifully. We avoid the common pitfalls of dry or crumbly cookies by emphasizing precise flour measurement and using cold butter, which is crucial for maintaining the cookie’s structure and preventing excessive spreading during baking. The subtle hint of almond extract, while optional, elevates the flavor profile, adding a sophisticated depth that complements the classic vanilla. This thoughtful combination of ingredients and techniques results in a cookie that is both tender and flavorful, a delightful canvas for our vibrant green frosting.
The star of the decoration is our easy-to-make buttercream, which achieves that iconic festive green hue. Whether you opt for liquid or gel food coloring, the result is a frosting that is smooth, creamy, and spreadable, perfect for coating each shamrock. But what truly sets these cookies apart is the finishing touch: a generous sprinkle of green sparkling sugar and edible shimmer dust. This glittery adornment catches the light, creating a dazzling effect that makes these cookies not just tasty, but visually captivating. It’s this attention to both flavor and aesthetics that makes our Shimmery Shamrock Sugar Cookies truly special and a guaranteed hit for any St. Patrick’s Day celebration.
Essential Ingredients for Your Lucky St. Patrick’s Day Cookies
Crafting these festive shamrock cookies requires a few basic baking staples, each playing a crucial role in achieving that perfect texture and flavor. We’ll divide the ingredients into three main categories: the cookie dough, the buttercream frosting, and the dazzling decorations.
For the Perfect Shamrock Sugar Cookie Dough
- All-purpose flour: The foundation of our cookies. Remember to spoon and level your flour carefully to avoid dry, crumbly cookies. Too much flour can make the dough stiff and difficult to work with, while too little can lead to cookies that spread excessively.
- Baking powder: Provides a subtle lift, contributing to the soft, tender texture of the cookies without making them cakey.
- Unsalted butter: Crucial for richness and flavor. It must be cold and cut into cubes. Using cold butter helps prevent the dough from becoming too warm, which is key to avoiding chilling for hours and maintaining sharp cookie shapes. If using salted butter, simply omit the extra salt from the recipe.
- Granulated sugar: Adds sweetness and helps create that desirable crisp edge while keeping the center soft.
- Large egg: Binds the ingredients together, adding moisture and structure to the dough.
- Salt: A pinch of salt balances the sweetness and enhances all the other flavors in the cookie.
- Vanilla extract: Essential for that classic, comforting sugar cookie flavor. Use a good quality pure vanilla extract for the best results.
- Almond extract (optional): A little goes a long way! Almond extract adds a sophisticated depth of flavor that pairs beautifully with vanilla. Be cautious not to add more than ¼ to ½ teaspoon, as its potent flavor can easily overwhelm the cookies if used excessively.
Crafting the Vibrant Green Buttercream Frosting
- Unsalted butter: For the frosting, it needs to be at room temperature. This ensures a smooth, creamy consistency when whipped.
- Confectioners’ sugar / powdered sugar: The primary sweetener and thickener for the frosting, giving it a smooth, melt-in-your-mouth texture.
- Salt: Just a tiny amount to balance the sweetness of the powdered sugar.
- Vanilla extract: Adds a delightful aroma and flavor to the buttercream, complementing the cookies.
- Milk of choice or heavy cream: Used to adjust the consistency of the frosting. Start with a smaller amount and add more gradually until your frosting reaches your desired spreadable or pipeable texture. Heavy cream will yield a richer, thicker frosting.
- Green food coloring or gel: To achieve that iconic St. Patrick’s Day green. Gel food coloring provides more vibrant color with less liquid, which is ideal for maintaining frosting consistency. Liquid coloring can be used but may require more to reach the desired shade.
Sparkling Decorations for That Extra Irish Charm
- Green sparkling sugar: Large, coarse sugar crystals that add a beautiful sparkle and textural crunch.
- Green sanding sugar: Finer than sparkling sugar, it provides a more subtle shimmer and even coverage.
- Shimmering edible green sugar dust: For an ultimate, ethereal glow, this dust will make your shamrocks truly magical.
- St. Patrick’s themed sprinkles: An alternative to plain sugars, these can add extra festive shapes and colors. Of course, all toppings are optional – you can leave them off for a simpler look if preferred!
Step-by-Step Guide: How to Bake and Decorate Your Shamrock Delights
Follow these detailed instructions to create your own batch of festive and delicious Shimmery Shamrock Sugar Cookies. Precision and attention to detail at each step will ensure perfect results.
Preparing the No-Chill Sugar Cookie Dough
- Prepare your baking sheets: Line several baking sheets with parchment paper. This prevents sticking and makes for easy cleanup. Set them aside.
- Combine dry ingredients: In a medium bowl, whisk together the measured all-purpose flour, baking powder, and salt. Whisking ensures these dry ingredients are evenly distributed. Set this mixture aside.
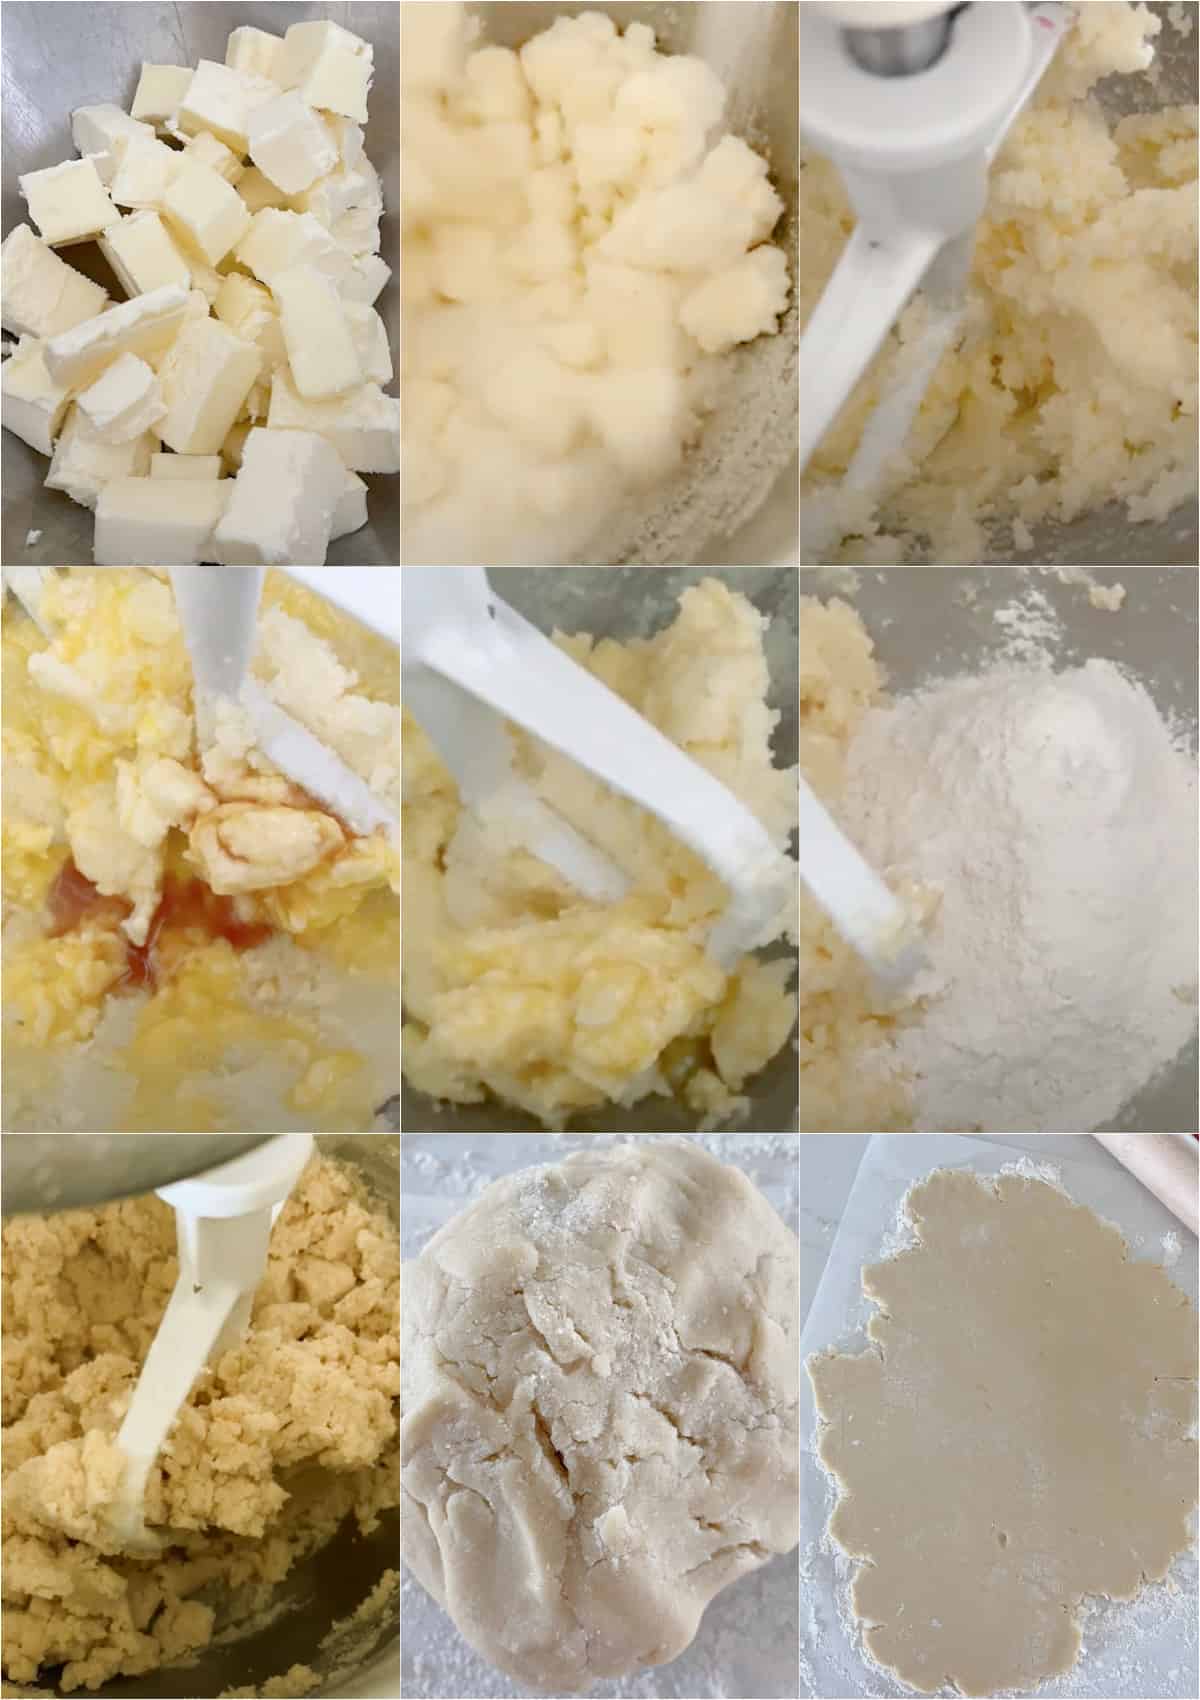
- Cream butter and sugar: In the bowl of a stand mixer fitted with the paddle attachment (or using a hand mixer), cream together the cold, cubed unsalted butter and granulated sugar on medium speed until the mixture is light, fluffy, and smooth. This typically takes about 2-3 minutes.
- Add wet ingredients: Beat in the large egg, vanilla extract, and optional almond extract until just combined. Scrape down the sides and bottom of the bowl with a spatula to ensure everything is fully incorporated.
- Incorporate dry into wet: Gradually add the reserved flour mixture to the wet ingredients, beating on low speed until just combined. Be careful not to overmix; overmixing can develop the gluten in the flour, leading to tougher cookies. The dough will appear crumbly at this stage.
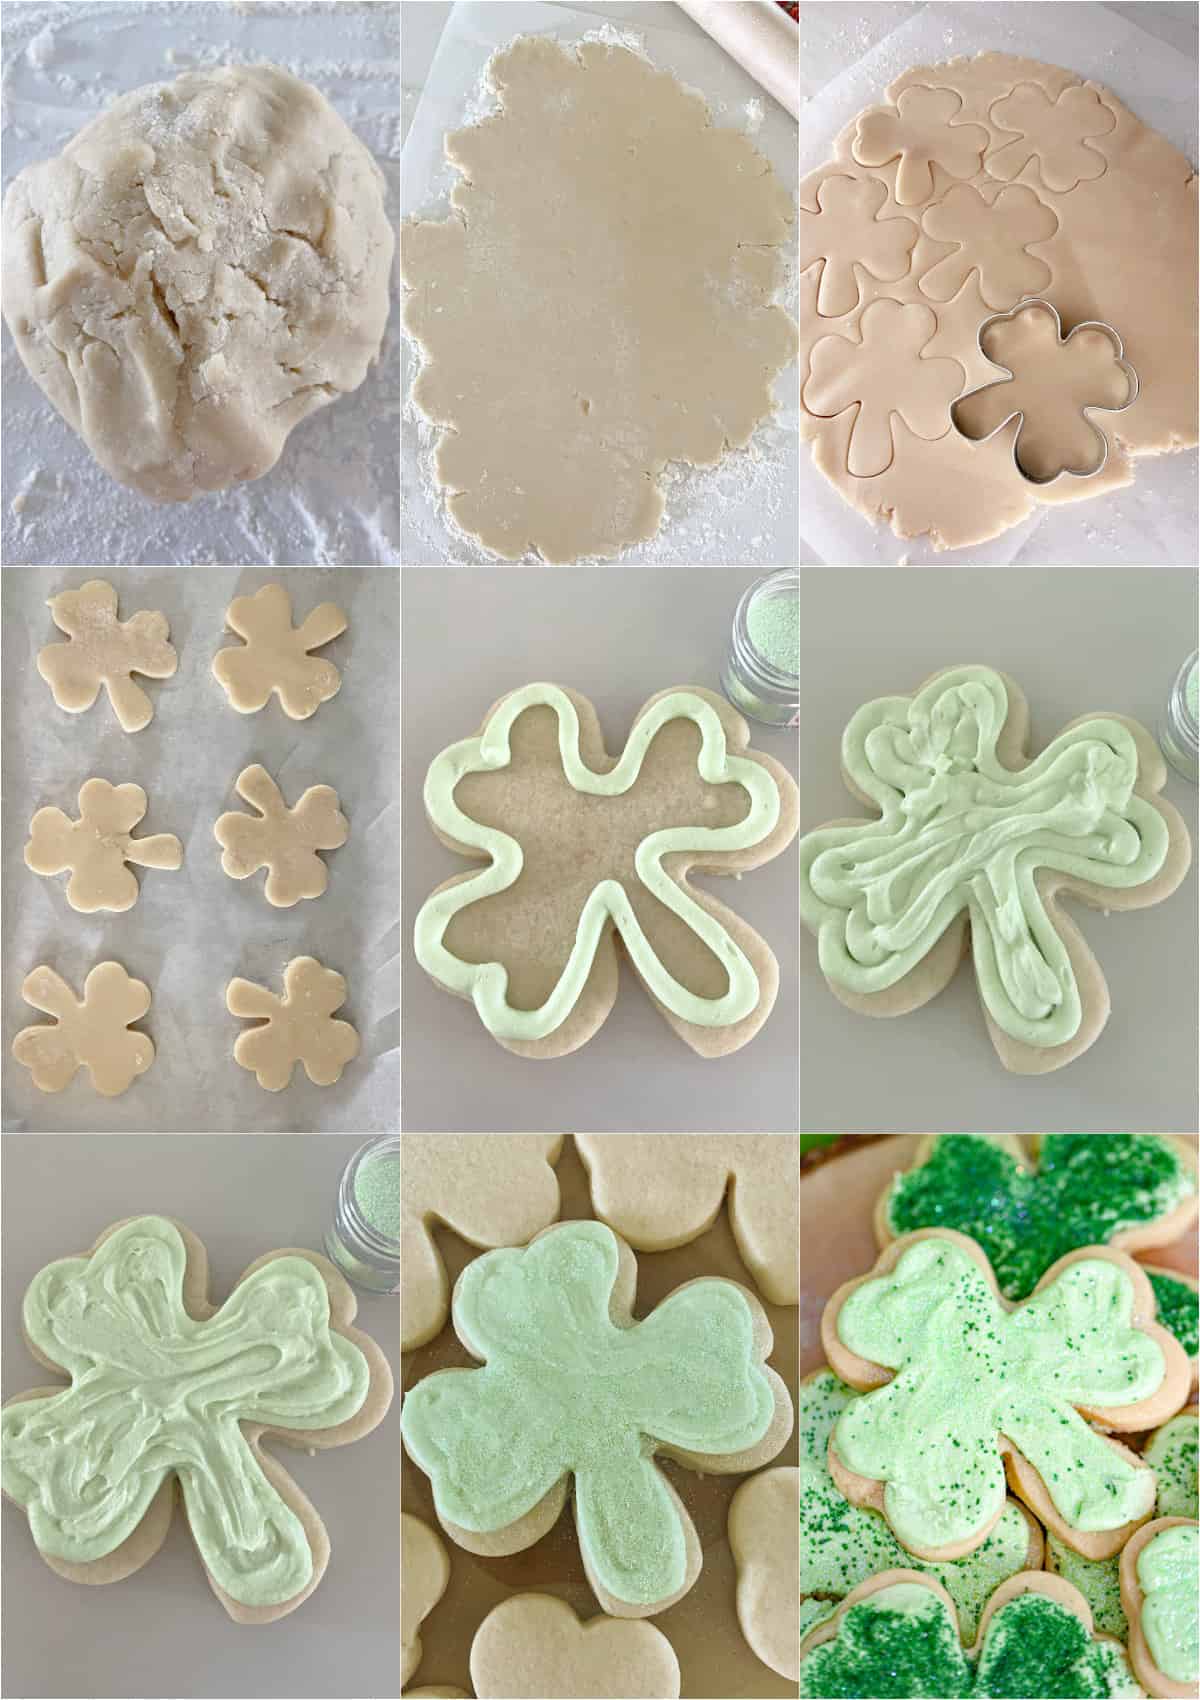
- Form the dough: Turn the crumbly dough out onto a clean surface. Gently knead it with your hands for a minute or two until it comes together to form a cohesive ball. Do not over-knead.
- Roll out the dough: Lightly flour your work surface and a rolling pin. Roll the dough to an even thickness of about 1/3 inch to 3/8 inch. Maintaining a consistent thickness is important for even baking.
- Cut out shapes: Using shamrock-shaped cookie cutters, cut out your cookies. Re-roll any dough scraps as needed, but try to do so minimally to keep the dough tender.
- Prepare for baking: Carefully transfer the cut-out shamrock cookies to your prepared baking sheets, leaving about 2 inches between each cookie to allow for slight spreading.
Baking Your Beautiful Shamrock Shapes
- Flash-freeze: Once the cookies are on the baking sheets, transfer them to the freezer for 10 minutes. This flash-freeze method is key to preventing the cookies from spreading too much in the oven, helping them maintain their perfect shamrock shape. While the first batch is freezing, preheat your oven to 350°F (175°C).
- Bake to perfection: Bake the cookies for 10-12 minutes, or until the edges are just barely golden brown on the bottoms. Watch them closely to avoid over-baking, which can result in hard, dry cookies. The tops should remain light in color.
- Cool: Allow the baked cookies to cool on the baking sheets for a few minutes before carefully transferring them to a wire rack to cool completely. They must be entirely cool before frosting to prevent the buttercream from melting.
Whipping Up the Easy Green Buttercream
- Initial mix: In a clean mixing bowl, combine the room temperature unsalted butter, half of the powdered sugar, vanilla extract, salt, and half of your chosen milk or heavy cream. Beat on low speed until combined, then increase to medium-high and beat until smooth and creamy.
- Adjust consistency and sweetness: Add the remaining powdered sugar gradually, beating until fully incorporated. Then, slowly add more milk or heavy cream, a tablespoon at a time, until the frosting reaches your desired consistency – thick enough to hold its shape but smooth enough to spread easily.
- Color your frosting: Add a few drops of green food coloring or gel to the frosting mixture. Mix well, starting with a small amount and adding more as needed, until you achieve your desired vibrant green hue.
Decorating Your Shamrock Masterpieces
- Frost the cookies: There are two main ways to frost your cooled cookies:
- Spatula or knife method: Use an offset spatula or a small knife to spread an even layer of green buttercream over the top of each shamrock cookie.
- Piping bag method: For more precision, transfer the frosting to a pastry bag fitted with a small or medium round piping tip. Pipe the frosting onto the cookies, then use a small spatula or the back of a spoon to gently smooth it out if desired.
- Add the sparkle: Immediately after frosting each cookie (before the frosting sets), sprinkle generously with green sparkling sugar, sanding sugar, or shimmering edible green sugar dust. You can also add St. Patrick’s themed sprinkles for extra flair. The wet frosting will help the decorations adhere.
- Allow to set: Once decorated, arrange the cookies on a tray or wire rack and allow the frosting to set completely. This typically takes about 3 hours at room temperature, or even overnight. Setting prevents the frosting from smudging when stacked.
Pro Tips for Flawless St. Patrick’s Day Cut-Out Cookies
Achieving perfect cut-out cookies is an art, but with these expert tips, you’ll be baking like a pro in no time. These insights will help you avoid common pitfalls and ensure your Shimmery Shamrock Sugar Cookies are as beautiful as they are delicious.
Dough Handling Secrets for Perfect Shapes
- The power of cold butter: Always ensure your butter is cold and cut into cubes when making the dough. This keeps the dough cooler during mixing, which is essential for maintaining the cookies’ shape and preventing them from spreading excessively during baking. Warm butter can lead to a sticky, unmanageable dough.
- Mastering the flash-freeze: After cutting out your shamrock cookies, a quick 10-minute flash-freeze in the freezer is your secret weapon. This rapid chilling firms up the butter in the dough, locking in the cookie’s shape before it hits the warm oven. If you’re baking in batches, keep unbaked cookies chilled in the refrigerator while another tray bakes to ensure consistent results.
- Accurate flour measurement: Measuring flour correctly is paramount for the right dough consistency. Always fluff up the flour in its container before lightly spooning it into your dry measuring cup. Avoid packing it down. Use a straight edge (like the back of a knife) to level off the excess. This prevents adding too much flour, which can lead to dry, crumbly cookies.
Baking to Golden Perfection
- Do not over-bake! This is perhaps the most crucial tip for soft, bakery-style sugar cookies. Over-baking will result in cookies that are tough, dry, and lose their delicate texture. Look for just barely golden edges, and remove them from the oven while the centers still look slightly soft. They will continue to set as they cool on the hot baking sheet.
- Even thickness is key: When rolling out your dough, strive for a consistent thickness. Uneven dough will lead to some cookies baking faster and potentially burning, while others remain undercooked. Aim for 1/3 to 3/8 inch thickness for optimal results.
Frosting and Finishing Touches
- Patience with setting frosting: Once your cookies are frosted and decorated, allow the buttercream to set completely. This can take about 3 hours or even overnight, depending on humidity. Resist the urge to stack them before they’re fully set, or your beautiful designs will smudge and stick together.
- Homemade vs. store-bought frosting: While homemade buttercream offers a superior taste and texture, don’t hesitate to use store-bought buttercream frosting for an easy shortcut. Simply add green food coloring or gel to tint it to your desired shade, and you’ll still have beautifully decorated cookies with minimal effort.
- Experiment with decorations: Don’t limit yourself to just sparkling sugar. Consider edible glitter, different shades of green sprinkles, or even small edible pearls to add unique touches to your shamrock designs.
Storage and Freezing Tips for Long-Lasting Festive Fun
Preparing delicious St. Patrick’s Day treats should be enjoyable, and knowing how to properly store them ensures your hard work lasts. These tips will help you keep your Shimmery Shamrock Sugar Cookies fresh and delightful for as long as possible, whether you’re making them ahead or saving leftovers.
Keeping Your Frosted Cookies Fresh
- Airtight is key: Once the frosting has fully set, store your decorated shamrock cookies in an airtight container at room temperature. A cookie tin or a plastic container with a tight-fitting lid works perfectly. This will keep them fresh and soft for up to 3-5 days.
- Avoid refrigeration for frosted cookies: We generally do not recommend refrigerating frosted sugar cookies. The cool, dry environment of a refrigerator can actually dry out the cookies faster, making them hard and stale. It can also cause the frosting to become sticky or dull the sparkle of your decorations due to condensation when they return to room temperature.
- Layer with parchment: If you need to stack frosted cookies in your container, place a sheet of parchment paper or wax paper between each layer to prevent sticking and preserve the decorations.
Freezing Unfrosted Baked Cookies
- Freeze baked, unfrosted cookies: If you want to get a head start on your holiday baking, you can freeze the baked cookies before frosting them. Allow the cookies to cool completely after baking.
- Layer carefully: Arrange the unfrosted cookies in a single layer on a baking sheet and flash-freeze them until solid (about 1-2 hours). Once firm, transfer them to an airtight freezer-safe container, separating layers with parchment or waxed paper.
- Thaw and frost: Frozen unfrosted cookies can be stored for up to 2-3 months. When you’re ready to enjoy them, simply thaw them at room temperature for a few hours before preparing and applying your fresh buttercream frosting and decorations. This method ensures optimal texture and allows for fresh frosting when served.
Serving Suggestions: Making Your St. Patrick’s Day Celebration Extra Special
These Shimmery Shamrock Sugar Cookies are inherently festive, but with a few creative serving ideas, you can elevate your St. Patrick’s Day celebration to truly magical heights. Beyond simply placing them on a plate, consider these suggestions to make your cookies a highlight.
- Festive Cookie Platter: Arrange your shamrock cookies artfully on a large platter alongside other green or Irish-themed treats. Think mint brownies, lime-flavored desserts, or even a bowl of green candies. The varied textures and shades of green will create an enticing display.
- Edible Party Favors: Individually wrap frosted shamrock cookies in small cellophane bags with a festive green ribbon. They make charming party favors for guests to take home, extending the celebration. It’s a sweet way to say “thank you” for sharing in the St. Paddy’s Day fun.
- Coffee or Tea Companion: Pair these delightful cookies with a warm beverage. For adults, a cup of Irish coffee or a hot chocolate with a splash of mint liqueur would be a perfect complement. For everyone, classic milk or a fragrant cup of green tea can enhance the experience.
- Dessert Bar Addition: If you’re hosting a larger gathering, create a St. Patrick’s Day dessert bar. These shamrock cookies will shine amongst other themed sweets like Lucky Charm marshmallow treats, green velvet cupcakes, or pistachio desserts. They add color, sparkle, and that essential festive shape.
- Gifting with Love: Box a selection of these homemade cookies in a decorative tin or box as a thoughtful gift for neighbors, teachers, or friends. Handmade treats always carry a special touch, and these shimmering shamrocks are sure to spread cheer and luck.
- Kids’ Decorating Station: For a fun party activity, bake the shamrock cookies ahead of time, then set up a decorating station. Provide bowls of green buttercream, various green sprinkles, edible glitter, and small spatulas or piping bags. Kids (and adults!) will love customizing their own lucky cookies.
No matter how you choose to serve them, biting into one of these delicious frosted shamrock cookies feels like finding your very own pot of gold at the end of a rainbow. It truly makes for a lucky day!
Enjoy the celebration and the pure joy that comes with this fun Shamrock Cookies Recipe!
Frequently Asked Questions About Shamrock Cookies
Q: Can I make the cookie dough ahead of time?
A: Yes! You can prepare the cookie dough and store it tightly wrapped in plastic wrap in the refrigerator for up to 3 days. Before rolling and cutting, let it sit at room temperature for about 15-20 minutes to soften slightly, making it easier to work with.
Q: My cookies spread too much. What went wrong?
A: Several factors can cause cookies to spread. Ensure your butter is cold when you start mixing the dough. Also, always flash-freeze the cut-out cookies for 10 minutes before baking. Using too much flour (not spooning and leveling) or an oven that isn’t at the correct temperature can also contribute to spreading. Make sure your oven is accurately calibrated with an oven thermometer.
Q: How can I get a vibrant green color for my frosting?
A: For the most vibrant green, use gel food coloring instead of liquid drops. Gel colors are more concentrated, so you’ll need less, which helps maintain the frosting’s consistency. Start with a few drops, mix well, and gradually add more until you achieve your desired shade.
Q: Can I use different flavors for the cookies?
A: Absolutely! While vanilla and optional almond extract are classic, feel free to experiment. You could try adding a hint of mint extract for a mint-chocolate chip flavor profile (especially good with a chocolate drizzle), or even a touch of lemon zest to the dough for a brighter taste. Adjust the extracts carefully as some are very potent.
Q: How long do the frosted cookies last?
A: When stored in an airtight container at room temperature, frosted shamrock cookies will stay fresh and delicious for about 3 to 5 days. Ensure the frosting is completely set before stacking them to prevent smudging.
Q: What if I don’t have a shamrock cookie cutter?
A: No problem! You can use any cookie cutter you have on hand. Circle cutters are a great alternative. You can still frost them green and add sprinkles to maintain the festive theme. Alternatively, you can try to cut out shamrock shapes freehand with a knife, though it requires a steady hand!

More Festive St. Patrick’s Day Treats
- Luscious Lime Vodka Jello Shots
- 10 Awesome Chocolate Mint Brownies
- Awesome Rainbow Cookies
- Christmas Cookie Bars
- Mint Chocolate Layered Brownies
- Easter Egg Sugar Cookies
Shamrock Cookies Recipe
By Kim Lange
If you’re on the lookout for an amazing St. Patrick’s Day cookie recipe, our festive and easy St. Patrick’s Day Shamrock Cookies are ideal for fun celebrating!

Prep Time
10 mins
Cook Time
12 mins
Flash Freeze
10 mins
Course
Dessert
Servings
16 Large Cookies
Ingredients
Cut Out Sugar Cookies
- 3 cups all-purpose flour, spooned and leveled
- 2 teaspoons baking powder
- 1 cup unsalted butter, cold & cut into cubes (can also use salted butter, omit salt)
- 1 cup granulated sugar
- 1 large egg
- ½ teaspoon salt
- 2 teaspoons vanilla extract
- ¼ teaspoon almond extract (optional)
Easy Buttercream Frosting
- 1 cup unsalted butter, room temperature
- 3 – 4 cups powdered sugar
- ¼ teaspoon salt
- 2 teaspoons vanilla extract
- 2-4 tablespoons milk of choice or heavy cream
- Green food coloring or gel to tint frosting
- Green sparkling sugar and/or shimmering sugar dust
Instructions
Cut Out Sugar Cookies
- Line baking sheets with parchment paper, set aside.
- Whisk together the flour, salt and baking powder, set aside.
- Using a mixer, cream together the cold, cubed butter and sugar until smooth and creamy. Blend in the egg and both extracts. Gradually add the flour mixture and beat until just combined, scraping down the bowl, as needed, including the bottom.
- The dough will be crumbly, so knead it together with your hands as you scoop it out of the bowl until it comes together.
- Roll dough on a lightly floured surface to about 1/3″ to 3/8″ thickness preferred using a rolling pin and then cut into shapes using shamrock cookie cutters.
- Place cut out cookies on the prepared baking sheets 2 inches apart and then transfer to the freezer for 10 minutes, while you preheat the oven to 350 degrees F.
- Bake for 10-12 minutes until just barely golden on the bottoms, being careful to not over-bake.
- Let sit for a few minutes on the sheet, then transfer to a cooling rack to cool completely before frosting.
Easy Buttercream Frosting & Decoration
- Using a mixer, mix together the butter, ½ of the powdered sugar, vanilla, salt and ½ of the milk until mixed well. Add the remainder of the powdered sugar and add more milk until you get the consistency you want for cookies. Add a few drops of green food coloring or gel to frosting mixture, mixing it in and adding more if needed to get the color you want for the frosting.
- To decorate cookies, use a spatula or knife to cover the cookies or add frosting to a pastry bag with a small or medium tip and pipe onto cookies. Smooth the frosting out with a spatula and knife, then add green sugar sprinkles or shimmering sugar dust to the tops.
- Allow cookies to set about 3 hours or overnight before stacking.
Tried This Recipe?
Let us know how it was by commenting below!
