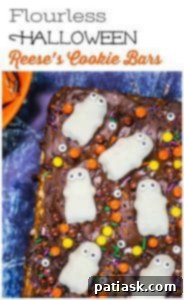
Spooky & Delicious: Irresistible Flourless Halloween Reese’s Monster Cookie Bars
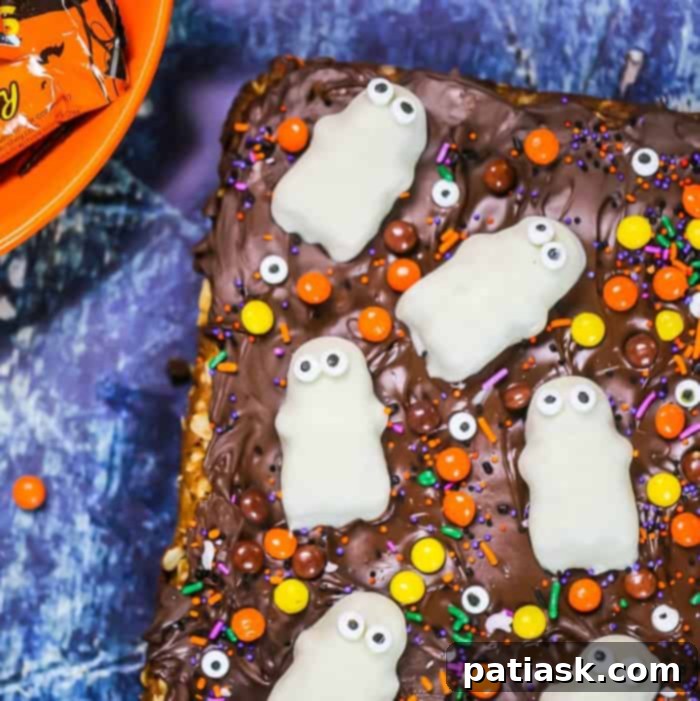
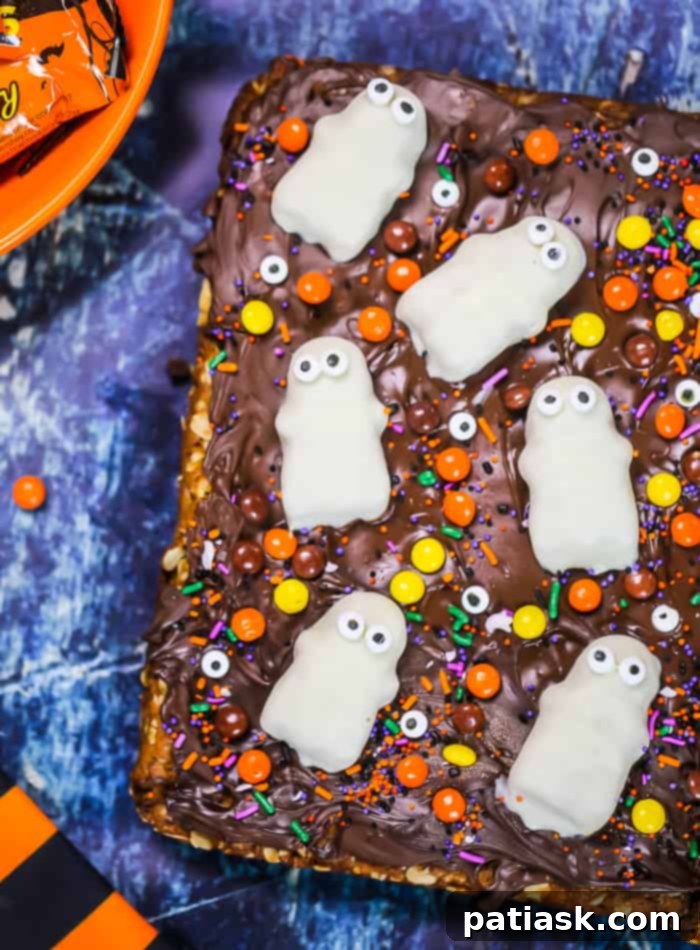
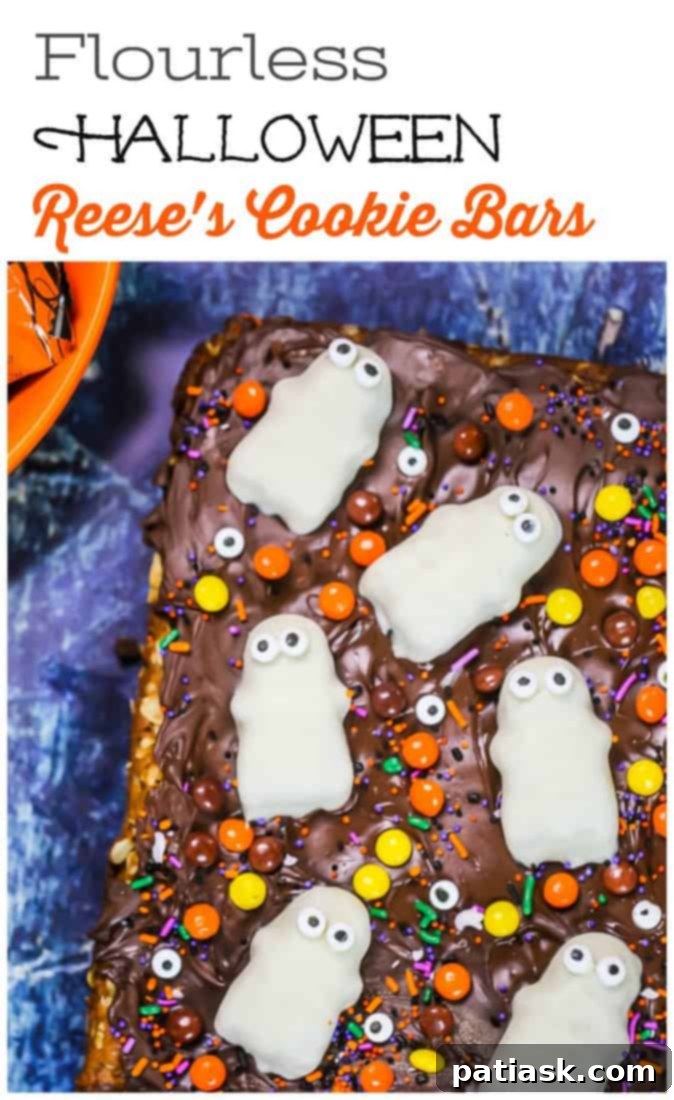
Embrace the enchanting spirit of the spooky season with these utterly adorable and incredibly delicious Flourless Halloween Reese’s Monster Cookie Bars! Imagine the classic, beloved monster cookie transformed into a convenient bar form, crowned with a rich chocolate peanut butter topping, and adorned with festive Reese’s Ghosts for that perfect ghostly touch. Not only are these treats a delightful visual spectacle for any Halloween gathering, but they are also wonderfully gluten-free, making them accessible to even more ghouls and goblins looking for a sweet escape. Get ready to bake up some magic that promises to be a hit with both kids and adults, offering a perfect blend of chewy texture, rich flavor, and festive flair!
If you’re craving more bewitching baked goods for your Halloween festivities, be sure to explore some of our other monstrously good recipes. Dive into our Best Monster Cookies, whip up a batch of Flourless Peanut Butter Monster Cookies, or try these fun Easy Halloween Cereal Treats and decadent Monster Nutella & Peanut Butter Cookies!
The Enchanting Origin of Monster Cookies: A Happy Accident in Baking History
Have you ever wondered about the intriguing history behind Monster Cookies? These delightful, everything-but-the-kitchen-sink treats have graced dessert tables for generations, and their origin story is quite charming. Legend has it that the very first Monster Cookie recipe came to be when its creator, Forest H. Wesley, faced a culinary dilemma: he ran out of wheat flour. Faced with this unexpected shortage, an ingenious baker improvised, combining peanut butter, oats, and an assortment of other delicious “goodies” to create a new kind of cookie. This serendipitous shortage of flour led to a unique, chewy, and incredibly satisfying cookie that quickly earned its “monster” moniker due to its substantial size and the delightful variety of ingredients it contained. It was a perfect accident that birthed a classic!
Our Flourless Halloween Reese’s Monster Cookie Bars pay homage to this classic tale, embracing the original flourless concept while transforming the traditional cookie into a convenient and shareable bar form. This innovation makes them perfectly suited for parties, gatherings, or simply enjoying with friends and family. The absence of traditional flour not only contributes to their unique, dense, and chewy texture but also makes them naturally gluten-free when using certified gluten-free oats, aligning with modern dietary preferences without sacrificing an ounce of flavor or fun. It’s a modern reinvention of a beloved classic, tailored for your festive Halloween celebrations!
There’s nothing quite like the satisfaction of a homemade dessert, especially when it caters to specific dietary needs like being grain-free or gluten-free. By simply opting for certified gluten-free rolled oats, these peanut butter chocolate bars become a fantastic option for those seeking delicious gluten-free Halloween treats. This Halloween, elevate your baking game with these easy-to-make, incredibly festive, and absolutely delicious flourless Reese’s Cookie Bars. They are an absolute blast to create and even more enjoyable to share, bringing smiles and spooky cheer to everyone who tries them.
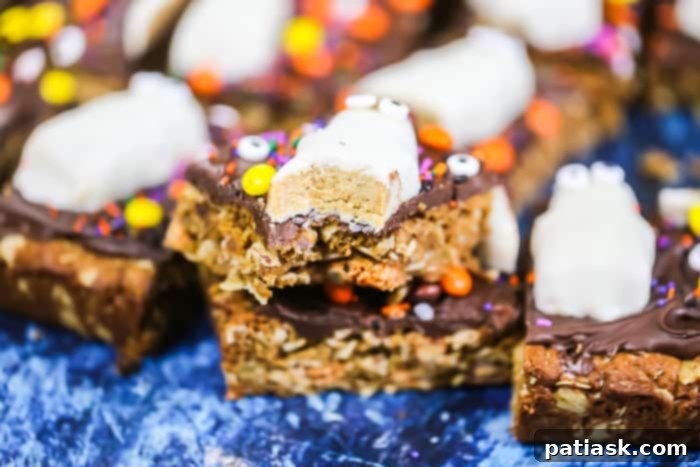
Why You’ll Fall in Love with These Fun and Flourless Halloween Reese’s Cookie Bars
When the leaves start to change and the air turns crisp, it’s time to infuse some spooky fun into your culinary creations. These Flourless Halloween Reese’s Monster Cookie Bars are more than just a dessert; they’re an experience designed to delight! Here’s why they’ll quickly become your go-to Halloween treat for years to come:
- Embrace the Halloween Spirit with Creative Flair: These bars are designed for seasonal festivity! With their vibrant colors, spooky (yet undeniably cute) Reese’s Ghosts, and endless customizable decorating possibilities, they perfectly capture the playful and eerie charm of Halloween. They’re a fantastic way to add a personalized, handmade touch to any celebration, making your party table stand out.
- Effortlessly Easy to Make, Even for Beginners: Forget complicated recipes and endless mixing! The base of these bars is an unbelievably simple oatmeal cookie layer, made without any traditional flour or excessive butter. You simply press the delightful, rich dough into a baking pan and bake it to golden perfection. It’s a straightforward, no-fuss process that even novice bakers can master, ensuring a stress-free baking experience for your holiday preparations.
- Infinitely Customizable for Every Craving: While delicious on their own, these cookie bars are a blank canvas for your culinary creativity. Feel free to incorporate an array of mix-ins to add extra texture and bursts of flavor. Consider adding colorful peanut M&Ms for a vibrant crunch, juicy raisins for a chewy contrast, various chopped nuts (like peanuts or walnuts) for richness, or even shredded coconut for a tropical twist. Each addition makes your monster cookie bars uniquely irresistible!
- Decadent Chocolate Peanut Butter Topping: A Dream Come True: The luscious topping is a dream come true for chocolate and peanut butter lovers. Once the cookie bars have cooled, simply melt some semisweet chocolate chips and spread them generously over the top. For an extra layer of indulgence and a richer flavor profile, stir in a heaping tablespoon of creamy peanut butter into the melted chocolate. This creates a smooth, ganache-like chocolate peanut butter layer that elevates the dessert to an entirely new level of deliciousness.
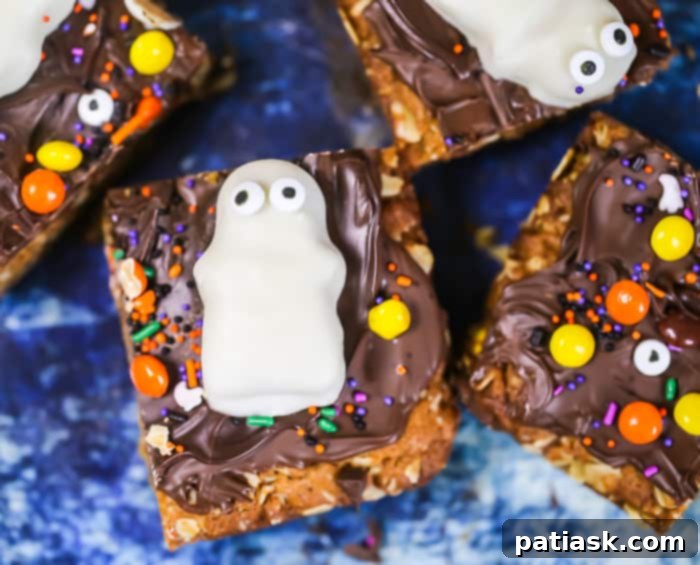
- Adorable Reese’s Ghosts for a Spooky Charm: The true stars of the show are the white chocolate-covered peanut butter cups in the shape of charming little ghosts from Reese’s. We think they’re more cute than scary, and they add an undeniable festive flair to each bar. These delightful candies aren’t just for decorating; they’re also fantastic snack-sized treats on their own, disappearing quickly from any candy bowl. (Insider tip: You might want to grab an extra bag or two for snacking while you bake!)
- The Perfect Gluten-Free Halloween Treat: For anyone seeking delicious gluten-free options for Halloween, these monster cookie bars are an ideal choice. The recipe naturally uses oats as its base instead of traditional wheat flour. By simply ensuring you use certified gluten-free oats, you can easily cater to gluten sensitivities or preferences, allowing everyone at your gathering to enjoy these spooky delights without compromise.
- A Sweet Treat for All Ages and Occasions: These bars are a guaranteed crowd-pleaser. Their irresistible combination of familiar flavors, fun decorations, and satisfying chewy texture makes them an instant hit with both kids and adults alike. Whether you’re hosting a costume party, planning a cozy family movie night, preparing treats for a school event, or simply want to enjoy a seasonal indulgence, these bars fit every occasion during the vibrant fall and Halloween season.
Essential Ingredients for Your Monster Cookie Bar Creation
Crafting these delectable Flourless Halloween Reese’s Monster Cookie Bars requires a straightforward list of pantry staples and festive Halloween candies. Here’s a closer look at the key ingredients and why they make these bars so special and flavorful:
- Peanut Butter: The undeniable star ingredient! Creamy peanut butter provides the foundational flavor and acts as the primary binder in our flourless base. We recommend using a creamy, processed peanut butter (like Skippy or Jif) for the best texture and consistency, as natural peanut butter can sometimes separate and alter the cookie bar’s structure and chewiness.
- Brown Sugar: This provides essential moisture, a rich molasses flavor, and helps achieve that perfectly soft and chewy texture characteristic of monster cookies. Ensure you pack the brown sugar firmly when measuring for accurate results.
- Vanilla Extract: A splash of pure vanilla extract is crucial, as it enhances and rounds out all the other flavors, adding warmth and aromatic depth to the cookie base. Don’t skip this flavor enhancer!
- Eggs: Eggs serve multiple purposes in this recipe: they act as an emulsifier, a powerful binder holding the flourless dough together, and contribute to the rich, tender texture of the bars. For optimal mixing and a smoother batter, make sure your eggs are at room temperature.
- Old-Fashioned Rolled Oats: These are the “flour” in our flourless bars, providing essential structure and that characteristic chewy, hearty texture. For a truly gluten-free option, be sure to use certified gluten-free oats. While quick oats can also work in a pinch, they may result in a slightly softer texture.
- Baking Soda: This key leavening agent reacts with the brown sugar and other ingredients to help the cookie bars rise slightly and contributes to their soft, tender crumb. Always check that your baking soda is fresh for the best results.
- Salt: A small but mighty pinch of salt is vital to balance the sweetness of the sugar and peanut butter, enhancing the overall flavor profile of both the cookie base and the chocolate topping.
- Semisweet Chocolate Chips: These are crucial for creating the delicious, melt-in-your-mouth chocolate topping that covers the bars. You can use milk chocolate or dark chocolate chips depending on your personal preference, but semisweet offers a classic and well-balanced flavor.
- Reese’s Halloween White Snack Size Ghosts: These adorable, limited-edition white chocolate-covered peanut butter ghosts are what give these bars their signature Halloween charm. They are both a decorative element and a delightful bite of creamy peanut butter goodness.
- Reese’s Piece’s Candies: Adding these colorful, crunchy candies on top provides an extra layer of peanut butter flavor and a festive splash of orange, yellow, and brown, making the bars even more appealing.
- Edible Eyeballs: These whimsical candy eyeballs are perfect for transforming your Reese’s ghosts into truly “monster” cookies, giving them a playful, slightly eerie, and utterly fun look.
- Halloween Sprinkles: A final flourish of festive sprinkles adds extra color, texture, and a celebratory touch, completing the spooky aesthetic of these delightful bars.
Step-by-Step Guide: How to Make Your Spooktacular Monster Cookie Bars
Creating these delightful Flourless Halloween Reese’s Monster Cookie Bars is a straightforward process, ensuring you have more time to enjoy the Halloween fun. Follow these detailed steps to achieve perfect, chewy, and festive cookie bars that everyone will adore:
- Prepare Your Baking Dish: Begin by preheating your oven to 350°F (175°C). It’s crucial to line a 9 x 13-inch baking dish with parchment paper, allowing a generous overhang on the sides. This overhang will serve as handles, making it incredibly easy to lift the entire slab of cooled bars out of the pan later. Lightly spray the parchment paper with non-stick cooking spray to prevent any sticking. Set the prepared dish aside.
- Cream Wet Ingredients: In a large mixing bowl, combine the creamy peanut butter and packed brown sugar. Using an electric mixer (either a handheld or stand mixer), beat them together on medium speed until the mixture is beautifully smooth, creamy, and thoroughly well-combined. This typically takes about 2-3 minutes. Next, beat in the vanilla extract until fragrant. Then, add the large eggs one at a time, mixing well after each addition until each egg is fully incorporated into the mixture. Remember to scrape down the sides of the bowl as needed to ensure everything is evenly mixed.
- Incorporate Dry Ingredients: To the wet mixture, add the old-fashioned rolled oats, baking soda, and salt. Mix on low speed, just until the dry ingredients are combined with the wet mixture. Be careful not to overmix the dough once the oats are added, as this can result in tougher bars. The dough will be noticeably thick and sticky, which is exactly the desired consistency for a flourless cookie base.
- Press and Bake the Base: Transfer the thick, peanut butter-oat dough evenly into your prepared 9×13-inch baking dish. Using the back of a spoon or your hands (you might find it helpful to lightly grease your hands with a bit of cooking spray), press the dough firmly and evenly into the bottom of the pan, spreading it all the way to the edges. Ensure the layer is uniform for even baking. Bake for 30 minutes, or until the top of the bars appears beautifully golden brown and the edges are visibly set. A quick test with a toothpick inserted into the center should come out mostly clean.
- Cool Completely: Once baked, carefully remove the cookie bars from the oven and place the entire pan on a wire rack to cool completely. Allowing them to cool fully is an absolutely crucial step before attempting to add the chocolate topping. If the bars are still warm, the chocolate will melt into the cookie base instead of forming a distinct, delicious layer on top. Patience here will be rewarded!
Creating a Luscious Chocolate Layer: The Perfect Topping for Your Bars
Once your cookie bars have cooled to room temperature, it’s time to add the glorious chocolate topping that perfectly complements the rich peanut butter base. This step adds another layer of decadence and visual appeal.
- Melt the Chocolate: Place your semisweet chocolate chips in a microwave-safe bowl. Microwave the chocolate chips in short 30-second increments, stirring well after each interval with a spatula. Continue microwaving and stirring until the chocolate is completely melted and beautifully smooth. This typically takes between 1.5 to 2 minutes in total, depending on your microwave’s power. It’s important to be careful not to overheat the chocolate, as it can seize and become unusable.
- Optional Peanut Butter Swirl: For an extra layer of rich flavor and a delightful variation, you can stir a heaping tablespoon of creamy peanut butter directly into the melted chocolate. This creates a wonderful chocolate peanut butter swirl effect and deepens the overall flavor profile of the topping. Mix until it’s smooth and thoroughly combined.
- Spread the Chocolate: Once melted and smooth, immediately pour the chocolate (or the chocolate-peanut butter mixture) over the completely cooled cookie bars. Use an offset spatula or the back of a spoon to gently and evenly spread the chocolate across the entire surface of the bars, ensuring it reaches all the way to the edges. This creates a uniform and irresistible layer that’s ready for decoration.
Decorating Your Spooky Halloween Monster Cookie Bars
Now for the most fun and creative part – bringing your monster cookie bars to life with festive decorations! This is where their unique Halloween charm truly shines and your personality can come through:
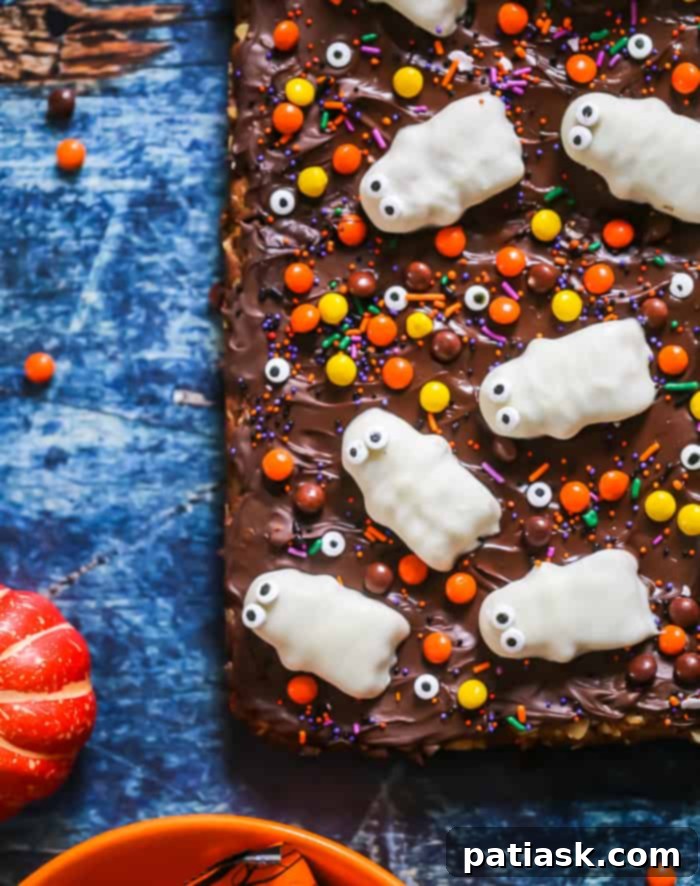
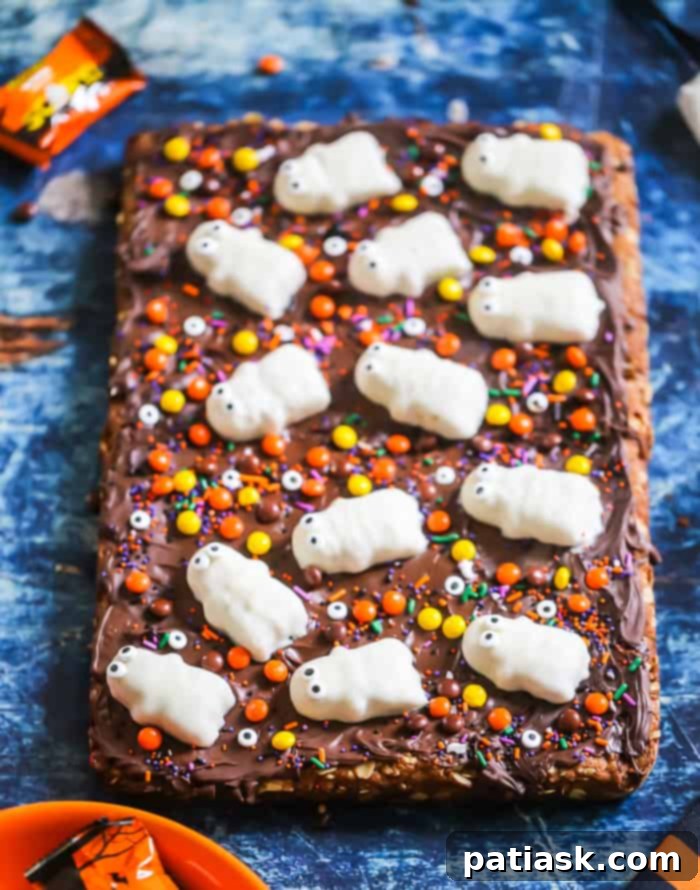
- Place Ghosts and Sprinkles: While the chocolate topping is still wet and warm (but not hot enough to melt the candy), quickly unwrap your Reese’s Halloween White Snack Size Ghosts and arrange them artistically on top of the chocolate layer. You can place them in rows, scattered, or in a fun pattern. Generously sprinkle the Halloween-themed sprinkles (like orange, black, and purple jimmies or spooky shapes) over the melted chocolate. If you have edible eyeballs, randomly place them across the chocolate surface for an extra touch of creepiness (or cuteness!), creating a playful monster effect.
- Add Eyeballs to Ghosts (Optional): To give your Reese’s ghosts a more personalized and truly “monster-like” appearance, you can attach eyeballs directly to them. Melt a very small amount of white chocolate chips (about 1-2 tablespoons) in a separate small microwave-safe bowl. Dip the back of a clean spoon or a toothpick into the melted white chocolate, then use that tiny bit of chocolate as “glue” to affix the back of an edible eyeball to each Reese’s ghost. This makes them look like they’re truly staring back at you with a mischievous gaze!
- Allow Chocolate to Set: It’s crucial to let the decorated chocolate topping set completely before attempting to cut the bars into individual portions. This can be done at room temperature, which might take a couple of hours, or you can expedite the process by placing the baking dish in the refrigerator for about 15-30 minutes. Once the chocolate is firm and solid to the touch, your bars are ready for slicing and devouring!
Tips for Perfect Flourless Halloween Reese’s Cookie Bars Every Time
Achieving bakery-quality flourless cookie bars is simple with a few helpful tips and tricks. These pointers will ensure your Flourless Halloween Reese’s Monster Cookie Bars turn out perfectly delicious and festive every time:
- Use Room Temperature Eggs: This is a small but impactful tip. Eggs incorporate better into batters and doughs when they are at room temperature. This leads to a smoother, more uniform mixture, which translates to a better texture in your finished cookie bars. Take them out of the fridge about 30 minutes before you start baking.
- Don’t Overmix the Oats: Once you add the oats, mix just until they are combined with the wet ingredients. Overmixing can develop the gluten in the oats (even if they are gluten-free, their structure can be affected) and lead to tougher, less tender bars. A gentle hand is best here.
- Proper Pan Preparation is Key: Lining your baking dish with parchment paper and leaving a generous overhang on the sides is absolutely crucial for easy removal of the entire slab of bars once they have cooled and the chocolate has set. This prevents sticking and makes cutting much simpler. Don’t skip this important step!
- Cool Completely Before Topping: Patience is a virtue in baking, especially here. If you pour melted chocolate over warm cookie bars, it will melt into the base, creating a messy rather than a distinct, beautiful chocolate layer. Allow the bars to cool completely to room temperature for the best results.
- Customize Your Candies and Toppings: While Reese’s Ghosts are fantastic and perfectly thematic, feel free to use other Halloween-themed candies you love. Think candy corn, mini chocolate bars, chopped up full-size Reese’s Peanut Butter Cups, or even gummy worms for a different look and texture.
- Achieve Clean Slices: For neat, professional-looking bars, once the chocolate topping is fully set, use a sharp, thin knife. For extra clean cuts, you can warm the knife blade under hot water, wipe it dry, and then make each cut. Clean the blade with a hot, damp cloth between each slice, especially after cutting through the chocolate.
Creative Variations and Customizations for Your Spooky Bars
One of the best things about these Flourless Halloween Reese’s Monster Cookie Bars is how adaptable they are. They are a fantastic base for all sorts of flavor twists and decorative customizations. Here are some ideas to spark your creativity and make these bars uniquely yours:
- Nut Butter Alternatives: While classic creamy peanut butter is a staple, you can experiment with other nut butters for a different flavor profile. Almond butter or cashew butter can be delicious alternatives, but keep in mind that their consistency might vary slightly, potentially affecting the bar’s texture. Always check for nut allergies if you’re serving these to a crowd.
- Chocolate Varieties: Instead of traditional semisweet chocolate chips for the topping, try milk chocolate for a sweeter, creamier finish or dark chocolate for a richer, more intense cocoa flavor. For an even more “ghostly” effect, you could use melted white chocolate for the topping base.
- Extra Mix-ins in the Dough: Elevate the flavor and texture of the cookie base by folding additional treats directly into the dough before baking. Mini chocolate chips, chopped nuts (like peanuts, walnuts, or pecans), shredded coconut, or even mini candy-coated chocolates (such as M&Ms or more Reese’s Pieces) would be fantastic additions.
- Spiced Bars for Fall: Infuse your cookie bars with the cozy flavors of autumn by adding a pinch of ground cinnamon, a dash of pumpkin pie spice, or even a touch of ginger to the cookie dough mixture. These warm spices pair beautifully with peanut butter and chocolate.
- Different Decorative Elements: Beyond the Reese’s Ghosts and edible eyeballs, consider using edible glitter for a shimmering effect, Halloween-themed cookie cutters to press shapes into the still-soft chocolate topping, or drawing spooky patterns (like cobwebs or bats) with contrasting melted chocolate (e.g., dark chocolate on a white chocolate topping).
Storage and Make-Ahead Tips for Convenience
These delicious Flourless Halloween Reese’s Monster Cookie Bars are wonderful for making ahead, which is perfect for busy holiday schedules or when you need a treat ready to go. Proper storage will ensure they stay fresh and delicious.
- At Room Temperature: Store leftover bars in an airtight container at room temperature for up to 3-4 days. It’s best to keep them in a cool, dry place, away from direct sunlight or any heat sources, as the chocolate topping can soften or melt.
- In the Refrigerator: For a firmer bar and extended freshness, store them in an airtight container in the refrigerator for up to a week. If you prefer a slightly softer texture for the chocolate, allow the bars to sit at room temperature for 10-15 minutes before serving.
- Freezing for Longer Storage: These bars freeze beautifully, making them an excellent make-ahead option! Once the chocolate topping is fully set and firm, cut the bars into individual portions. Wrap each bar tightly in plastic wrap to prevent freezer burn, then place the wrapped bars in an airtight freezer-safe container or a heavy-duty freezer bag. They can be frozen for up to 2-3 months. To enjoy, simply thaw them at room temperature for an hour or two, or overnight in the refrigerator, before serving.
Whether you’re hosting a haunted house party, attending a fright fest, or simply need a quick yet impressive Halloween treat for the kids (or the kid in you!), these flourless peanut butter chocolate monster cookie bars are incredibly fun, festive, and satisfying. They are also a fantastic option for anyone looking for flour-free and gluten-free treats without compromising on flavor or seasonal flair. Get ready to impress with these spooky delights and enjoy a truly delicious Halloween!
Explore More Halloween Delightful Recipes!
If these monster cookie bars have sparked your Halloween baking enthusiasm, don’t stop here! We have a cauldron full of other spooky and sweet recipes that are perfect for your seasonal celebrations. Click through to discover more ghoulishly good treats:
- BUTTERFINGER® Peanut Butter Cup Skulls Tombstone Treats – Deliciously eerie graveyard desserts that are both fun to make and to eat.
- Halloween Peanut Butter Rice Krispie Ghosts – Simple, crispy, and adorably spooky treats that are a hit with all ages.
- Cream Filled ‘Ghosts In the Graveyard’ Cupcakes – Spooktacular cupcakes that feature a creamy surprise inside and festive decorations.
- 10 Halloween Party Desserts & Jello Shots! – A comprehensive collection of the best party-ready spooky sweets, including adult-friendly options.
- Halloween Skull Cupcakes – Intricately designed cupcakes for a truly ghoulish feast that will impress your guests.
- 20 Spooktacular Halloween Desserts Round-Up! – A comprehensive list of Halloween baking inspiration, featuring a variety of creative and tasty recipes.
- Monster and Mummy Chocolate Covered Graham Cracker Cookies – Easy and fun to decorate, these cookies are perfect for a quick Halloween craft and snack.
- Halloween Cake Mix Cookies – Quick and customizable cookies using a simple cake mix shortcut, ideal for last-minute treats.
- Soft Batch Monster Cookies – The classic monster cookie recipe with an irresistible soft and chewy texture you’ll adore.
Flourless Halloween Reese’s Monster Cookie Bars Recipe
These Flourless Halloween Reese’s Monster Cookie Bars are the ultimate spooky season treat! Combining the chewy texture of classic monster cookies with a rich chocolate peanut butter topping and fun Reese’s Ghosts, they are not only delicious but also naturally gluten-free (with GF oats). Perfect for parties, family gatherings, or a cozy night in, this recipe promises a delightful baking experience and a truly irresistible dessert that captures the spirit of Halloween.
Recipe Details
- Course: Dessert
- Prep Time: 15 mins
- Cook Time: 30 mins
- Servings: 15 Servings
- Keyword: bars, flourless, halloween, monster cookies, oatmeal bars, oats, party treats, peanut butter, reese’s, gluten-free, chocolate
Ingredients
- 2 cups creamy peanut butter
- 1 cup packed brown sugar
- 1 teaspoon pure vanilla extract
- 2 large eggs, at room temperature
- 2-1/2 cups old-fashioned rolled oats (use certified gluten-free oats for a GF option)
- 1 teaspoon baking soda
- 1 teaspoon salt
- 2 cups semisweet chocolate chips (plus an optional heaping tablespoon of peanut butter for a chocolate peanut butter layer)
- 1 10.2 oz bag Reese’s Halloween White Snack Size Ghosts
- Reese’s Piece’s Candies, for topping
- Edible Eyeballs, for topping
- Halloween Sprinkles, for topping
Instructions
- Preheat oven to 350°F (175°C). Line a 9 x 13-inch baking dish with parchment paper, allowing some overhang on the longer sides, and lightly spray the parchment with non-stick cooking spray. Set aside.
- In a large mixing bowl, using an electric mixer, beat the peanut butter and brown sugar together on medium speed until the mixture is smooth and creamy (about 2-3 minutes). Mix in the vanilla extract, then add the eggs one at a time, beating well after each addition until fully incorporated. Scrape down the sides of the bowl as needed.
- Add the old-fashioned rolled oats, baking soda, and salt to the wet mixture. Mix on low speed until just combined. Be careful not to overmix the dough once the oats are added. The dough will be thick and sticky.
- Press the dough evenly into the prepared 9×13-inch baking dish. Use the back of a spoon or lightly greased hands to spread it firmly and uniformly across the bottom of the pan, extending to all edges.
- Bake for 30 minutes, or until the top of the bars is golden brown and appears set. A toothpick inserted into the center should come out mostly clean.
- Remove the cookie bars from the oven and place the pan on a wire rack to cool completely to room temperature. This is essential before adding the chocolate topping.
- Once the bars have cooled, melt the semisweet chocolate chips. Place them in a microwave-safe bowl and microwave in 30-second increments, stirring thoroughly after each, until completely smooth (approximately 1.5-2 minutes total). If desired, stir in a heaping tablespoon of peanut butter to create a chocolate peanut butter topping.
- Pour and spread the melted chocolate evenly over the cooled cookie bars using an offset spatula or the back of a spoon, ensuring it covers the entire surface.
- While the chocolate is still wet, quickly unwrap the Reese’s Halloween White Snack Size Ghosts and arrange them artistically on top of the chocolate layer. Generously sprinkle with Halloween sprinkles and place edible eyeballs randomly across the chocolate surface.
- To attach eyeballs more securely to the ghosts, melt a very small amount of white chocolate chips in a separate bowl. Use a tiny dab of this melted white chocolate as “glue” on the back of each eyeball before placing it on the Reese’s ghost.
- Allow the chocolate topping to set completely before cutting the bars. For faster setting, you can place the baking dish in the refrigerator for about 15-30 minutes. Once firm, use a sharp knife (cleaning it between cuts for neatness) to slice into squares or bars and serve your spooky treats!
