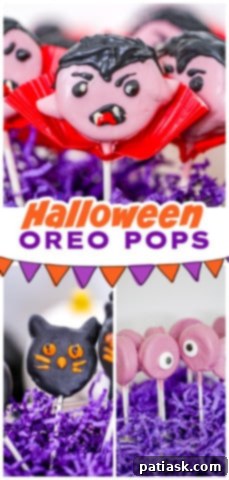
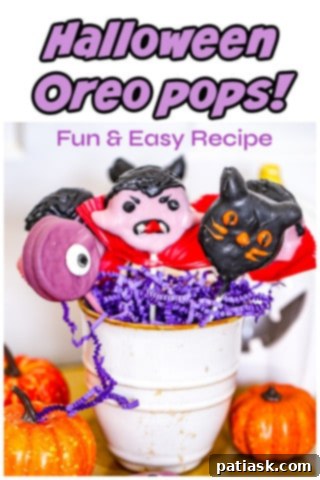
The enchanting aura of Halloween descends upon us once more, beckoning forth a season of delightful frights and enchanting flavors. As leaves turn to golden hues and crisp air fills the evenings, it’s the perfect time to conjure up some truly memorable **Halloween treats**. Forget the ordinary and prepare to embark on a culinary adventure that transforms classic cookies into bewitching masterpieces! This year, we’re thrilled to share our absolute favorite spooky snack: **Halloween Oreo Pops**. These adorable, easy-to-make cookie pops are guaranteed to be the star attraction at any festive gathering, captivating both young and old with their charm and deliciousness.
If you’re looking to elevate your Halloween dessert game, these Oreo cookie pops offer a fantastic blend of simplicity and creativity. They’re a wonderful alternative to traditional Halloween recipes and provide a personalized touch that store-bought treats simply can’t match. Whether you’re hosting a ghoulish gala, a casual family get-together, or just want to surprise the trick-or-treaters with something special, these **DIY Halloween treats** are your secret weapon for a spooktacular celebration.
Ready for more festive inspiration? You won’t want to miss these other crowd-pleasing Halloween delights: explore our spine-chilling Halloween Dipped Oreos, dig into a decadent Halloween Graveyard Dirt Cake, and get monstrously creative with these Frankenstein & Bride Brownies!
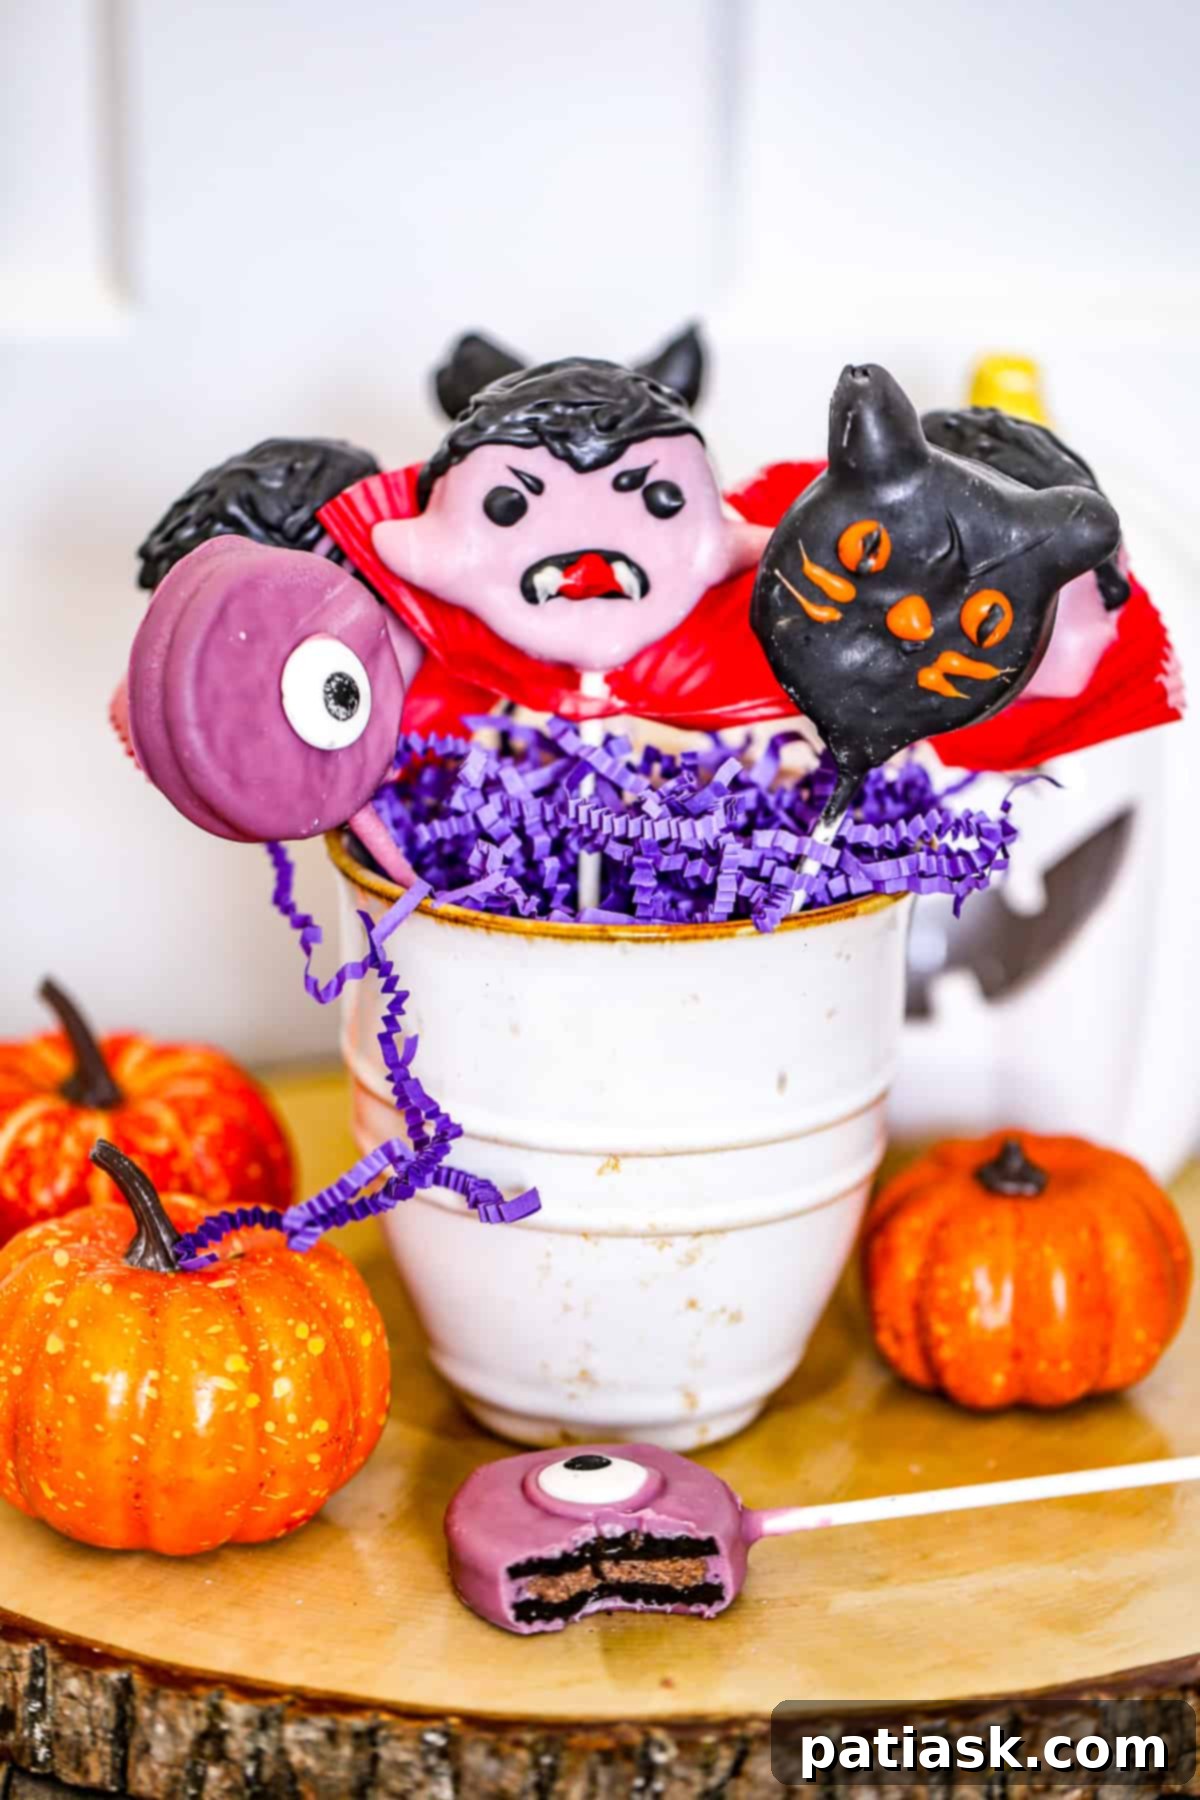
Everyone knows and loves the iconic, rich chocolatey flavor of an Oreo cookie. But have you ever imagined these beloved biscuits transformed into delightful, Halloween-themed confections on a stick? This guide will show you how to take the humble Oreo and turn it into three incredibly cool and ghoulishly fun **Halloween Oreo pops recipes** that are as enjoyable to make as they are to devour!
Prepare to be enchanted by how straightforward and exciting it is to craft these homemade **Halloween-themed Oreo pops**. With a minimal ingredient list – just your favorite Oreos, colorful chocolate melts, and a dash of spooky decorations – you can whip up these sweet and eerie treats in no time. They are perfect for enjoying yourself, sharing with friends and family, or adding a festive touch to any Halloween party spread.
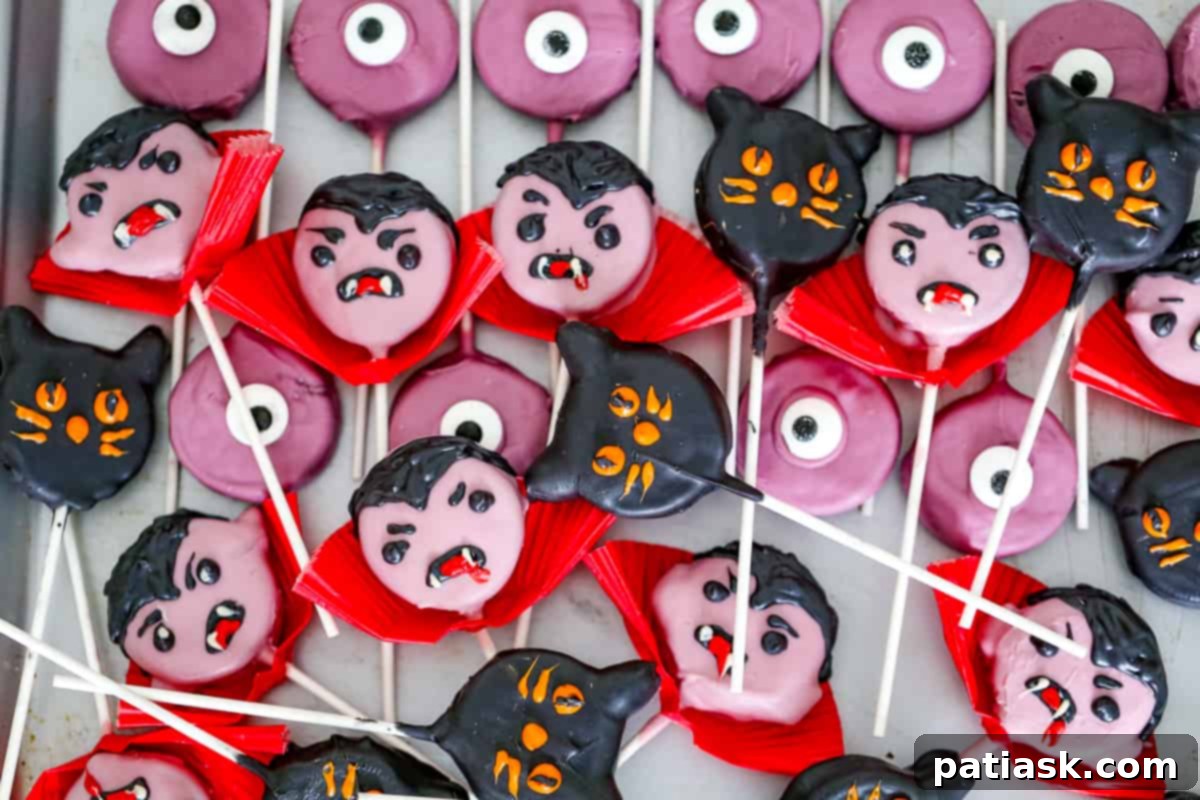
We’ve conjured up three distinct designs for our Halloween Oreo Pops: charming black cats, dapper vampires, and quirky one-eyed monsters. Each design offers a unique flair, ensuring there’s a spooky style for everyone to adore. You’ll love making all of these imaginative **Halloween Oreo pops recipes**! So, let’s dive in and discover how to create these captivating **Halloween Oreo cookie pops** that are sure to be the undisputed highlight of any Halloween gathering, bringing smiles and a touch of spooky sweetness to all!
**Conjuring Up Black Cat Oreo Pops**
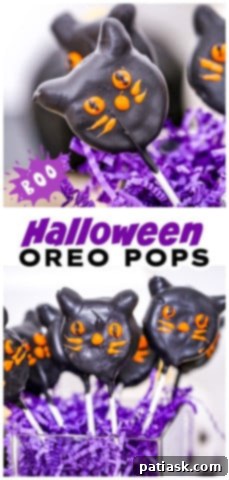
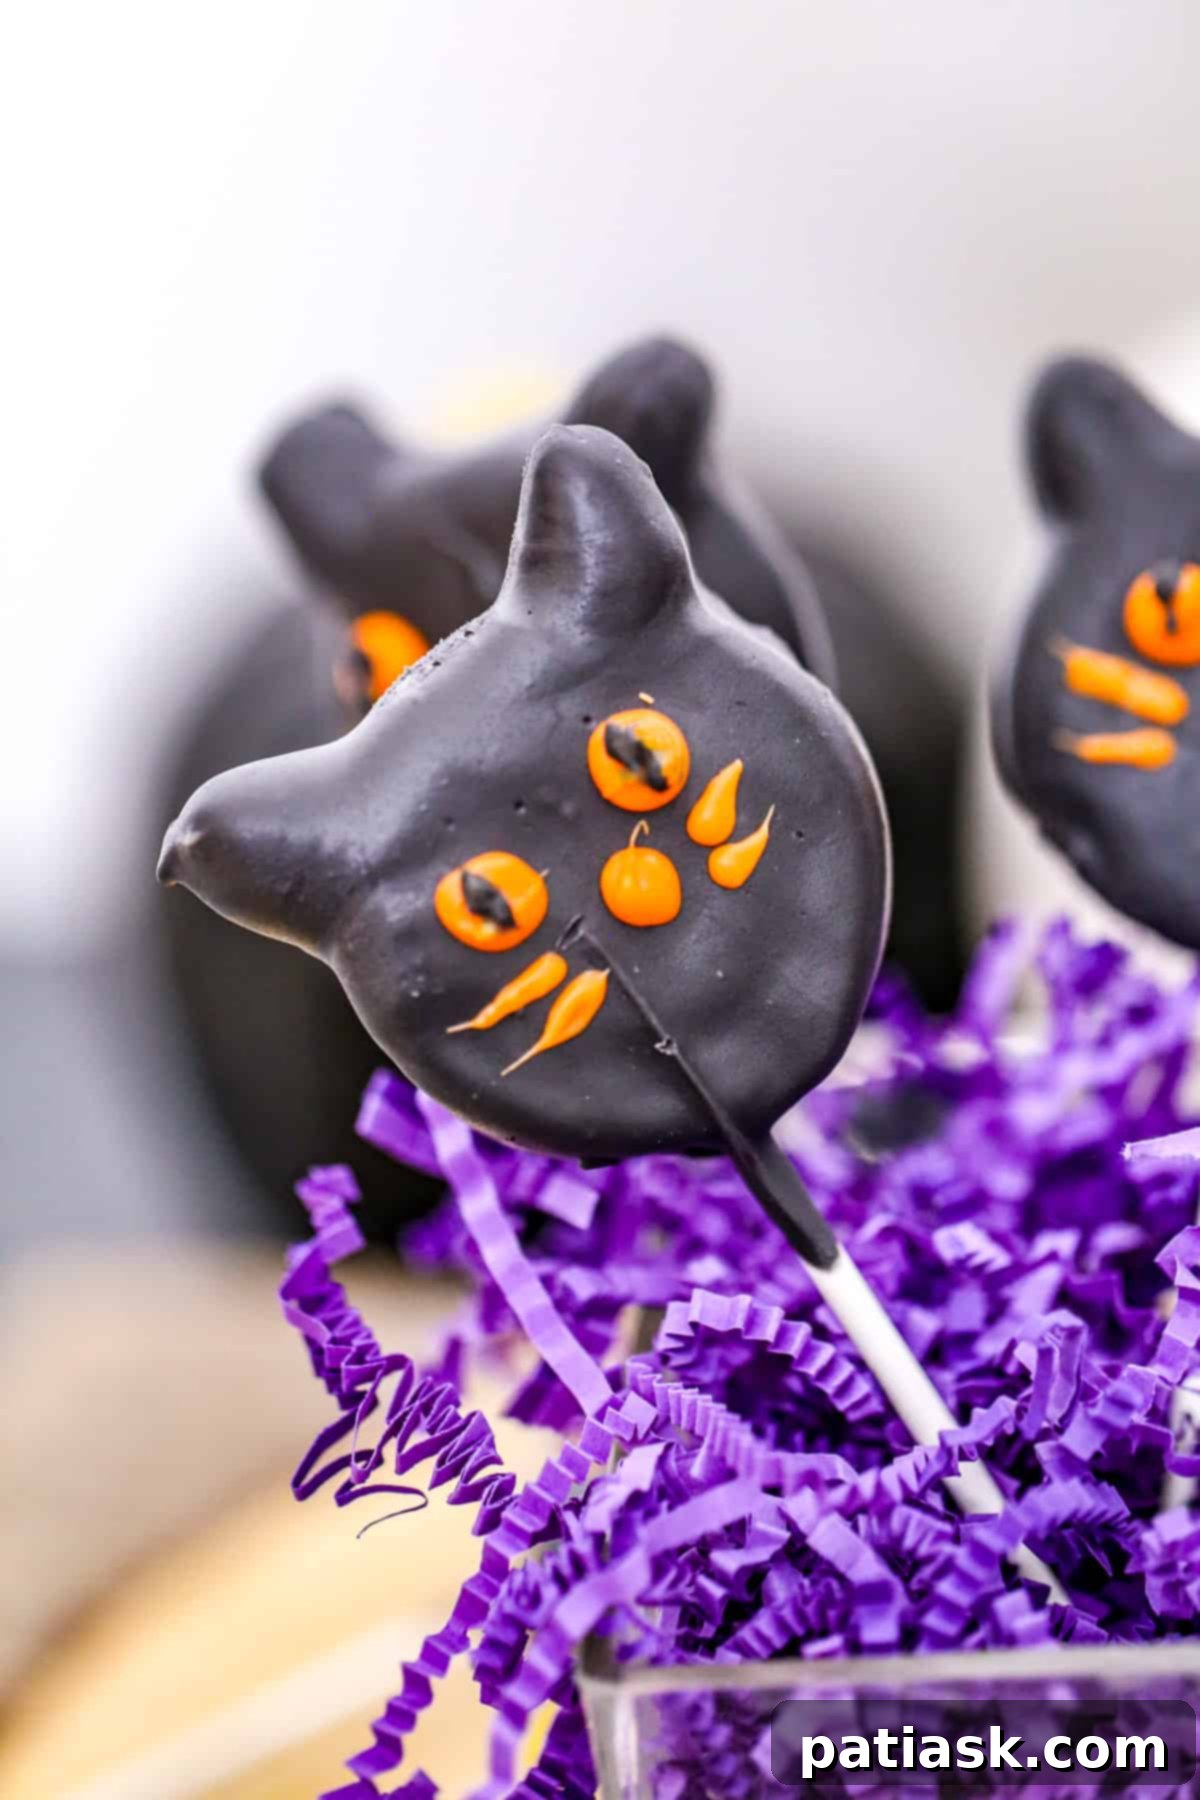
Unleash your inner sorcerer and create your very own batch of mysteriously adorable **Black Cat Oreo Pops**. These enchanting treats perfectly capture the spirit of Halloween with their classic black cat motif. We’ll guide you through each simple step, from dipping to decorating, ensuring you can craft these sweet, feline-shaped Oreo pops with ease. In less than an hour of active time (most of which is passive chilling in the fridge!), you’ll have a delightful collection of unique **Halloween Oreo cookie pops** ready just in time for the spooky holiday festivities. Their charming simplicity makes them a fantastic project for bakers of all skill levels!
The process is surprisingly quick, with much of the “witch-crafting” time dedicated to allowing the chocolate coating to firm up in the refrigerator. This makes them an excellent last-minute treat or a fun activity to enjoy with the family, guaranteeing maximum impact with minimal effort. Get ready to impress your guests with these purr-fectly delightful and easy **Halloween desserts**!
Ingredients for Black Cat Oreo Pops
- Oreos: The classic chocolate sandwich cookies are the foundation for these delightful pops.
- Wilton black candy melts: These provide the perfect rich black coating for our spooky cats. Melt according to package directions.
- Orange candy melts: Essential for piping vibrant orange eyes and noses. Alternatively, use orange or black frosting for face decorations once the chocolate has fully set.
- 1-2 teaspoons of coconut oil, vegetable oil, or canola oil per cup of chocolate: This optional addition helps achieve a smoother, more glossy consistency for dipping if your chocolate melts appear too thick.
- Mini Marshmallows: For shaping those distinctive pointy cat ears.
- Lollipop Sticks: To transform your Oreos into convenient and fun pops!
**How to Make the Black Cat Oreo Pops**
- **Prepare Your Workspace:** Begin by lining a sturdy cookie sheet or baking pan with a piece of parchment paper. This will prevent your chocolate-dipped Oreos from sticking and make cleanup a breeze.
- **Melt the Black Candy Melts:** Place the black candy melts in a microwave-safe bowl. Microwave in short 30-second intervals, stirring thoroughly and scraping down the sides of the bowl after each interval. Continue until the chocolate is completely smooth, creamy, and has a drizzly consistency ideal for dipping. If the chocolate appears too thick or not smooth enough for easy dipping, stir in 1-2 teaspoons of coconut oil, vegetable oil, or canola oil per cup of melted chocolate. This will thin it out and give it a beautiful glossy finish.
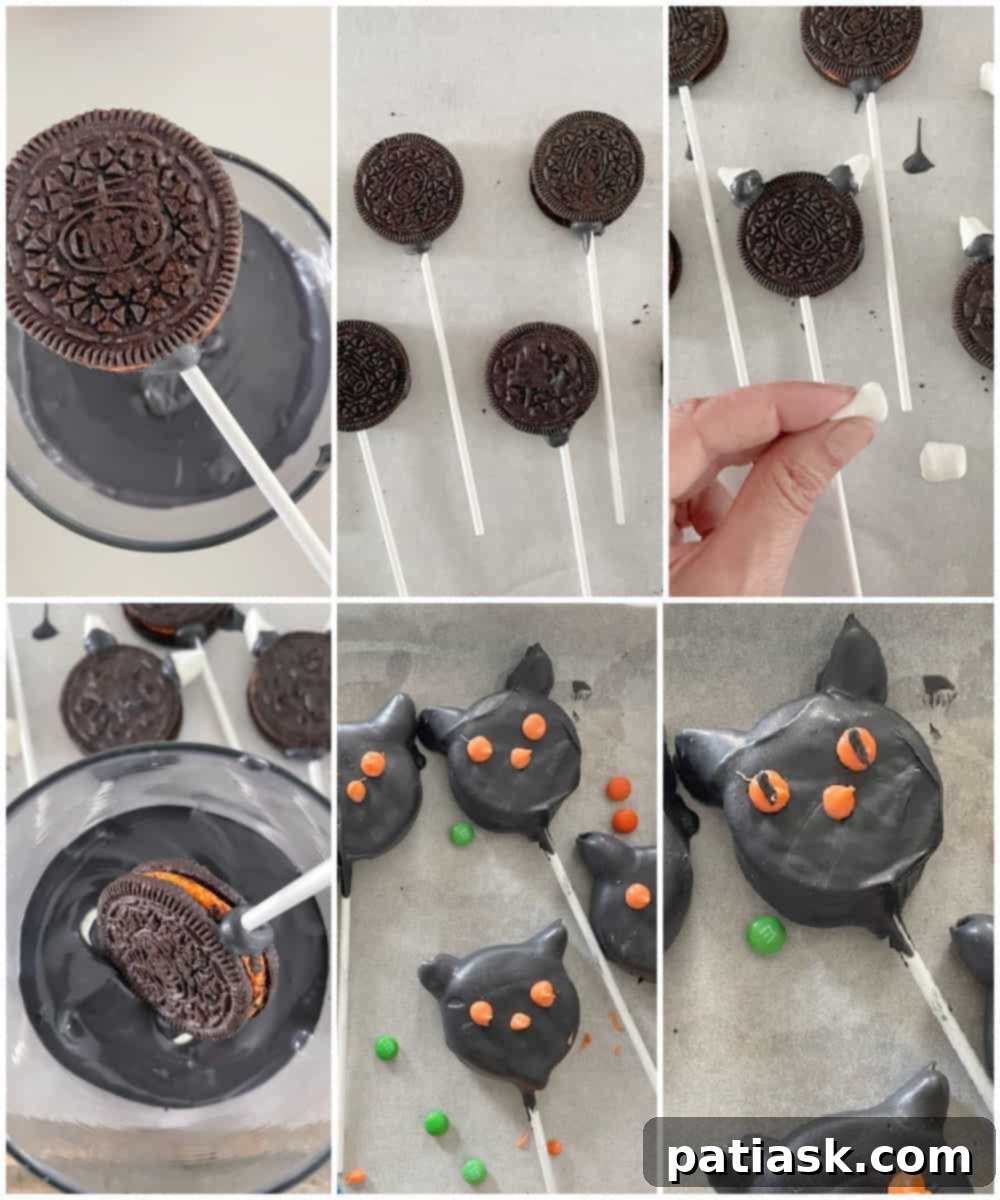
- **Insert the Lollipop Sticks:** Once your black chocolate is perfectly melted, dip the tip of a lollipop stick into the chocolate by about ½ inch. Carefully slide this chocolate-coated end into the cream filling of an Oreo cookie, pushing it about halfway through. Apply gentle pressure to the cookie itself, as sometimes the two halves can separate slightly when inserting the stick. The chocolate acts as a “glue” to secure the stick.
- **Set the Sticks:** Place the Oreos with inserted sticks onto the parchment-lined baking sheet.
- **Form the Ears:** Take a mini marshmallow and pinch one end to create a slightly pointy shape. Dip the rounded, unpinched end of the marshmallow into the melted black chocolate and immediately press it onto the top of the Oreo, positioning it to form a cute, pointy cat ear. Repeat for the second ear on the opposite side.
- **Initial Chill:** Transfer the baking sheet with the Oreos to the refrigerator and chill for approximately 10 minutes. This crucial step allows the chocolate securing the sticks and ears to firm up, preventing any mishaps during the main dipping process. Chilling time may vary depending on your chocolate and fridge temperature.
- **Dip the Oreo Pops:** Now it’s time for the full coating! Hold an Oreo pop by its stick and completely submerge the cookie (including the ears) into the melted black chocolate. Gently tap the stick against the side of the bowl or lightly shake off any excess chocolate, ensuring an even, smooth layer.
- **Return to Parchment:** Carefully place the fully coated Oreo pops back onto the baking sheet lined with parchment paper.
- **Second Chill:** Return the Oreo pops to the fridge for another 10 minutes to allow the chocolate coating to set completely.
- **Prepare Decorating Chocolate:** While the pops are chilling, melt the orange candy melts following the same microwave method as before. Once smooth, pour the melted orange chocolate into a small Ziploc bag or a piping bag fitted with a very small round tip. If using a Ziploc bag, snip a tiny hole in one corner.
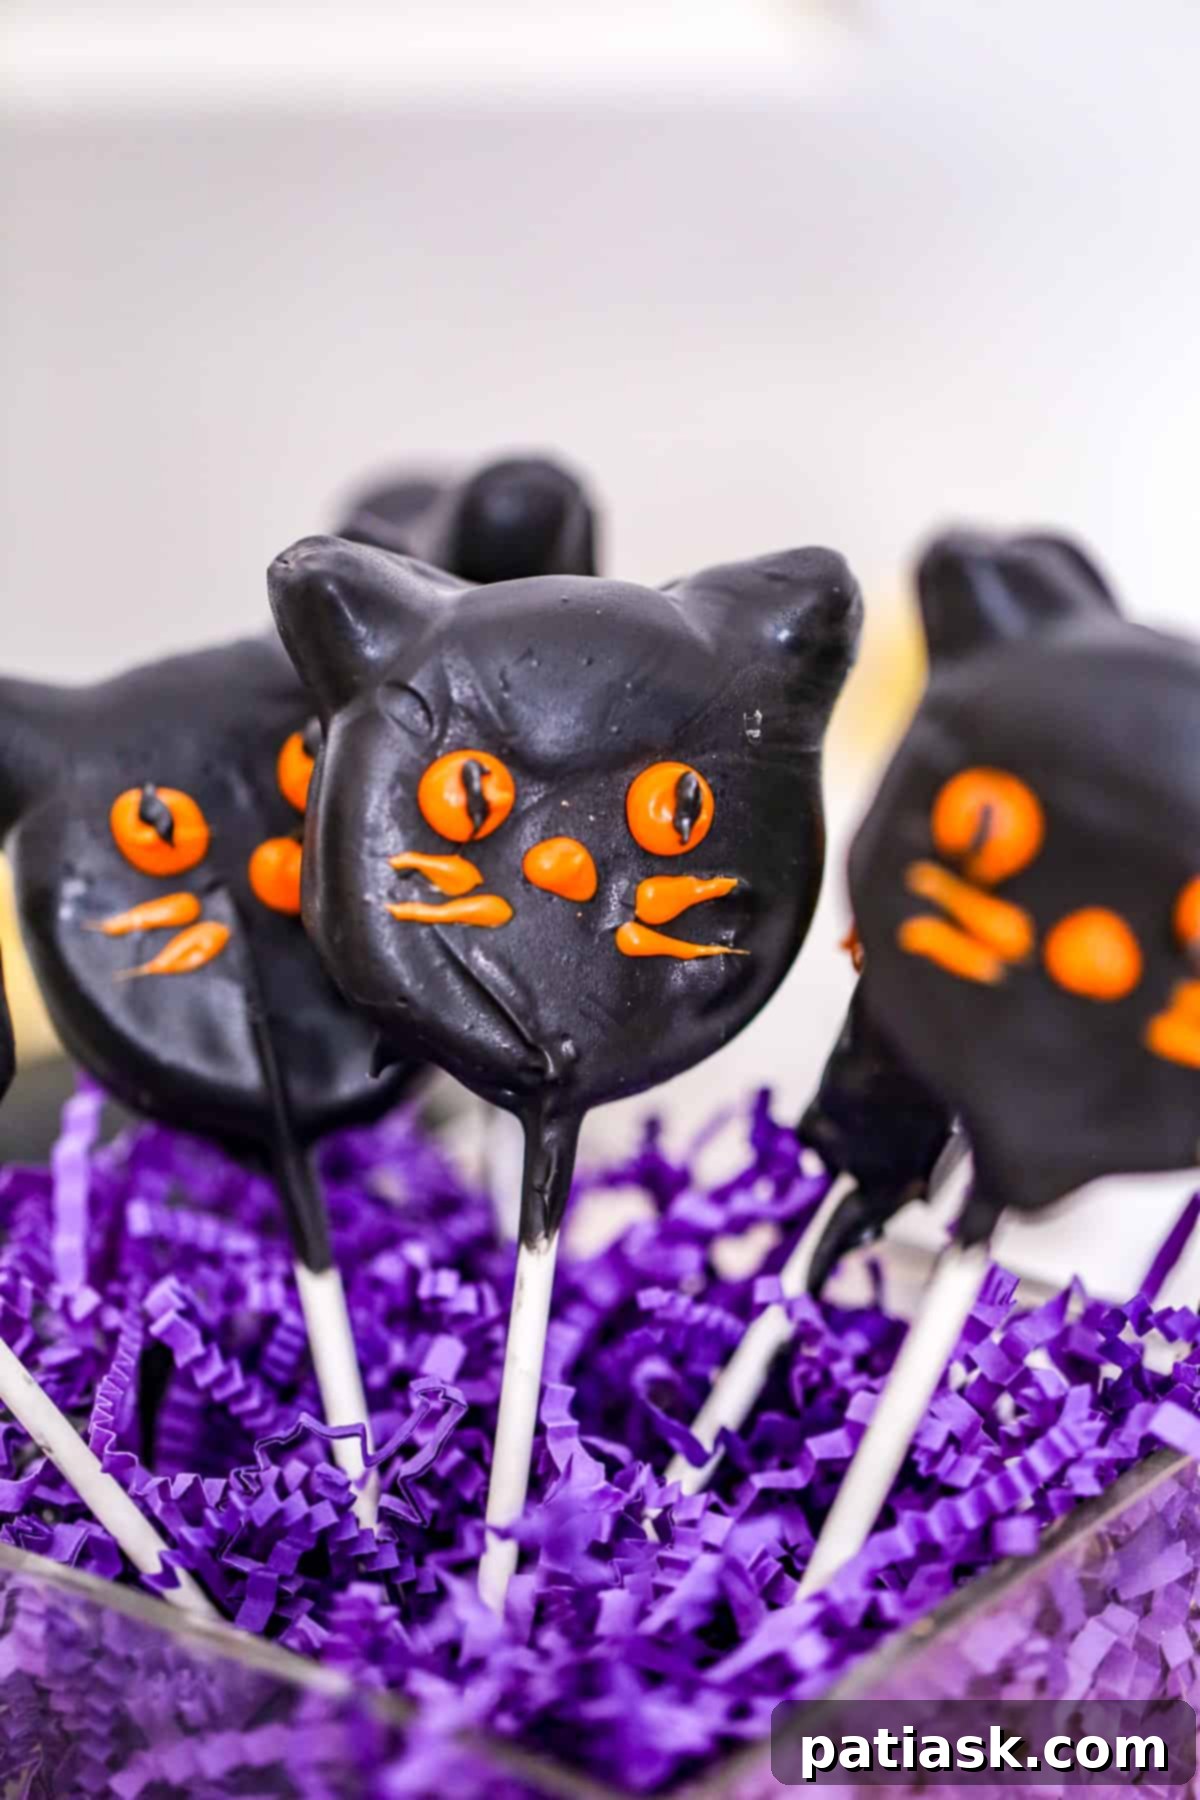
- **Decorate the Faces:** Retrieve the chilled black cat Oreo pops. Use the orange chocolate to carefully pipe two round eyes, a small triangular nose, and delicate whiskers on each cookie. For added detail and realism, melt a tiny bit of black chocolate (if you don’t have enough left, a drop of food-safe black gel color mixed into a small amount of white melted chocolate works) and pipe a tiny pupil into the center of each orange eye.
- **Final Chill:** Pop the decorated Oreo pops back into the fridge for a final 10 minutes to ensure all the decorative chocolate sets firmly.
- **Serve and Enjoy:** Once fully set, keep your enchanting Black Cat Oreo Pops stored in the refrigerator until you’re ready to serve them or package them beautifully to share with lucky friends and family! These are perfect as **kid-friendly Halloween snacks** and **easy Halloween party desserts**.
**Next Up: Fang-tastic Vampire Oreo Pops!**
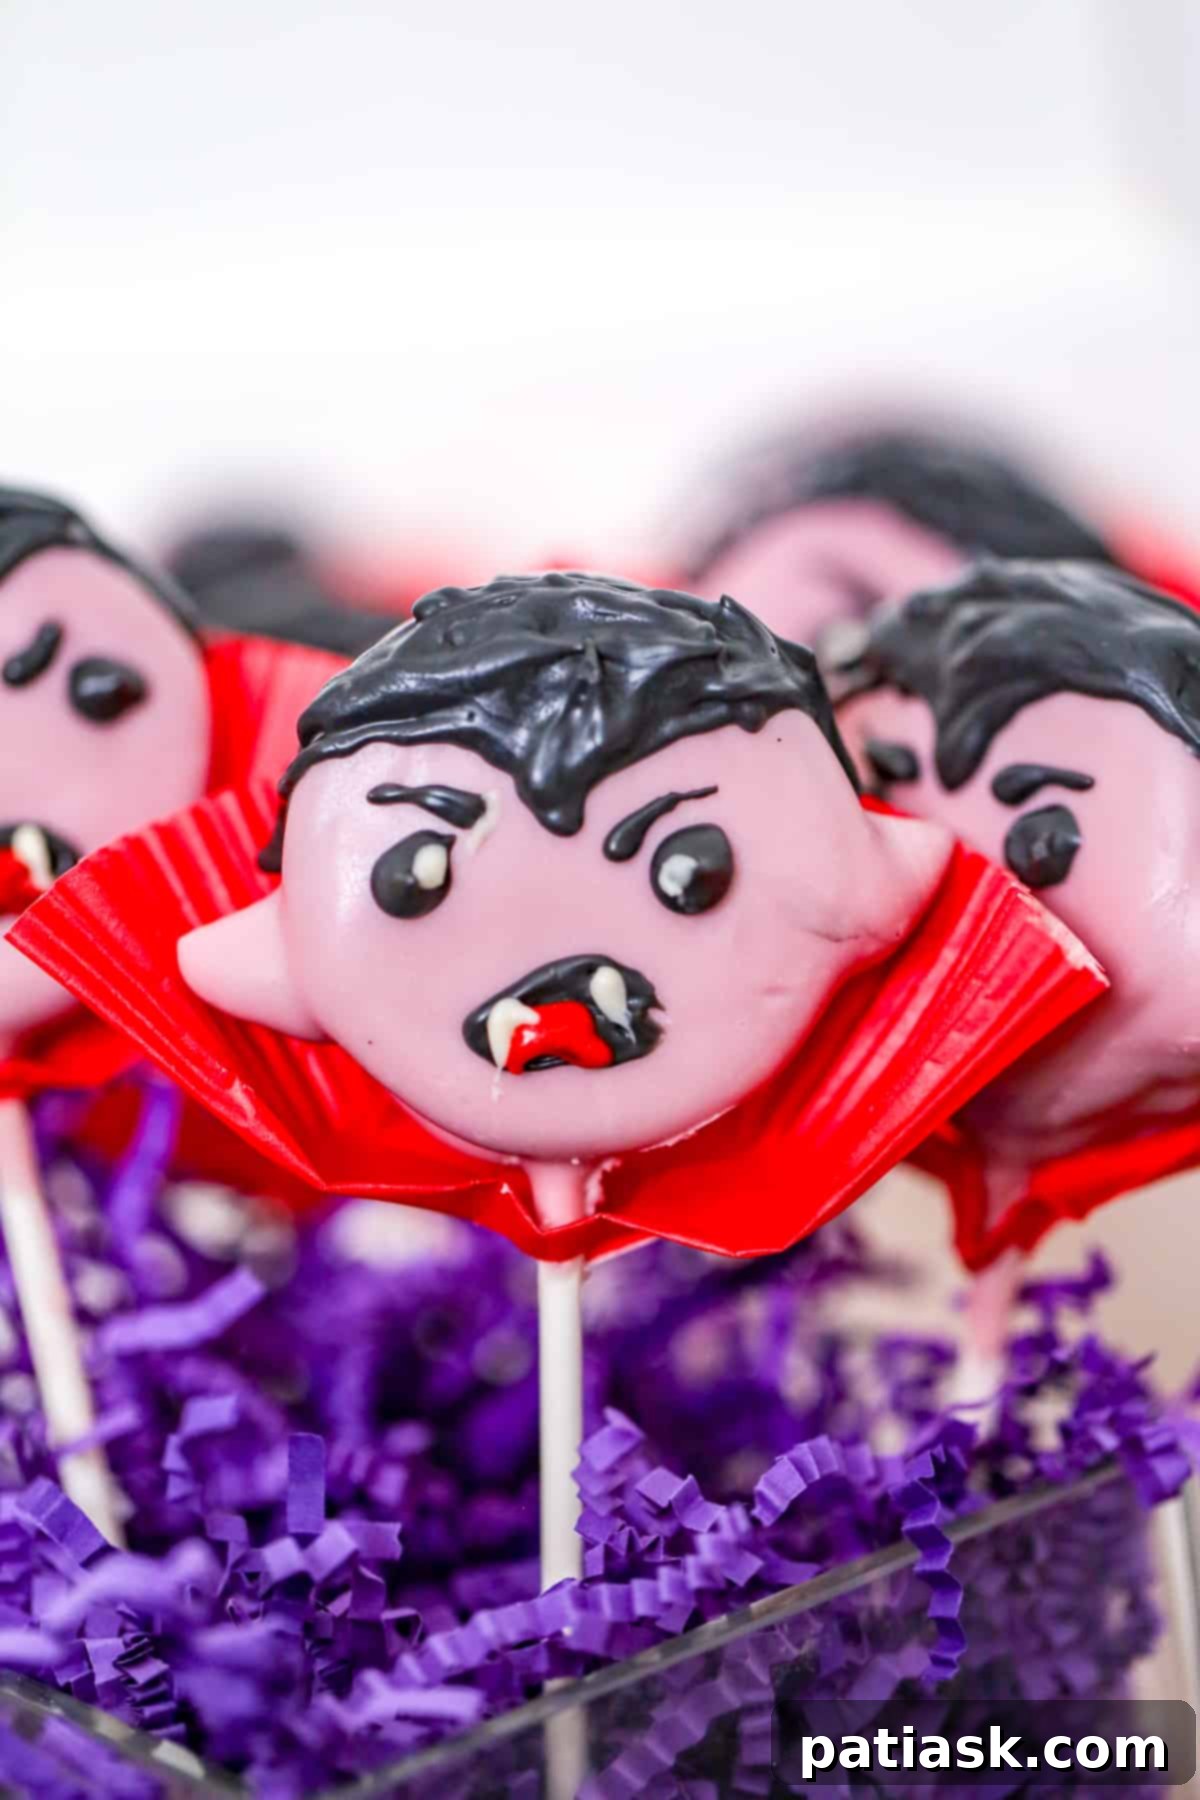
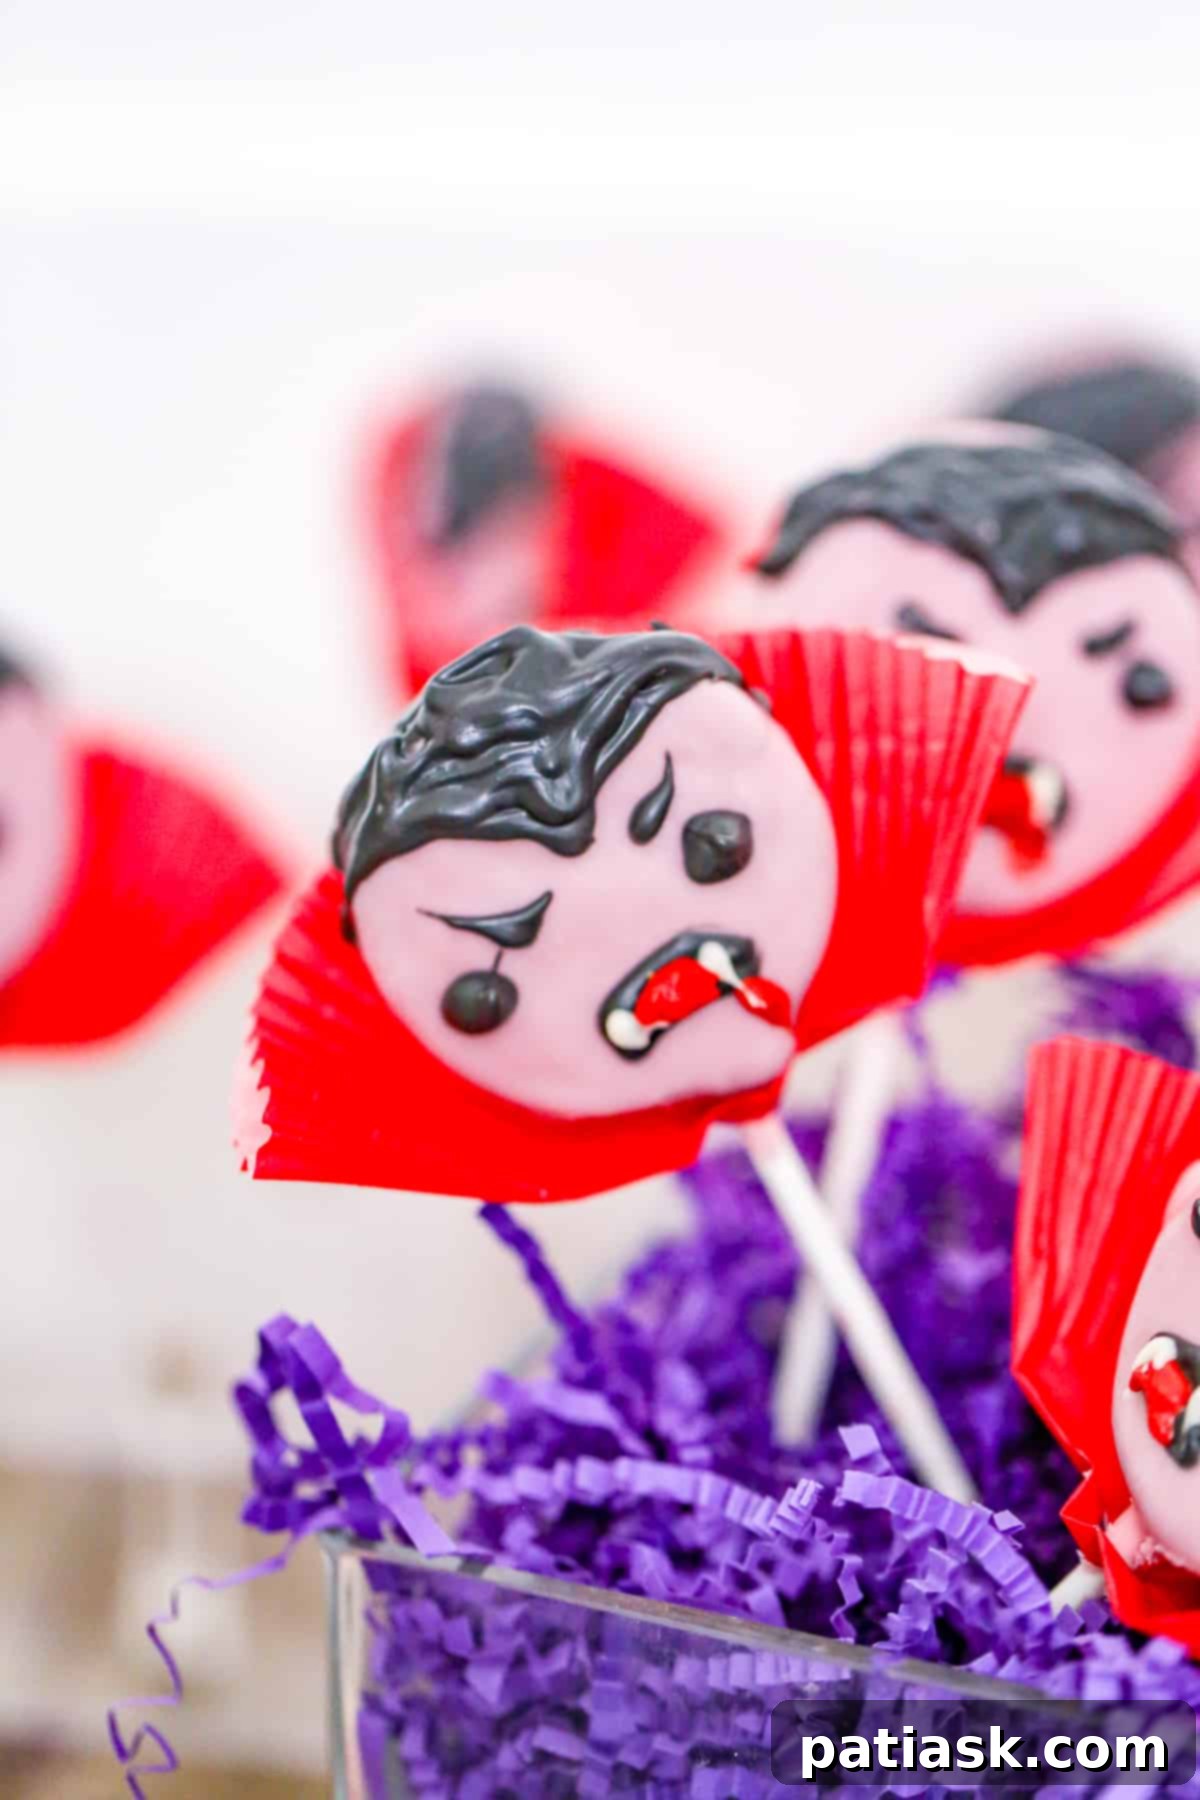
Prepare to sink your fangs into these incredibly charming and deliciously spooky **Vampire Oreo Pops**! These Halloween treats are more than just a feast for the eyes; they’re a simple yet sensational dessert that will undoubtedly be a hit at any Halloween bash. Their captivating design and delightful taste make them irresistible, drawing everyone in for a bite of eerie sweetness.
Whether you’re a seasoned baker or trying your hand at making **Oreo cookie pops** for the very first time, this **Halloween Oreo cookie pops recipe** is designed for success. The steps are straightforward, and the results are consistently impressive, ensuring a treat that’s both fun to make and guaranteed to please even the pickiest of ghouls. Get ready to unleash your creative spirit and craft these fang-tastic **Oreo pops** that perfectly embody the spirit of the season!
**Ingredients for Vampire Oreo Pops**
- Oreos: The essential base for our vampire treats.
- Lavender candy melts, black candy melts, white candy melts (or white chocolate chips), and red candy melts: These colors are crucial for creating the vampire’s skin tone, hair, eyes, and of course, a touch of “blood.”
- 1-2 teaspoons of coconut oil, vegetable oil, or canola oil per cup of chocolate: Useful for thinning chocolate that is too thick for smooth dipping, ensuring a professional, glossy finish.
- Cupcake liners: In festive colors like red, purple, black, or green, these are perfect for crafting tiny vampire capes and adding a dramatic flair.
- Mini Marshmallows: For creating the pointy vampire ears, adding to the fun, spooky look.
- Lollipop Sticks: To turn your ordinary Oreos into captivating, easy-to-handle pops.
**How to Make the Vampire Oreo Pops**
- **Prepare Your Baking Surface:** Lay out a piece of parchment paper on a cookie sheet to create a non-stick surface for your chilling Oreo pops.
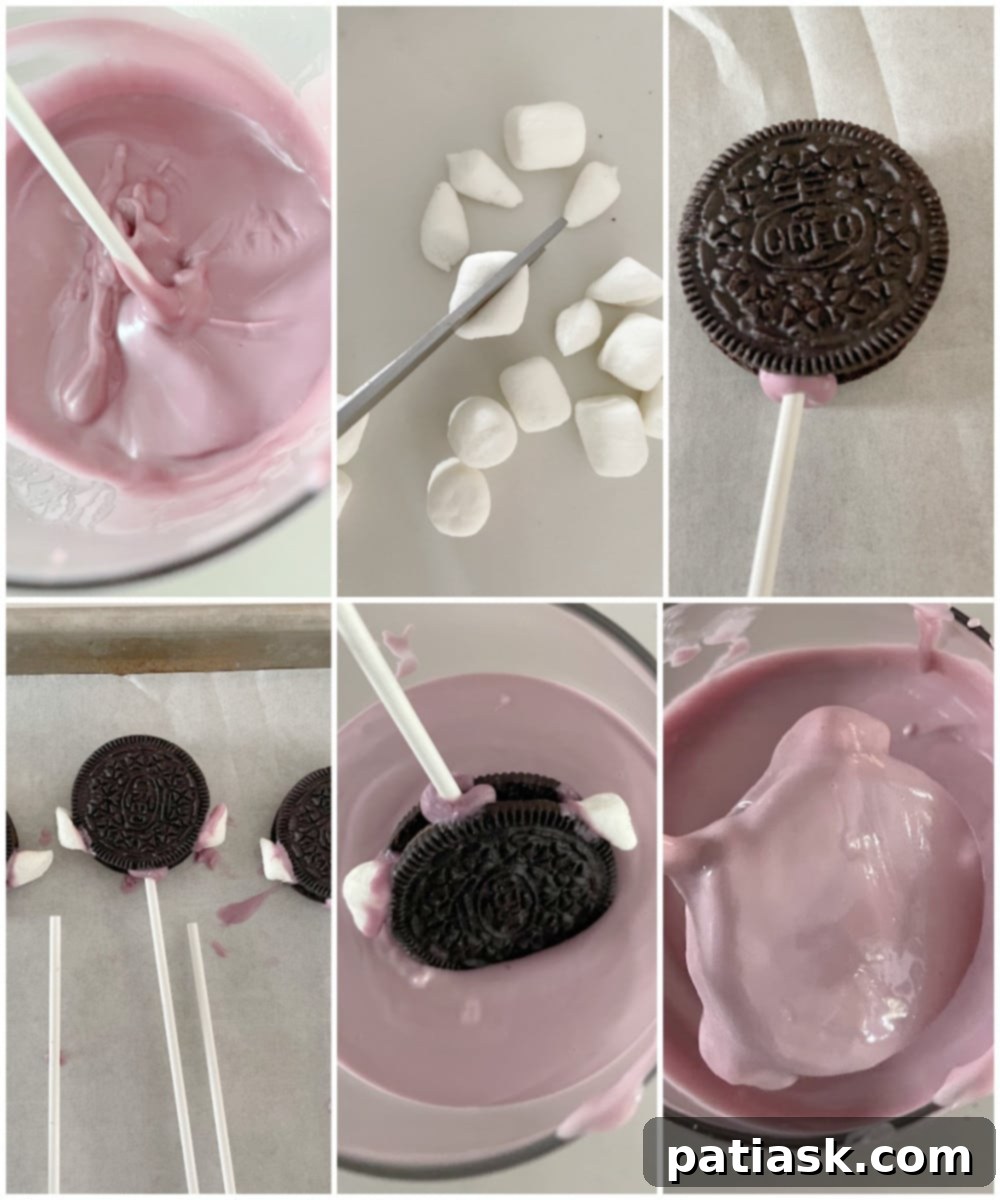
- **Melt the Lavender Candy Melts:** Place the lavender candy melts in a microwave-safe bowl. Heat in 30-second intervals, stirring vigorously and scraping the sides of the bowl after each interval. Continue until the chocolate is smooth and has a beautiful, flowing consistency. If the chocolate seems too thick for dipping, incorporate 1-2 teaspoons of coconut oil, vegetable oil, or canola oil per cup of melted chocolate. This will thin it out and give it an appealing glossy finish.
- **Insert Lollipop Sticks:** Dip about ½ inch of a lollipop stick into the melted lavender chocolate. Then, carefully slide the chocolate-coated end into the cream filling of an Oreo, pushing it halfway through the cookie. Gently press the cookie halves together if they start to come apart, ensuring the stick is firmly embedded. The chocolate acts as a stabilizer.
- **Set Aside:** Place the Oreos with inserted sticks onto the parchment-lined baking sheet.
- **Optional Vampire Ears:** If you’re adding ears, take a mini marshmallow and cut it diagonally to yield two small triangular shapes. Dip the base of each marshmallow triangle into the melted lavender chocolate and attach two to each side of the Oreo, positioning them to resemble pointy vampire ears. Immediately chill the pops in the refrigerator for about 10 minutes to allow the chocolate securing the ears to firm up. The setting time may vary based on your specific chocolate and refrigerator.
- **Dip the Cookies:** Once the initial chocolate (and ears, if added) is set, it’s time to fully coat the Oreos. Hold each Oreo pop by its stick and submerge it completely into the melted lavender chocolate. Gently tap the stick against the edge of the bowl or lightly shake to remove any excess chocolate, ensuring a smooth, even coating.
**Decorating the Fang-tastic Vampire Oreo Pops**
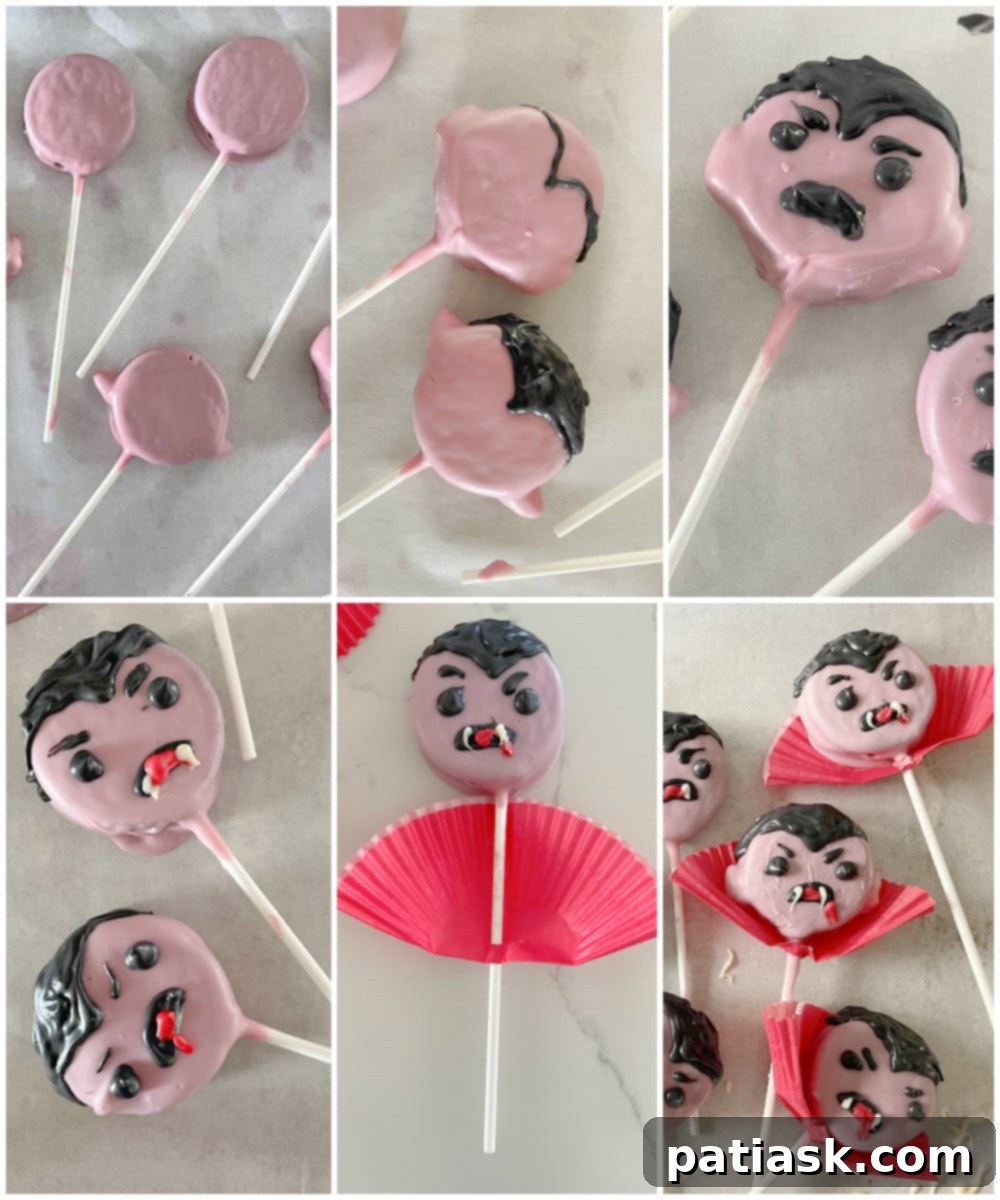
- **Chill the Dipped Pops:** Carefully place the freshly dipped Oreo pops back onto a baking sheet lined with parchment paper.
- **Set the Coating:** Return the pops to the refrigerator and chill for 10-20 minutes, allowing the lavender chocolate coating to harden completely. This firm base is essential for precise decorating.
- **Prepare Black Decorating Chocolate:** While your pops are chilling, melt the black candy melts using the same microwave method as before. Once smooth, transfer the melted black chocolate into a small Ziploc bag or a piping bag equipped with a small round tip. If using a Ziploc bag, snip a tiny hole in one corner for piping.
- **Draw Facial Features:** Remove the chilled Oreo pops from the fridge. Use the black chocolate to pipe a dramatic widow’s peak and some swooping hair onto the top of each cookie. Then, carefully draw expressive eyebrows, menacing eyes, and a sharp, downturned mouth for your vampire’s face. Precision here helps bring their character to life!
- **Add Bloody Details:** Melt some red candy melts. Using a separate small Ziploc or piping bag with a tiny snip, carefully pipe a small red tongue within the mouth outline and add a few drops of “bloody drool” trickling from the corners of the mouth for a truly macabre effect.
- **Create the Eyes and Fangs:** Melt some white chocolate or white candy melts. Using a fresh piping bag or Ziploc bag, pipe a small white dot into the center of each black eye to create a pupil. Then, pipe two sharp, delicate fangs extending from the top lip, making your vampire look ready for a bite!
- **Final Chill for Decoration:** Place the decorated Oreo pops back into the refrigerator for another 10 minutes to ensure all the fine chocolate details set firmly.
- **Craft the Cape:** To create a classic Dracula cape, take a festive cupcake liner (red, purple, or black work best). Fold the liner in half, then fold it in half again to form a quarter circle. Snip a small hole or slit near the folded corner. This allows the lollipop stick to pass through smoothly, creating an instant miniature cape effect around the base of the cookie.
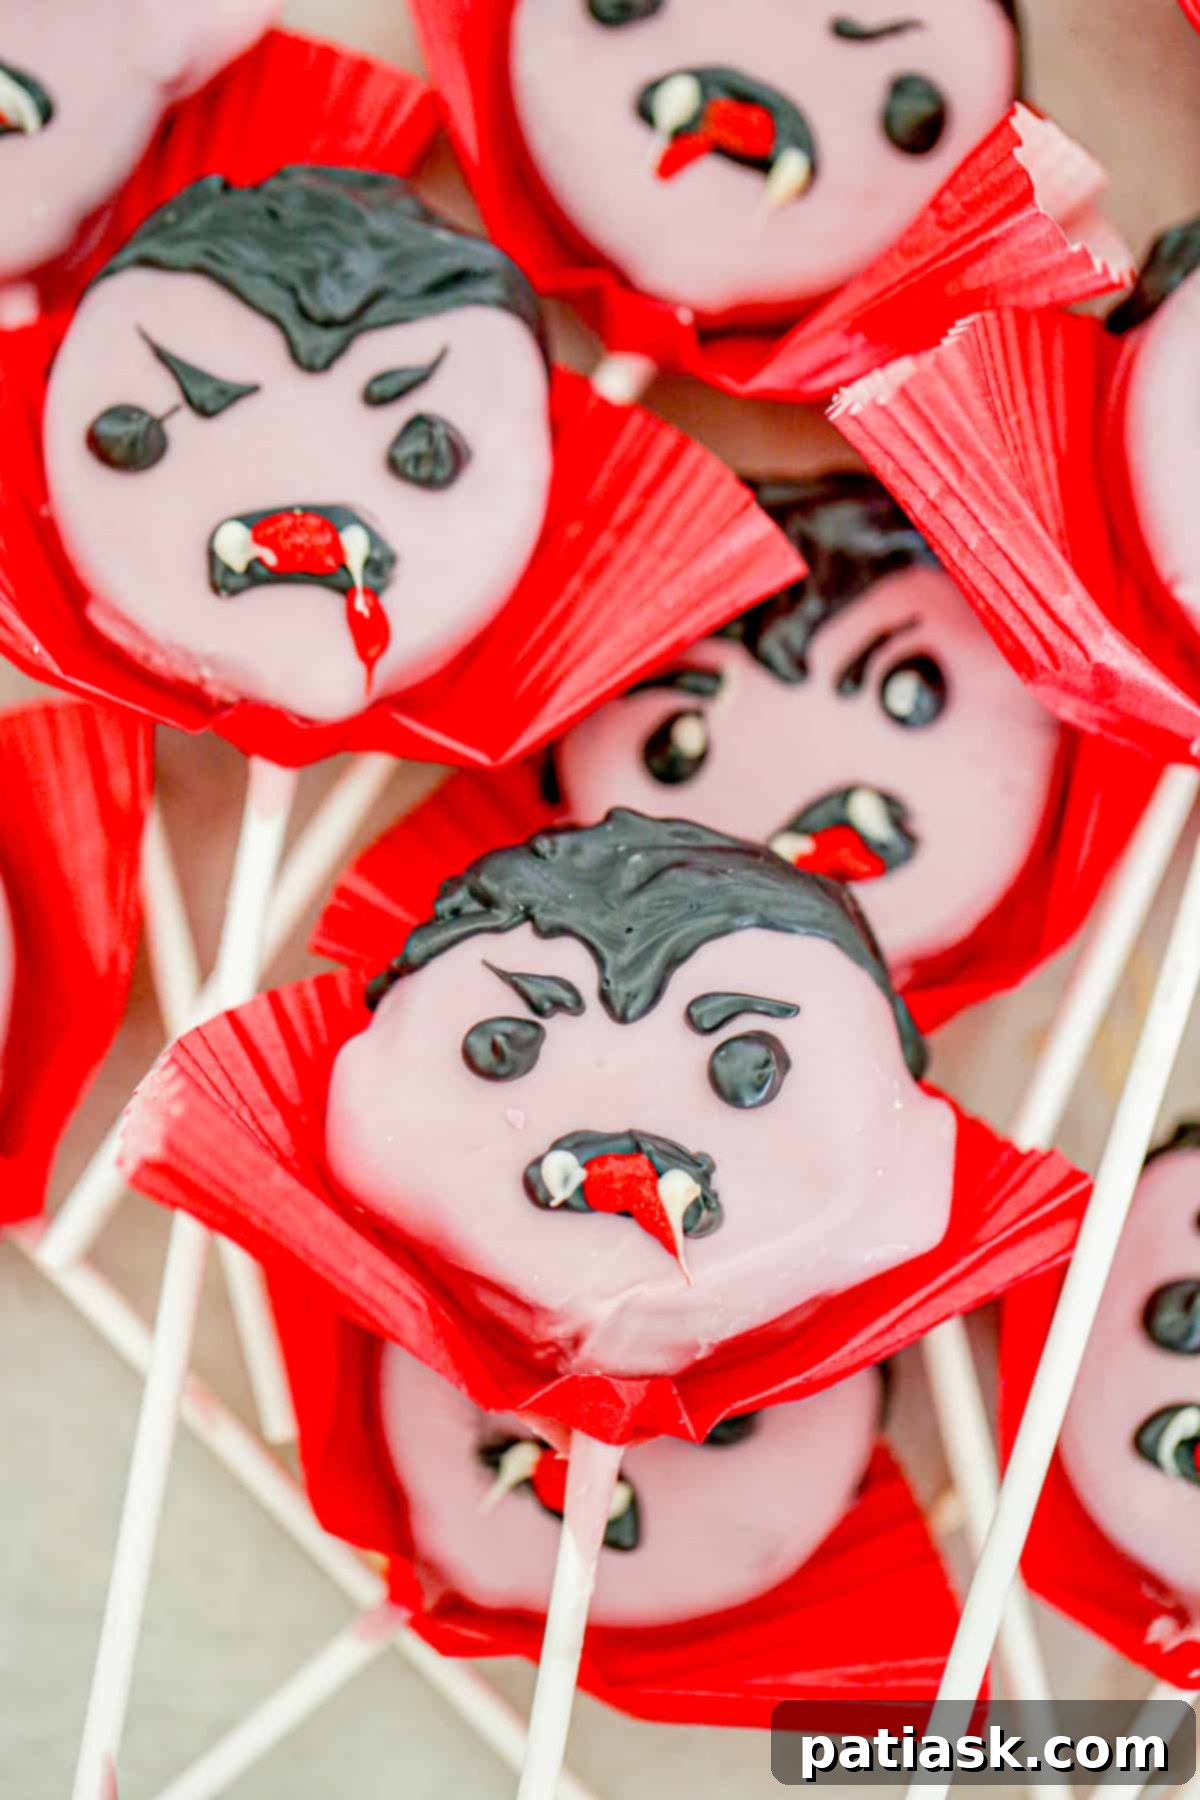
- **Display and Serve:** Once all the decorations are set, present these incredible **Vampire Oreo Pops**! They are perfect for individual cellophane gift wraps or for artful display at your Halloween feast. Be warned, kids and adults alike will be “dying” to try them! These make fantastic **Halloween party desserts** and add a truly unique element to your **spooky treats** collection.
**And Thirdly: Whimsical One-Eyed Monster Oreo Pops!**
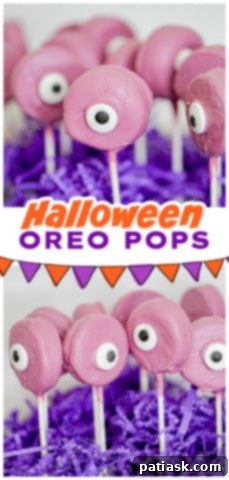
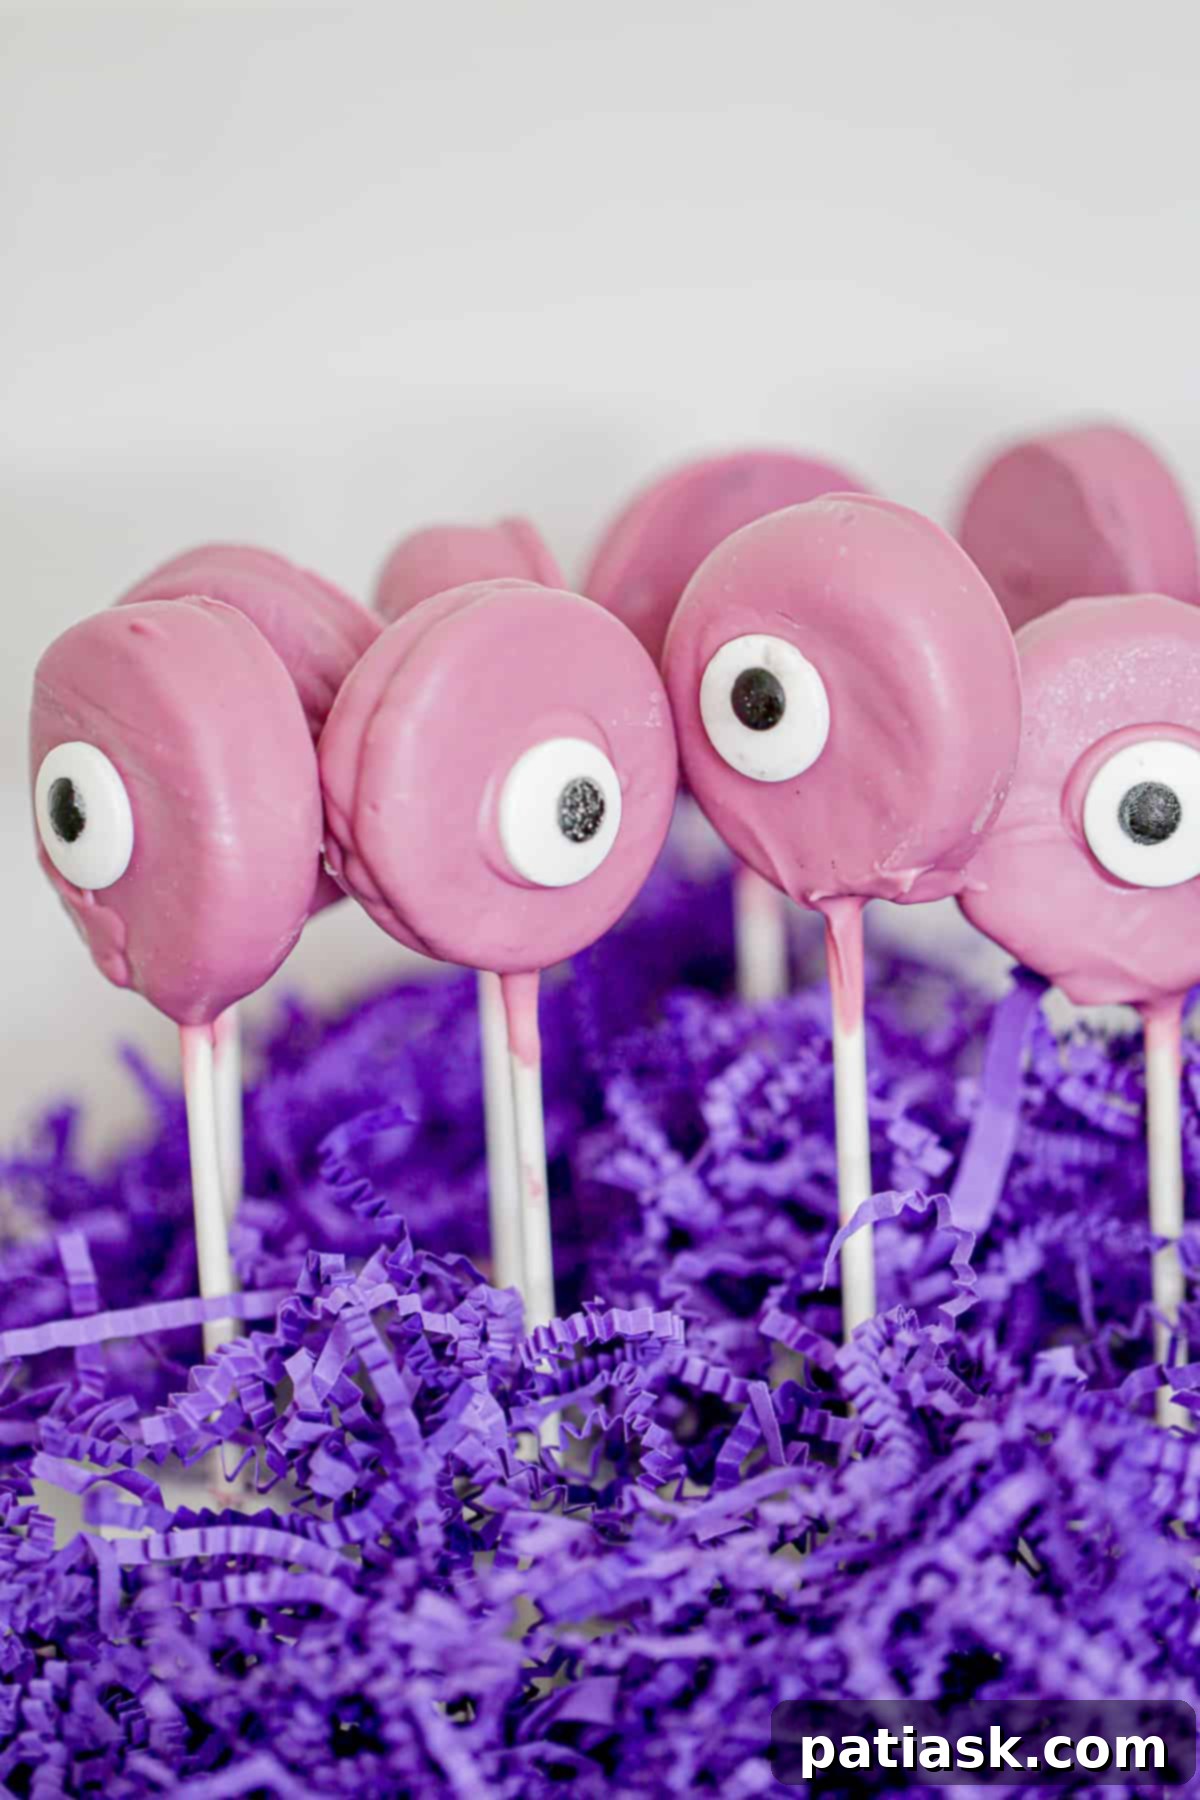
Get ready to unleash some monstrously good fun with these chillingly delightful **One-Eyed Monster Oreo Pops**! These quirky little creatures are not only incredibly simple to create but are guaranteed to be an absolute smash hit at your next Halloween bash. Their vibrant colors and playful single eye make them irresistible to everyone, from tiny tots to grown-up ghouls.
With just a few basic ingredients and minimal steps, you can swiftly transform ordinary Oreos into delicious, eye-popping treats in a matter of minutes. The beauty of these **easy Halloween treats** lies in their quick assembly and the endless possibilities for customization, allowing you to create a whole army of unique monsters. They are perfect for last-minute party preparations or for when you want a fun, no-fuss **Halloween dessert** that still makes a big impact.
**Ingredients for One-Eyed Monster Oreo Pops**
- Oreos: The classic cookie base for these fun monsters.
- Lavender candy melts: Or any vibrant color of your choice – green, orange, or purple are also excellent options for monster skin!
- Candy eyes: Large candy eyes are perfect for that classic monster look.
- 1-2 teaspoons of coconut oil, vegetable oil, or canola oil per cup of chocolate: This helps thin the chocolate for a super smooth and easy dipping process, ensuring a flawless monster coating.
- Lollipop Sticks: To transform your Oreos into convenient and fun pops!
**How to Make the One-Eyed Monster Oreo Pops**
- **Prepare Your Workstation:** Line a sturdy cookie sheet or baking tray with a sheet of parchment paper. This will provide a non-stick surface and make handling your monster pops easier.
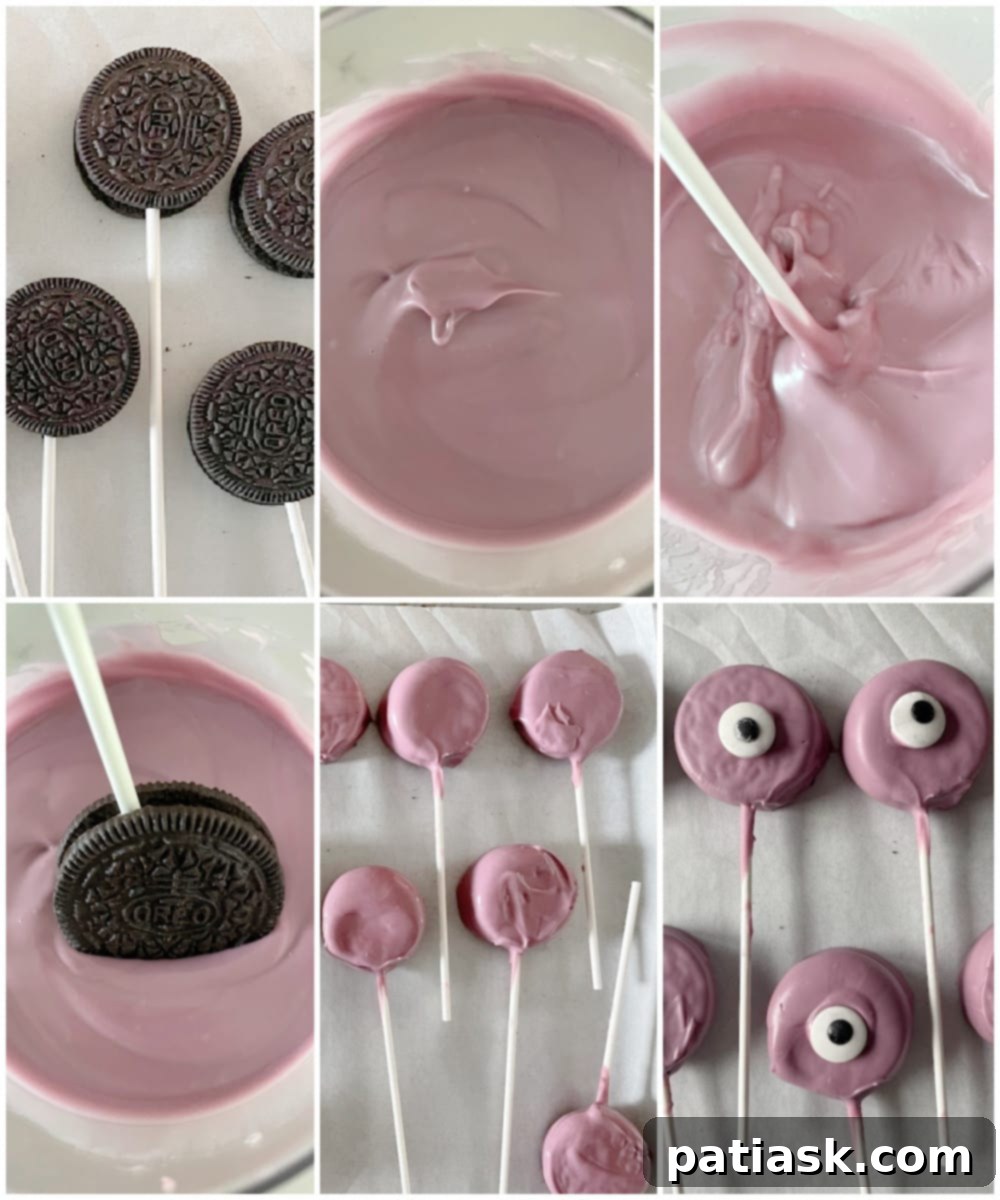
- **Melt the Candy Melts:** Place your chosen color of candy melts (lavender, green, orange, or purple work wonderfully for monsters) into a microwave-safe bowl. Microwave in short 30-second intervals, stirring well and scraping the sides of the bowl after each interval. Continue this process until the chocolate is completely smooth, fluid, and has a drizzly consistency perfect for dipping. If the chocolate appears too thick, stir in 1-2 teaspoons of coconut oil, vegetable oil, or canola oil per cup of melted chocolate to achieve a glossy and extra-smooth finish.
- **Insert Lollipop Sticks:** Dip about ½ inch of a lollipop stick into the melted chocolate. Then, carefully slide this chocolate-coated end into the cream filling of an Oreo cookie, pushing it about halfway into the center. Gently press the cookie halves together if they show signs of separating, ensuring the stick is securely held by the cream and a bit of chocolate.
- **Allow to Set:** Place the Oreos with inserted sticks onto the parchment-lined baking sheet.
- **Initial Chill:** Transfer the baking sheet to the refrigerator and chill for approximately 10 minutes. This step is crucial for allowing the chocolate holding the stick to firm up, preventing the cookie from falling off during the main dipping process. Adjust chilling time as needed based on your chocolate and refrigerator.
- **Dip the Monster Pops:** Once the sticks are secure, it’s time for the main event! Hold an Oreo pop by its stick and fully immerse the entire cookie into the melted colored chocolate. Gently tap the stick against the side of the bowl or lightly shake off any excess chocolate to achieve a smooth and even coating.
- **Place on Baking Sheet:** Carefully return the freshly dipped Oreo pops to the baking sheet lined with parchment paper.
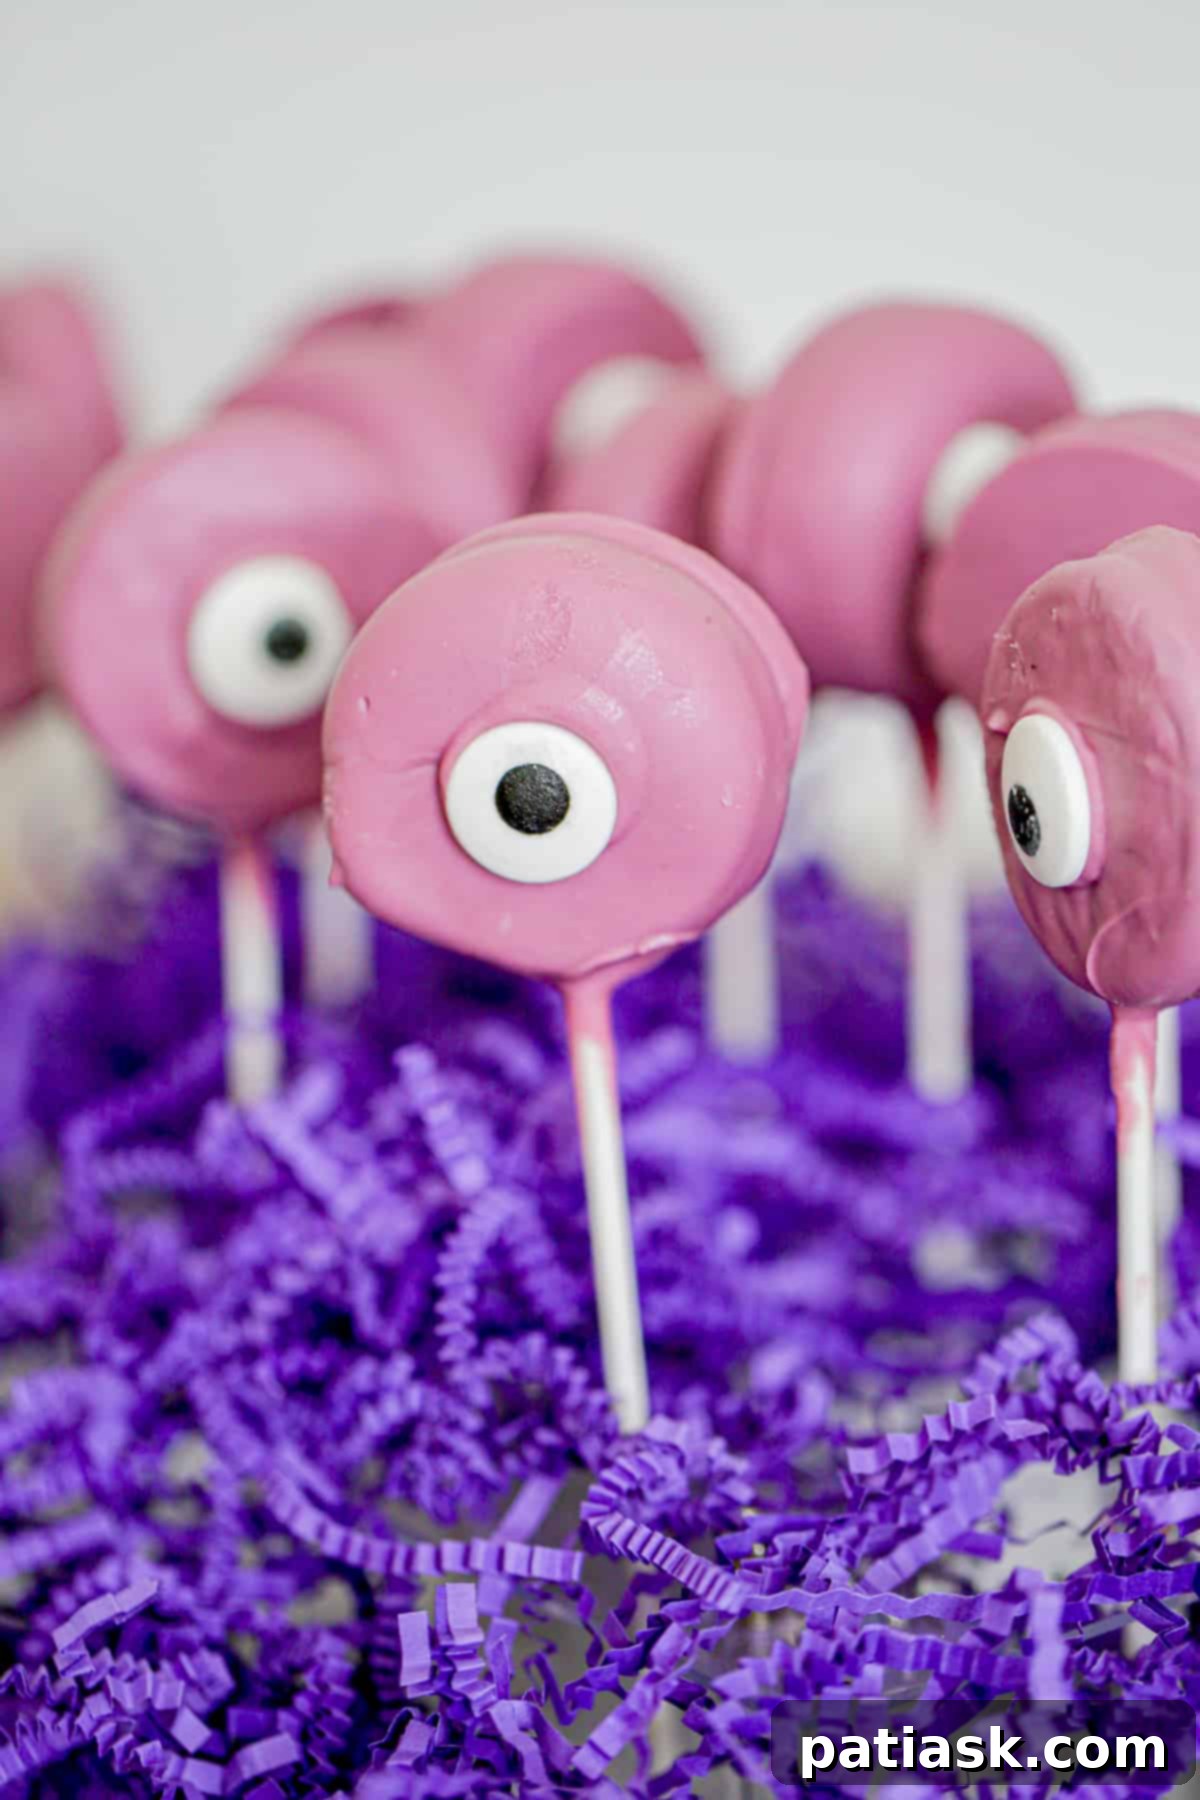
- **Add the Eye:** While the chocolate is still wet and tacky, immediately press a large candy eyeball onto the center of each dipped cookie. You can get creative here and even add more than one eye if you wish, as they come in all sorts of eye candy sizes and styles!
- **Final Chill:** Return the decorated Oreo pops to the refrigerator for another 10 minutes to allow the chocolate coating and candy eyeball to set completely.
- **Serve or Store:** Once they are firm and fully set, keep these whimsical One-Eyed Monster Oreo Pops in the refrigerator until you are ready to serve them, or package them up individually for a charming Halloween gift to friends and family! These are fantastic **kid-friendly Halloween snacks** and **easy no-bake Halloween recipes**.
**Pro Tips for Perfect Oreo Pops**
**Choosing Your Oreos Wisely**
When crafting delightful **Oreo pops** and inserting those crucial lollipop sticks, the type of Oreo you choose can make a significant difference. While standard Oreos work, I highly recommend opting for Double Stuf Oreos or Mega Stuf Oreos. These varieties boast a considerably thicker cream filling compared to the regular ones, which provides a much more stable anchor for the lollipop stick. The extra filling creates a stronger bond, preventing the cookie from rotating or detaching from the stick during the dipping process. I’ve found that using fudge-filled or orange-filled Oreos also offers a robust center, sometimes even allowing you to skip the initial chocolate-dipping step for the stick, as the thick filling alone might be sufficient to hold it firmly in place.
**Mastering the Dipping Technique**
Achieving a perfectly smooth and even coating on your **Halloween Oreo Cookie Pops** is key to their professional appearance. Here are some essential **dipping tips** to ensure success:
- **Use a Narrow Glass for Best Results:** For the easiest and most efficient dipping, once your chocolate melts are perfectly smooth, pour the melted chocolate into a tall, narrow glass or mug. This allows you to fully submerge the Oreo in a straight up-and-down motion, ensuring complete coverage without excess mess.
- **If Using a Bowl:** If a narrow glass isn’t available and you’re using a bowl, tilt the bowl slightly. Hold the Oreo pop by the stick and move it around, dipping up and down and side to side within the chocolate. This technique helps ensure the entire cookie is covered, especially as the chocolate level decreases.
- **Don’t Be Shy with Chocolate:** It’s better to melt a little extra chocolate than to run out mid-dipping. If you find your chocolate level getting too low to fully submerge the Oreos, simply melt another small batch to replenish.
- **Tap Off Excess:** After dipping, gently tap the lollipop stick against the side of your glass or bowl. This helps to shake off any excess chocolate, preventing drips and ensuring a clean, smooth finish. Do this over the container of melted chocolate to catch any runoff.
- **Work Quickly but Deliberately:** Melted chocolate can set relatively fast, especially if your kitchen is cool. Work efficiently but without rushing, ensuring each pop is dipped and placed on parchment paper before the chocolate hardens.
**How Long Do Oreo Pops Last?**
To ensure your delicious **Halloween Oreo pops** remain fresh and firm, proper storage is essential. I highly recommend keeping these delightful Oreo treats in the refrigerator. When stored correctly in an airtight container, they can stay fresh and perfectly enjoyable for up to a few weeks. Leaving them out at room temperature, especially in warmer conditions, can cause the chocolate coating to soften or even melt, potentially affecting their appearance and texture.
For even longer preservation, these **Halloween Oreo cookie pops** can be frozen! Simply place them in an airtight container or a freezer-safe Ziploc bag. When you’re ready to enjoy them, allow them to thaw slightly at room temperature or in the refrigerator for a few minutes. Always ensure they are covered to keep them clean and protect them from absorbing any unwanted odors from the fridge or freezer. These storage tips ensure your **spooky treats** are ready whenever hunger for Halloween deliciousness strikes!
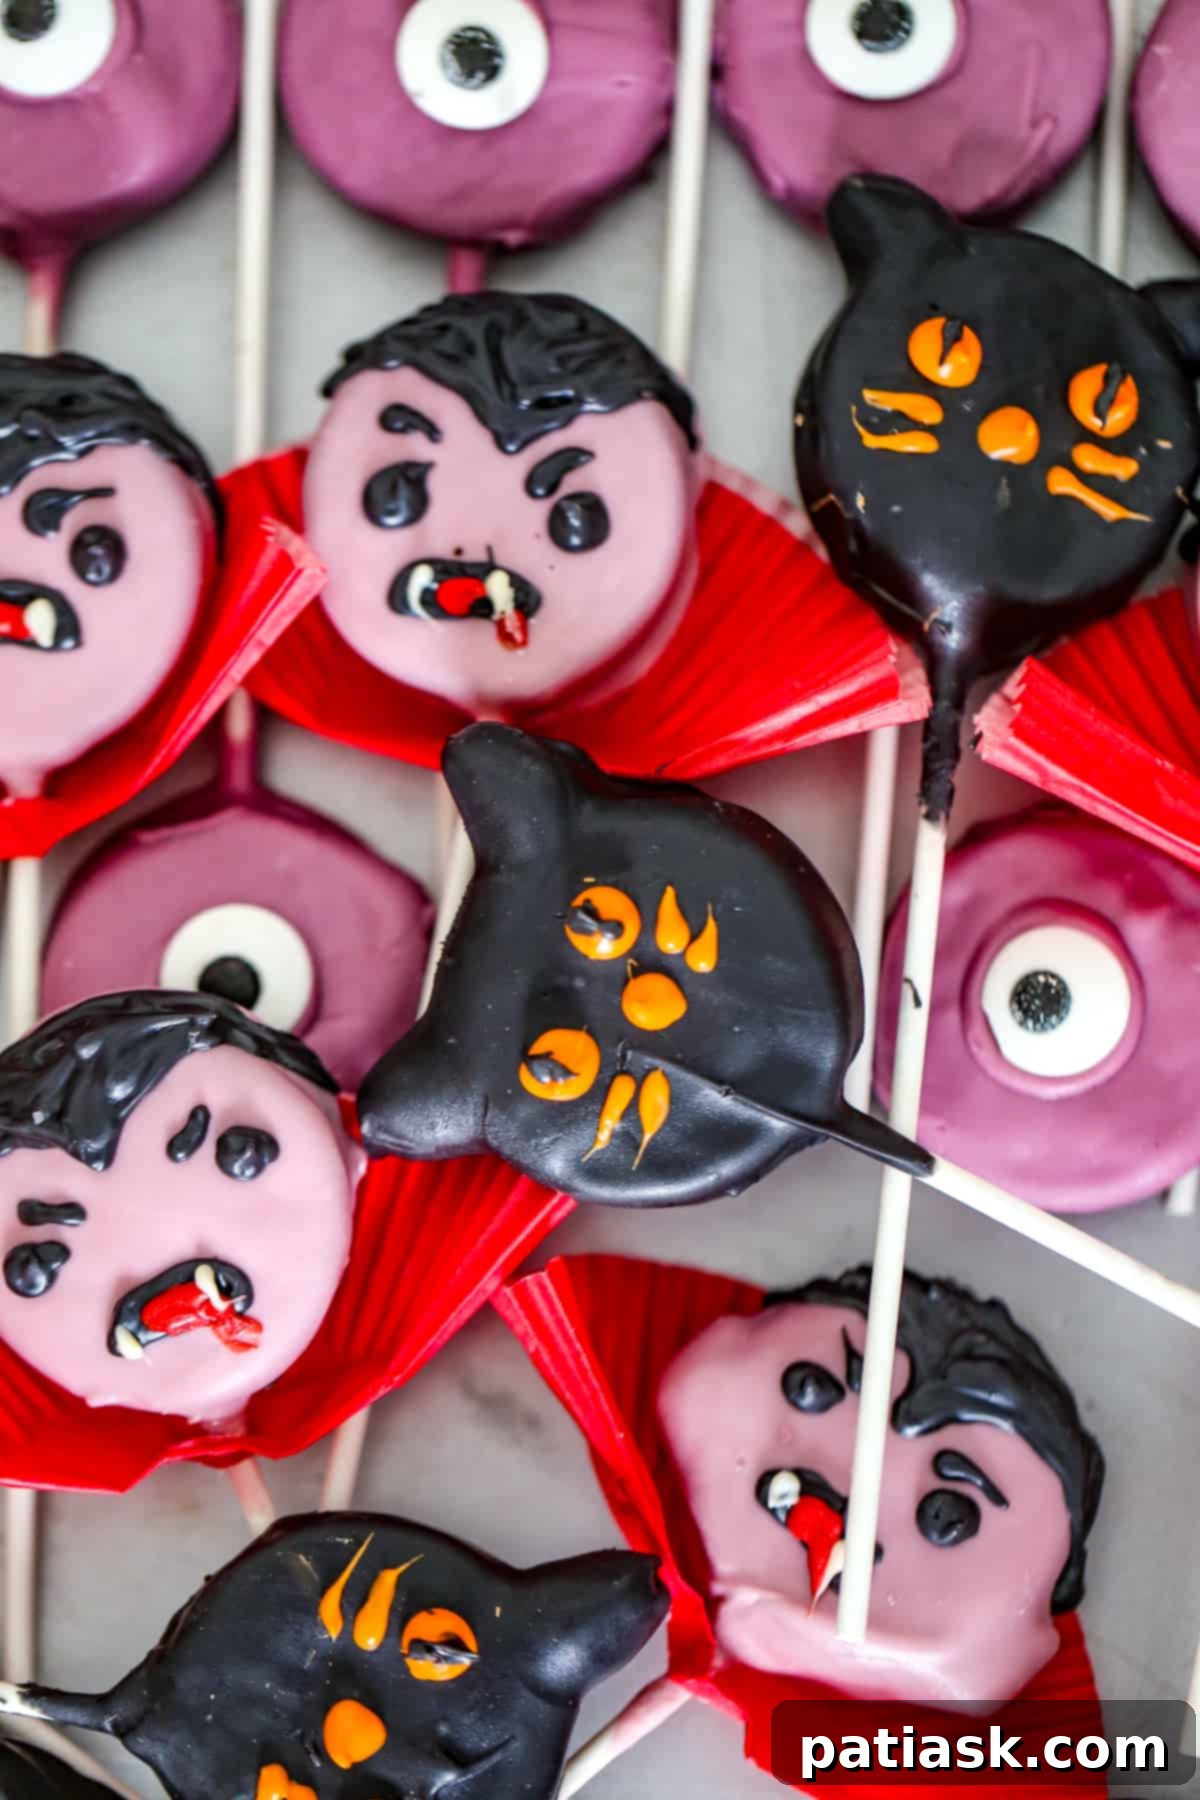
For a truly spook-tacular and memorable Halloween, let these homemade **Halloween Oreo Pops** take center stage at your festivities. Whether you’re planning a night of frightful fun, hosting a vibrant Halloween party, or simply enjoying an afternoon of creative family bonding, these easy and utterly delicious party snacks are guaranteed to be a huge hit with everyone. Their charming designs and irresistible flavors make them the perfect **Halloween desserts** for any occasion.
So, don’t be shy – embrace the spirit of the season and give these **spooky treats** a try! They might be small in stature, but they pack a colossal punch of flavor and fun. Trust us, once you make this **Halloween Oreo Pops recipe**, you will not regret it! Get ready to enjoy the cheers and delight from your guests as they sink their teeth into these imaginative and tasty **Oreo cookie pops**.
Share your amazing creations on Pinterest, Instagram, and Facebook! You’ll find all the detailed recipes below, making it easy to whip up these festive delights!
**Love Halloween Oreo Recipes? Discover More Delights!**
- Delicious Oreo Brownies with Oreo Frosting
- Pumpkin Oreo Truffles
- Oreo Stuffed Brownies
- Halloween Graveyard Dirt Cake
- Fall Snack Mix
Vampire Oreo Pops
Kim Lange
Pin Recipe
Equipment
- Lollipop sticks
Ingredients
Vampire Oreo Pops
- Oreos
- Lavender candy melts black candy melts, white candy melts and red candy melts
- Mini marshmallows
- 1-2 teaspoons of coconut oil vegetable oil or canola oil per cup of chocolate after melting if chocolate isn’t as smooth and appears too thick for dipping.
- Cupcake liners: Red purple, black, green are good colors to use
Instructions
Vampire Oreo Pops
- Place a piece of parchment paper on cookie sheet.
- Place the lavender colored melts in a microwave-safe bowl and microwave in 30 second intervals. Scrape the side of the bowl and stirring between each interval until each the color is smooth and drizzly. To get extra-smooth chocolate or if chocolate is too thick for dipping oreos, add 1-2 teaspoons of coconut oil, vegetable oil or canola oil per cup of chocolate after melting. It will make the chocolate glossy and even smoother.
- Once the lavender chocolate is melted, dip your lollipop stick in it about ½ inch, and then slide it in the cookie cream stuffing in the Oreo about halfway. Press the cookie part gently as well, sometimes they like to come slightly apart when sticking them.
- Set the stuck Oreos on a sheet pan lined with parchment paper.
- Skip this step if you aren’t making Vampire Ears: How to make the Vampire Ears -Take mini marshmallows and cut diagonally across the marshmallow to get 2 small triangle marshmallows. Place 2 marshmallows on each side of the head to make some pointy ears, by dipping candy into the melted chocolate and place them on the sides of his face. Then chill in the fridge for around 10 minutes to let that bit of chocolate firm up. It may take longer, depending on the chocolate used.
- Time to dunk those Oreos in the melted chocolate. Dip the Oreo pops until they are fully covered and gently tap or shake off excess chocolate.
Video
Black Cat Oreo Pops
Kim Lange
Pin Recipe
Equipment
- Lollipop sticks
Ingredients
Black Cat Oreos
- Oreos
- Wilton black candy melts
- Orange candy melts or can pipe orange frosting/black frosting for face decor once the chocolate has set.
- 1-2 teaspoons of coconut oil vegetable oil or canola oil per cup of chocolate after melting if chocolate isn’t as smooth and appears too thick for dipping.
Instructions
Black Cat Oreos
- Place a piece of parchment paper on cookie sheet.
- Place the black colored melts in a microwave-safe bowl and microwave in 30 second intervals. Scrape the side of the bowl and stirring between each interval until each the color is smooth and drizzly. To get extra-smooth chocolate or if chocolate is too thick for dipping oreos, add 1-2 teaspoons of coconut oil, vegetable oil or canola oil per cup of chocolate after melting. It will make the chocolate glossy and even smoother.
- Once the black chocolate is melted, dip your lollipop stick in it about ½ inch, and then slide it in the cookie cream stuffing in the Oreo about halfway. Press the cookie part gently as well, sometimes they like to come slightly apart when sticking them.
- Set the stuck Oreos on a sheet pan lined with parchment paper.
- Pinch the end of mini marshmallow and dip the round part of the marshmallows and place on top of the cat’s head to make some pointy ears.
- Chill in the fridge for around 10 minutes to let that bit of chocolate firm up. It may take longer, depending on the chocolate used.
- Time to dunk those Oreos in the melted chocolate. Dip the Oreo pops until they are fully covered and gently top or shake off excess chocolate.
- Place the Oreo Pops on the baking sheet lined with parchment paper.
- Then chill once again in the fridge for 10 minutes.
- Melt the orange chocolate melts and pour melted chocolate into a ziploc bag or you can use a piping bag with a small round tip. If using a ziploc bag, cut a small hole in that corner and start piping chocolate.
- Pipe the eyes, nose and whiskers on each of the cookies. Take some of the black melted chocolate and make a pupil in each eye by piping it in.
- Let the Oreo pops chill in the fridge another 10 minutes.
- Once they are set, keep them in the fridge until ready to serve or package up to give to friends and family!
One-Eyed Monster Oreo Pops
Kim Lange
Pin Recipe
Equipment
- Lollipop sticks
Ingredients
One-Eyed Monster Oreo Pops
- Oreos
- Lavender candy melts
- Candy eyes
- 1-2 teaspoons of coconut oil vegetable oil or canola oil per cup of chocolate after melting if chocolate isn’t as smooth and appears too thick for dipping.
Instructions
One-Eyed Monster Oreo Pops
- Place a piece of parchment paper on cookie sheet.
- Place the lavender colored melts in a microwave-safe bowl and microwave in 30 second intervals. Scrape the side of the bowl and stirring between each interval until each the color is smooth and drizzly. To get extra-smooth chocolate or if chocolate is too thick for dipping oreos, add 1-2 teaspoons of coconut oil, vegetable oil or canola oil per cup of chocolate after melting. It will make the chocolate glossy and even smoother.
- Once the lavender chocolate is melted, dip your lollipop stick in it about ½ inch, and then slide it in the cookie cream stuffing in the Oreo about halfway. Press the cookie part gently as well, sometimes they like to come slightly apart when sticking them.
- Set the stuck Oreos on a sheet pan lined with parchment paper.
- Chill in the fridge for around 10 minutes to let that bit of chocolate firm up. It may take longer, depending on the chocolate used.
- Time to dunk those Oreos in the melted chocolate. Dip the Oreo pops until they are fully covered and gently tap or shake off excess chocolate.
- Place the Oreo Pops on a baking sheet lined with parchment paper.
- Add a candy eyeball to each of the dipped cookies or add more, they make all kinds of eye candy sizes!
- Then chill once again in the fridge for 10 minutes.
- Once they are set, keep them in the fridge until ready to serve or package up to give to friends and family!
