These Best No Chill Sugar Cut Out Cookies are a beloved classic, consistently ranking among the most popular cookie recipes that simply cannot be resisted. They are particularly cherished during the festive Christmas holiday season, bringing joy and a touch of homemade magic to any gathering. There’s truly nothing quite like the delightful flavor of perfectly baked, homemade iced sugar cookies.
Imagine soft, thick cookies with that signature bakery-style appeal, yet incredibly easy to make. These sugar cookies are designed to hold their shape beautifully without the need for chilling the dough – a true game-changer for busy bakers. Each cookie is then adorned with a delectable, smooth cookie icing, making them not only scrumptious but also wonderfully fun to decorate. If you enjoy festive baking, you might also love our ‘Ugly Sweater’ Christmas Cookies and the playful Santa’s Christmas Trash Cookies!

Discover the Magic of Our Best No Chill Sugar Cut Out Cookies
Are you tired of waiting? If you’re seeking a recipe that bypasses the lengthy chilling process and minimizes fuss, allowing you to dive straight into baking perfect, chewy, and utterly delicious homemade sugar cookies, then you’ve found your ultimate guide. Our best no-chill sugar cut-out cookie recipe is specifically crafted to deliver exceptional results with maximum convenience.
As the holiday season draws near, the comforting scent of freshly baked cookies is an essential part of the festive atmosphere, evoking cherished memories and a warm sense of nostalgia. These delightful cookie cutter sugar cookies are not just a treat for your taste buds; they are also designed to be a significant time-saver in the kitchen, making holiday baking less stressful and more enjoyable. Their incredible versatility means they are perfect for any occasion, from birthday parties to casual get-togethers, offering a canvas for endless creative decoration.
Whether you’re a novice stepping into the world of baking or a seasoned pro looking for an efficient yet delicious sugar cookie recipe, this comprehensive article will walk you through every step of creating the best no-chill cut-out sugar cookies. Prepare to impress your loved ones with these irresistible treats and indulge in guilt-free baking joy. Grab your apron, preheat your oven, and get ready to create some truly delicious masterpieces! You’ll absolutely adore this Best No Chill Sugar Cookies recipe! These fun-to-make cookies are perfect for involving kids in the kitchen, and even more enjoyable to eat. Let’s embark on this delightful baking journey!

Essential Ingredients for Perfect No-Chill Sugar Cookies
Crafting the perfect no-chill sugar cookies requires a precise blend of quality ingredients. The key lies not just in what you use, but also in their temperature and consistency. Here’s a detailed look at everything you’ll need to create both the delicious cookies and their vibrant icing.
For the Best No Chill Sugar Cookie Dough:
- Unsalted butter, cool but not room temperature (this is crucial for preventing spread)
- Granulated sugar
- Salt (to balance the sweetness and enhance flavor)
- Large eggs, cold (cold eggs help maintain dough structure)
- Vanilla extract (for that classic, comforting aroma)
- All-purpose flour
For the Smooth Sugar Cookie Icing:
- Powdered sugar (also known as confectioners’ sugar)
- Whole milk (adjust quantity for desired icing consistency)
- Light corn syrup (adds shine and helps the icing set)
- Almond extract (complements the vanilla in the cookies beautifully)
- Gel food coloring (choose your favorite colors for decorating) – a pro tip is to divide the icing into several bowls, coloring some and leaving one white for contrast.
- Sprinkles and colored sugars (for festive and fun decorations)

Step-by-Step Instructions: How to Make No-Chill Cut Out Sugar Cookies
Achieving bakery-quality sugar cookies at home is simpler than you think, especially with a no-chill recipe. Follow these detailed steps for guaranteed success.
- Begin by preheating your oven to 325 degrees F (160 degrees C). Prepare your baking sheets by lining them with parchment paper or a silicone mat. This step ensures easy removal of cookies and consistent baking.
Crafting the Perfect No-Chill Sugar Cookie Dough
The foundation of a great cut-out cookie is the dough. Paying close attention to ingredient temperature and mixing technique is vital for preventing spread and achieving that desirable soft, thick texture.
- In a spacious mixing bowl, combine your cool unsalted butter, granulated sugar, and a pinch of salt. It’s crucial that the butter is cool – not rock hard cold from the fridge, but definitely not at room temperature. Butter that is too soft will cause your cookies to spread excessively during baking. Remember, unsalted butter is preferred as it allows you to control the salt content precisely; salted butter has varying water percentages that can affect dough consistency and lead to spreading.
- Set your electric mixer to its lowest speed. The goal here is to incorporate the ingredients without introducing too much air into the dough. Excessive air can also contribute to cookie spreading. Mix just until the ingredients are combined and no dry spots remain.
- Next, add the two cold large eggs and the vanilla extract to the mixture. Continue beating at the lowest speed until these wet ingredients are just incorporated. Ensuring the eggs are cold is another key factor in helping the cookies maintain their shape during baking. Don’t worry if the mixture appears slightly lumpy; this is normal. Just ensure there are no large, unincorporated chunks of butter, and scrape down the sides and bottom of the bowl periodically to ensure everything is evenly mixed.
- Gradually add the all-purpose flour. Again, with your mixer set to the lowest speed, mix until the dough just comes together. This process should be quick. Turn off the mixer and test the dough: if you can press your finger into it and the dough doesn’t stick, it’s ready to roll. Overmixing the flour can develop too much gluten, resulting in tough cookies.
- Remove the prepared sugar cookie dough from the bowl and gently form it into a ball. For easier handling, divide the dough in half, setting one half aside. Lightly dust your work surface, your hands, and your rolling pin with a minimal amount of flour.
- Using your floured hands, gently flatten one half of the dough. Then, use your rolling pin to roll it out to a uniform thickness of approximately 3/8 inch (about 1 cm). Using a ruler or measuring tape can help ensure consistent thickness, which is important for even baking and a soft, thick cookie.
- Lightly dust your chosen cookie cutters with flour to prevent sticking. Press them firmly into the rolled-out dough, making sure to utilize your space efficiently to maximize the number of cookies from each roll.
- Carefully transfer your cut-out dough shapes onto the prepared baking sheets. Bake in your preheated oven for 10-14 minutes. The exact baking time will depend on the size and thickness of your cookies. Crucially, avoid baking for more than 14 minutes. The aim is for thick, soft cookies with hardly any browning. They will firm up as they cool.
- Once baked, remove the cookies from the oven and let them rest on the hot cookie sheet for 2-4 minutes. This brief resting period helps them set without becoming brittle.
- Finally, gently transfer the cookies to a wire cooling rack to cool completely before decorating. This prevents sogginess and ensures the icing will adhere properly.

Creating the Perfect Sugar Cookie Icing for Your Cut-Out Masterpieces
A beautiful cookie deserves beautiful icing. This simple sugar cookie icing recipe comes together quickly and provides a smooth, shiny finish that sets beautifully.
- In a mixing bowl, using an electric mixer, combine the powdered sugar with ¼ cup of whole milk to start. Mix until the mixture is smooth and lump-free. Gradually add the light corn syrup and almond extract, mixing thoroughly. If a thinner consistency is desired, add more milk, one tablespoon at a time, until your desired flow is achieved. Continue mixing everything together on medium-low speed for about 5 minutes until it’s perfectly smooth and glossy. The corn syrup is key here: it helps the icing harden with a lovely sheen, preventing it from being too sticky.
Artful Decoration: How to Decorate Your No Chill Sugar Cut Out Cookies
Decorating is where your creativity truly shines! With a little practice, you can transform simple cookies into edible works of art.
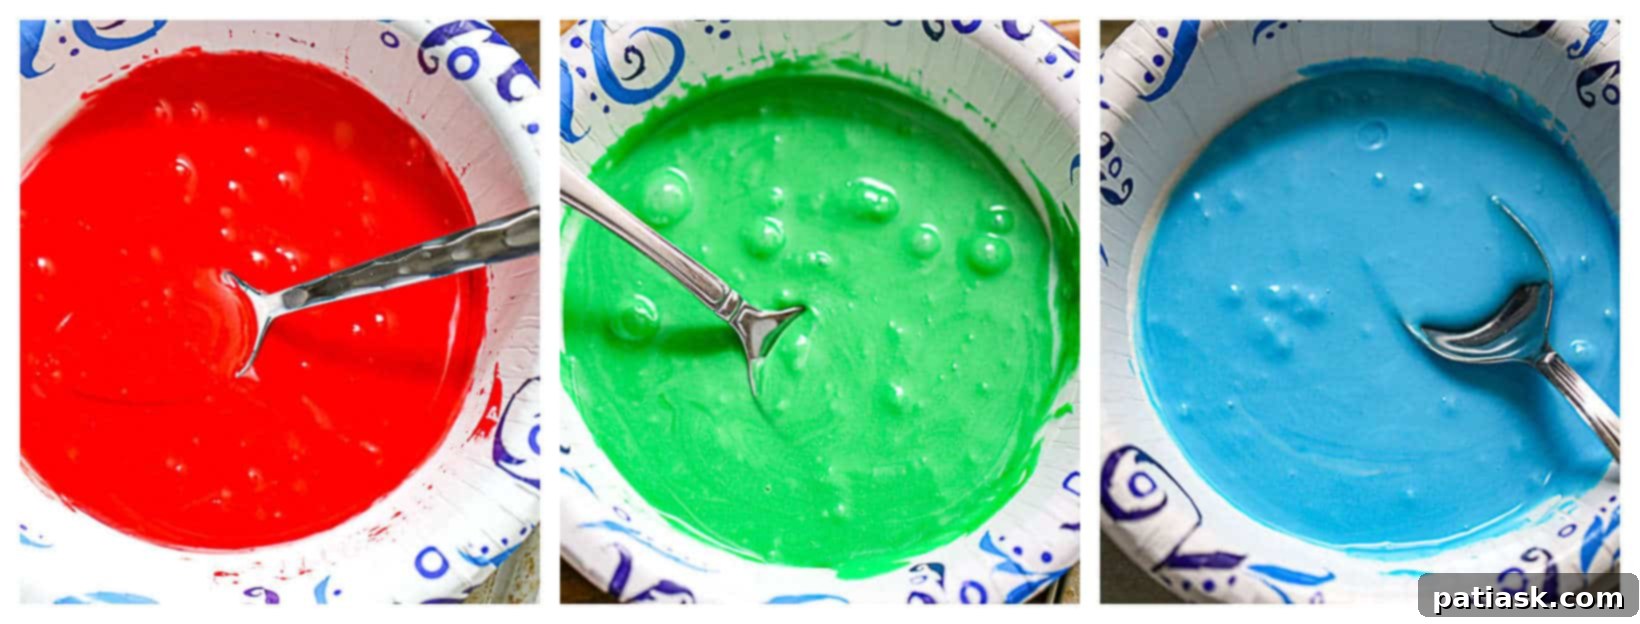
- To decorate your cookie cutter sugar cookies, you’ll generally work with two icing consistencies: an outline icing and a flood icing. Your outline icing should be relatively thick, similar to the consistency of toothpaste, allowing you to create defined borders. Your flood icing, on the other hand, should be thinner, resembling light corn syrup, designed to spread smoothly and fill larger areas. Add gel food coloring to achieve your desired vibrant shades, one drop at a time until the perfect hue is reached. You can certainly opt to skip the outlining step and just use flood icing, but be mindful to leave a little room for the icing to spread to the edges without overflowing.
- Pro Tip for Easy Bag Loading: For hassle-free filling of your piping bags (or a simple Ziploc bag with a snipped corner), place the bag tip-down into a tall glass. Fold the top of the bag down over the rim of the glass. This stable setup will hold the bag open and upright, making it easy to pour in your icing. Always keep any unused icing sealed tightly to prevent it from drying out.
- A common technique is to start with a slightly thicker icing for outlining, then thin it out with a tiny bit more milk to create your flood icing. Piping an outline creates a barrier that prevents the thinner flood icing from running off the cookie edges. Once outlined, allow the border to set for a minute or two before flooding.
- Once you’ve applied the flood icing, use a clean toothpick or a quilling tool to gently guide the icing into place, ensuring it reaches all corners and fills any gaps. A gentle tap or two on your work surface can also help the icing settle evenly and release any trapped air bubbles.
- Should you notice any small air bubbles forming on the surface of your wet icing, simply pop them with the tip of your toothpick or quilling tool for a perfectly smooth finish.
- Patience is a virtue when it comes to drying. Allow the icing to dry completely for about 6-8 hours (or even overnight) before stacking, packing, or adding any additional intricate decorations. Rushing this step can lead to smudged designs.
- For storage, once the icing has fully set, place the decorated cookies on cookie sheets and tent them loosely with foil. This helps to protect the delicate icing and prevent the cookie bottoms from drying out.
Sugar Icing vs. Royal Icing: What’s the Difference?
- No, sugar icing and royal icing are not the same. While both are popular choices for decorating cookies, they differ significantly in their composition and properties. Royal icing is traditionally made with egg whites (or meringue powder) and confectioners’ sugar. This gives it a very hard, durable finish when dry, making it ideal for intricate piping work, creating 3D elements, and providing structural integrity to cookie decorations. It dries completely opaque and can be quite brittle.
- Sugar icing, on the other hand, like the one we’re using for these delicious no-chill cookies, is made primarily with confectioners’ sugar, liquid (water or milk), and often a touch of corn syrup. This results in an icing that dries to a softer, less brittle consistency than royal icing. It still sets firm enough to stack but retains a slightly yielding texture when bitten into, which many prefer for everyday sugar cookies. The corn syrup contributes to its characteristic shine and smoother finish.
Storing Your Delicious Cut Out Sugar Cookies
Proper storage is essential to keep your sugar cookies fresh, soft, and their decorations intact.
- Once your sugar cookies are completely cooled and the icing has fully set, they can be stored in an airtight container at room temperature for up to 3 days. To maintain their texture, especially for frosted cookies, keep them in a cool, dry area of your kitchen. Humidity can alter their delightful texture. When stacking iced cookies, ensure the icing is completely dry to prevent sticking and smudging.
- For longer storage, sugar cookies freeze beautifully. Place them in airtight freezer bags or containers, separating layers with parchment paper, and they will stay fresh for up to three months. Thaw them at room temperature before serving.
Expert Sugar Cookie Baking Tips for Success
Mastering sugar cookies is all about a few key techniques. These tips will help you achieve consistently perfect, soft, and delicious results every time.
- Avoid Overmixing the Dough: This is perhaps the most crucial tip! Mix your cookie dough at the lowest speed possible. Overmixing incorporates too much air, which leads to cookies spreading, and also develops gluten, resulting in a tough texture. Mix only until the ingredients are just combined and no streaks of flour remain.
- Be Gentle with Flour When Rolling: When rolling out your dough on a work surface, use a very light dusting of flour. Too much flour will dry out your dough, making your cookies tough and crumbly. The goal is just enough flour to prevent sticking. Alternatively, for a completely no-flour rolling surface, roll the dough between two sheets of parchment paper. This method also makes for easy cleanup!
- Flash Freeze for Sharper Edges: If you find your cookie dough has become a little too warm or soft while working with it, leading to less defined cut-out shapes, a quick flash freeze can save the day. Place the cut-out shapes on a baking sheet and pop them into the freezer for 5-10 minutes before baking. This helps them hold their shape perfectly in the oven. It’s a trick I swear by!
- Always Bake on Parchment Paper: Lining your baking sheets with parchment paper is non-negotiable for sugar cookies. It not only prevents sticking but also ensures even baking and makes cleanup a breeze. After cutting your cookie shapes, transfer them directly to the parchment-lined sheet.
- Roll Dough Evenly and Uniformly: Consistency is key for uniform baking. Aim to roll your dough out to an even thickness of about 3/8 inch (1 cm) before cutting. If you struggle with even rolling, consider using a rolling pin with thickness guides or dowels on either side of your dough. Dough that’s too thin will bake up crisp and potentially brittle, while dough that’s too thick might not bake through properly. The 3/8 inch thickness ensures a wonderfully soft, chewy texture.
- Remove Cookies Before They Brown: The secret to soft sugar cookies is to avoid overbaking. Sugar cookies should appear pale and set, with little to no golden color around the edges, when removed from the oven. They will continue to bake slightly on the hot baking sheet for a few minutes after removal. A golden hue means they’ve baked too long and will likely be crispy rather than soft.
- Explore Other Frosting Options: While our smooth sugar icing is fantastic, if you’re a fan of a more classic, creamy taste, feel free to decorate your cookies with a delicious buttercream frosting instead!
- Quick Air Fryer Alternative: For those who love their air fryer, check out these Air Fryer Sugar Cookies (from Scratch Recipe) for another fast and convenient cookie option.
By integrating these expert tips and tricks into your baking routine, you can significantly elevate your cookie game and consistently impress everyone with your skills. Always remember to maintain the proper dough temperature, use high-quality ingredients, and don’t shy away from experimenting with various flavors and shapes to infuse your unique personal touch into every batch.

There you have it! Making these best no-chill sugar cut-out cookies is truly a creative and enjoyable experience that doesn’t need to be complicated or time-consuming. This recipe proves that you can achieve perfectly shaped, deliciously soft cookies without the fuss of chilling dough, making it ideal for spontaneous baking or last-minute holiday preparations.
By diligently following the right instructions, using quality ingredients, and adding those special personal touches through decoration, you can create delicious no-chill cookies that will undoubtedly bring smiles to everyone’s faces. These cookies are a testament to the fact that simple methods can yield extraordinary results.

Perfect for any festive occasion, from holiday parties to everyday treats, these cookies are guaranteed to impress with their exquisite flavor and beautiful designs. Say goodbye to tedious chilling times and hello to more precious moments spent decorating and savoring these delectable treats. Elevate your holiday baking game and beyond with the best no-chill cut-out sugar cookies. Your taste buds, and all your delighted guests, will undoubtedly thank you!
Remember, you absolutely do not need to be a professional baker to create the most incredible no-chill sugar cut-out cookies ever. All you need are the right techniques, and I’ve provided all the essential guidance right here for you!
If you decide to make this full recipe, please share your creations! Tag me on Pinterest, Instagram, and Facebook. I’d love to see your beautiful cookies!
MORE Christmas Cookies! You Know You Want More! 🙂
- Snickerdoodle Cinnamon Chip Cookies
- Christmas Cowboy Cookies
- ‘Thick ‘n Fudgy’ Chocolate Explosion Cookies
- 10 Super Sweet Christmas Tree Desserts To Pine Over!
- Iced Oatmeal Cookies
- Butter Pecan Snowball Cookies
- Christmas Chocolate Crackle Cookies
- Soft and Chewy Ginger Spiced Molasses Cookies
- Sugar Cookies with Vanilla Icing
- Soft Maple Brown Sugar Cookies
Also, don’t miss out on learning more about Easy Pie Crust Tips & trying this Double Chocolate Banana Bread and the fun Oreos Cookies & Cream Football Dip for some more inspiring recipes!
Best No Chill Cut Out Sugar Cookies
By Kim Lange
This amazing cookie recipe makes the most delicious soft, thick bakery-style sugar cookies! They hold their shape quite nicely, with no chilling of the dough, and are decorated with a simple, smooth-looking cookie icing that is delectably fun and scrumptious!
Average Rating: 4.86 from 7 votes

Prep Time: 20 mins
Cook Time: 10 mins
Cooling Time: 10 mins
Course: Dessert
Servings: 20 Cookies
Calories: (Not provided in original content)
Ingredients
Best No Chill Sugar Cookies
- 4 sticks unsalted butter, cool from the fridge (2 cups)
- 2 cups granulated sugar
- 1 teaspoon salt
- 2 large eggs, cold
- 1 tablespoon vanilla extract
- 6 cups all-purpose flour
Sugar Cookie Icing
- 6 cups powdered sugar
- ¼ cup whole milk (use more for thinner icing)
- ⅓ cup light corn syrup
- 1 teaspoon almond extract
- Gel food coloring (use whatever colors you want to use; divide into bowls, color some, leave one white)
- Sprinkles, colored sugars
Instructions
Best No Chill Sugar Cookies
- Preheat oven to 325 degrees F and line your baking sheets with parchment paper.
Making the Sugar Cookie Dough
- In a mixing bowl, add your cool unsalted butter, sugar, and salt. The butter should still be cool, not cold but not room temperature, as this will prevent the cookies from spreading. Unsalted and salted butter have very different water percentage contents; using salted butter can often cause spreading.
- Turn your mixer to the lowest speed available to avoid incorporating air into the dough, which also causes spreading. Mix together just until incorporated.
- Mix in the 2 cold eggs and the vanilla to the mixture and beat at the lowest speed until the eggs and vanilla are just incorporated. Make sure the eggs are cold, as this helps the cookies hold their shape. The mixture may look lumpy, and that is fine. Just ensure there are no big chunks of butter and mix more if needed, scraping down the sides and bottom of the bowl.
- Add the flour and turn your mixer to the lowest setting. Mix until it all comes together; this won’t take long. Turn the mixer off and touch the dough. If you can leave an imprint with your finger without the dough sticking to it, it’s ready.
How to Make the Cookies with a Cookie Cutter
- Remove dough and roll into a ball. Split the dough in half to start rolling. Place the other half aside. Prepare a work surface with a light dusting of flour on the surface, your hands, and the rolling pin.
- Using floured hands, flatten out the dough a bit, then use a rolling pin to roll it and smooth it out to be THICK, about 3/8 inch. Use a measuring tape to ensure consistency.
- Lightly dust your chosen cookie cutters with flour. Press firmly into the dough, utilizing your space wisely.
- Place your cut dough onto your parchment paper-covered cookie sheets and bake in your preheated oven for 10-14 minutes, depending on the size of your cookies. Do not bake over 14 minutes. You want these to be thick and soft, and once cooled, they will be just that!
- After removing from the oven, let the cookies set on the cookie sheet for 2-4 minutes.
- Move them onto a cooling rack to cool completely.
Sugar Cookie Icing
- In a mixing bowl, using a mixer, combine powdered sugar and start with 1/4 cup milk. Mix until smooth. Add corn syrup and almond extract. Add more milk as needed to create a smooth mixture, one tablespoon at a time. Mix everything together until smooth, about 5 minutes.
How to Decorate Cookies
- To decorate cookies, you can use an outline icing and a flood icing. Your outline icing should be the consistency of toothpaste. Your flood icing should be the consistency of corn syrup and is what is used for most of the cookie. Add food coloring one drop at a time until the desired color is reached. Cookies do not have to have borders, and you may just opt to do flood icing if you wish.
- Pro tip: For easy loading, place the piping bag into a tall glass and pull the top down around the sides of the glass. This will hold the bag in place while you pour. Keep unused icing sealed until ready to use.
- Working with one cookie at a time, pipe an outline around the inner edge of the cookie. Let it sit for just a minute or two, then fill in the inner section with the same color. Immediately take a toothpick or icing needle and work the icing to fill in any exposed areas.
- For a completely smooth surface, don’t wait too long to fill in the outline. If the outline dries too much, you will see the distinction between the outline and inner area.
- Decorate with sprinkles while the icing is still wet.
- Allow the icing to dry completely before packing or adding additional decorations (about 6-8 hours).
- Store them on cookie sheets tented with foil to keep the cookie bottoms from drying out.
Notes
This icing will keep for several weeks on the countertop in a sealed container.
Practice piping on a sheet of parchment paper before you begin decorating cookies. This will give you a feel for how much pressure to use when squeezing out the icing, and it’s a good way to get used to holding the piping while drawing.
Keyword: christmas cookies, classic cookies, cookies, cut-out cookies, sugar cookie icing, sugar cookies
Recipe adapted from Foolproof No Chill No Spread Sugar Cookies


