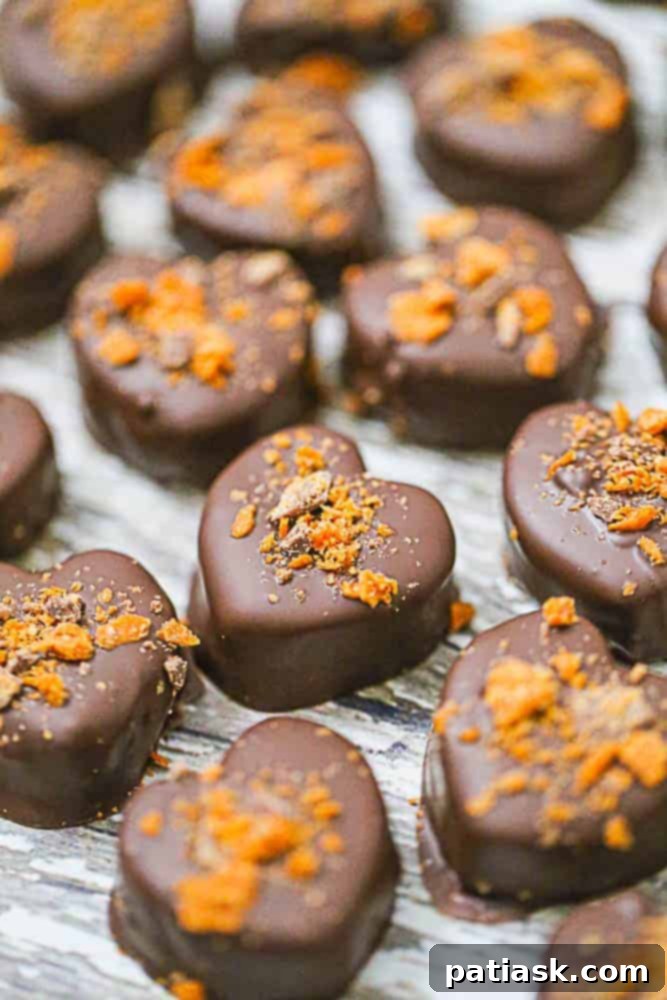
These exquisite, easy-to-make Butterfinger Truffles are designed to disappear almost as quickly as you make them! Indulge in the rich, creamy texture of these bite-sized peanut butter truffles, each infused with crunchy Butterfinger candy bits and enveloped in a luxurious chocolate coating. While perfect for any occasion, shaping them into hearts adds a charming touch, making them ideal for Valentine’s Day or other special celebrations.
Truffles are renowned for their simplicity and impressive presentation. Their convenient bite-sized nature makes them a beloved treat at parties and holiday gatherings, and they serve as an excellent homemade gift. If you have a sweet tooth, you’ll also adore our White Chocolate Truffles and this delightful Heart-Shaped Valentine’s Day Cake!

Why You’ll Fall in Love with These Butterfinger Truffles
There’s something uniquely captivating about a homemade truffle, and these Butterfinger Peanut Butter Truffles are no exception. They combine several irresistible elements into one perfect bite: the creamy richness of peanut butter, the distinctive crunch of Butterfinger candy, and the smooth indulgence of chocolate. This no-bake recipe means less time in the kitchen and more time enjoying these delightful confections. They are not only incredibly easy to prepare but also look sophisticated enough to impress at any event. Whether you’re a seasoned baker or a beginner, you’ll find joy in creating these fantastic treats that are guaranteed to be a crowd-pleaser.
The Allure of Butterfinger: A Flavor Sensation
What sets Butterfinger apart is its unique combination of crisp, flaky peanut butter core enrobed in chocolate. This beloved candy bar brings an unparalleled texture and flavor profile to our truffles. When chopped and incorporated into the creamy peanut butter dough, the Butterfinger bits retain their characteristic crunch, creating an exciting contrast that elevates these truffles from simple sweets to extraordinary confections. The interplay of sweet, salty, and nutty notes from the peanut butter and Butterfinger, balanced by the smooth chocolate coating, makes these truffles utterly addictive. It’s a nostalgic flavor that appeals to almost everyone, making these truffles a guaranteed hit for all ages.
More Truffle Ideas You’ll Swoon Over!
If you’re as passionate about truffles as we are, explore these other incredible recipes: Chocolate Maple Walnut Cream Truffles, Red Velvet Luv Truffles, Chocolate Espresso Truffles, 4th of July Oreo Truffles, No Bake Cookie Dough Cups, and Chocolate Coconut Truffles. Each offers a unique flavor experience that’s sure to tantalize your taste buds.

Creative Ways to Shape Your Butterfinger Truffles
While heart shapes add a special flair, these Butterfinger truffles are incredibly versatile when it comes to presentation. You have several fun options to choose from, depending on your occasion and preference:
- Cookie Cutters for Festive Shapes: For a delightful touch, especially for holidays like Valentine’s Day, use a heart-shaped cookie cutter. This method creates uniform, adorable truffles that are perfect for gifting or a themed party. Don’t limit yourself to hearts; any small cookie cutter can transform your truffles into stars, flowers, or even mini animals for children’s parties. The key is to roll the dough to an even thickness for consistent results.
- Classic Rolled Balls: If you prefer a more traditional truffle look or want to simplify the process, use a cookie scoop to portion the dough and then gently roll it into smooth balls. This is a quick and efficient way to create a batch of perfectly round truffles, ideal for larger gatherings or when you’re short on time. Once rolled, they’re ready for dipping in chocolate.
- Truffle Bars: For an easy-to-serve dessert, press the Butterfinger truffle dough evenly into a 9×9 inch baking dish. Once chilled and firm, melt your favorite chocolate and pour it over the top. Before the chocolate sets, sprinkle additional chopped Butterfinger pieces for extra crunch and visual appeal. Refrigerate until firm, then cut into neat squares or rectangles. These bars are fantastic for potlucks or when you need a dessert that can be portioned easily.
This versatile recipe is actually an adaptation of our beloved Home-Made Chocolate Peanut Butter Eggs, with the exciting addition of chopped Butterfinger candies to the mix. The result is pure deliciousness!

Essential Ingredients for Your Butterfinger Truffle Recipe
Crafting these delectable Butterfinger truffles requires a few simple, readily available ingredients that come together to create a symphony of flavors and textures. Each component plays a crucial role in achieving the perfect no-bake truffle consistency and taste:
- Creamy Peanut Butter: The star of our truffles! Opt for a smooth, creamy variety to ensure a velvety texture for the truffle base. Creamy peanut butter binds the ingredients and provides that classic, comforting flavor.
- Unsalted Butter: Adds richness and helps to create a pliable, workable dough that holds its shape beautifully.
- Light Brown Sugar: Contributes a subtle caramel note and helps to sweeten the peanut butter base, enhancing its depth of flavor. While the recipe specifies “light brown sugar,” you could use dark brown sugar for a richer, more molasses-like flavor, if desired. Find quality brown sugar for the best results.
- Powdered Sugar: Essential for achieving the right consistency for a no-bake truffle dough. It dissolves easily, ensuring a smooth mixture, and adds bulk without making the truffles grainy. Have extra on hand, as you may need to add more powdered sugar if your dough feels too sticky.
- Pinch or Two of Salt: A tiny amount of salt is a flavor enhancer, perfectly balancing the sweetness of the other ingredients and bringing out the nutty notes of the peanut butter.
- Milk Chocolate Chips: Provides a sweet, creamy chocolate coating. Milk chocolate is typically preferred for its accessibility and broad appeal, offering a classic flavor contrast to the peanut butter. You can use any brand of milk chocolate chips.
- Semisweet Chocolate Chips: A blend of milk and semisweet chocolate chips creates a more balanced chocolate flavor for the coating, preventing it from being overly sweet and adding a subtle depth.
- Vegetable Shortening: A secret weapon for a smooth, glossy, and easily dippable chocolate coating. It helps the chocolate melt smoothly and sets with a beautiful shine, preventing it from cracking.
- Butterfinger Bars, Chopped: The star inclusion! Finely chopping Butterfinger Bars ensures that every truffle bite delivers that signature crunch and flavor.
Crafting Heart-Shaped Butterfinger Truffles: A Step-by-Step Guide!
Follow these simple instructions to create your own batch of irresistible heart-shaped Butterfinger truffles. This no-bake recipe is straightforward and delivers delicious results every time.
- **Prepare Your Workspace:** Begin by lining a baking sheet with wax paper or parchment paper. This will prevent your truffles from sticking and make cleanup a breeze. Set this aside.
- **Melt the Base Ingredients:** In a medium saucepan, combine the creamy peanut butter, unsalted butter, light brown sugar, and a pinch or two of salt. Place the saucepan over medium heat and stir constantly until all ingredients are fully melted and smoothly combined. The mixture will begin to bubble gently; continue stirring to ensure even heating and prevent scorching. Once smooth, remove the saucepan from the heat.
- **Create the Truffle Dough:** Gradually add the powdered sugar to the warm peanut butter mixture, a little at a time. Stir continuously until the powdered sugar is completely incorporated and the mixture forms a thick, pliable dough, similar in consistency to cookie dough. Next, fold in approximately 1 and a half of your chopped Butterfinger bars. It’s perfectly fine if some of the candy melts slightly; this will only infuse more Butterfinger flavor throughout the truffle base. If the dough is too warm to handle comfortably, allow it to cool down to room temperature. For faster cooling, you can place it in the refrigerator for about 10-15 minutes until it’s firm enough to work with.
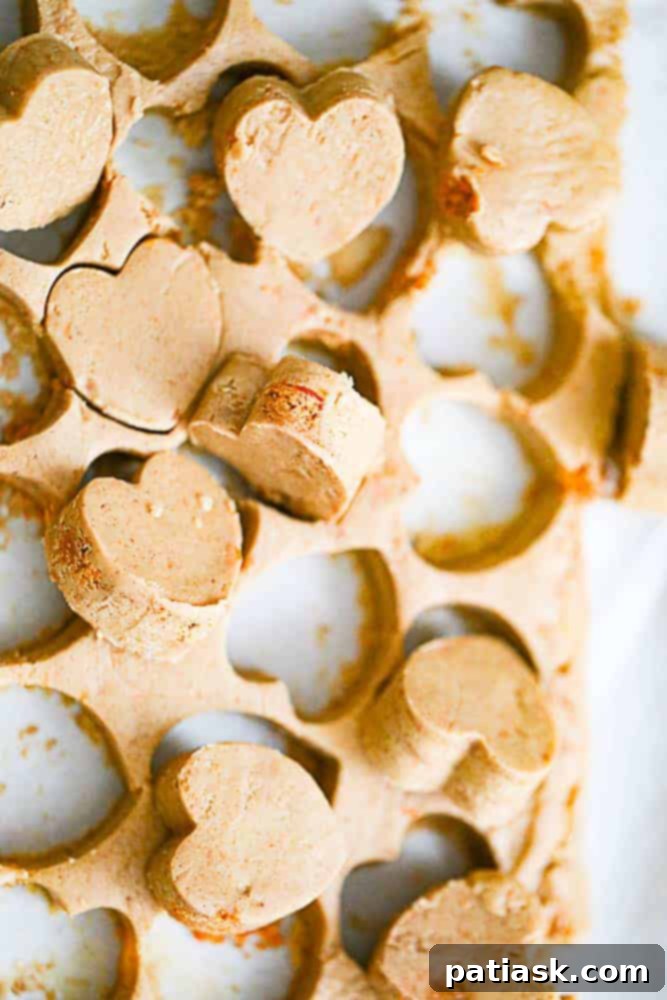
- **Shape Your Truffles:** Transfer the cooled truffle dough onto the parchment-lined baking sheet. Using a rolling pin, or simply your hands, roll or press the dough evenly to about 1/2 inch thickness. Now, take your chosen cookie cutter (preferably heart-shaped for this recipe) and cut out your truffle shapes. Carefully transfer each cut-out truffle back onto the baking sheet. Gather any leftover dough scraps, re-roll them, and cut out more shapes until all the dough is used.
- **Chill for Firmness:** Place the baking sheet with your shaped truffles into the refrigerator for approximately 20-30 minutes. This chilling period is crucial as it allows the truffles to firm up, making them easier to handle and dip in chocolate.
- **Prepare the Chocolate Coating:** While the truffles are chilling, prepare your chocolate coating. In a microwave-safe bowl, combine the milk chocolate chips, semi-sweet chocolate chips, and vegetable shortening. Microwave in 30-second intervals, stirring thoroughly after each interval, until the chocolate is completely melted and smooth. Be careful not to overheat the chocolate. Once melted, let it cool for about 5 minutes; this prevents it from being too hot and melting your truffles when dipping.
- **Dip and Decorate:** Once the truffles are firm and the chocolate is slightly cooled, it’s time to dip! Use a long-tined fork or a dipping tool to carefully submerge each truffle into the melted chocolate, ensuring it’s fully coated. Gently shake off any excess chocolate. Immediately place the dipped truffle back onto the wax paper-lined baking sheet. Before the chocolate sets, sprinkle the remaining chopped Butterfinger bits or crumbles on top of each truffle for an appealing finish and extra crunch.
- **Final Chill and Serve:** Return the chocolate-covered truffles to the refrigerator. Allow them to chill for another 10-15 minutes, or until the chocolate coating is completely set and firm.
Now, it’s time to DEVOUR your homemade Butterfinger Truffles! These treats are best enjoyed when stored in an airtight container in the refrigerator until ready to serve.
Tips for Perfect Butterfinger Truffles Every Time
Achieving the perfect truffle is easier than you think, especially with a few helpful tips:
- **Dough Consistency is Key:** If your peanut butter mixture is too sticky after adding the powdered sugar, add a little more powdered sugar, a tablespoon at a time, until it reaches a firm, non-sticky, yet pliable consistency. If it’s too dry and crumbly, add a tiny bit more peanut butter or melted butter.
- **Chill, Chill, Chill:** Don’t skip the chilling steps! This is vital for truffles to hold their shape and to prevent the chocolate coating from melting the truffle base. Firm truffles are much easier to dip.
- **Tempering Chocolate (Optional but Recommended):** For a professional-looking, glossy, and snappy chocolate coating, consider tempering your chocolate. While shortening helps, proper tempering ensures the best texture and prevents blooming (white streaks).
- **Double Dip for Extra Indulgence:** For a thicker chocolate coating, chill the truffles after the first dip until the chocolate is set, then dip them again.
- **Get Creative with Toppings:** While Butterfinger crumbles are fantastic, you can also experiment with other toppings like sprinkles, sea salt flakes, finely chopped nuts, or a drizzle of white chocolate for added visual appeal and flavor.
- **Storage Matters:** Always store your truffles in an airtight container in the refrigerator. This keeps them fresh, firm, and prevents the chocolate from becoming soft. They typically last for up to 1-2 weeks in the fridge.
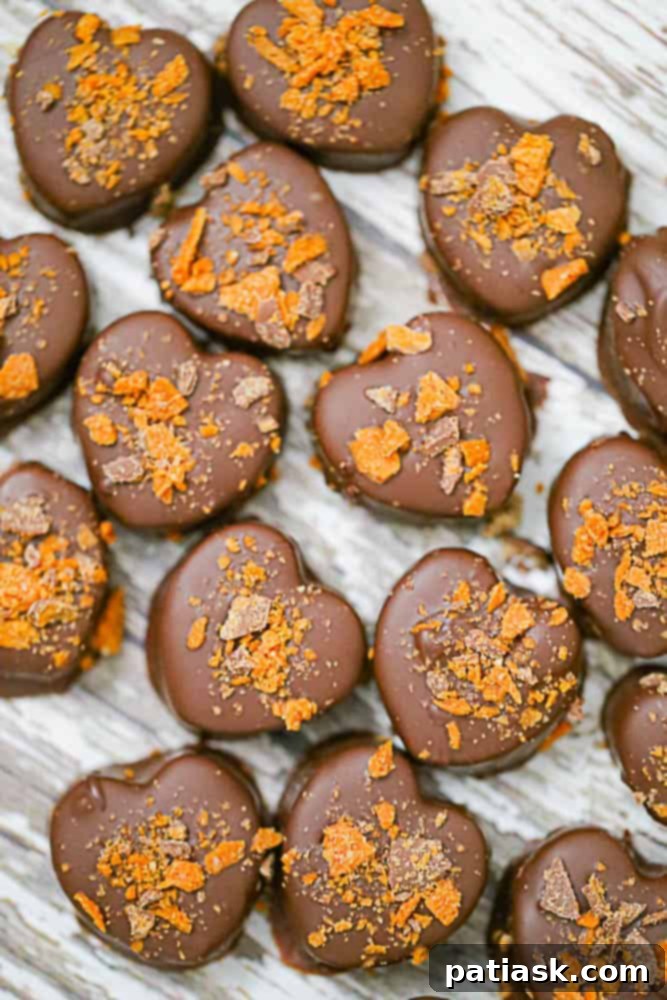
This peanut butter Butterfinger candy truffle recipe is a perfect fusion of flavors, designed to create a confectionary delight that’s both super peanut buttery and wonderfully crunchy. They are truly easy to make for a sweet treat that will quickly become a cherished family favorite. You simply won’t be able to resist the fun and deliciousness of this fantastic no-bake recipe!
Don’t forget to share your creations on Pinterest, Instagram, and Facebook!
Are You Here for More Delicious Treats?
- Butterfinger Snack Cake
- 16 Caramel Apple Recipes! We Got Ya Covered!
- Butterfinger Peanut Butter Fudge Dream Pie
- Butterfinger Caramel Cookie Bars
- Chocolate Heart Peanut Butter Cookies
- Butterfinger Rice Krispie Treats
- Easy Brownie Truffles
Butterfinger Truffles Recipe
These Butterfinger truffles will vanish before you know it! These delicious creamy, bite-sized confectionary peanut butter truffles are made with crunchy Butterfinger candy bits and dipped in a rich chocolate! Easy to make for a wonderful sweet treat that is sure to become a family favorite or a party showstopper.
Prep Time: 25 mins
Cook Time: 45 mins
Course: Dessert
Servings: 30 Servings
Ingredients
- 1 cup creamy peanut butter
- ¼ cup unsalted butter
- ¼ cup light brown sugar
- 1 ¾ cups powdered sugar (add more if needed)
- pinch or 2 of salt
- 1 ½ cups milk chocolate chips
- ½ cup semi-sweet chocolate chips
- 2 tablespoons vegetable shortening
- 2 Butterfinger Bars, chopped up
Instructions
- Line a baking sheet with wax paper or parchment paper and set aside.
- In a medium saucepan over medium heat, combine the peanut butter, butter, salt, and brown sugar and heat until melted, stirring constantly. The mixture will bubble, so make sure you keep stirring. Remove from the heat.
- Add the powdered sugar a little at a time, stirring until completely combined with the peanut butter mixture. The mixture should be thick like a cookie dough. Add 1 ½ of the chopped Butterfingers into the mixture and mix in. It’s ok if the candy melts a little. Once mixed in, let the mixture cool down if it’s too hot to handle by letting it come to room temperature or putting it in the refrigerator for about 10-15 minutes to speed up the process.
- Transfer the candy dough to a baking sheet covered in parchment paper. Roll the candy dough out on the parchment-lined baking sheet with a rolling pin or flatten it out with hands to ½ inch thick. Use a cookie cutter and make your shapes and place them back on the baking sheet. Once shapes are cut out, reroll the remaining dough and make more hearts.
- Transfer the baking sheet to the fridge for the candies to firm up, about 20-30 minutes.
- Once the hearts are set, melt the chocolate chips and shortening together in the microwave in 30-second increments, stirring after each increment, until completely melted. Leave to cool for 5 minutes.
- Use a long-tined fork to flip each heart when dipping it in melted chocolate to cover, then shake off excess chocolate and place on waxed paper. Add the remainder of the Butterfinger crumbles on top of each dipped heart.
- Return the chocolate-covered peanut butter hearts to the refrigerator to allow the chocolate to set, about 10-15 minutes.
- Store in the refrigerator in an airtight container until ready to serve.
Notes
You can also scoop the dough using a small cookie scoop or tablespoon and roll it into balls to coat instead of heart shapes.
Nutrition
Serving: 15g
Keywords
butterfinger, candy, confection, dessert, party treats, peanut butter, truffles
Tried This Recipe?
Let us know how it was by commenting below!
