Indulge in Homemade Luxury: The Ultimate Millionaire Bars Recipe
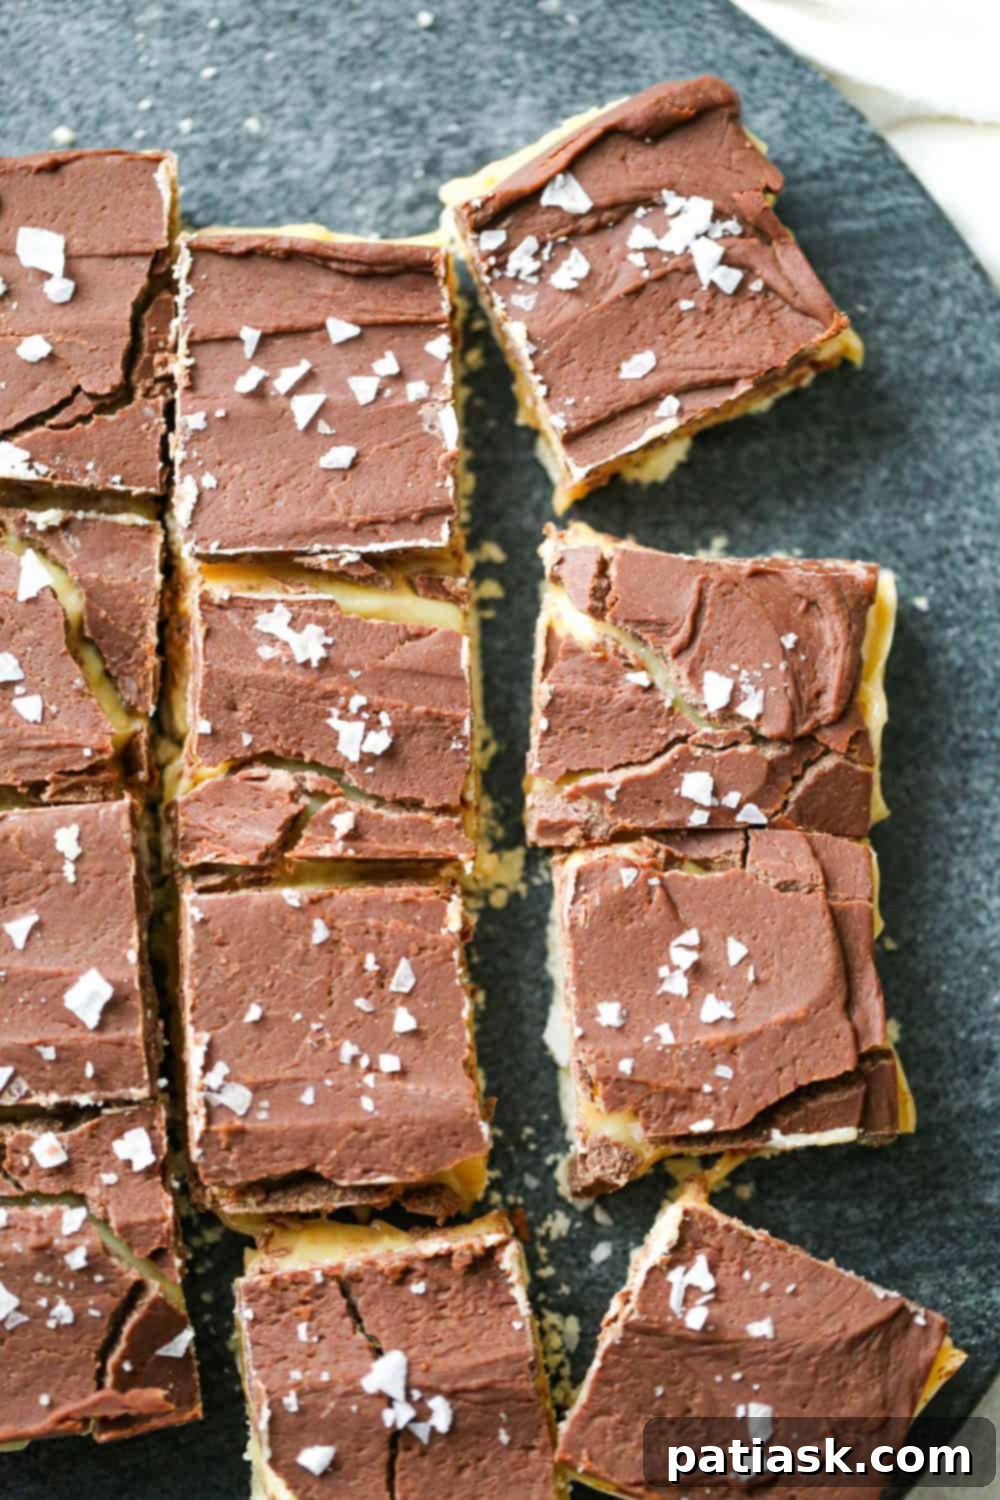
Prepare to be captivated by a dessert that truly lives up to its name. These aren’t just any bars; these are Millionaire Bars – a decadent trio of buttery shortbread, smooth, creamy caramel, and rich milk chocolate that layer together to create an utterly irresistible treat. Often hailed as a gourmet take on the classic Twix bar, our Millionaire Bars recipe promises a taste so exquisite, you’ll feel like a million bucks with every bite!
Whether you call them Millionaire’s Shortbread, Caramel Shortbread, or simply the best dessert bars you’ve ever tasted, this recipe is a fan favorite for a reason. Its rich, chewy texture and harmonious blend of flavors make it a showstopper for any occasion.

What are Millionaire Bars? A Symphony of Flavors
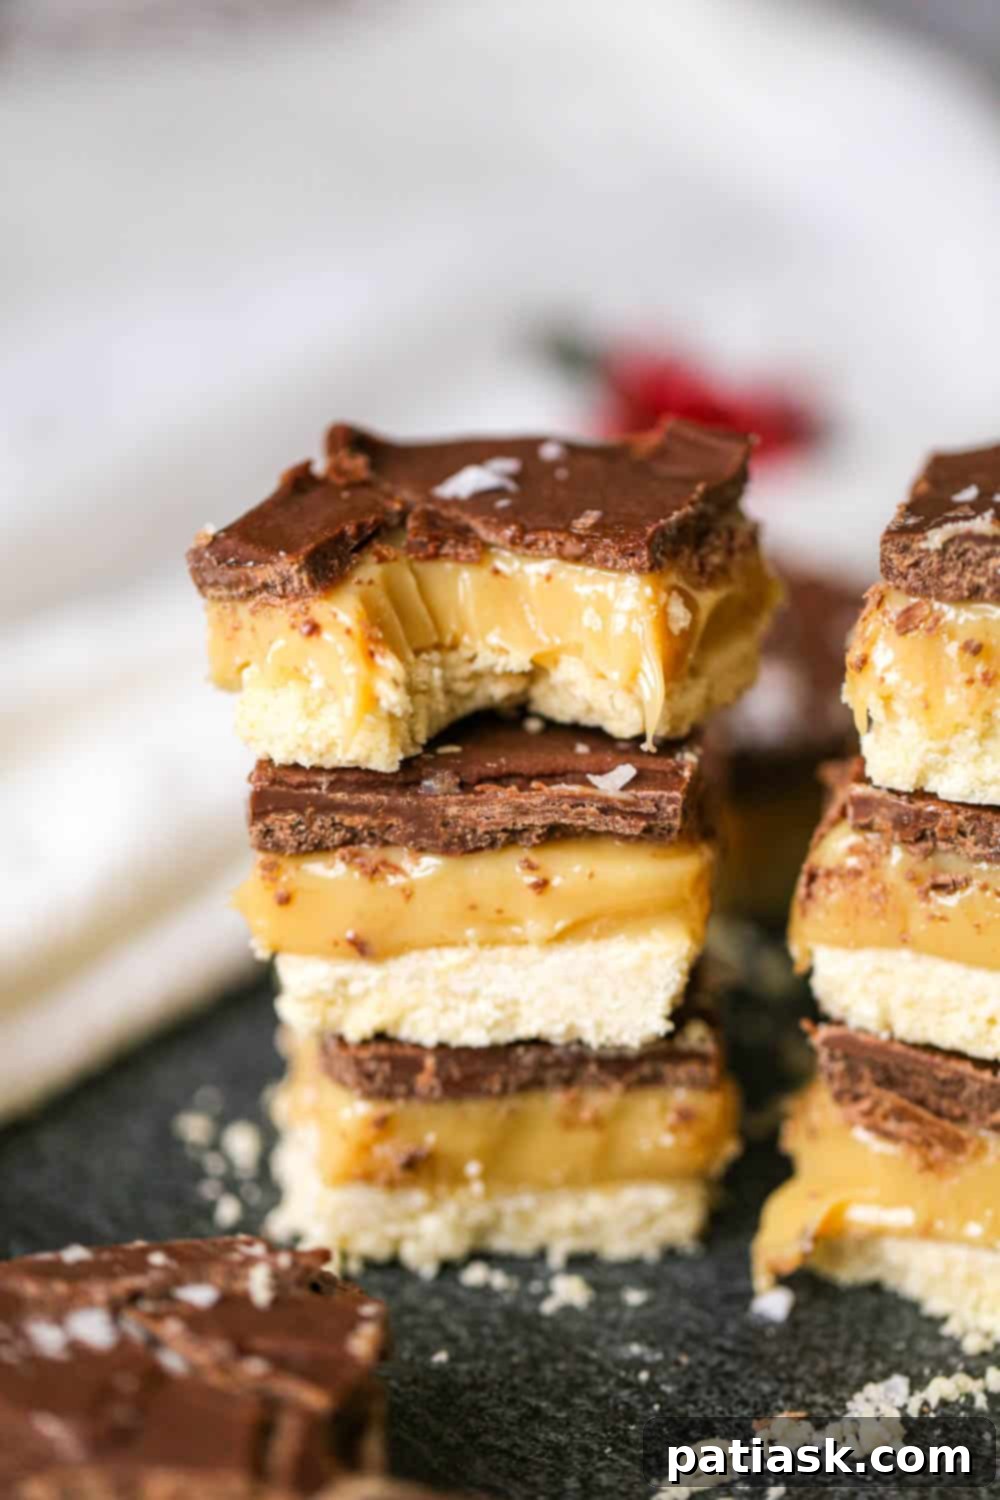
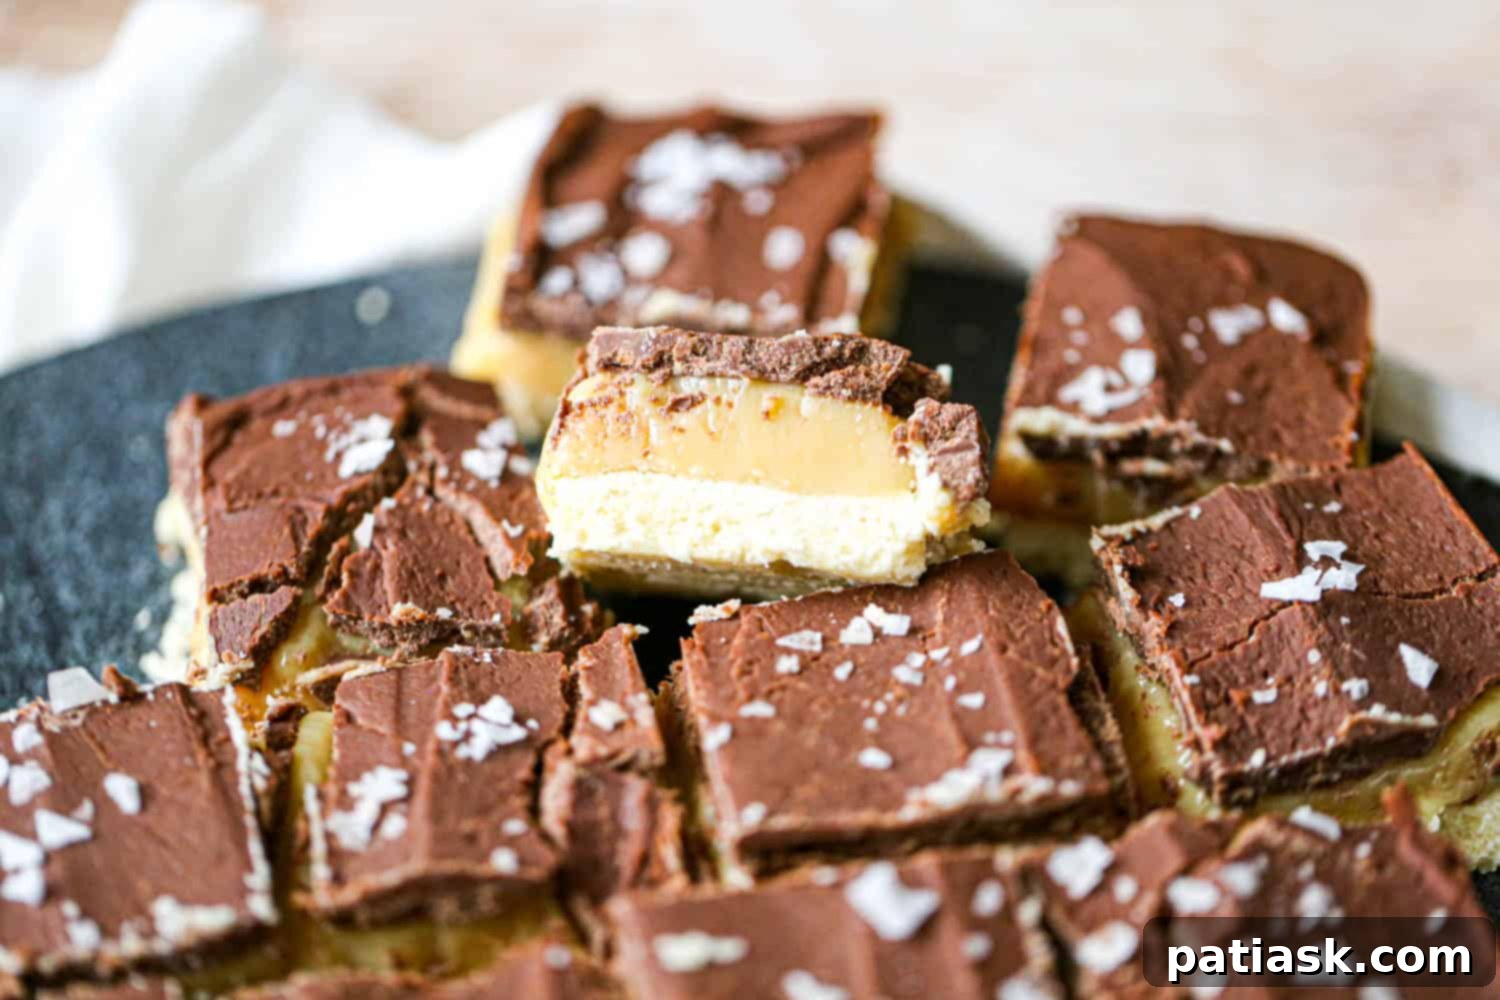
Millionaire Bars, also famously known as Millionaire’s Shortbread, are a classic confectionery delight originating from Scotland. They’re composed of three magnificent layers, each contributing its unique texture and taste to create a dessert that’s far greater than the sum of its parts:
- Buttery Shortbread Crust: The foundation of this luxurious treat is a tender, crumbly shortbread base. Made with simple ingredients like flour, butter, and sugar, this layer provides a delightful counterpoint to the sweetness of the layers above. Its crispness offers a satisfying bite that sets the stage for the indulgence to come.
- Rich Caramel Layer: Nestled atop the shortbread is a thick, gooey layer of homemade caramel. This isn’t just any caramel; it’s a slow-cooked, golden masterpiece, made from sweetened condensed milk and butter. Its deep, buttery flavor and wonderfully chewy consistency are what truly earn these bars their “millionaire” status.
- Decadent Chocolate Topping: The grand finale is a generous coating of smooth, melted milk chocolate. While the original recipe often calls for milk chocolate, many variations exist, allowing you to customize the richness and sweetness to your preference. This final layer hardens to provide a satisfying snap, encasing the soft caramel and shortbread beneath.
The beauty of Millionaire Bars lies not only in their exquisite taste but also in the delightful contrast of textures: the crisp shortbread, the chewy caramel, and the firm chocolate. This intricate combination makes them incredibly addictive and a perennial favorite for dessert lovers.
Crafting the Perfect Millionaire Bars: Ingredients You’ll Need
Creating these heavenly Millionaire Bars doesn’t require a pantry full of exotic ingredients. In fact, you’ll likely find most of what you need already on hand. However, using good quality ingredients can elevate your bars from great to truly extraordinary. Here’s a breakdown of what you’ll need for each luscious layer:
Shortbread Crust Ingredients
- All-Purpose Flour: The backbone of our buttery crust. Ensure it’s fresh for the best texture.
- Unsalted Butter: High-quality butter is key for a rich, flavorful shortbread. Unsalted allows you to control the overall saltiness.
- Granulated Sugar: Provides sweetness and contributes to the crust’s tender crumb.
- Salt: A pinch of salt perfectly balances the sweetness and enhances the butter flavor.
Caramel Layer Ingredients
- Sweetened Condensed Milk: This is the star of the caramel layer. Brands like Eagle Brand are popular for their consistent quality. Fat-free versions can also be used if preferred, though full-fat often yields a richer caramel.
- Butter: Adds richness and helps achieve that perfectly smooth, chewy consistency.
Chocolate Ganache Layer Ingredients
- Good Quality Milk Chocolate Chips or Chopped Pieces: The better the chocolate, the better your ganache. Milk chocolate provides a classic, sweet topping, but feel free to experiment with dark or semi-sweet for a less intense sweetness.
- Heavy Cream: Essential for creating a silky, pourable ganache that sets beautifully.
- Optional: Sea Salt Sprinkles: A fantastic addition to cut through the sweetness and add a sophisticated touch.
Gathering these simple yet essential ingredients is the first step towards creating a dessert that will impress everyone.

How to Make Millionaire Bars: A Step-by-Step Guide
Making Millionaire Bars is a rewarding baking project that involves three distinct stages, each requiring a little patience for setting. This layered approach ensures each component shines in its own right.
Prep Time: 25 mins | Cook Time: 25 mins | Servings: 16 Servings
Course: Dessert | Keyword: bars, caramel, chocolate, holiday baking, layered desserts, shortbread
Summary: Who could resist this trio of buttery shortbread, smooth, creamy caramel and decadent, rich milk chocolate? Life is good, right?
Author: Kim Lange
Print Recipe
Pin Recipe
Instructions
Preparation for Baking
Preheat your oven to 350°F (175°C). Line an 8-inch square baking pan with aluminum foil or parchment paper, ensuring there’s an overhang on the sides. This overhang will serve as handles later, making it easy to lift the entire slab of bars out of the pan. Lightly spray the foil or parchment with nonstick cooking spray to prevent sticking.
Shortbread Crust
- In a large mixing bowl, using an electric mixer or stand mixer, cream together the softened unsalted butter and granulated sugar until the mixture is light, fluffy, and pale in color. This process incorporates air, contributing to a tender shortbread.
- Gradually add the all-purpose flour and salt to the creamed butter and sugar. Mix on low speed until the dough just comes together and forms a cohesive ball. Be careful not to overmix, as this can result in a tough crust.
- Press the shortbread dough evenly into the prepared 8-inch square pan. Use your fingers or the back of a spoon to create a smooth, compact base. With a fork, pierce the dough all over. This prevents the shortbread from puffing up too much during baking, ensuring a flat surface for your caramel.
- Bake for 25-30 minutes, or until the edges are lightly golden brown. The center should still be relatively pale but firm to the touch. Remove from the oven and set aside on a wire rack to cool completely. It’s crucial for the shortbread to be fully cooled before adding the next layer to prevent the caramel from melting or separating.
Caramel Layer
- In a heavy-bottomed saucepan, combine the sweetened condensed milk and butter. Using a heavy-bottomed pan is important as it distributes heat more evenly, preventing the caramel from scorching.
- Place the saucepan over medium-low heat. Whisk the mixture constantly as it comes to a gentle simmer. Continuous whisking is key to prevent sticking and burning, especially at the bottom of the pan.
- Continue to simmer over low heat for approximately 15-20 minutes, whisking without interruption. The mixture will gradually thicken and transform into a beautiful light amber color. If you notice any burning or darkening too quickly, reduce the heat immediately. A good caramel consistency will be thick enough to coat the back of a spoon.
- Once the caramel has reached the desired thickness and color, immediately pour it over the cooled shortbread crust in the pan. Spread it evenly using a spatula. Allow the caramel layer to cool completely at room temperature for about 2-3 hours. This setting time is crucial for the caramel to firm up enough to support the chocolate layer and provide that signature chewy texture.
Chocolate Ganache Layer
- Place the good quality milk chocolate chips (or chopped chocolate) and heavy cream in a microwave-safe bowl.
- Microwave in 30-second intervals, stirring thoroughly after each interval, until the chocolate is completely melted and the mixture is smooth and glossy. Alternatively, you can melt the chocolate and cream together in a double boiler over simmering water.
- Carefully pour and spread the melted chocolate ganache evenly over the cooled and set caramel layer. Use an offset spatula for a perfectly smooth finish.
- If desired, immediately sprinkle with sea salt flakes for a sophisticated sweet and salty contrast.
- Refrigerate the bars for at least 1 hour, or until the chocolate layer is completely set and firm to the touch. This step is vital for clean cuts.
- Once chilled, use the foil overhang to gently lift the entire slab of Millionaire Bars out of the pan and transfer it to a cutting board.
- Using a sharp knife, cut the bars into small squares. For the cleanest cuts, you can dip your knife in hot water and wipe it clean between each cut. Store any leftover bars in an airtight container in the refrigerator for up to a week, or at room temperature for up to 5 days, though refrigeration helps maintain their shape and freshness.
Notes
Feel free to experiment with different chocolate varieties for your topping! While milk chocolate is traditional, dark chocolate offers a richer, less sweet profile, and white chocolate can add a unique creamy twist. Whatever tickles your fancy!
Tips for Millionaire Bars Success
- Quality Ingredients Matter: Especially for the butter and chocolate. Higher quality ingredients will significantly impact the final flavor and texture.
- Don’t Rush the Cooling: Allowing each layer to cool and set completely is the most crucial step for perfectly defined layers and clean cuts. Patience is a virtue in Millionaire Bar making!
- Constant Whisking for Caramel: To prevent the caramel from burning and sticking, stir it constantly, especially when it’s simmering.
- Even Shortbread Base: Press the shortbread dough firmly and evenly into the pan to ensure uniform baking and a stable foundation for the other layers.
- Sharp Knife for Cutting: For neat squares, use a sharp, warm knife. Run it under hot water and wipe it dry before each cut.
Variations to Customize Your Millionaire Bars
While the classic Millionaire Bar is perfect on its own, there are many ways to customize this recipe to suit your taste or occasion:
- Chocolate Variations: Swap milk chocolate for dark chocolate (60-70% cacao) for a more intense, less sweet flavor, or use white chocolate for a creamier, milder topping. You could even swirl two types of chocolate together.
- Nutty Crunch: Sprinkle finely chopped nuts (pecans, walnuts, almonds) over the caramel before adding the chocolate, or on top of the chocolate before it sets, for an added layer of texture and flavor.
- Flavored Caramel: A pinch of sea salt in the caramel itself, or a splash of vanilla extract, can enhance its depth. Consider a hint of espresso powder for a mocha-caramel twist.
- Festive Toppings: For holidays, consider adding festive sprinkles, crushed candy canes (for Christmas), or a drizzle of contrasting colored chocolate.
- Different Spices: A tiny pinch of cinnamon or nutmeg in the shortbread can add a warm, comforting note.
These variations allow you to put your own spin on this beloved dessert, making it uniquely yours!
Serving and Storing Your Millionaire Bars
These luxurious bars are perfect for any occasion – from casual gatherings to elegant holiday festivities. They make wonderful gifts, wrapped in pretty boxes or cellophane bags, and are always a hit at potlucks and bake sales.
- Serving: Allow the bars to come to room temperature for about 15-20 minutes before serving for the best texture, allowing the caramel to soften slightly.
- Storage: Store Millionaire Bars in an airtight container. They will keep well in the refrigerator for up to a week. For longer storage, you can freeze individual bars wrapped tightly in plastic wrap for up to 2-3 months. Thaw in the refrigerator overnight or at room temperature for an hour before enjoying.
Frequently Asked Questions about Millionaire Bars
Why are my Millionaire Bars gooey/not setting?
The most common reason for a caramel layer that doesn’t set is insufficient cooking time. Ensure you’re whisking constantly and cooking the caramel until it visibly thickens and turns a rich amber color. Also, make sure you allow adequate cooling time at room temperature before adding the chocolate layer.
Can I use store-bought caramel?
While homemade caramel offers superior flavor and texture, you can use a high-quality store-bought caramel sauce, preferably one labeled “thick” or “for baking,” as a shortcut. Heat it slightly to make it pourable before spreading over the shortbread.
How do I get clean cuts?
The key to clean cuts is patience and a sharp, warm knife. Ensure the bars are fully chilled in the refrigerator, then use a knife dipped in hot water and wiped dry before each slice. This prevents the chocolate from cracking and the caramel from sticking to the blade.
Can I make these ahead of time?
Absolutely! Millionaire Bars are an excellent make-ahead dessert. They keep well in the refrigerator for several days, making them perfect for parties or holiday baking when you need to prepare things in advance.
What if my chocolate layer cracks?
Cracking can occur if the chocolate ganache is spread too thickly or if the bars are chilled too rapidly. Try to achieve an even, moderate thickness for the chocolate layer, and don’t place them directly into a very cold freezer immediately after spreading the chocolate. A gradual chill in the fridge is best.
You now have all the secrets to treat your friends and family to these delicious and unique Millionaire Bars. With the right ingredients, our simple tips, and a little patience, you can whip up these amazing bars in no time. So break out the mixing bowl and start making these show-stopping treats today!
Craving More Delicious Recipes? Check These Out!
- Super Easy Gluten Free Sugar Cookie Bars (Sugar-free)
- Peppermint Sugar Cookie Bars
- Christmas Cookie Bars
- Healthy Oatmeal Cups
- Death By Chocolate Bars
- Oatmeal Butterscotch & Chocolate Chip Cookie Bars
- Home-made Snickerdoodle Cookie Bars!
- Coconut Flour Chocolate Brownies
