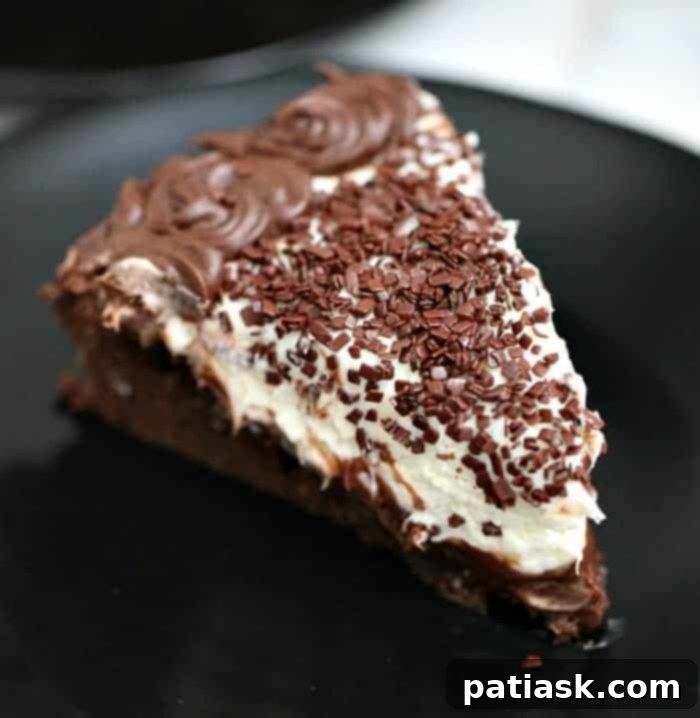
Awesome Chocolate Brownie Cheesecake Dessert: The Ultimate Indulgence
Prepare yourself for a truly irresistible treat: the Awesome Chocolate Brownie Cheesecake Dessert. This culinary masterpiece combines the best of two beloved desserts into one unforgettable experience. Imagine sinking your teeth into layers of rich, fudgy brownie, decadent chocolate fudge frosting, and a luxuriously creamy cheesecake. It’s a symphony of textures and flavors that promises to satisfy even the most intense chocolate cravings.
Why This Dessert Is Unforgettable
In a world of delicious desserts, this Chocolate Brownie Cheesecake stands out. It’s not just a cake; it’s an experience. Each bite delivers a harmonious blend of the deep, intense chocolate of a perfectly baked brownie with the light, tangy sweetness of a classic cheesecake. The addition of a smooth chocolate fudge frosting bridges these two worlds, creating a moist, rich, and utterly luxurious dessert that is both familiar and exciting. It’s the ideal choice for chocolate lovers who crave complexity and indulgence without having to choose between their favorite treats.
Essential Ingredients for Perfection
To create this magnificent dessert, you’ll need a few key components. The foundation is a rich brownie base, which can be made from scratch using high-quality unsalted butter, granulated sugar, pure vanilla extract, large eggs, all-purpose flour, natural unsweetened cocoa powder, baking powder, and a pinch of salt. For the creamy cheesecake layer, you’ll need room temperature cream cheese, sugar, vanilla extract, cold whipping cream, and powdered sugar. Finally, two tubs of your favorite rich and creamy chocolate frosting will complete the chocolatey layers and add the perfect finishing touch. Quality ingredients truly make a difference in achieving that ultimate decadent flavor.
Related Brownie Delights You’ll Adore
If you’re a devoted fan of brownies and seeking more variations of this classic treat, you’ve come to the right place. Our collection includes a range of tempting recipes that showcase the versatility and irresistible charm of brownies. Beyond this incredible brownie cheesecake, some of our other cherished brownie favorites feature these must-try recipes:
- Fudgy Chocolate Chunk Brownies: For those who love extra gooeyness and generous chunks of chocolate.
- Super Easy Homemade Brownies: A go-to recipe when you need a quick yet delicious chocolate fix.
- OMG! Heavenly Cherry Cheesecake Swirl Brownies: A delightful blend of fruit and creaminess swirled into fudgy brownies.
- Ultimate Gooey Brownies: The epitome of a melt-in-your-mouth brownie experience.
- Chocolate Chip Cookie Dough Buttercream Brownies: A creative combination of two beloved desserts in one bar.
- Brown Sugar Brownie Bars: A unique twist offering a caramel-like depth of flavor.
- And this truly decadent Chocolate Covered Strawberry Brownie Trifle Delight: An elegant and impressive dessert for special occasions.
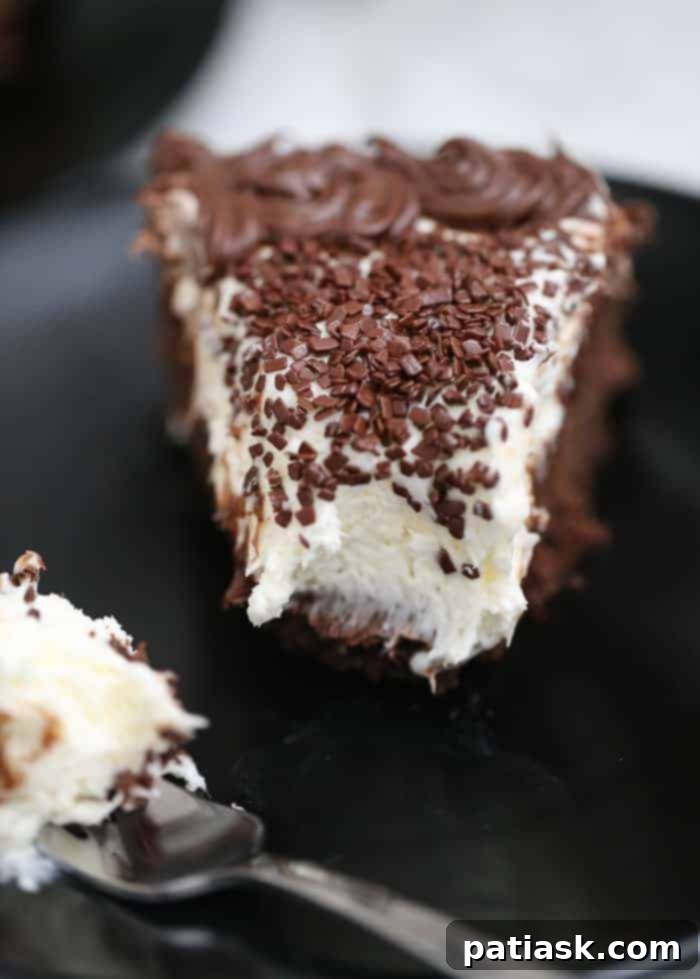
Master the Layers: How to Make Chocolate Brownie Cheesecake Dessert
While this sensational dessert may appear elaborate, crafting it is surprisingly manageable, especially with our clear, step-by-step instructions. We believe that delicious recipes should be accessible to everyone, and this Chocolate Brownie Cheesecake is no exception. It does involve a few stages, but each one is straightforward, leading you to a stunning and incredibly tasty result. With a little preparation, you’ll be creating a dessert that looks and tastes like it came from a gourmet bakery.
The Fudgy Brownie Base
The journey to our incredible cheesecake begins with the brownie layer. This is the only baked component, ensuring a perfectly moist and fudgy foundation. You have the option to make brownies from scratch using our recipe or opt for a convenient boxed brownie mix, preparing it according to package directions. For optimal results, bake your chosen brownie batter in an 8-inch springform pan, making sure the bottom is lined with parchment paper and the sides are lightly greased. This preparation step is crucial for easy removal of your finished dessert. Once baked, let the brownie cool completely. This cooling period is vital to prevent the subsequent layers from melting or becoming soggy. Once cool, carefully loosen the brownie from the springform pan by releasing the latch, but keep it in the pan for the next layers. If you prefer a slightly thinner cheesecake, a 9-inch springform pan can also be used, adjusting the baking time slightly.
Layering on the Decadent Chocolate Frosting
With your brownie base cooled and ready, it’s time for the first layer of chocolatey delight: the fudge frosting. Spread a generous, thick layer of your favorite chocolate frosting evenly over the entire surface of the brownie. This not only adds an extra dimension of rich chocolate flavor but also acts as a delicious barrier for the creamy cheesecake. The recipe calls for two tubs of rich and creamy chocolate frosting, ensuring you have enough for this middle layer and for decorating the sides and top of the finished cake. For a touch of elegance or fun, you can use a pastry bag with your desired tip to create decorative swirls or a neat border. If piping isn’t your style, simply use an offset spatula to spread the frosting smoothly. Once frosted, place the brownie base in the fridge while you prepare the cheesecake filling, allowing the frosting to firm up slightly.
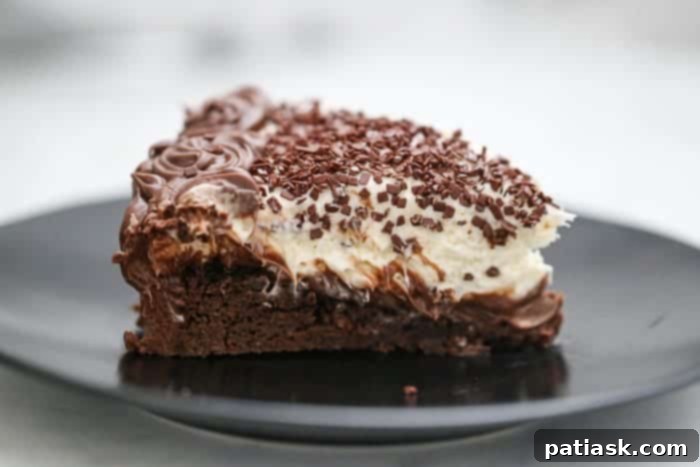
Crafting the Creamy No-Bake Cheesecake
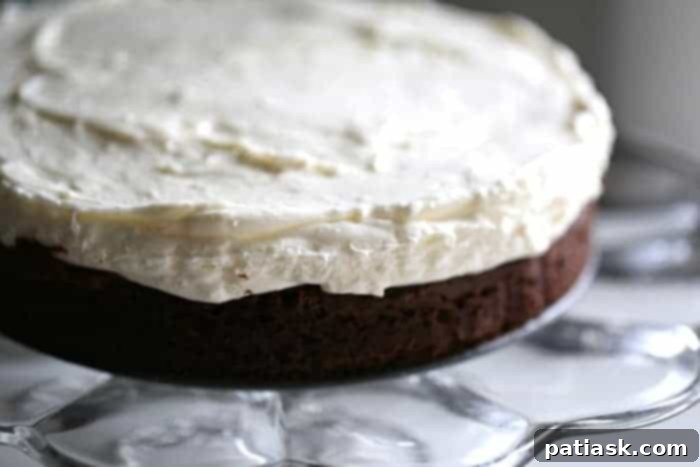
The beauty of this dessert lies in its no-bake cheesecake layer, which is both simple to prepare and wonderfully luxurious. In a large mixing bowl, beat room temperature cream cheese with sugar until the mixture is beautifully smooth and lump-free. Stir in the vanilla extract for an added hint of warmth. In a separate bowl, whip cold heavy whipping cream with powdered sugar until firm, stiff peaks form. This step is crucial for the cheesecake’s airy and stable texture. Gently fold the whipped cream into the cream cheese mixture in stages, ensuring everything is well combined without deflating the cream. This creates a light yet rich and creamy filling that perfectly complements the fudgy brownie. Once prepared, retrieve your frosted brownie from the fridge, ensuring it’s still in the springform pan. Spoon the cheesecake mixture evenly over the chocolate frosting layer, carefully spreading it to the edges. Return the entire springform pan to the refrigerator for at least 5 hours, or ideally overnight. Proper chilling time is essential for the cheesecake to set firmly, making it easy to slice and serve.
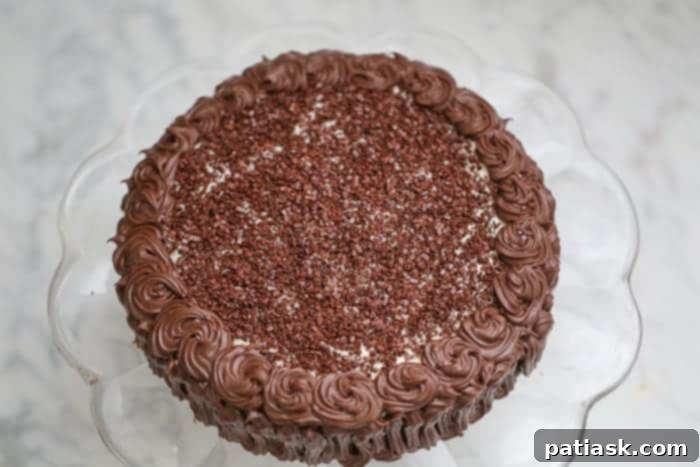
The Grand Finale: Decorating Your Cheesecake Brownie
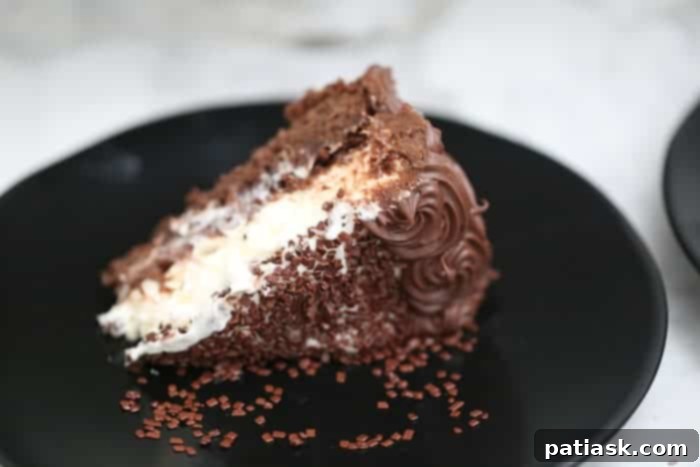
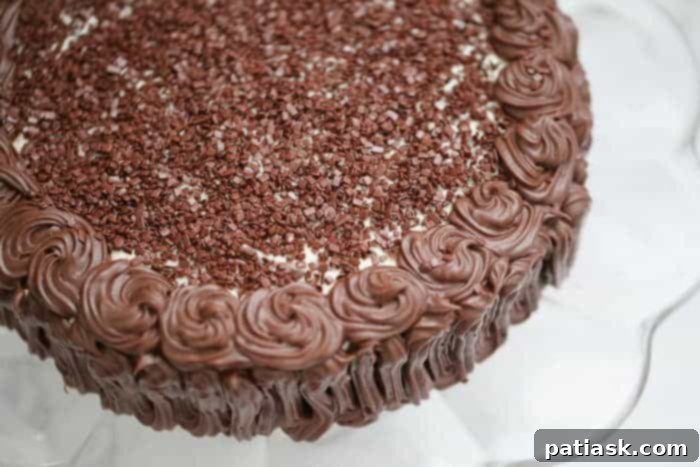
Once your cheesecake has thoroughly chilled and set, it’s time for the final touches. Carefully remove the dessert from the springform pan. To prevent it from sliding on your serving plate, place a small dab of frosting or whipped cream on the plate before centering the cheesecake. Now, for the final frosting layer! Using the remaining chocolate frosting, unleash your creativity. You can pipe a decorative border along the top edge, create elegant zig-zag patterns up the sides, or simply spread it on for a rustic look. This step allows for personalization. Consider adding sprinkles for a festive look, chopped nuts for extra texture, fresh fruit, chocolate shavings, or even more frosting swirls for an extra indulgent presentation. If you prefer a simpler approach, you can skip the full frosting and instead drizzle the top with warm fudge sauce and a dollop of whipped cream just before serving. Return the finished cake to the fridge for about 30 minutes to allow the frosting to set, then serve when you’re ready to impress!
Pro Tips for a Perfect Brownie Cheesecake
Achieving a truly exceptional Chocolate Brownie Cheesecake is within reach with a few expert tips:
- Make-Ahead Magic: This dessert is an entertainer’s dream! It can be fully assembled a day or two in advance and stored in the refrigerator. In fact, the flavors often meld and deepen over time, resulting in an even more delicious treat. This makes it perfect for dinner parties or holiday gatherings, allowing you to focus on your guests.
- Shortcut Savvy: Don’t feel pressured to make everything from scratch. Using a high-quality boxed brownie mix is a fantastic shortcut that doesn’t compromise on flavor. For the cheesecake filling, you can substitute whipping cream and powdered sugar with 1 1/2 cups of Cool Whip (thawed), simply folding it into the cream cheese mixture for a quick and easy no-fuss option.
- Ingredient Quality Matters: While shortcuts are great, don’t skimp on the quality of your core ingredients. Good cream cheese, rich cocoa powder, and delicious chocolate frosting will elevate the overall taste of your dessert.
- Chilling is Key: Patience is a virtue, especially with cheesecake. Allowing ample time for the cheesecake layer to set in the refrigerator (at least 5 hours, preferably overnight) is crucial for clean slices and a stable structure.
- Room Temperature Cream Cheese: For the smoothest, lump-free cheesecake filling, ensure your cream cheese is at room temperature before beating. This helps it incorporate easily with the sugar and other ingredients.
Variations and Customizations
One of the best aspects of this chocolate brownie cheesecake is its adaptability. Feel free to make it your own! For an extra burst of flavor, consider adding a layer of raspberry preserves or a caramel drizzle between the brownie and cheesecake layers. A hint of espresso powder in the brownie batter or frosting can deepen the chocolate flavor. You could also experiment with different chocolate types for the frosting—perhaps a dark chocolate ganache for a more intense experience, or a milk chocolate frosting for extra sweetness. Top with fresh berries for a touch of tartness, or crushed cookies for added crunch. The possibilities are endless for making this amazing dessert uniquely yours.
Serving Suggestions
This dessert is substantial and rich, making it perfect for serving after a meal or as the star of a celebratory spread. Serve individual slices as is, or with a scoop of vanilla bean ice cream for an added layer of indulgence. A dollop of fresh whipped cream and a sprinkle of chocolate shavings or cocoa powder can elevate the presentation further. It’s also a fantastic addition to dessert buffets, sure to be the first item to disappear!
The Ultimate Chocolate Indulgence
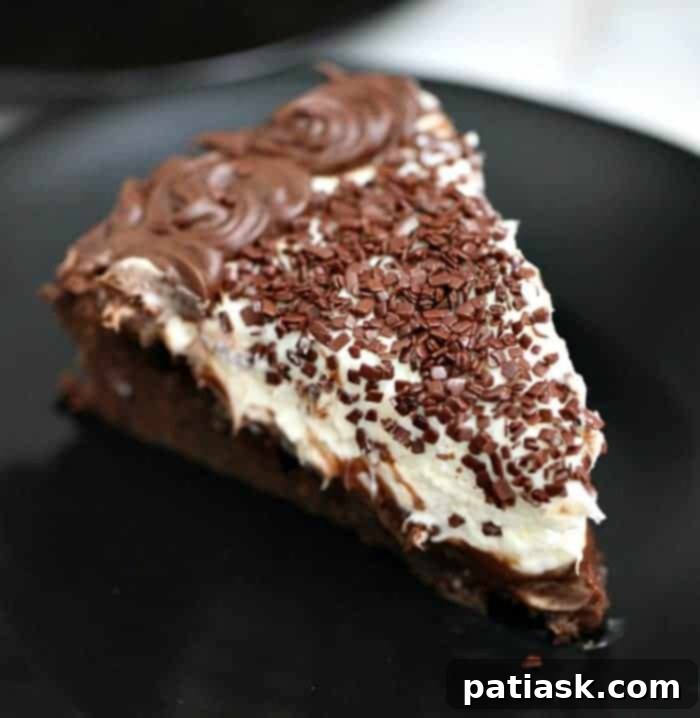
These heavenly chocolate brownie cheesecake layers are designed to tantalize your taste buds and leave you utterly satisfied. It’s truly no wonder this dessert has become a beloved favorite for so many. The perfect marriage of fudgy brownies and creamy, no-bake cheesecake, generously topped with chocolate fudge, creates a dessert that’s not just eaten but savored. Get ready to impress your family and friends with this show-stopping, drool-worthy creation!
More Irresistible Desserts!
If you’ve enjoyed this delightful creation, be sure to explore more of our fantastic dessert recipes:
- Rainbow Sprinkle Cake
- Perfect Brownies
- Brookie Bars
- 4 Ingredient Oreo Dessert
- Reese’s S’mores Graham Cracker Candy
Awesome Chocolate Brownie Cheesecake Dessert Recipe
This decadent dessert features tempting layers of fudgy brownie, rich chocolate fudge frosting, and creamy no-bake cheesecake. It’s a combination that’s truly swoon-worthy and sure to become a favorite!
Author: Kim Lange
Course: Dessert
Cuisine: American
Servings: 8 Servings
Keywords: brownie pie, brownies, cheesecake, dessert
Ingredients
Brownies – See notes for boxed brownie option
- 10 tablespoons unsalted butter, melted
- ⅔ cup sugar
- 1 teaspoon vanilla extract
- 2 large eggs, room temperature
- ⅔ cup all-purpose flour
- 5 tablespoons natural unsweetened cocoa
- 1 teaspoon baking powder
- ¼ tsp salt
Chocolate Frosting
- 2 tubs chocolate frosting, room temperature (or use 2 Pillsbury Chocolate Frosting pastry bags)
Cream Cheese Filling – See notes for Cool Whip option
- 16 oz cream cheese, room temperature
- ½ cup sugar
- ½ teaspoon vanilla extract
- ¾ cup whipping cream, cold
- ⅔ cup powdered sugar
- Additional Toppings: Sprinkles, nuts, fruit, curds, Oreos, etc., or more frosting!
Instructions
- Preheat the oven to 350 degrees F (175 C). Line the bottom of an 8-inch springform pan with parchment paper and lightly grease the sides of the pan. (You can also use a 9-inch springform pan, but the layers will not be as thick.)
Brownies – See notes for boxed brownie option
- Combine the melted butter, sugar, and vanilla extract in a medium bowl. Add in the eggs and mix until well combined. In a separate medium bowl, combine the flour, cocoa powder, baking powder, and salt. Slowly add the dry flour mixture to the egg mixture and mix until just combined. Pour the batter into the prepared pan and spread it out evenly.
- Bake the brownie for 25-30 minutes if you’re using an 8-inch pan, or 22-26 minutes if using a 9-inch pan, or until a toothpick inserted into the center comes out with a few moist crumbs.
- Remove the brownie from the oven and allow it to cool for 3 to 4 minutes. Then, remove the outer ring of the springform pan and transfer the brownie to a cooling rack to finish cooling completely.
Chocolate Frosting Middle Layer
- Once the brownie is completely cooled, place it back into the springform pan if desired for assembly. Frost the top of the brownie with a thick layer of chocolate frosting. Place the frosted brownie in the fridge to chill while you prepare the cream cheese filling.
Cream Cheese Filling – See notes for Cool Whip option
- In a large mixing bowl, beat the room temperature cream cheese and sugar until well combined and smooth. Add the vanilla extract and mix until smooth. Set this mixture aside.
- In a separate mixing bowl, using a whisk attachment or electric mixer, whip the cold heavy whipping cream and powdered sugar until stiff peaks form.
- Gently fold one-third of the whipped cream into the cream cheese mixture until just combined. Gently fold in the remaining whipped cream until the mixture is uniform and smooth.
- If you removed the brownie from the pan, place it back into the 8-inch springform pan. For easy removal later, you can line the sides of the pan with a strip of parchment paper before adding the cheesecake layer. Spread the creamy cheesecake mixture evenly over the frosted brownie.
- Refrigerate the cheesecake until firm, about 5 hours or preferably overnight. Once it is firm, carefully remove it from the springform pan and set it on a serving plate. You can dab a small amount of frosting or whipped cream underneath to keep it from sliding.
Chocolate Frosting Sides & Top
- Place the remaining chocolate frosting in a pastry bag with your desired tip. Pipe frosting along the sides of the cake and create a decorative border on top as desired. Get creative with additional toppings like sprinkles, chopped nuts, fresh fruit, or chocolate curls to suit your special occasion.
- Place the decorated cake back in the fridge for about 30 minutes to allow the frosting to firm up, then serve when ready.
- Alternatively, if you prefer not to frost the entire cake, you can simply drizzle slices with warm hot fudge sauce and maybe add a dollop of whipped cream before serving.
Notes
- Another option: If you don’t want to frost the entire cake, you can drizzle with hot fudge and serve with whipped cream.
- Brownies: You can use a boxed brownie mix, prepared as directed on the package using the ingredients called out.
- For a shortcut cream cheese filling using Cool Whip: Replace whipping cream with 1 1/2 cups of thawed Cool Whip and omit the powdered sugar. Simply fold the Cool Whip into the cream cheese mixture until combined.
Enhance Your Chocolate Skills!
For more baking insights and to refine your chocolate techniques, be sure to check out my Microwave Chocolate Tempering Tips!
