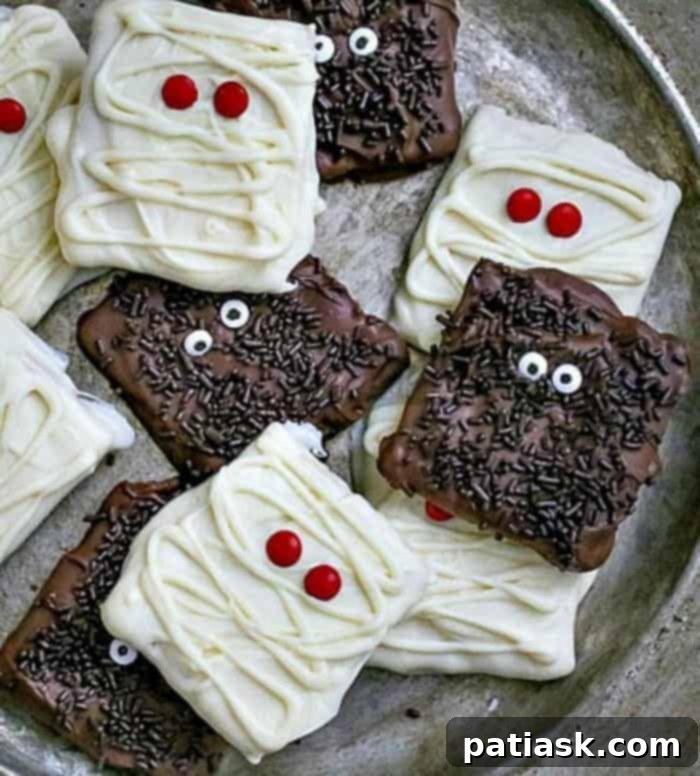
Spooktacularly Easy: Monster and Mummy Chocolate Covered Graham Crackers for Halloween
Are you searching for a delightfully festive and incredibly fun idea to elevate your Halloween celebrations? Look no further! We’ve got your sweet cravings “chocolate” covered with these absolutely tempting Monster and Mummy Chocolate Covered Graham Crackers! These enchanting treats are not just delicious; they are also an incredibly simple and rewarding no-bake activity perfect for getting into the spooky spirit. Imagine crisp graham crackers enveloped in smooth, rich chocolate, then transformed into adorable monsters and eerie mummies. They’re guaranteed to be a smashing hit with everyone, from the littlest ghouls and goblins to grown-up monsters, making them the ultimate easy Halloween dessert for any party or family gathering.
Much like our popular Easter Peep Chocolate Covered Graham Crackers and the festive Peppermint Crunch White Chocolate Covered Graham Crackers, these Halloween variations combine simplicity with irresistible charm. For more inspiration, be sure to check out 50 Spooky Fun Halloween Cookies to complete your holiday treat table.
Why These Halloween Treats Are a Must-Make
There are countless reasons why these chocolate covered graham crackers should be at the top of your Halloween treat list. First and foremost, their simplicity is unmatched. You don’t need to be a seasoned baker to create these masterpieces. With just a few basic ingredients and minimal effort, you can produce a batch of treats that look professionally made. This makes them an ideal project for busy parents, budding young chefs, or anyone looking for a quick yet impressive dessert.
Beyond their ease, these treats offer incredible versatility. Whether you prefer the classic sweetness of milk chocolate, the intensity of dark chocolate, or the creamy richness of white chocolate, you can tailor each cracker to your taste. The decorating possibilities are endless, allowing you to unleash your creativity and give each monster or mummy its own unique personality. From googly eyes to colorful sprinkles and artistic chocolate drizzles, you can customize every detail, ensuring no two treats are exactly alike.
These adorable and eerie creations are also guaranteed to be a crowd-pleaser at any Halloween bash. Their charming appearance will capture attention, and their delicious taste will keep everyone coming back for more. They’re perfect for school parties, neighborhood trick-or-treat events, or simply enjoying at home with your family while watching a spooky movie. Plus, involving children in the decorating process adds an extra layer of fun, transforming baking into a memorable family activity that fosters creativity and shared joy during the holiday season.
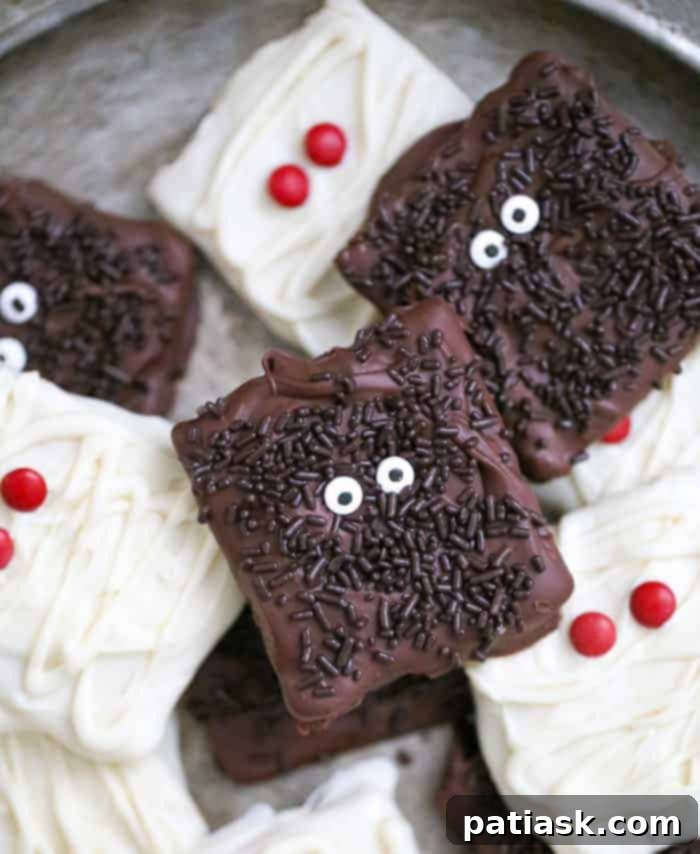
The Foundation of Flavor: Choosing Your Ingredients
The success of any simple recipe often hinges on the quality of its core ingredients. For these delightful chocolate covered graham crackers, selecting the right crackers and chocolate is paramount. The beauty of this recipe lies in its adaptability, allowing you to experiment with different flavor profiles to suit your preferences.
Selecting the Perfect Graham Crackers
When it comes to the graham cracker base, you have a few excellent options, each offering a distinct flavor to complement your chocolate coating:
- Honey Graham Crackers: These are the classic choice, providing a subtle sweetness and a distinct honey flavor that pairs beautifully with both milk and dark chocolate. Their light, crispy texture offers a wonderful contrast to the smooth chocolate.
- Chocolate Graham Crackers: For the ultimate chocolate lover, opting for chocolate graham crackers creates a decadent double-chocolate experience. This choice is particularly fantastic for the monster cookies, intensifying their rich flavor.
- Regular Graham Crackers: These act as a versatile blank canvas, allowing the chocolate and any added decorations to truly shine.
I personally gravitate towards the chocolate graham crackers for the monster creations, as I’m quite partial to the chocolate-on-chocolate combination. However, for the mummy cookies, using honey graham crackers with white chocolate offers a delightful and contrasting taste experience. Why limit yourself to just one flavor when you can enjoy both in these easy Halloween desserts?
The Importance of Quality Chocolate
The chocolate you choose will significantly impact the final taste and texture of your treats. Investing in good quality chocolate is truly worth it for a superior result. Brands like Ghirardelli or Godiva are excellent choices, known for their smooth melting properties and rich flavor. Higher quality chocolate melts more evenly, coats more smoothly, and is less prone to seizing (becoming thick and unworkable).
You can use chocolate chips (milk, semi-sweet, or dark), chocolate discs, or even chopped chocolate bars. For the white chocolate, choose high-quality white chocolate chips or bars, or opt for white candy melts if you’re looking for an even easier and foolproof melting process that sets quickly and stays smooth.
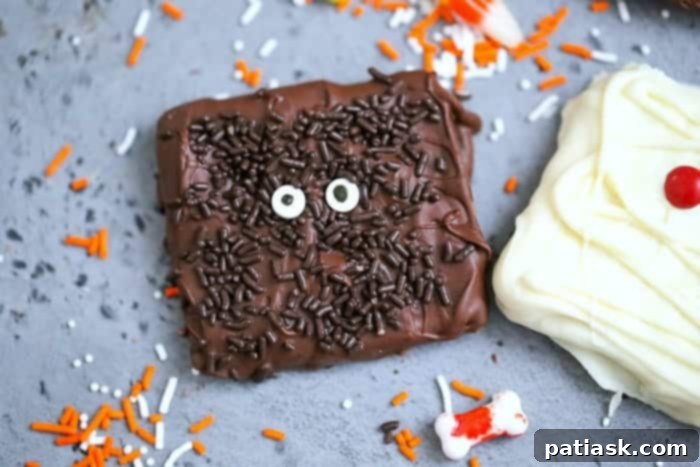
Mastering the Art of Melting and Dipping
The process of melting and dipping chocolate is straightforward, but a few key techniques will ensure your Monster and Mummy Graham Crackers turn out perfectly smooth and delicious every time. Precision here guarantees a gourmet-like finish for your homemade treats.
Foolproof Chocolate Melting Techniques
There are two primary methods for melting chocolate, both effective with a bit of care:
- Microwave Method: This is the quickest way. Place your chocolate chips or chopped chocolate in a microwave-safe bowl. Microwave on high for one minute, then stir thoroughly. The chocolate may not look melted, but stirring helps distribute heat. Continue microwaving in 30-second intervals, stirring vigorously after each, until the chocolate is mostly melted. Then, switch to 15-second intervals, stirring until completely smooth. Remember, chocolate continues to melt from residual heat, so it’s better to slightly under-melt and stir to finish than to overheat, which can cause it to seize.
- Double Boiler Method: For a more controlled and gentle melt, use a double boiler. Place a heat-safe bowl over a pot of simmering water, ensuring the bottom of the bowl does not touch the water. Add your chocolate to the bowl and stir constantly as it melts from the steam. This method prevents scorching and helps maintain a smooth consistency, ideal for more delicate chocolates.
Pro Tip for Melting: Regardless of your chosen method, always ensure your bowl and all utensils are completely dry. Even a single drop of water can cause chocolate to seize, turning it into a thick, grainy, unworkable mess. Avoid overheating your chocolate in the microwave; low power and frequent stirring are your allies!
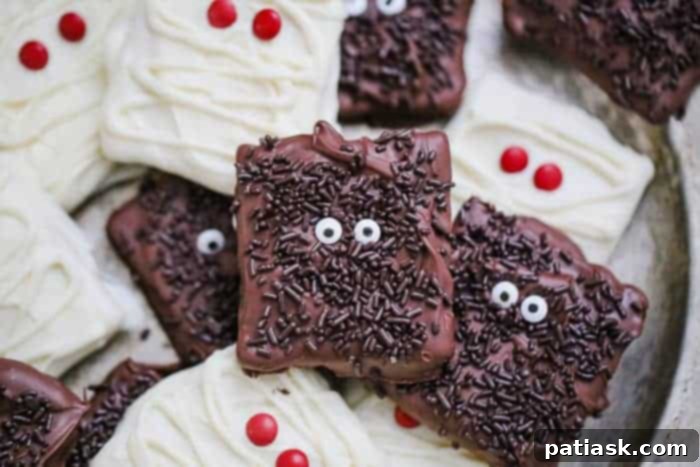
Achieving Perfect Chocolate Coverage
Once your chocolate is perfectly melted and smooth, it’s time for the fun part: dipping! Here’s how to get that flawless coating:
- Use the Right Tools: A sturdy fork or a dipping tool (like a candy dipping fork) works best for holding the graham cracker.
- Dip One by One: Submerge one graham cracker at a time into the melted chocolate, ensuring both sides are fully coated.
- Shake Off Excess: Gently lift the cracker out of the chocolate and tap the fork or dipping tool against the side of the bowl. This allows any excess chocolate to drip off, preventing puddles and ensuring a neat, even layer.
- Work in Batches: It’s recommended to work with about four graham crackers at a time. Dip and decorate these four, then move on to the next set. This gives you time to add decorations before the chocolate sets, especially important for attaching candy eyes or sprinkles. Approximately 1 cup of chocolate chips is sufficient for covering four graham cracker halves, usually leaving a little extra.
- Prepare Your Surface: Have a baking sheet lined with parchment paper or tin foil ready. This provides a non-stick surface for your chocolate-covered crackers to set without sticking.
Unleashing Your Creativity: Decorating Your Spooky Crackers
This is where the magic truly happens! Transforming simple chocolate-covered graham crackers into adorable monsters and eerie mummies is the most enjoyable part of the process. Let your imagination run wild with colors, textures, and candy embellishments.
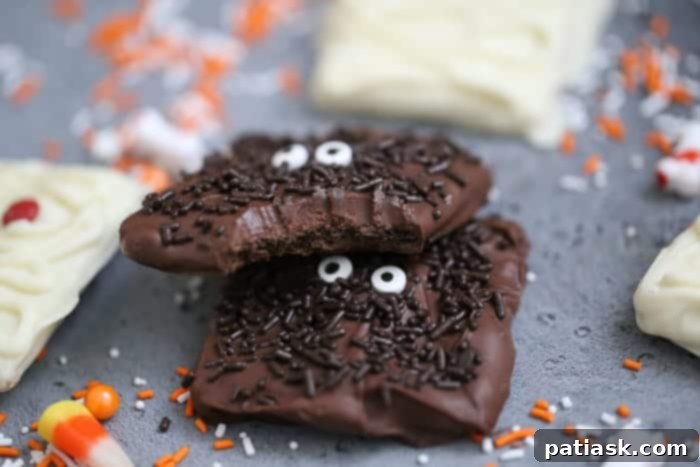
Crafting Adorable Monster Graham Crackers
For your spooky monster friends, the possibilities are endless:
- The Base: Start with graham crackers coated in milk or dark chocolate for a rich, deep monster color.
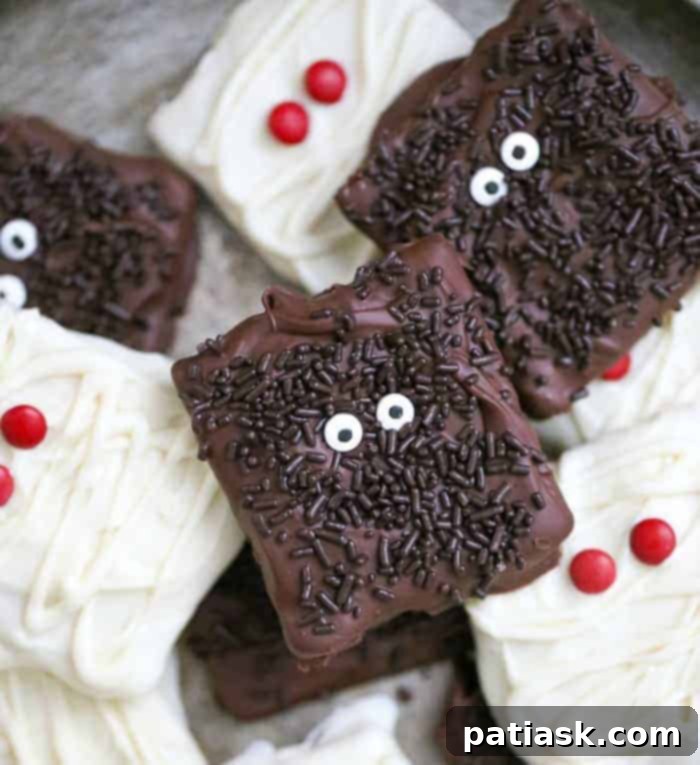
- Monster Eyes: The easiest way to bring your monsters to life is with candy eyeballs. I found mine at Walmart in the Wilton cake section, but they are widely available at craft stores or online. For a fun alternative, use red, yellow, or green mini M&Ms, or even pipe small dots of colored frosting for a custom look. Feel free to use one eye, two, or even three for a truly monstrous effect!
- Hair and Fur: While the chocolate is still wet, sprinkle on colorful jimmies, chocolate sprinkles, or shredded coconut dyed green for fuzzy monster hair.
- Mouths and Scars: Use edible markers or a small amount of contrasting melted chocolate (placed in a zip-lock bag with a tiny snip off the corner) to pipe on jagged mouths, stitches, or scars.
- Monster Personalities: Experiment with different sprinkle colors and eye placements to give each monster a unique personality – happy, grumpy, silly, or truly terrifying!
Wrapping Up Eerie Mummy Graham Crackers
Mummies offer a wonderfully classic Halloween aesthetic:
- The Base: White chocolate provides the perfect canvas for your mummies, creating a stark contrast against the dark graham cracker beneath (if using chocolate grahams) and the “bandages.”
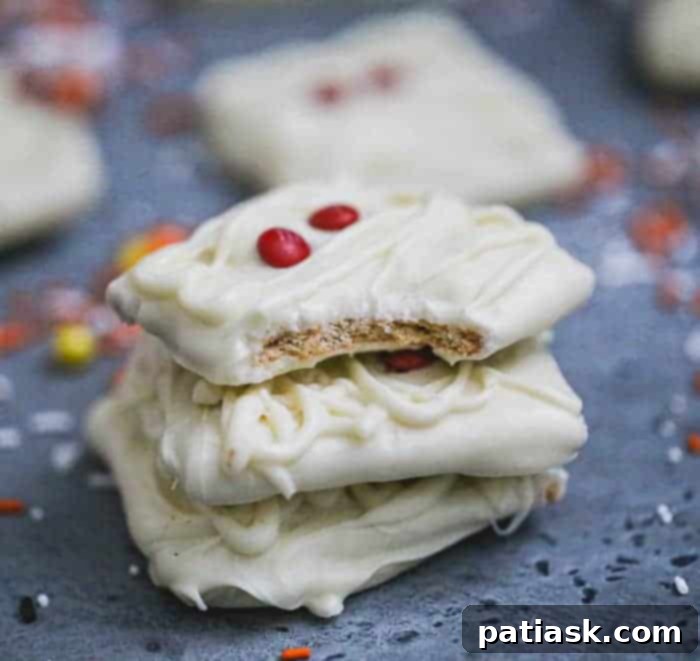
- Mummy Bandaging: This is easier than it looks! Spoon any leftover melted white chocolate (or a contrasting color like milk chocolate) into a small zip-lock bag. Snip a tiny corner off the bag. Over your set chocolate-covered cracker, pipe the chocolate in a zig-zag motion to create the appearance of mummy bandages. Start piping gently; the chocolate will come out fast, so control the pressure by not squeezing too hard.
- Mummy Eyes: Red mini M&Ms are fantastic for a bloodshot, eerie mummy eye effect. Alternatively, use standard candy eyeballs or small dots of piped black or red frosting.
- The Ancient Look: For an extra touch of “ancient” realism, you can lightly dust the finished mummies with a tiny bit of cocoa powder (for white chocolate) or powdered sugar (for dark chocolate) using a clean, soft brush.
These Monster and Mummy Chocolate Covered Graham Cracker Cookies are not just spooky cute; they’re also incredibly fun to make and even better to sink your teeth into! Give them a try and watch them disappear!
Simple Ingredients for Spooky Delights
Creating these festive Halloween treats requires only a handful of readily available ingredients. You likely have most of these in your pantry already, making this a convenient last-minute treat option!
- 2 cups chocolate chips: Choose your favorite – milk, semi-sweet, dark, or white chocolate chips, discs, or chopped chocolate. For a truly smooth melt and vibrant colors, candy melts are also an excellent option.
- 8 graham crackers of choice: Honey, chocolate, or regular graham crackers will all work wonderfully.
- Extras for decoration: Candy eyeballs, assorted sprinkles (chocolate, colorful jimmies), mini M&Ms (especially red for mummy eyes).
Step-by-Step Guide to Monster and Mummy Creation
Follow these easy steps to bring your delicious Monster and Mummy Chocolate Covered Graham Crackers to life:
- Prepare your workspace by lining a baking sheet with parchment paper or tin foil.
- If making both monster and mummy cookies, it’s often easiest to work in two separate batches: one with milk/dark chocolate and one with white chocolate.
- In a microwave-safe bowl, melt your chosen chocolate. Microwave for 1 minute, then stir well. Continue microwaving in 30-second intervals, stirring vigorously after each, until the chocolate is mostly smooth. Finish with 15-second intervals, stirring until completely melted and smooth. Remember, the chocolate will continue melting from its own heat, so avoid overcooking to prevent seizing. Stirring consistently helps achieve a beautiful, smooth consistency.
- Using a fork or spatula, dip each graham cracker half into the melted chocolate, ensuring both sides are fully coated. Lift the cracker, gently tapping it against the edge of the bowl to allow any excess chocolate to drip off.
- Carefully slide the dipped cracker off your fork/spatula onto the prepared parchment-lined baking sheet.
- For Monster Cookies: Immediately add candy eyeballs while the chocolate is still wet. Sprinkle with chocolate or colorful jimmies to create “hair” or “fur.” Allow the chocolate to set.
- For Mummy Cookies: Let the initial white chocolate coating set completely (either at room temperature or briefly in the fridge). Then, take any remaining melted chocolate (white or a contrasting color) and spoon it into a small zip-lock bag. Snip a tiny corner off the bag. Pipe the chocolate in a zig-zag motion across the cracker to create the mummy bandages. Be gentle with pressure; the chocolate can come out quickly. Add red mini M&Ms or candy eyeballs for the mummy’s eyes.
- Once decorated, place the chocolate-covered graham crackers on parchment paper or tin foil. Let them set completely. This can take about 20-30 minutes at room temperature.
- If you’re in a hurry, you can speed up the setting process by placing the baking sheet with the cookies in the refrigerator for about 10 minutes. Once firm, they are ready for devouring!
Storing Your Homemade Halloween Treats
Once your delightful Monster and Mummy Chocolate Covered Graham Crackers have fully set, proper storage will keep them fresh and delicious for days. Store them in an airtight container at room temperature. Layering them between sheets of parchment paper can prevent them from sticking together, especially if your decorations are quite elaborate. These treats will generally stay fresh and crispy for up to one week. While refrigeration can prolong their shelf life, it may sometimes cause the chocolate to “bloom” (develop a whitish film due to sugar crystallization), though this doesn’t affect the taste. For the best texture and appearance, room temperature storage in a cool, dry place is usually ideal.
Frequently Asked Questions (FAQs) about Chocolate Covered Graham Crackers
Here are some common questions about making these spooky treats:
Q: Can I use candy melts instead of chocolate chips?
A: Absolutely! Candy melts are an excellent alternative, especially for vibrant colors and an even easier melting process. They tend to set faster and typically don’t require tempering, making them very beginner-friendly.
Q: How long do these treats take to set?
A: At room temperature, they usually set within 20-30 minutes. If you’re pressed for time, a quick 10-minute chill in the refrigerator will solidify the chocolate much faster.
Q: Can I make these Monster and Mummy Chocolate Covered Graham Crackers ahead of time?
A: Yes, they are perfect for making in advance! You can prepare them up to a week before your event. Just store them in an airtight container at room temperature to maintain freshness and prevent sticking.
Q: What should I do if my chocolate seizes?
A: Seized chocolate is usually caused by moisture or overheating. Unfortunately, it’s often difficult to fully salvage. Prevention is key: ensure all your equipment is completely dry and melt chocolate slowly. If it does seize, you can try stirring in a teaspoon of vegetable oil or shortening at a time until it loosens, but the texture might not be as smooth.
Q: Can I use other types of cookies or crackers?
A: While graham crackers provide an ideal flat surface and satisfying crunch, you can certainly experiment with other bases! Oreos, shortbread cookies, or even pretzel rods are fantastic candidates for chocolate dipping and Halloween decorating.
Q: Are these treats suitable for younger children to help make?
A: Definitely! Melting the chocolate should be done by an adult, but dipping the crackers and especially decorating the monsters and mummies is a fantastic, kid-friendly activity. It’s a wonderful way to involve them in Halloween preparations.
Mummy and Monster Chocolate Covered Graham Crackers
Kim Lange
If you’re hard-pressed for coming up with of a festive, fun idea for your Halloween celebration, then we’ve got you ‘chocolate’ covered with these tempting Monster and Mummy Chocolate Covered Graham Cracker Cookies!
Prep Time: 20 mins
Ingredients
Per 8 Chocolate Covered Graham Crackers
- 2 cups chocolate chips discs or chopped chocolate of choice
- 8 graham crackers of choice chocolate, honey or regular
- Extras: eyeballs/sprinkles
Instructions
- So, I did mine in 2 batches, 1 milk chocolate covered and 1 white chocolate covered. I suggest making 4 at a time, then decorating, then moving to the next 4, and so forth.
- In a microwave-safe bowl, microwave the chocolate one minute then stir. Microwave 30 seconds then stir. If needed, repeat the 15-second intervals with stirring until the mixture is smooth and melted. Keep in mind, the chocolate will continue melting, so there’s no reason to overkill the melting, or it will seize up. Keep stirring to keep the chocolate melting nicely.
- With a fork or spatula, dip the graham crackers one at a time into the chocolate until coated on both sides. Lift out of the chocolate, and tap on the side of the dish to let excess chocolate drip off.
- Slide the dipped cracker off the fork or spatula and onto a parchment lined baking sheet.
- Decorate with eyeballs.
- If making monster cookies, add chocolate sprinkles to top.
- If making mummy cookies, use remainder of chocolate and place in ziplock bag and snip a corner and pipe bandages using zig-zag motion. Chocolate will come out fast if you start piping right away, so make sure you control the pressure by not squeezing it out too hard and fast.
- Place the chocolate covered grahams on parchment paper or tin-foil and let them set. If you’re in a hurry, place the parchment paper or tin-foil on a cookie sheet and place the cookies in the fridge for 10 minutes or so and then take them out and voila…you’re ready to rock and roll!
- I let mine set out about 20 to 30 minutes at room temperature, and they were ready for devouring.
Keyword: brown sugar cookies, chocolate, chocolate covered cookies, chocolate covered graham, graham crackers, halloween, rice krispie treats
Tried This Recipe? Let us know how it was by commenting below!
More Enchanting Holiday Treat Ideas
Looking for more easy and fun treats to celebrate the holidays? Here are some other fantastic recipes to inspire your baking adventures:
- Chocolate Dipped Peanut Butter Cup Double Stuffed Oreos
- Marshmallow S’mores Rice Krispies
- Halloween Oreos
- Best Monster Cookies
- Spooky Mummy Rice Krispies
- Ooh-la-la Chocolate Peppermint Marshmallow Bark
- Andes Mint Chocolate Covered Graham Crackers
- Halloween Peanut Butter Rice Krispie Ghosts
- Creamy Home-made Mini Peanut Butter Cups
