Irresistible No-Bake Cookie Dough Truffle Cups: Your Ultimate Easy Dessert!
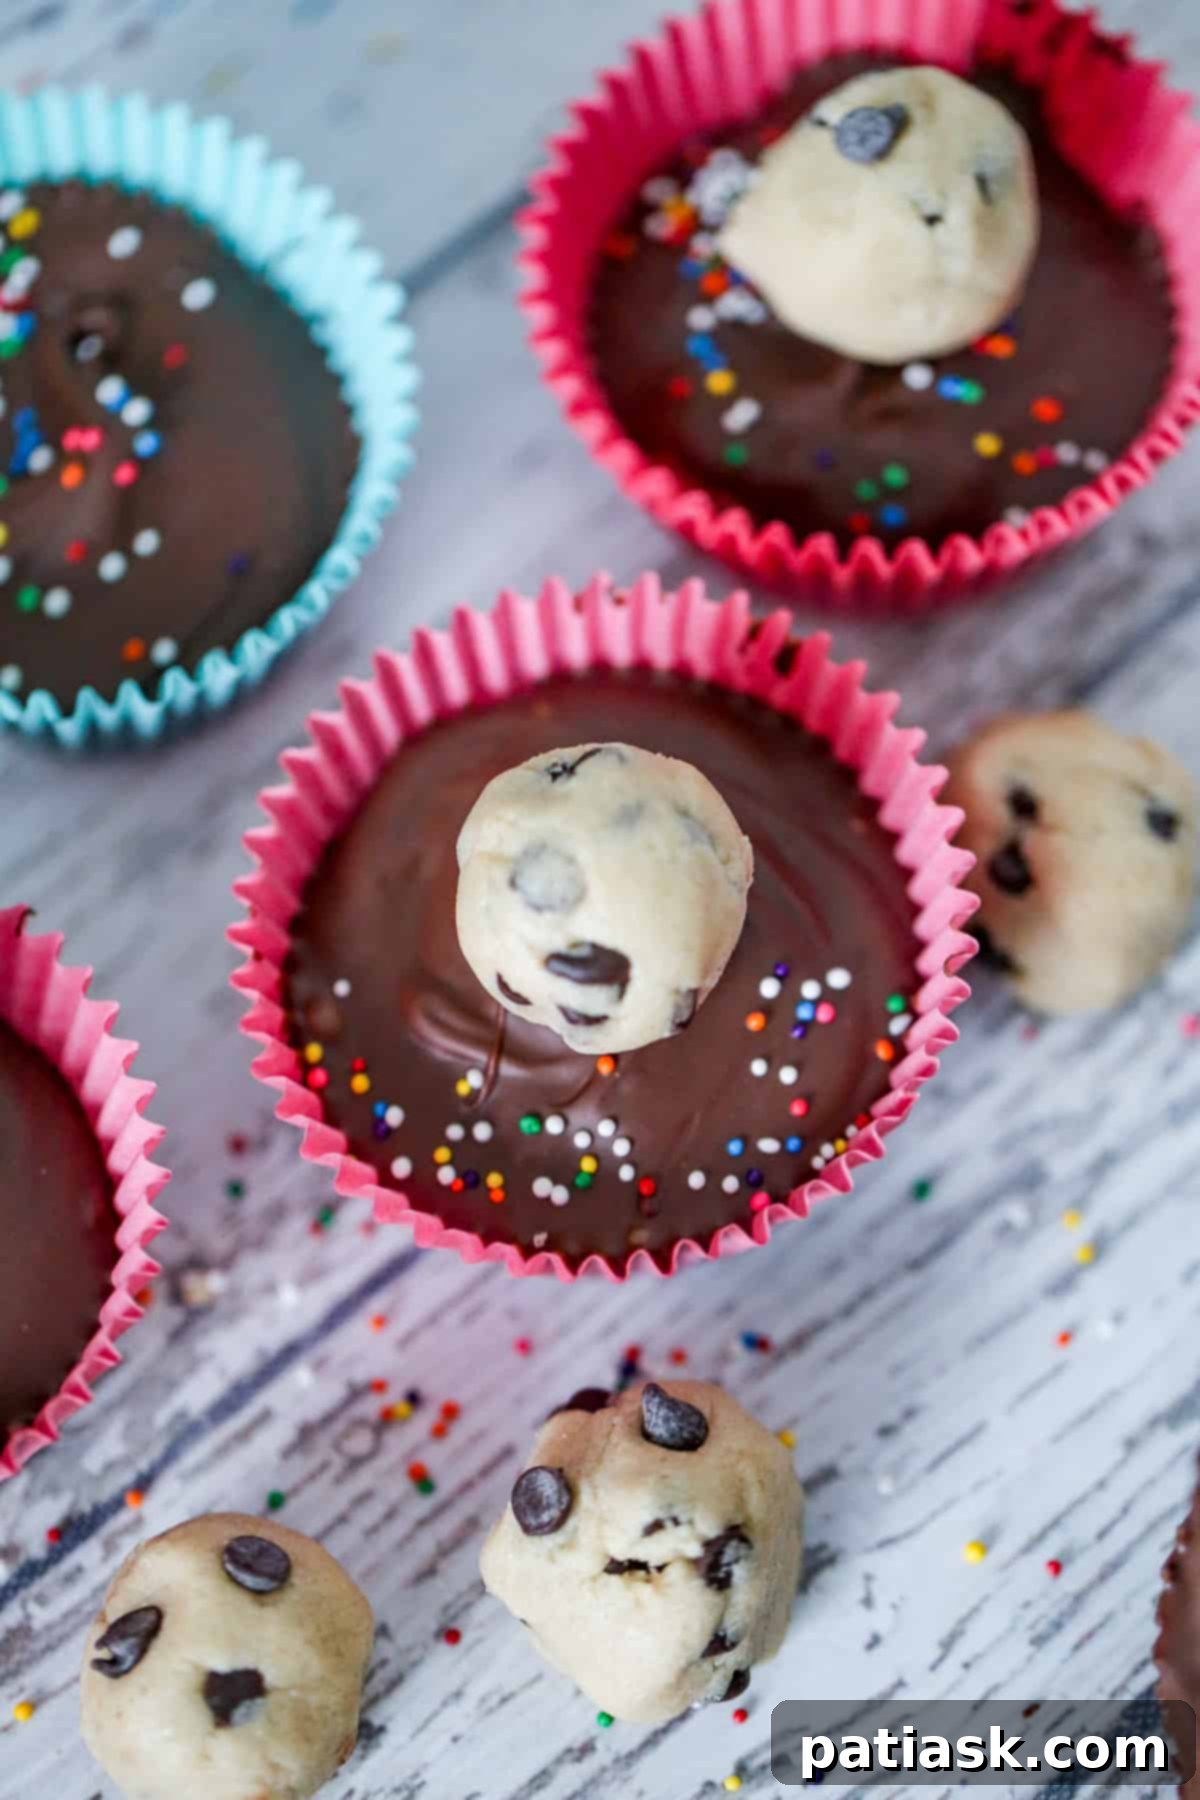
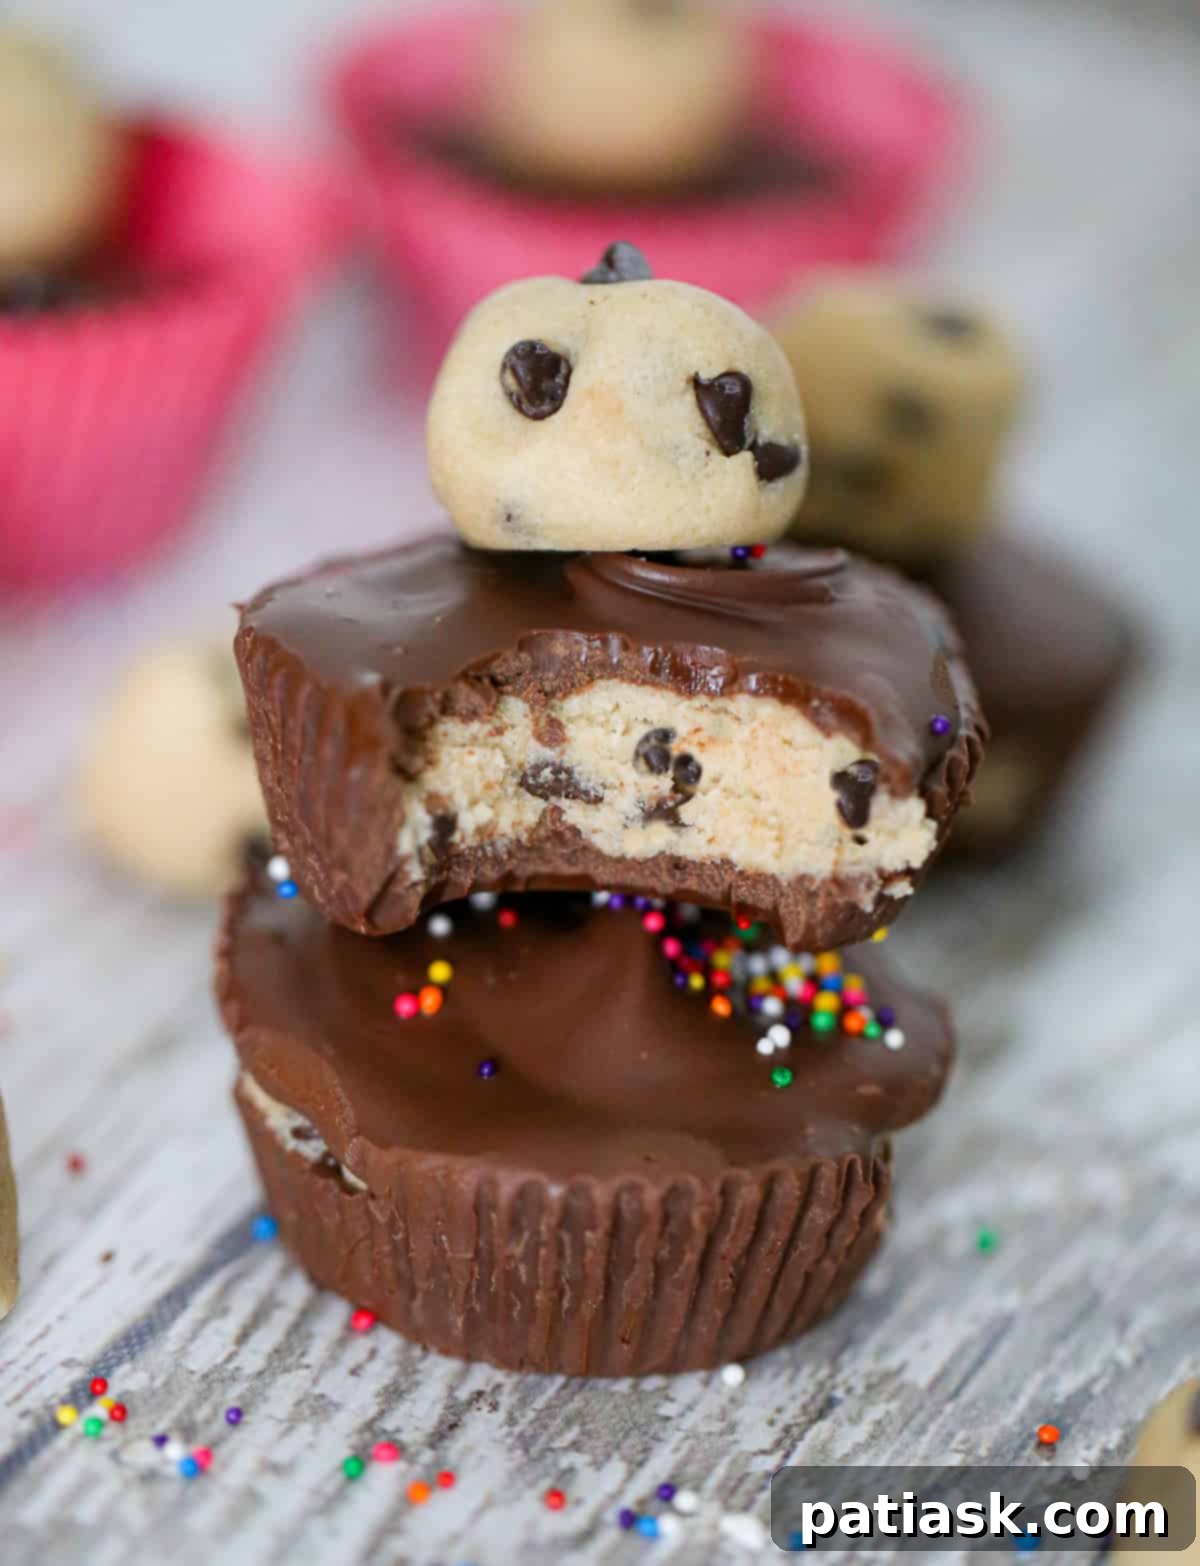
Prepare to tantalize your taste buds with our incredibly easy and utterly delightful No-Bake Cookie Dough Truffle Cups! Imagine rich, edible cookie dough nestled within layers of smooth, creamy chocolate, then topped with adorable mini cookie dough balls for an extra touch of charm. These delightful treats are not just a dessert; they are a celebration in every bite, perfect for parties, holidays, or simply satisfying that insistent sweet craving.
While classic chocolate peanut butter cups hold a special place in our hearts, these cookie dough-stuffed chocolate cups offer a unique and irresistible twist. They’re a quick and easy homemade candy that no one can resist, combining two of the world’s most beloved flavors: chocolate and cookie dough. If you’re a fan of cookie dough in any form, from The Best Cookie Dough Frosting to raw spoonfuls straight from the bowl, then these truffle cups are about to become your new obsession.
Why You’ll Fall in Love with These Easy No-Bake Cookie Dough Cups
These scrumptious treats are more than just a dessert; they’re an experience. Here’s why they’ll quickly become a staple in your recipe collection:
- Unbeatable Flavor Combination: The dreamy pairing of rich, smooth chocolate and sweet, decadent cookie dough is simply divine. It’s the ultimate indulgence for anyone who loves both these classic flavors.
- Effortless Preparation: No baking required means less time in the kitchen and more time enjoying! The process involves simply whipping up edible cookie dough, shaping it, and then enrobing it in melted chocolate. It’s a straightforward recipe perfect for beginners and seasoned bakers alike.
- Perfect for Any Occasion: Whether you’re hosting a party, celebrating a holiday, or just craving a special treat, these cookie dough cups fit the bill. Their charming appearance makes them an instant hit and a beautiful addition to any dessert spread.
- Customizable Fun: From choosing your favorite type of chocolate to adding an array of toppings like sprinkles, sea salt, or different candy pieces, you can easily personalize these cups to suit any taste or theme.
- Kid-Friendly Activity: The simple, no-bake nature of this recipe makes it a fantastic activity to do with kids. They’ll love helping to roll the cookie dough balls and decorate the finished cups.
You won’t be able to resist these scrumptious treats! This cookie dough truffle recipe is truly perfect when you want to satisfy your sweet tooth with two of your favorite desserts in one amazing bite!

What Exactly Are No-Bake Cookie Dough Truffle Cups?
At their core, No-Bake Cookie Dough Truffle Cups are individual servings of safe-to-eat cookie dough enveloped in a generous coating of chocolate. They take inspiration from traditional chocolate truffles and candy cups but feature a delightful, chewy cookie dough center instead of ganache or peanut butter. The “no-bake” aspect means you skip the oven entirely, relying on chilling to set the chocolate and firm the cookie dough. This makes them an accessible and hassle-free treat for anyone to create.
The Magic of Edible Cookie Dough: Safe & Delicious
The star of these truffle cups is the edible cookie dough. Unlike traditional cookie dough meant for baking, this recipe is specifically designed to be enjoyed raw. The key difference lies in two main components: the absence of raw eggs and the heat-treatment of flour.
Raw flour can sometimes contain harmful bacteria, but a quick heat-treatment step eliminates this risk, making your cookie dough perfectly safe to eat. Our edible cookie dough is not only safe but also incredibly easy to prepare. You can heat-treat your own all-purpose flour, or even gluten-free flour, right in your microwave, making this a super easy and convenient step! The result is a smooth, rich, and utterly delicious cookie dough that forms the heart of these amazing treats.
Expert Tips for Perfect No-Bake Cookie Dough Cups Every Time
To ensure your No-Bake Cookie Dough Truffle Cups turn out perfectly every time, keep these expert tips in mind. They cover everything from ingredient selection to storage, guaranteeing a delicious outcome.
Tips for Crafting Your Cookie Dough Truffle Cups
- Storage is Key: For optimal freshness and to maintain their firm structure, always store your finished cookie dough cups in the refrigerator. Keep them chilled until just before serving to prevent the chocolate from melting and the dough from softening too much. Stored in an airtight container, they’ll stay delicious for up to a week.
- Aesthetic Appeal: Elevate the visual appeal of your truffle cups by adding some mini cookie dough balls on top. This not only makes them look extra adorable but also gives your dessert fans a delightful hint at the delicious cookie dough surprise awaiting them inside.
- Salty-Sweet Perfection: If you’re a fan of the irresistible salty-sweet flavor profile, consider topping these cups with a light sprinkle of high-quality sea salt flakes. The contrast between the rich chocolate, sweet cookie dough, and a hint of salt is truly divine.
- Size Matters for Every Event: Customize the size of your truffle cups to suit the occasion. Make them jumbo for a truly decadent individual dessert, or opt for mini-sized cups for easy-to-grab party treats or a delightful sampling platter. Adjust the amount of cookie dough and chocolate accordingly.
- Creative Toppings for Extra Flair: Don’t limit yourself to just cookie dough balls. Unleash your creativity by adding some colorful sprinkles, a drizzle of contrasting white chocolate, crushed nuts, or even a sprinkle of cocoa powder for an elegant finish.
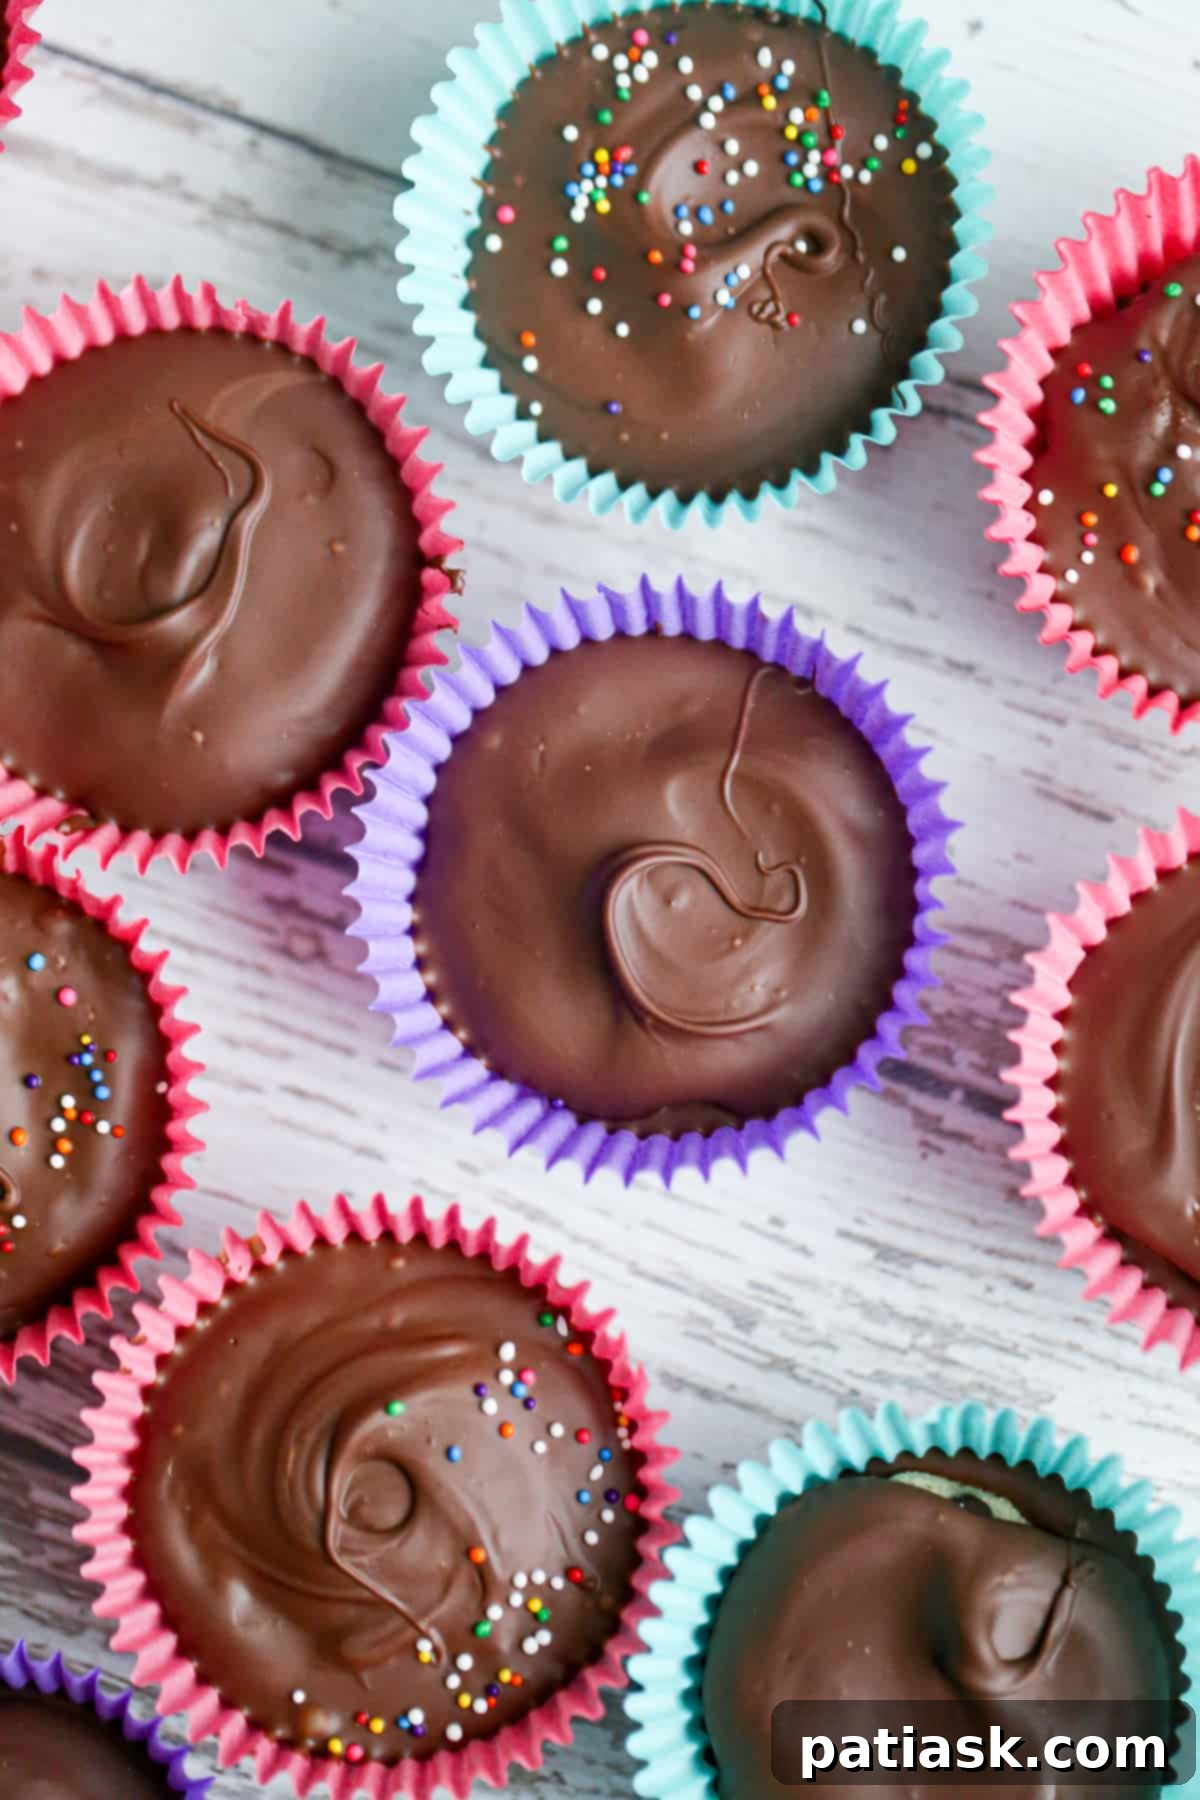
- Achieve a Smooth Finish: After adding both the base chocolate layer and the top layer over the cookie dough, gently tap the muffin tin or tray a few times on your counter. This helps to even out the chocolate, eliminate any air bubbles, and ensure a smooth, professional-looking coating.
- Don’t Forget the Liners!: Muffin liners or mini cupcake liners are absolutely essential. They not only make these cups easy to handle and serve but also ensure that your beautiful chocolate shells come out of the muffin tin cleanly without sticking.
Mastering the Art of Melting Chocolate
The success of your cookie dough cups heavily relies on perfectly melted chocolate. Follow these guidelines for a smooth, glossy finish:
- Choose Your Chocolate Wisely: You have the freedom to use any type of chocolate you prefer! Milk chocolate, semi-sweet, dark chocolate chips, or even white chocolate can all create delicious results. For my batch, I often enjoy a combination of dark and milk chocolate for a balanced flavor profile.
- Quality Over Quantity: Always opt for good-quality chocolate chips or baking chocolate. Higher quality chocolate not only provides a superior flavor but also melts more smoothly and sets with a better texture, preventing a grainy or dull appearance.
- The Right Tools: Use sturdy, heat-safe bowls for melting your chocolate. Glass or ceramic bowls are excellent choices as they retain heat well, helping the chocolate to melt evenly.
- Gentle Microwave Method: When using a microwave, heat the chocolate chips in short bursts. Start with 30 seconds at a time, then remove the bowl and stir the chocolate vigorously for at least 20-25 seconds. Chocolate continues to melt even after it’s removed from the microwave due to residual heat. This prevents scorching and ensures a silky-smooth consistency. Typically, 1.5 to 2 minutes total microwave time, with stirring intervals, does the trick for most quantities.
Essential Edible Cookie Dough Tips
Creating safe and delicious edible cookie dough is simple with these key tips:
- Heat-Treating Flour for Safety: This is a crucial step for edible cookie dough. Raw flour can harbor bacteria, so it’s important to heat-treat it before consumption. It’s incredibly easy to do this yourself with all-purpose flour or gluten-free flour, ensuring your cookie dough is perfectly safe to eat.
- Microwave Method for Flour: To heat-treat your flour, simply place it into a microwave-safe bowl. Microwave the flour for a total of 90 seconds. Important: microwave in 30-second intervals, whisking the flour thoroughly for a few seconds between each burst. This ensures the heat is distributed evenly and prevents the flour from burning.
- Creative Uses for Leftover Dough: If you find yourself with a bit of extra cookie dough, don’t let it go to waste! Roll it into small balls for a quick snack, use it as a delightful garnish for cupcakes or cheesecakes, sandwich it between Oreos, or swirl it into your favorite ice cream for an ultimate indulgence. Yum!
- Exciting Add-ins: Customize your cookie dough with various add-ins to give these sweet treats a fun twist. Consider folding in colorful M&M’s, sweet Reese’s Pieces, chopped nuts for texture, or even different types of mini chocolate chips to create unique flavor combinations.
Ingredients You’ll Need to Create These Delights
Gathering your ingredients is the first step toward creating these heavenly no-bake cookie dough truffle cups. Most of these items are likely already in your pantry!
- Unsalted butter, room temperature
- Brown sugar, packed
- Heavy cream or milk of choice
- Vanilla extract
- Salt
- All-purpose flour or gluten-free flour (remember to heat-treat this!)
- Mini chocolate chips, for the cookie dough (add more if desired)
- Chocolate chips for melting (your favorite type: milk, semi-sweet, dark, or white)
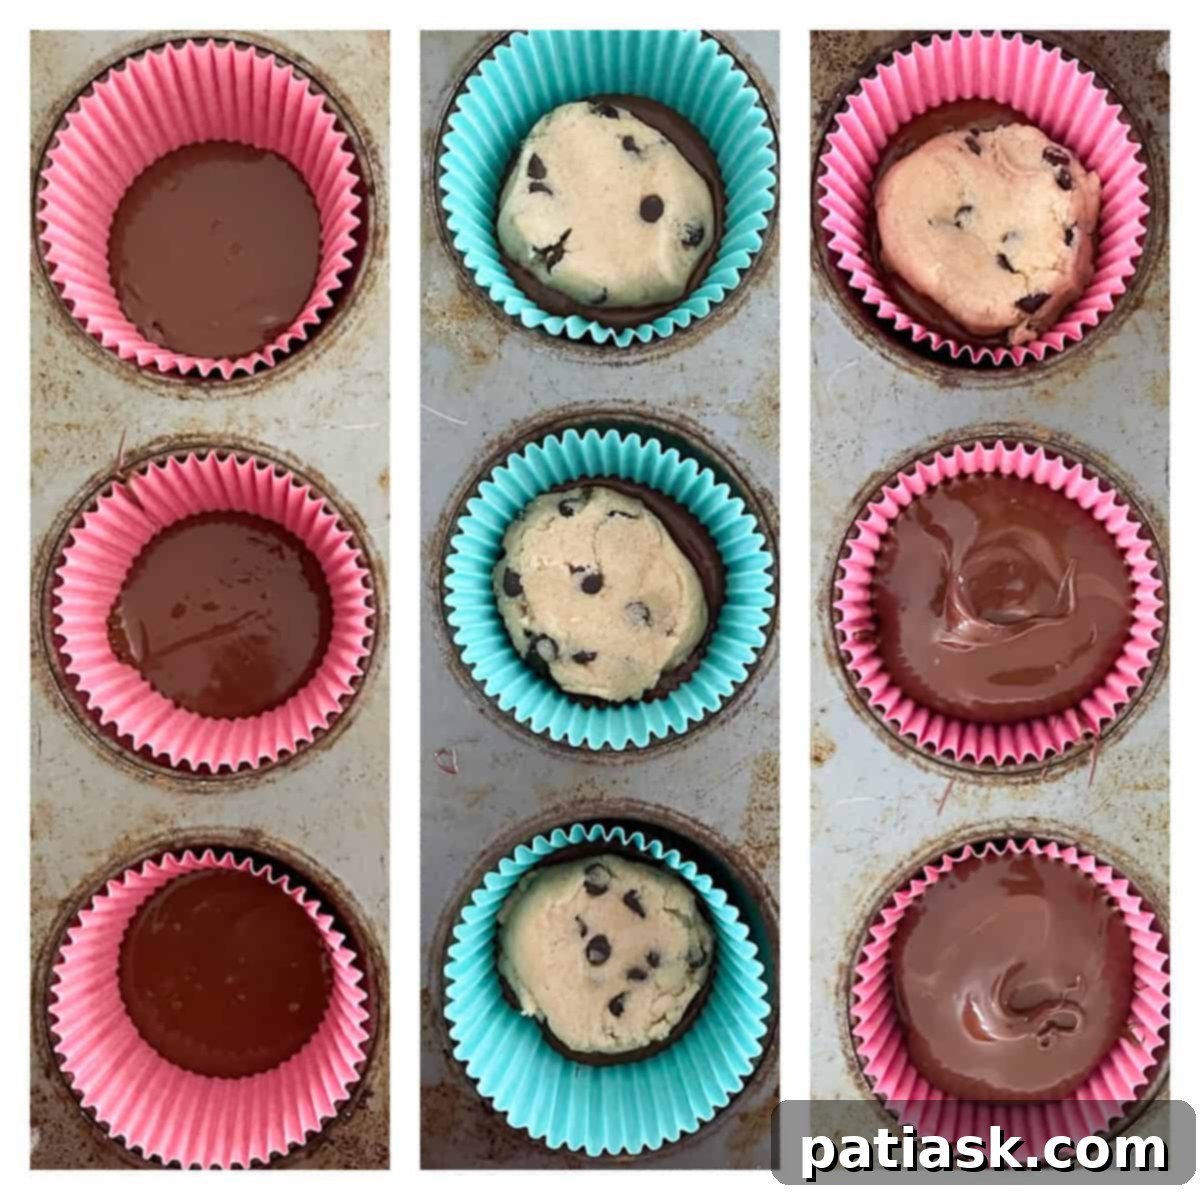
Step-by-Step Guide: How to Make No-Bake Cookie Dough Truffle Cups
Follow these simple instructions to create your own batch of delightful cookie dough truffle cups. It’s a straightforward process that yields impressive results!
Part 1: Preparing the Edible Cookie Dough
- Heat-Treat the Flour: Place your all-purpose or gluten-free flour into a microwave-safe bowl. Microwave the flour for a total of 90 seconds. Make sure to microwave in 30-second bursts, whisking the flour thoroughly for a couple of seconds between each burst. This ensures the flour is evenly heated and safe to consume.
- Cream Butter and Sugar: In a medium bowl, using an electric mixer, cream together the softened unsalted butter and packed brown sugar until the mixture is light, fluffy, and smooth.
- Combine Wet Ingredients: Add the heavy cream (or milk of your choice), salt, and vanilla extract to the creamed butter and sugar. Mix until all these ingredients are well combined and fully incorporated.
- Add Flour: Gradually add the heat-treated flour to the wet mixture, mixing on low speed until just combined. Be careful not to overmix the dough.
- Fold in Mini Chocolate Chips: Gently fold in the mini chocolate chips until they are evenly distributed throughout the edible cookie dough.
Part 2: Shaping and Chilling the Cookie Dough
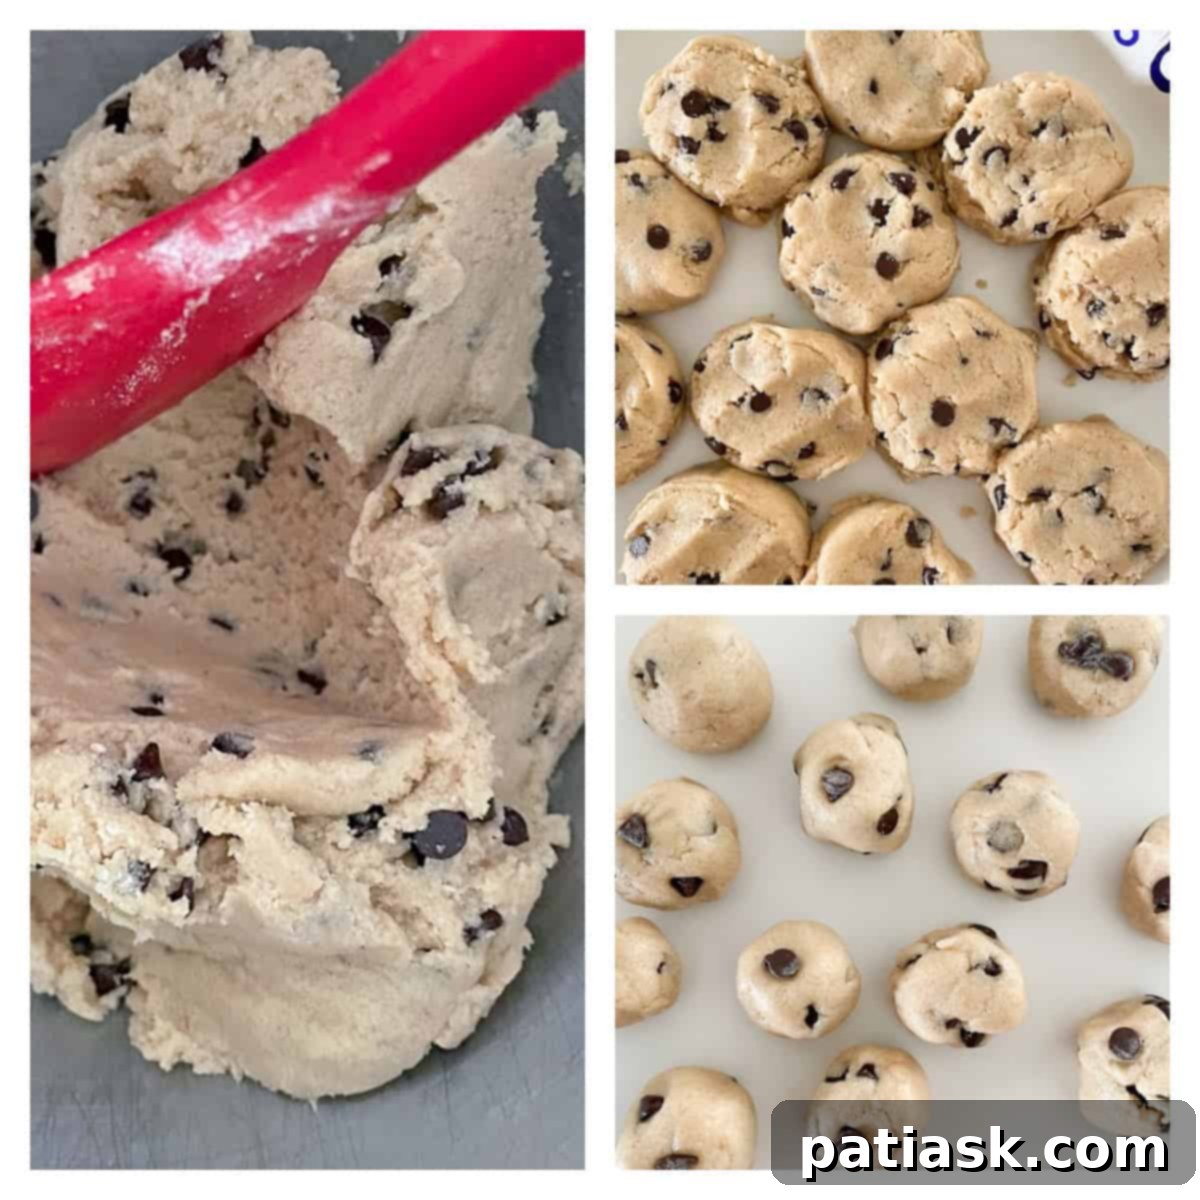
- Form the Dough: Scoop the prepared cookie dough and roll it into uniform balls. For the cups, slightly flatten these balls into even-sized, thick discs. If you plan to use mini cookie dough balls for garnish, roll those at this stage too.
- Chill the Dough: Place the cookie dough mounds (discs) and any extra mini balls into an airtight container and refrigerate them while you prepare the chocolate coating. Chilling helps the dough firm up and maintain its shape during assembly.
Part 3: Assembling and Finishing Your Truffle Cups
- Prepare Chocolate Layer 1: Melt your chosen chocolate chips according to the “Melting Chocolate Tips” section above. Once melted, drop approximately one teaspoon (for mini cups) or one tablespoon (for jumbo cups) of melted chocolate into the bottom of each candy liner, placed in a muffin tin.
- Place Cookie Dough Discs: Carefully place a chilled cookie dough disc on top of the melted chocolate in each liner. Gently press down to ensure it adheres to the chocolate base and creates a stable foundation.
- Add Chocolate Layer 2: Spoon another generous, thick layer of melted chocolate over the cookie dough disc, ensuring the cookie dough is completely covered and the liner is filled to the desired level.
- Decorate: While the top chocolate layer is still wet, immediately add your desired toppings. This is the perfect time for sprinkles, a light sprinkle of sea salt flakes, or those cute mini cookie dough balls you prepared earlier.
- Chill and Enjoy: Chill the assembled cookie dough truffle cups in the refrigerator for at least 30 minutes, or until the chocolate is completely set and firm. Once set, transfer them to an airtight container and store them in the fridge for up to one week. These treats are best enjoyed straight from the refrigerator for optimal texture and taste.
This recipe yields approximately 12-15 jumbo cups or 24-30 mini cups, depending on the size of your liners and how generously you fill them.
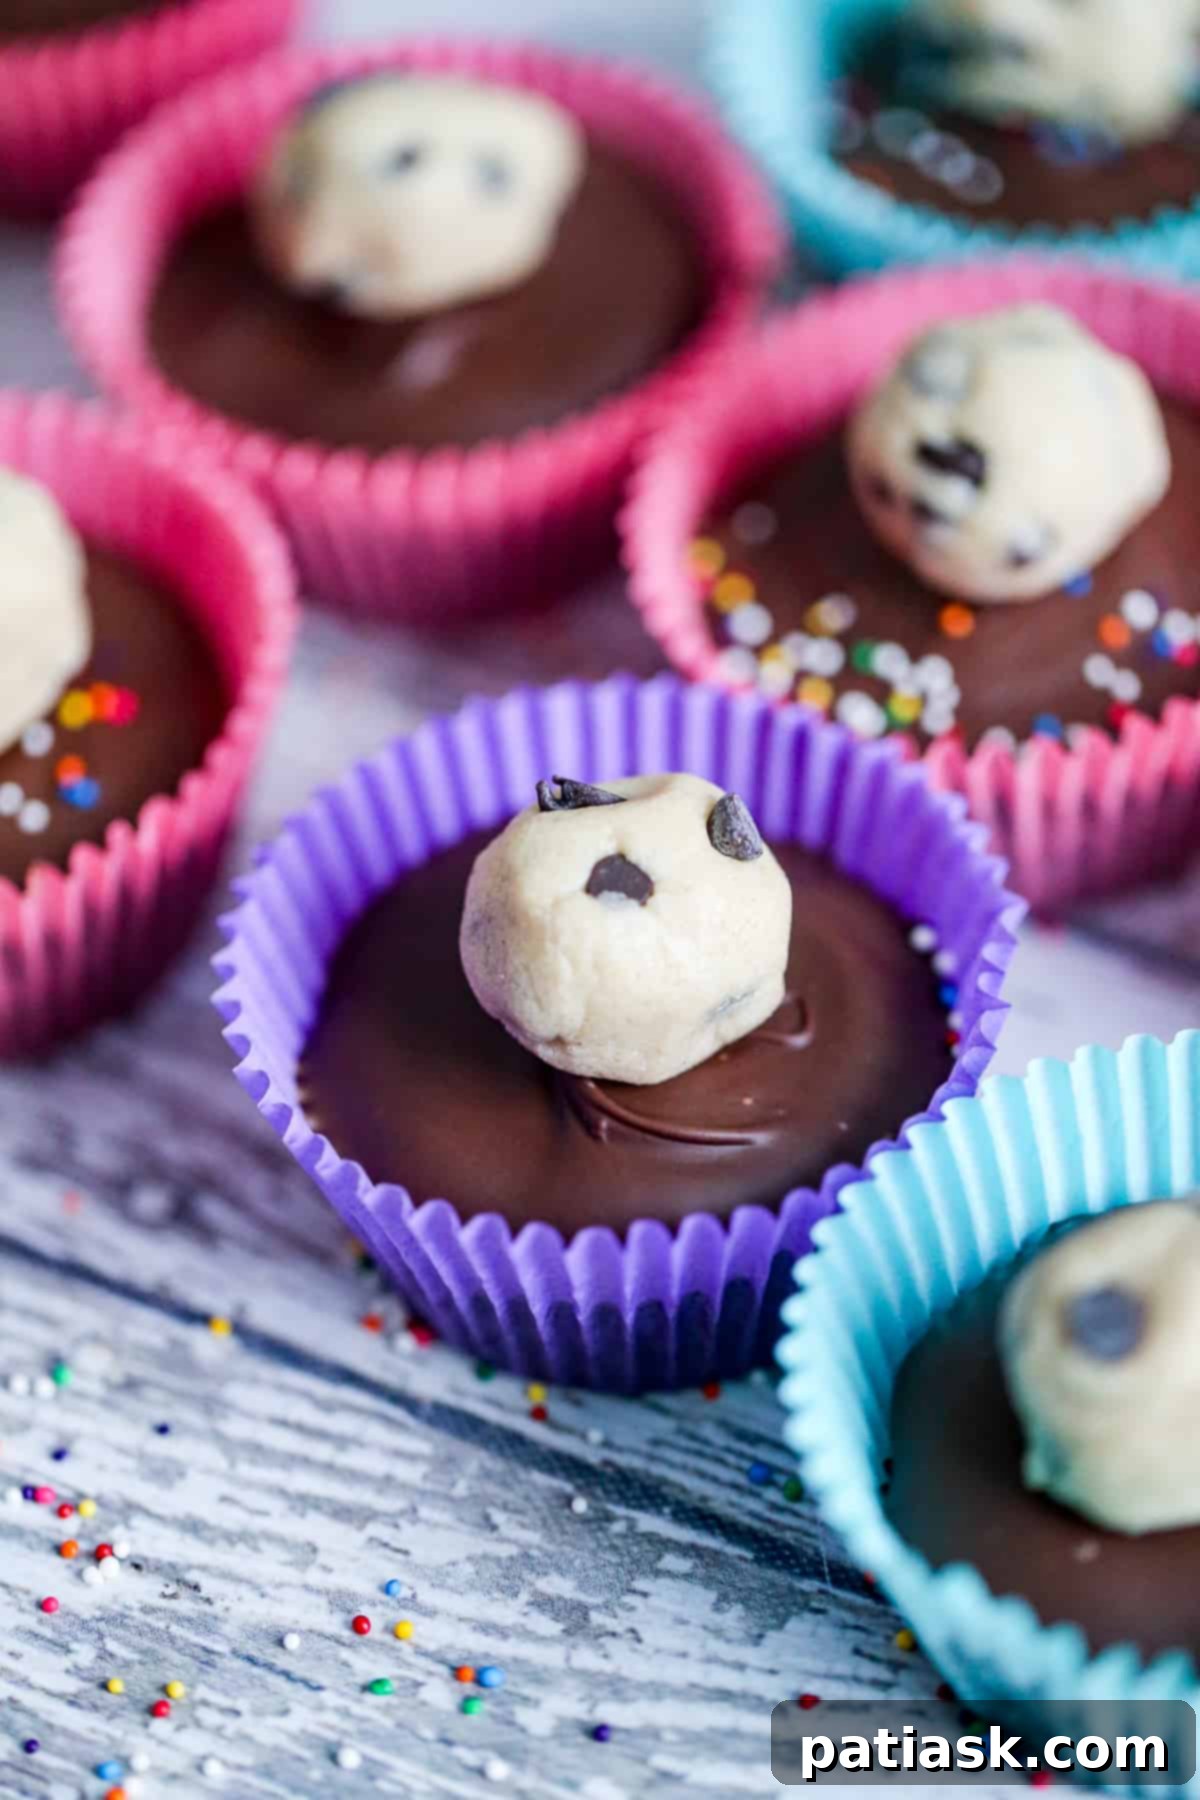
Serving Suggestions & Perfect Occasions
These No-Bake Cookie Dough Truffle Cups are incredibly versatile and perfect for a wide range of occasions. Serve them as a charming dessert at holiday gatherings like Christmas, Easter, Mother’s Day, Father’s Day, and Valentine’s Day. They also make fantastic additions to birthday parties, baby showers, or any celebration where a delightful, easy-to-eat treat is appreciated. Present them on a decorative platter, or package them individually as edible gifts. They’re also an ideal sweet ending to a casual weeknight meal or a luxurious late-night snack with a cup of coffee or a glass of milk. The fact that the kids can help make them only adds to their charm, making them a family favorite. Let’s devour!
Storage Instructions
To keep your No-Bake Cookie Dough Truffle Cups fresh and firm, proper storage is essential. Once the chocolate has fully set, transfer the cups to an airtight container. Store them in the refrigerator for up to one week. For longer storage, you can also freeze these treats for up to 2-3 months. When ready to enjoy from frozen, simply transfer them to the refrigerator for a few hours to thaw, or let them sit at room temperature for about 15-20 minutes for a slightly softer texture. We find they are best enjoyed straight out of the fridge for that perfect bite of chilled cookie dough and snappy chocolate.
Frequently Asked Questions (FAQs) About No-Bake Cookie Dough Truffle Cups
- Are these truly no-bake?
- Yes, these cookie dough truffle cups require absolutely no baking! The “dough” component is edible cookie dough designed to be consumed raw, and the chocolate simply needs to be melted and then chilled to set.
- Why do I need to heat-treat the flour?
- Heat-treating the flour is a crucial safety step. Raw flour can sometimes contain harmful bacteria, similar to raw eggs. Microwaving the flour eliminates these potential contaminants, making the cookie dough safe to eat.
- Can I use other types of chocolate for the coating?
- Absolutely! Feel free to use your favorite type of chocolate for the coating. Milk, semi-sweet, dark, or white chocolate chips all work wonderfully. You can also combine different chocolates for a unique flavor profile.
- How long do these cookie dough cups last?
- When stored in an airtight container in the refrigerator, these no-bake cookie dough cups will stay fresh and delicious for up to one week.
- Can I freeze these cookie dough truffle cups?
- Yes, these treats freeze very well! Place them in an airtight container or freezer bag and freeze for up to 2-3 months. Thaw them in the refrigerator overnight or for a few hours before serving, or enjoy them directly from the freezer for a firmer, colder treat.
More Irresistible Cookie Dough & Truffle Recipes You’ll Love!
If you’ve fallen in love with these no-bake wonders, explore more of our decadent cookie dough and truffle creations:
- Chocolate Chip Cookie Dough Bars
- Edible Chocolate Chip Cookie Dough
- 4th of July Oreo Truffles
- Cookie Dough Brownie Cookies
- M&M Cookie Dough Bars
- Cookie Dough Brownies
- Mini Cupcake Golden Oreo Cookie Balls
- Cookie Butter Truffles
- Easy Lime Cheesecake Bars
- No Bake Chocolate Biscoff Pumpkin Cups
Recipe: No Bake Cookie Dough Truffle Cups
About This Recipe
Author: Kim Lange
Our easy, No Bake Cookie Dough Truffle Cups are made with real cookie dough covered in layers of creamy chocolate! We even added some mini cookie dough balls on top to make them look extra adorable.
Key Details
- Prep Time: 15 mins
- Course: Dessert
- Keywords: candy, chocolate, chocolate chip, cookie dough, cups, easy dessert, no bake, truffle
Ingredients for Cookie Dough
- 8 tablespoons unsalted butter (1 stick, room temperature)
- 1 cup brown sugar (packed)
- 2 tablespoons heavy cream
- 1 teaspoon vanilla extract
- ½ teaspoon salt
- 2 cups all-purpose flour or gluten-free flour (heat-treated)
- ½ cup mini chocolate chips (more if desired)
Ingredients for Chocolate Coating
- 2 cups chocolate chips of choice (milk, semi-sweet, dark, or white)
Instructions for Cookie Dough
- Place flour into a microwave-safe bowl and microwave for a total of 90 seconds.
- Microwave flour in 30-second bursts, whisking for a couple of seconds between each burst to ensure even heating and prevent burning.
- Using a mixer, cream together the softened unsalted butter and packed brown sugar in a bowl until the mixture is smooth and light.
- Add the heavy cream, salt, and vanilla extract to the creamed mixture and mix until all ingredients are well combined.
- Gradually add the heat-treated flour to the mixture, mixing until just combined and no dry streaks remain. Be careful not to overmix.
- Gently fold in the mini chocolate chips until they are evenly distributed throughout the edible cookie dough.
Instructions for Shaping and Coating
- Scoop or roll the cookie dough into uniform balls. For the cups, slightly flatten these balls into even-sized thick discs. If desired, roll some extra mini cookie dough balls for garnish.
- Place the cookie dough mounds (discs) and any extra mini balls in an airtight container and refrigerate while you prepare the chocolate coating. This helps them firm up and maintain their shape.
- For the chocolate coating, melt your chosen chocolate chips using the tips outlined above. Once melted, drop approximately one teaspoon (for mini cups) or one tablespoon (for jumbo cups) of melted chocolate into each candy liner placed in a muffin tin.
- Carefully place a chilled cookie dough disc on top of the melted chocolate in each liner, gently pressing down to ensure it adheres to the chocolate base.
- Spoon another thick layer of melted chocolate over the cookie dough disc, ensuring it is completely covered and fills the liner to the top.
- Immediately add your desired toppings, such as sprinkles, a light sprinkle of sea salt, or the cute mini cookie dough balls you prepared earlier, while the chocolate is still wet.
- Chill the finished cookie dough truffle cups in the refrigerator for at least 30 minutes, or until the chocolate is completely set and firm.
- Once set, store these delectable treats in an airtight container in the fridge for up to one week. They are best enjoyed straight from the refrigerator.
This recipe yields approximately 12-15 jumbo cups or 24-30 mini cups, depending on your preferred size.
Conclusion: Indulge in Your Homemade Cookie Dough Dream!
There’s truly nothing quite like the satisfaction of creating a decadent dessert from scratch, especially when it’s as effortlessly delicious as these No-Bake Cookie Dough Truffle Cups. Combining the comforting nostalgia of edible cookie dough with the luxurious delight of chocolate, these treats are sure to bring smiles to faces and joy to taste buds. Whether you’re whipping up a batch for a special occasion or simply treating yourself, these easy, customizable, and utterly irresistible cups are a testament to the magic of simple, homemade indulgence. So go ahead, gather your ingredients, follow our tips, and get ready to devour your new favorite no-bake sensation!
