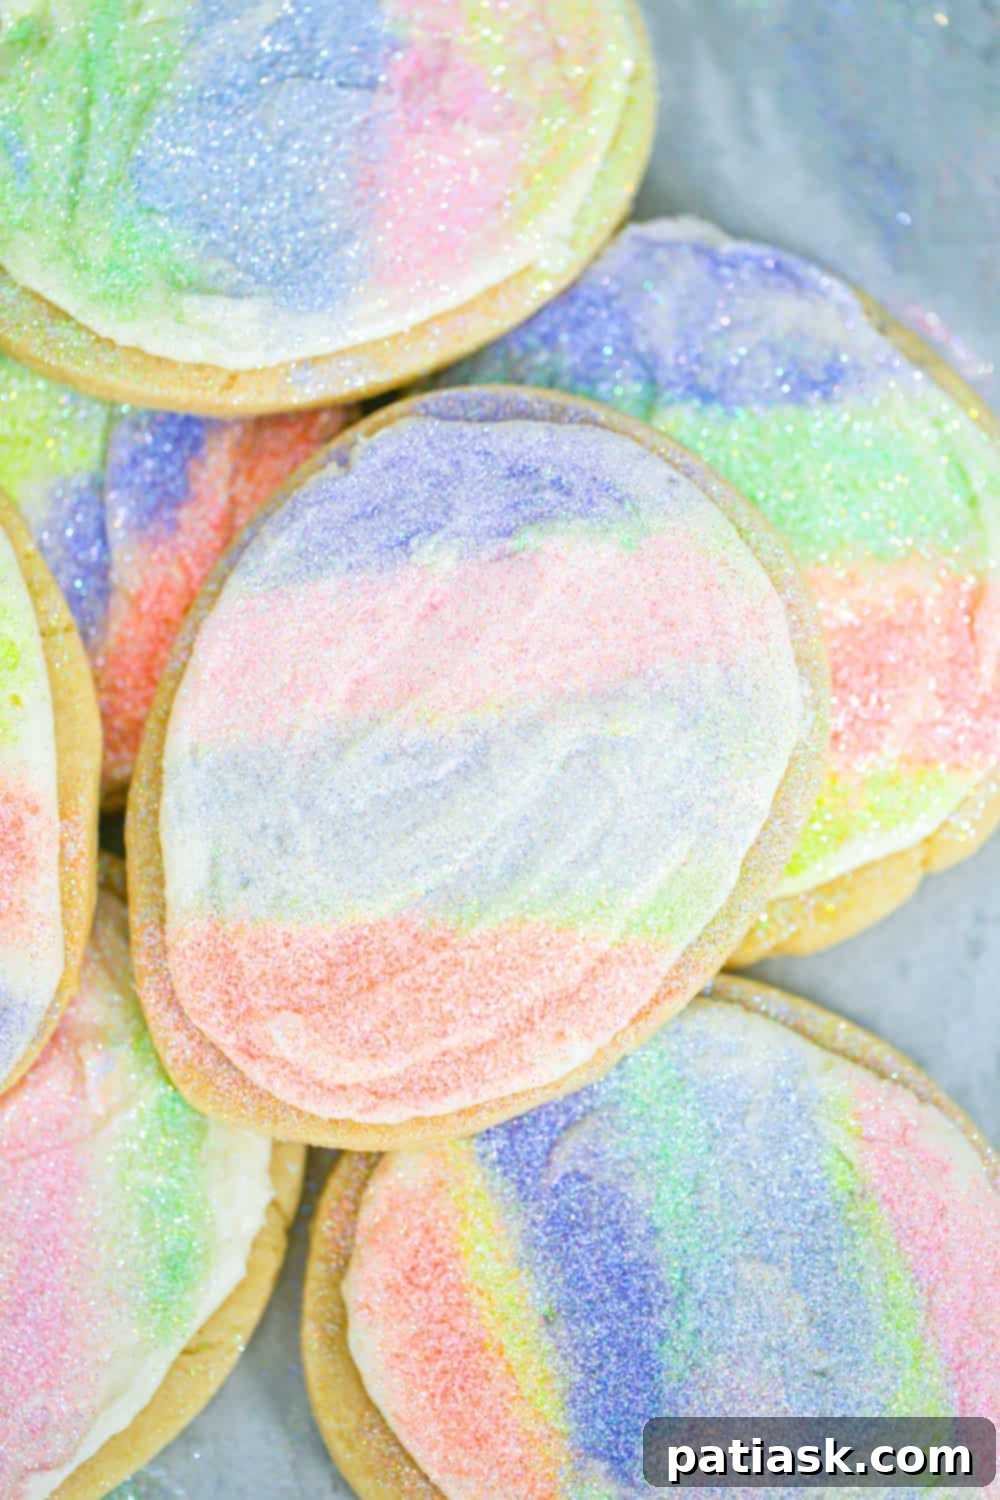
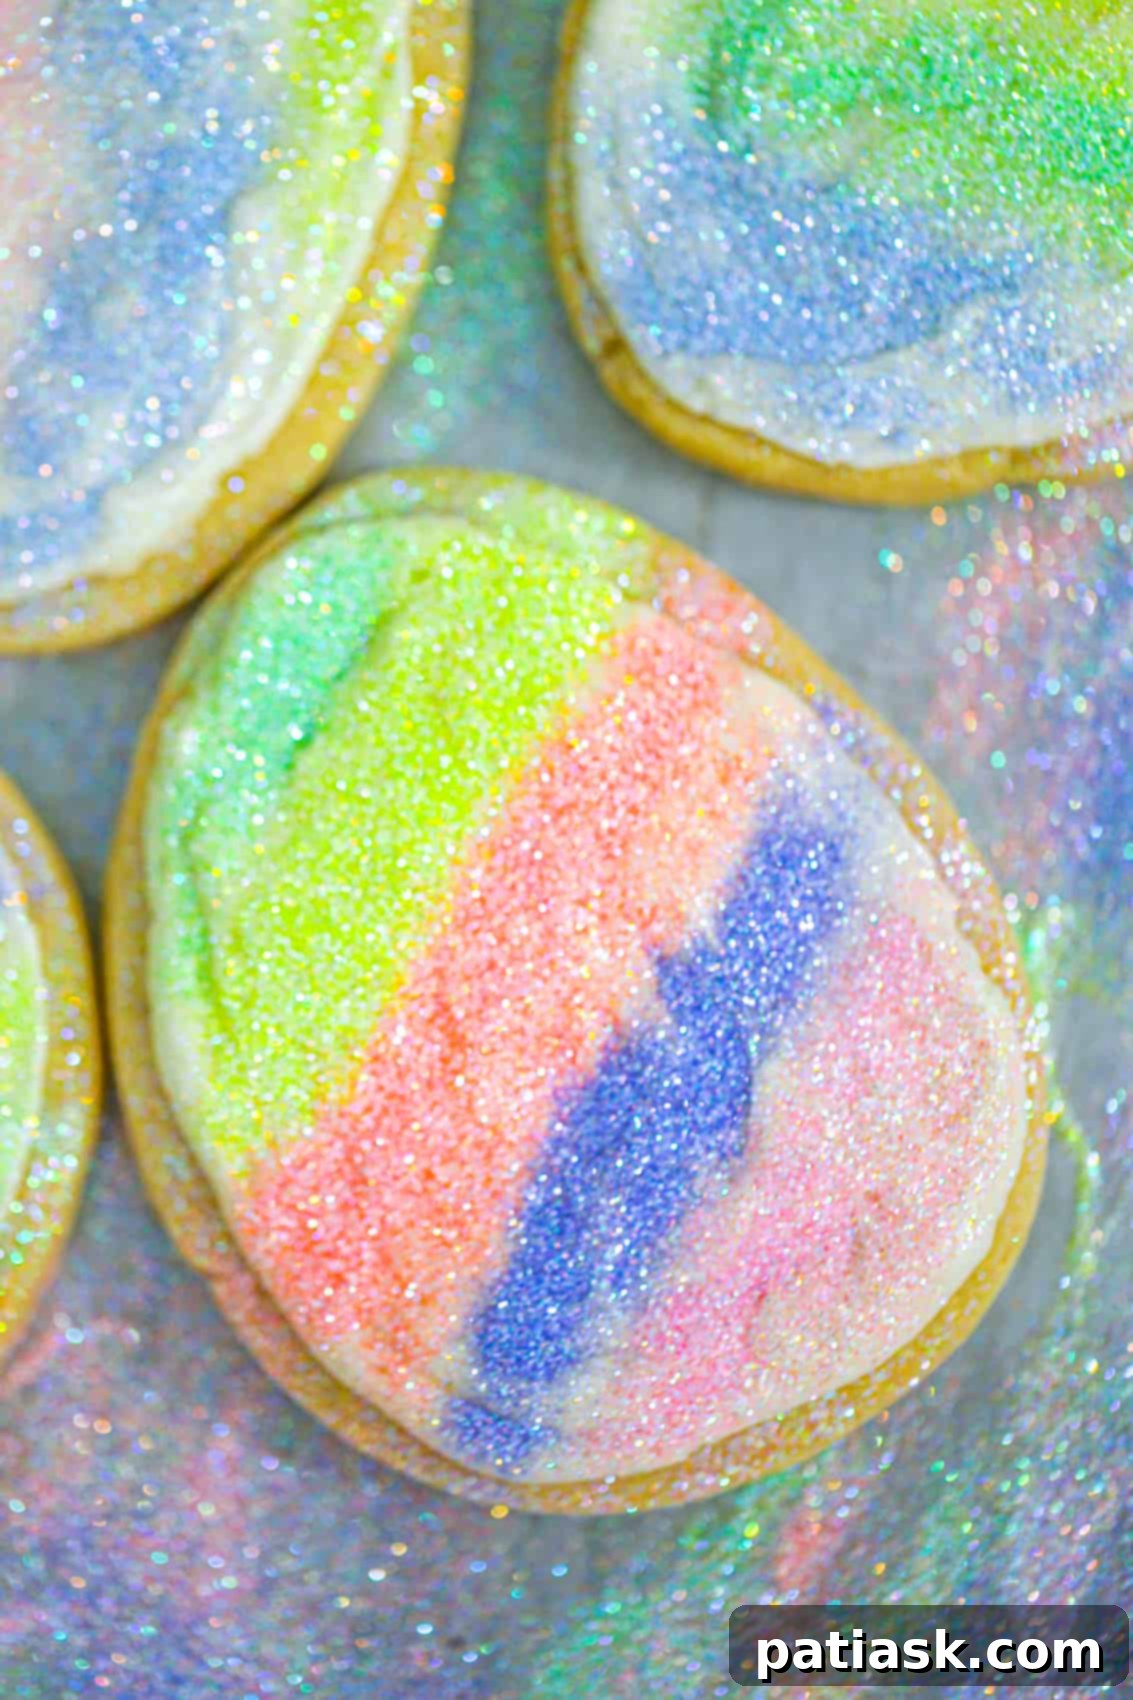
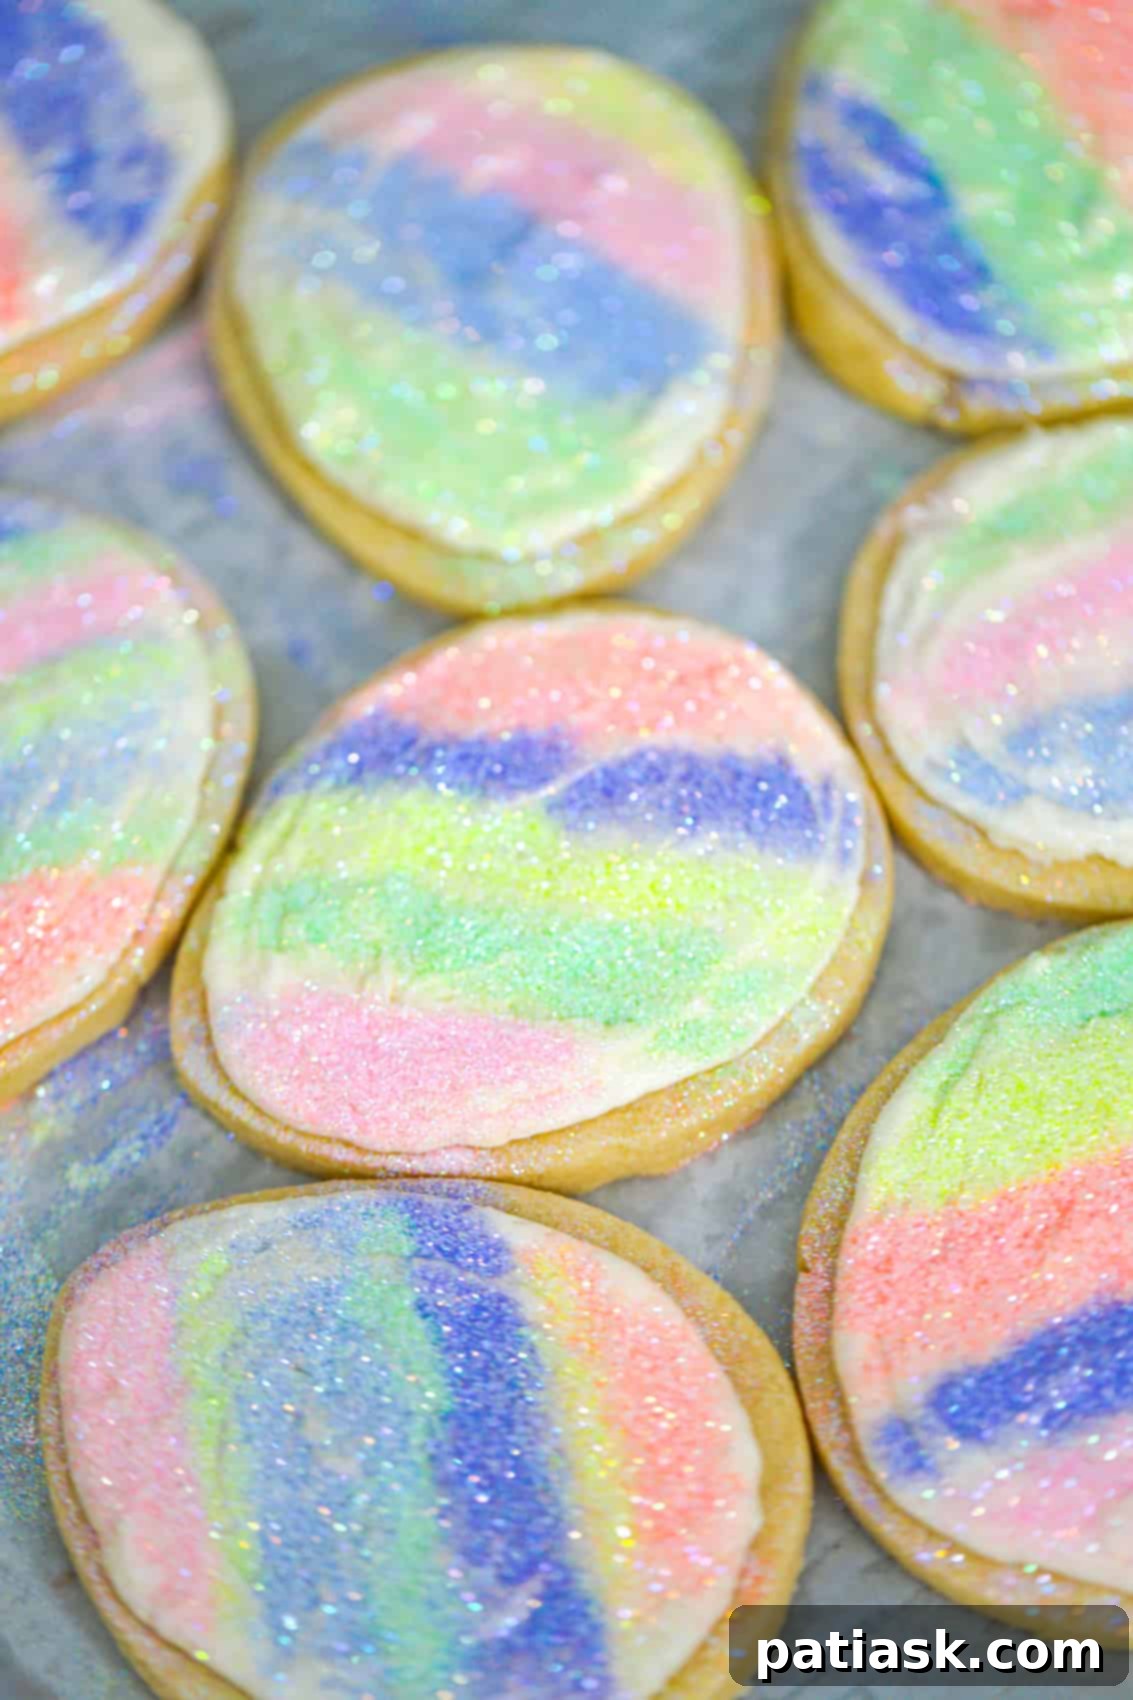
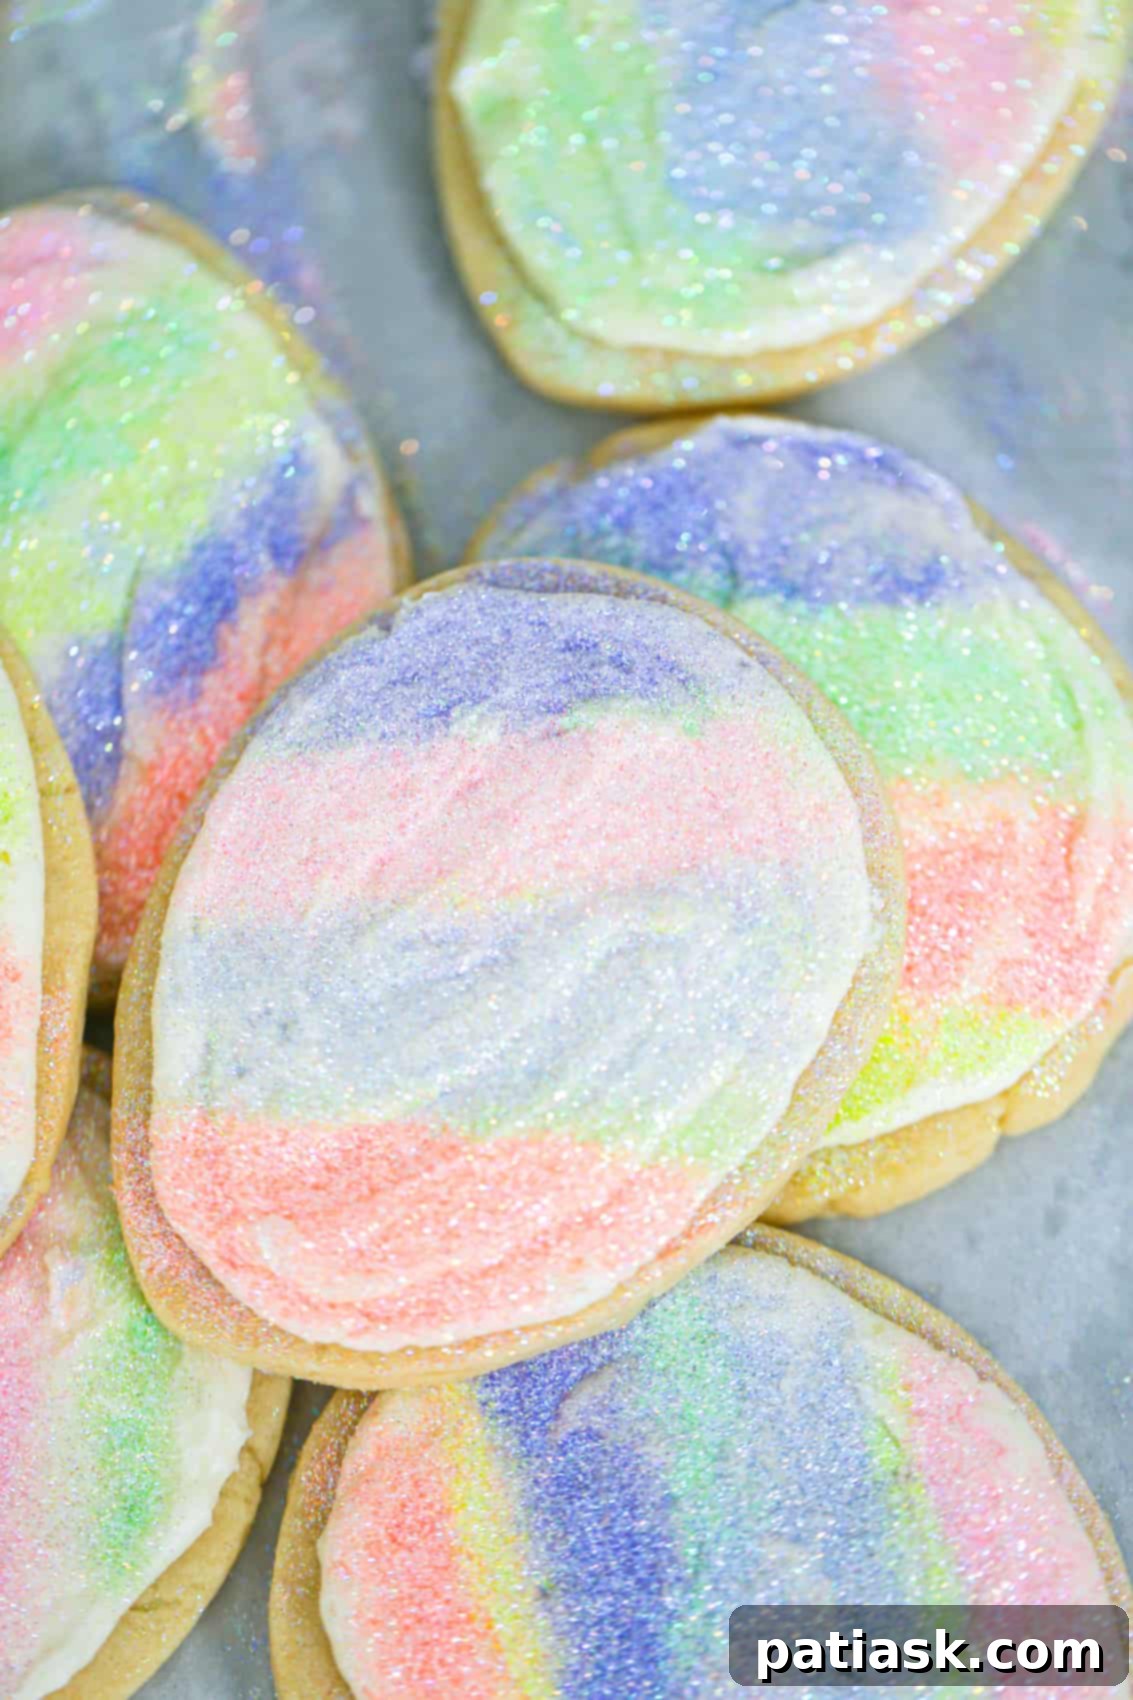
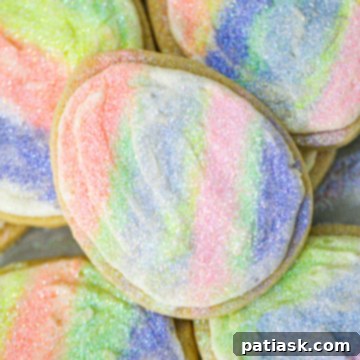
Welcome to the enchanting world of baking, where delightful treats bring smiles and create lasting memories! Today, we’re diving into a recipe for truly magical Rainbow Easter Egg Sugar Cookies. These aren’t just any cookies; they are a celebration of spring, bursting with irresistible buttery vanilla flavor and a tender, melt-in-your-mouth texture. Each cookie is crowned with a deliciously smooth vanilla buttercream frosting, elegantly dusted with edible sparkle glitter, making them almost too beautiful to eat – almost! But don’t worry, we’ll certainly enjoy every shimmering bite.
This easy-to-follow Easter Egg Cut-Out Sugar Cookie Recipe is an absolute joy, especially when the kids get involved in decorating. Imagine their excitement as they transform simple cookies into dazzling works of art! These vibrant cookies are perfect for adding a touch of homemade charm to your Easter celebrations, right alongside other festive favorites like classic shamrock cookies or a delightful assortment of Easter peep dessert treats.
Why These Rainbow Easter Egg Sugar Cookies Will Be Your New Favorite
There are countless reasons to fall in love with making these festive Easter egg cut-out sugar cookies. They bring so much joy and deliciousness to your holiday table!
- They are, without a doubt, the cutest rainbow egg cookies ever! Their vibrant sparkle makes them a centerpiece-worthy dessert.
- This recipe offers a fun, kid-friendly Easter project for the entire family. From mixing the dough to cutting out shapes and especially the decorating, everyone can participate and create treasured memories.
- Decorating these cookies is super simple with edible sugar or glitter! You just sprinkle it directly on top of the frosted cookies. This brilliant shortcut means no need to mix multiple frosting colors to achieve that stunning rainbow effect, saving you time and effort while still delivering spectacular results.
- The dough is incredibly easy to work with, featuring minimal chilling time thanks to the use of chilled butter. This ensures a smooth baking experience without endless waiting.
- We utilize a special Flash-Freeze Method for the cut-out dough. This clever technique prevents your cookies from spreading excessively in the oven, ensuring they maintain their beautiful egg shapes for perfectly crisp edges every time.
Crafting Our Perfect Cut-Out Easter Sugar Cookies
The foundation of these magnificent cookies lies in a simple yet incredibly reliable cookie dough. It comes together effortlessly using a handful of basic pantry ingredients you likely already have on hand. The magic truly begins once the dough is prepared; from there, it’s a matter of rolling it out, cutting it into charming egg shapes, and then a quick flash-freeze before baking. This entire process is designed to be straightforward and enjoyable for bakers of all skill levels.
The Flash-Freeze Method: Your Secret Weapon Against Spreading
To achieve perfectly shaped sugar cookies that hold their form and don’t spread too much during baking, chilling the dough is absolutely essential. Our recommended technique involves rolling out the dough immediately after you prepare it – don’t chill the entire ball of dough first, as it will become too firm to work with. Once rolled and cut into your desired Easter egg shapes, arrange them on a baking sheet lined with parchment paper. Then, pop them into the freezer for just 10 minutes. Alternatively, if your freezer space is limited, you can place them in the refrigerator for 15-20 minutes. This quick chill sets the butter, preventing the cookies from losing their distinct egg outlines as they bake. It’s a simple step that makes a huge difference!
One of the best parts about these Easter egg cookies is the fuss-free decorating. Forget intricate designs or multiple bowls of colored frosting. Our method is wonderfully straightforward: a smooth layer of classic vanilla buttercream icing, followed by a generous sprinkle of glittering sugar. That’s all it takes to achieve a stunning, festive look!
Vanilla Buttercream: We adore using our homemade vanilla buttercream for its rich flavor and smooth texture. However, if you’re short on time or prefer a quicker route, high-quality store-bought buttercream works beautifully as an easy shortcut. The key is the deliciousness of the frosting combined with the visual appeal of the sprinkles. Just like our festive shamrock sugar cookies, these Easter eggs come alive with a simple yet effective dusting of colored sugar.
What You’ll Need to Begin Your Easter Egg Cookie Adventure
Gathering your tools and ingredients before you start ensures a smooth and enjoyable baking process. Here’s everything you’ll need to create your beautiful rainbow Easter egg sugar cookies:
- Mixer: A stand mixer or a good hand mixer will make creaming the butter and sugar, as well as whipping up the buttercream, a breeze.
- Rolling Pin: Essential for rolling out your cookie dough evenly. An adjustable rolling pin can help achieve consistent thickness.
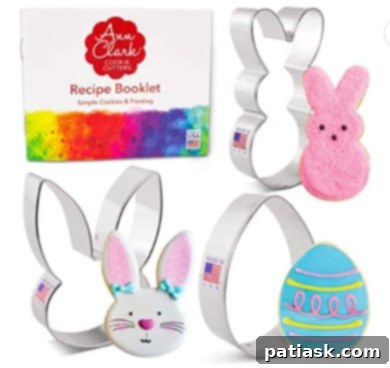
- Easter Cookie Cutters: While any egg-shaped cookie cutter will work, a set with various sizes or additional Easter shapes (like bunnies or chicks) can add more variety to your festive platter. For reference, the original recipe used Ann Clark 3-piece Easter egg cookie cutters.
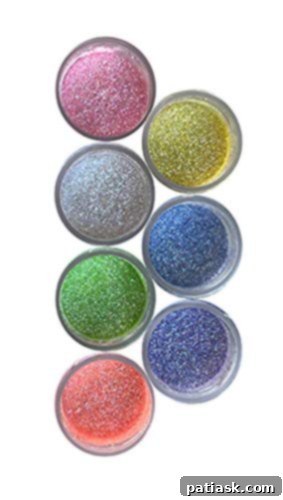
- Sanding Sugar Sprinkles or Disco Glitter: This is where the “rainbow” magic happens! You can find a wide array of colorful sanding sugars or edible glitter in the baking aisle of most grocery stores or online. These are much easier and quicker to use than painstakingly coloring different batches of frosting, yet they still provide that beautiful, eye-catching sparkle. The OH! SWEET ART Easter Disco Cake SET offers a fantastic range of shimmering colors.
- Decorating Essentials for Vanilla Buttercream:
- A knife or small icing spatula for spreading the buttercream smoothly onto the cookies.
- For a more precise application, you can use a piping or pastry bag. If you don’t have one, a sturdy ziplock bag with a small corner snipped off works perfectly.
- A medium-sized round tip (if using a piping bag) to outline the egg and fill it in with frosting, then smooth with your spatula.
- Alternatively, for a different frosting texture, you might consider using a dedicated sugar cookie icing.
- Baking Sheets and Parchment Paper: Lining your baking sheets with parchment paper prevents sticking and ensures easy cleanup. Quality baking sheets promote even baking.
Ingredients You’ll Need for These Festive Treats
For the Easter Egg Shaped Sugar Cookies:
- All-purpose flour, spooned and leveled for accurate measurement.
- Baking powder, for a touch of lift.
- Unsalted butter, cold and cut into cubes. Using cold butter helps maintain cookie shape. If using salted butter, simply omit the additional salt.
- Granulated sugar, for sweetness and tender texture.
- One large egg, binding our ingredients together.
- Salt, to balance the sweetness and enhance flavors.
- Vanilla extract, providing that classic, comforting aroma and taste.
- Almond extract, a secret ingredient that adds a delightful depth of flavor (optional, but highly recommended!).
For the Easy Buttercream Frosting & Dazzling Topping:
- Unsalted butter, at room temperature for a smooth, creamy frosting.
- Powdered sugar (confectioners’ sugar), for a silky-smooth icing.
- Salt, a pinch to cut the sweetness.
- Vanilla extract, for the perfect buttercream flavor.
- Milk of choice or heavy cream, to adjust frosting consistency.
- Assorted sparkling sanding sugars and/or shimmering sugar dust. These edible glitters are key to the rainbow effect! The OH! SWEET ART Easter Disco Cake SET (7 colors including Baby Pink, Baby Blue, Baby Violet, Baby Yellow, Baby Green, Baby Orange) is an excellent choice for a vibrant display.
Other Icing Option: For those who prefer a different frosting, a traditional sugar cookie icing recipe can also be used.
Instructions: How to Make Rainbow Easter Egg Shaped Sugar Cookies
Part 1: Crafting the Perfect Easter Egg Shaped Sugar Cookies
- Prepare Your Baking Sheets: Begin by lining several baking sheets with parchment paper. Set them aside, ready for your cookie creations.
- Combine Dry Ingredients: In a medium bowl, whisk together the all-purpose flour, salt, and baking powder. This ensures even distribution of leavening and seasoning. Set this dry mixture aside.
- Cream Butter and Sugar: Using a hand mixer or stand mixer fitted with the paddle attachment, cream together the cold, cubed unsalted butter and granulated sugar until the mixture is light, smooth, and creamy. This should take a few minutes.
- Incorporate Wet Ingredients: Blend in the large egg and both the vanilla and almond extracts. Mix until just combined.
- Add Dry to Wet: Gradually add the reserved flour mixture to the wet ingredients, beating on low speed until just combined. Be careful not to overmix. Scrape down the sides and bottom of the bowl as needed to ensure everything is fully incorporated.
- Form the Dough: The dough might appear crumbly at this stage. Gently knead it together with your hands as you scoop it out of the bowl until it forms a cohesive ball.
- Roll and Cut: On a lightly floured surface, roll the dough to your preferred thickness, typically about ⅓ to ⅜ inch. Use your egg-shaped cookie cutter to cut out the cookies.
- Flash-Freeze for Shape Retention: Carefully place the cut-out cookies onto your prepared baking sheets, ensuring they are about 2 inches apart. Transfer the baking sheets to the freezer for 10 minutes. While they chill, preheat your oven to 350 degrees F (175°C).
- Bake to Perfection: Bake the cookies for 10-12 minutes, or until the edges are just barely golden. It’s crucial not to overbake, as this keeps them soft and prevents browning.
- Cool Completely: Allow the cookies to sit on the baking sheet for a few minutes before carefully transferring them to a wire cooling rack to cool completely. They must be fully cooled before frosting.
Part 2: Easy Buttercream Frosting & Dusting Cookies for that Rainbow Effect
- Prepare the Buttercream: In your mixer, combine the room temperature butter, half of the powdered sugar, vanilla extract, salt, and half of your chosen milk/heavy cream. Mix until well combined and smooth.
- Adjust Consistency: Add the remaining powdered sugar and gradually incorporate more milk/heavy cream, a tablespoon at a time, until you reach your desired frosting consistency – smooth and spreadable, but not too thin.
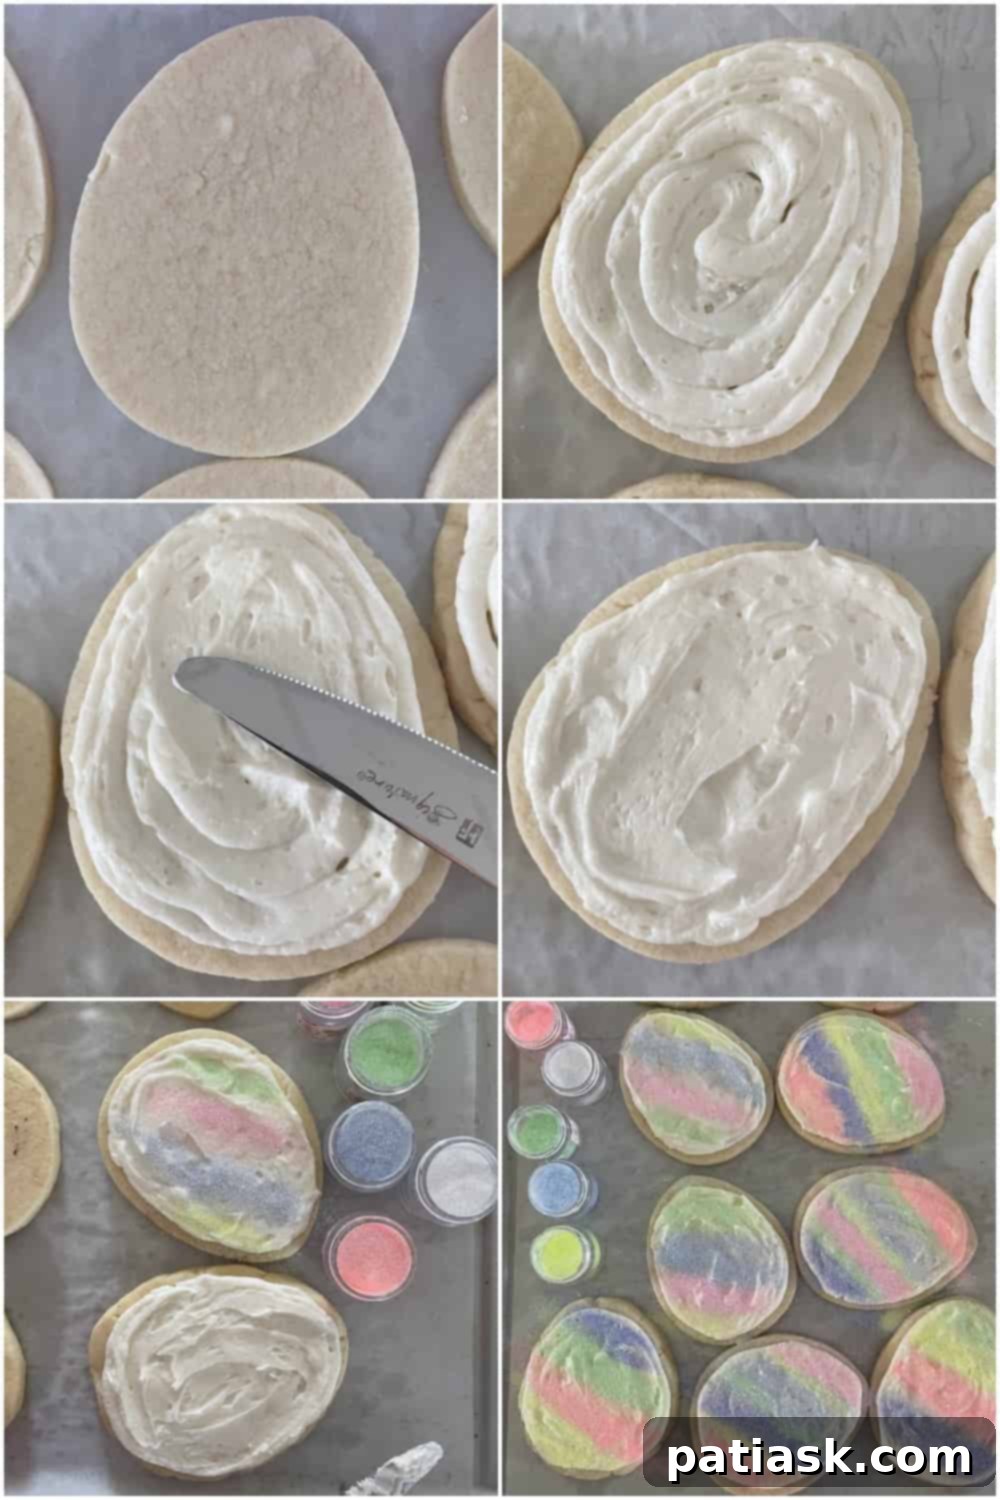
- Decorate the Cookies: Once the cookies are completely cool, use a small spatula or knife to spread a thin, even layer of buttercream over each cookie. For more intricate decorating, transfer the frosting to a pastry bag fitted with a small or medium round tip, outline the egg, fill it in, and then smooth it with a spatula.
- Add the Sparkle: Immediately after frosting each cookie, generously sprinkle with your assorted sanding sugars or shimmering sugar dust. This is where the rainbow magic truly comes to life!
- Allow to Set: Let the decorated cookies set for about 3 hours at room temperature, or preferably overnight, before stacking them to prevent smudging.
Expert Tips for Perfect Sugar Cookies Every Time
Achieving bakery-quality sugar cookies is easier than you think with a few simple tricks up your sleeve:
- Cold Butter is Key: Always use cold butter, cut into cubes, for the cookie dough. This helps the dough stay firm, preventing the cookies from spreading too much and ensuring they hold their charming egg shapes during baking.
- Harness the Power of Flash-Freezing: Once you’ve cut out your cookie shapes, a quick 10-minute flash-freeze in the freezer is transformative. This step is crucial for no-spread sugar cookies. If you’re baking in batches, consider putting one tray in the freezer and another in the fridge for 15-20 minutes. By the time the first batch bakes, the next will be perfectly chilled and ready, guaranteeing consistent, beautifully shaped cookies.
- Measure Flour Accurately: Precision in measuring flour makes a significant difference in cookie texture. Fluff up your all-purpose flour before lightly spooning it into your dry measuring cup. Avoid packing it down. Then, use the back of a knife or a straight edge to level off the excess flour.
- Resist Overbaking: For soft, tender, and “bakery-style” cookies, do not overbake! They should only be barely golden on the bottoms. Overbaking will result in hard, dry, and browned cookies.
- Allow Frosting to Set: After frosting, give your cookies ample time to set. About 3 hours or even overnight is ideal before stacking them. This prevents the frosting from smudging and keeps your beautiful decorations intact.
- Homemade vs. Store-Bought Frosting: While homemade buttercream offers a superior taste, don’t hesitate to use store-bought buttercream frosting for a convenient shortcut. For those who enjoy a different texture, royal icing with meringue powder (available online) is another popular choice for sugar cookies, or you can use a dedicated sugar cookie icing recipe.
How to Store Your Rainbow Easter Egg Cut-Out Cookies
- These delightful rainbow cookies can be prepared ahead of time. Store them in an airtight container at room temperature for several days to maintain their freshness.
- We generally do not recommend refrigerating frosted sugar cookies, as the cold environment can tend to dry them out more quickly.
How to Freeze Baked and Unbaked Cookies
- Freezing Baked Cookies: If you’re planning to bake in advance, you can freeze baked, unfrosted cookies. Arrange them in layers separated by parchment or waxed paper in an airtight container. Once thawed, you can frost them fresh.
- Freezing Cookie Dough: For future baking sessions, you can also freeze the cut-out, unbaked cookie dough shapes. Place them on a parchment-lined baking sheet and freeze until solid, then transfer to an airtight freezer bag for up to 3 months. Bake from frozen, adding a minute or two to the baking time.
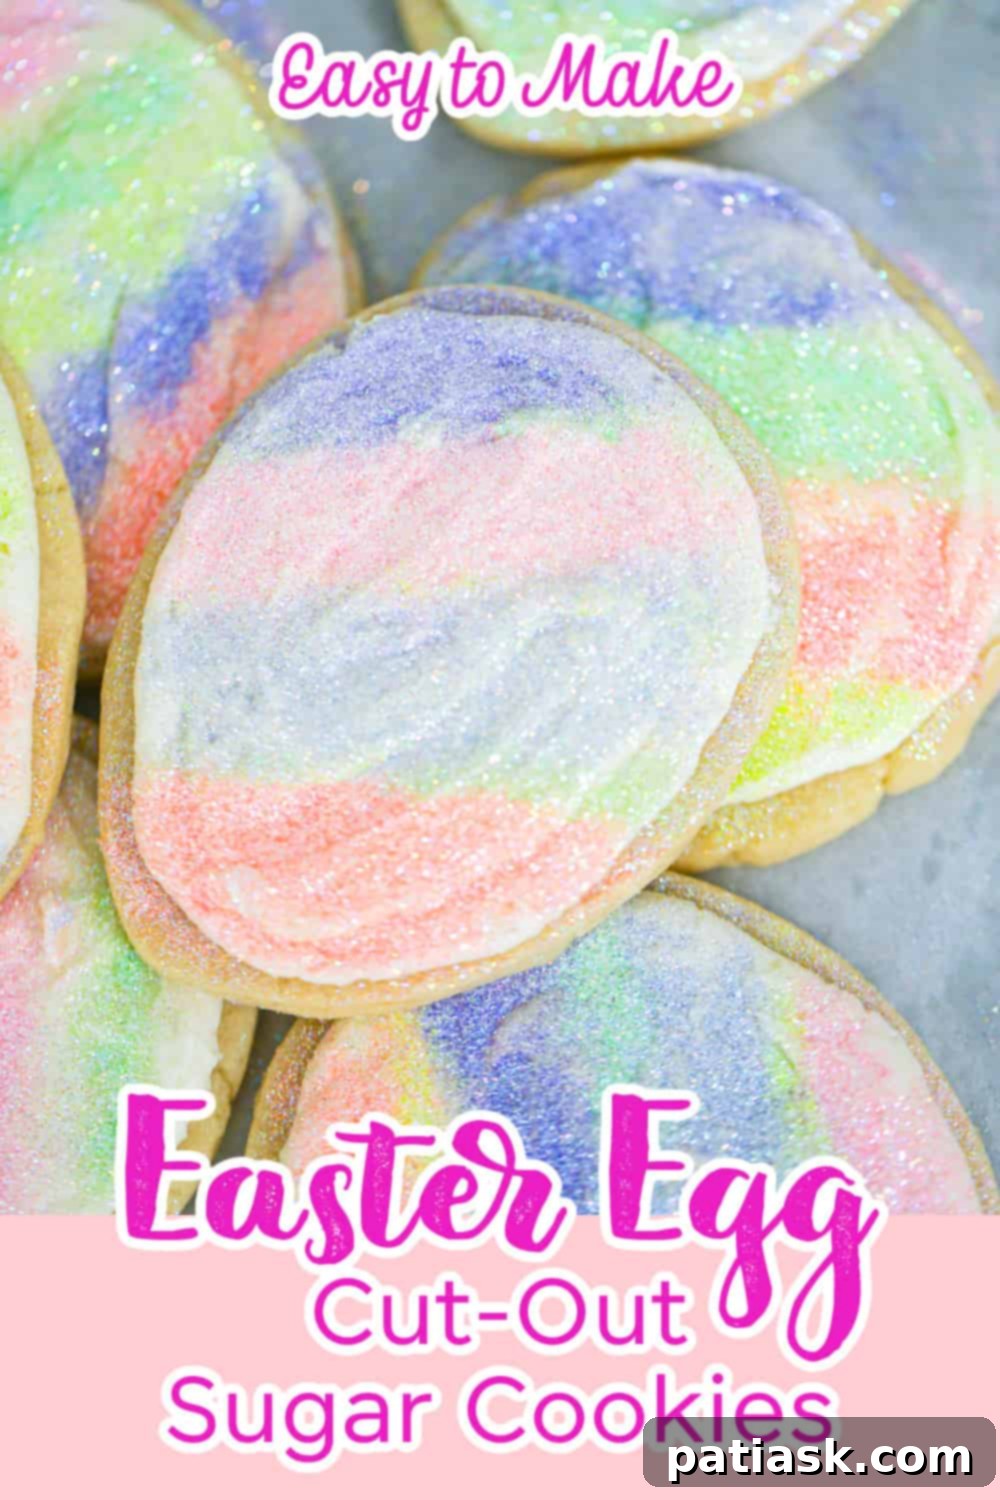
These Rainbow Easter Egg Cut-Out Sugar Cookies are more than just a sweet treat; they’re a symbol of springtime joy and celebration. They are perfectly suited for Easter baskets, adorning charcuterie boards, or as thoughtful homemade gifts. Whether you make them small or large, serving these vibrant cookies on a beautiful platter will undoubtedly delight friends, family, and guests at any gathering celebrating Easter. Their festive appeal and delicious taste make them an unforgettable part of your holiday desserts.
Don’t forget to share your beautiful creations on your favorite social media platforms like Pinterest, Instagram, and Facebook! We love seeing your baking triumphs!
More Delightful Easter & Spring Dessert Ideas!
- Best Soft Sour Cream Cookies with Buttercream Frosting
- 45 Awesome Easter & Spring Desserts Collection
- M&M Easter Egg Marshmallow Fudge Brownies
- Homemade Chocolate Peanut Butter Eggs
- Tips for Freezing Cookie Dough and Baked Cookies
- Charming Easter Rice Krispie Nests
- Festive Easter M&M Chocolate Chip Blondies
- 35 Festive Homemade Easter Treats
- Easy Easter Candy Nests
- Decadent Carrot Cake Truffles
Easter Egg Sugar Cookies
Author: Kim Lange
These fun, disco Easter Egg Sugar Cookies are so soft and thick with irresistible buttery vanilla flavor, topped with an equally delicious frosting with edible sparkle glitter! Almost too cute to eat, but hey! We will eat them!
Ingredients
Easter Egg Shaped Sugar Cookies
- 3 cups all-purpose flour (spooned and leveled)
- 2 teaspoons baking powder
- 1 cup unsalted butter (cold & cut into cubes, can also use salted butter, omit salt)
- 1 cup granulated sugar
- 1 large egg
- ½ teaspoon salt
- 2 teaspoons vanilla extract
- ¼ teaspoon almond extract
Easy Buttercream Frosting & Edible Glitter/Sanding Sugar
- 1 cup unsalted butter (room temperature)
- 3 – 4 cups powdered sugar
- ¼ teaspoon salt
- 2 teaspoons vanilla extract
- 2-4 tablespoons milk of choice or heavy cream
- Assorted sparkling sand sugars and/or shimmering sugar dust (e.g., OH! SWEET ART – Easter Disco Cake SET with 7 colors: Baby Pink, Baby Blue, Baby Violet, Baby Yellow, Baby Green, Baby Orange)
Instructions
How to Make Easter Egg Shaped Sugar Cookies
- Line baking sheets with parchment paper, set aside.
- Whisk together the flour, salt, and baking powder, set aside.
- Using a mixer, cream together the cold, cubed butter and sugar until smooth and creamy. Blend in the egg and both extracts. Gradually add the flour mixture and beat until just combined, scraping down the bowl as needed, including the bottom.
- The dough will be crumbly, so knead it together with your hands as you scoop it out of the bowl until it comes together.
- Roll dough on a floured surface to about ⅓” to ⅜” thickness preferred and cut into shapes using an egg shaped cookie cutter.
- Place cut-out cookies on the prepared baking sheets 2 inches apart and then transfer to the freezer for 10 minutes, while you preheat the oven to 350 degrees F.
- Bake for 10-12 minutes until just barely golden on the bottoms, being careful not to over-bake.
- Let sit for a few minutes on the sheet, then transfer to a cooling rack to cool completely before frosting.
Easy Buttercream Frosting & Edible Glitter/Sanding Sugar
- Using a mixer, mix together the butter, ½ of the powdered sugar, vanilla, salt, and ½ of the milk until mixed well. Add remaining powdered sugar and add more milk until you get the consistency you want for cookies.
- To decorate cookies, use a spatula or knife to cover the cookies, or add frosting to a pastry bag with a small or medium tip and pipe onto cookies.
- Smooth the frosting out with a spatula and knife, then add sugar sprinkles or shimmering sugar dust to the tops.
- Allow cookies to set about 3 hours or overnight before stacking.
Notes
- You could also use a different sugar cookie icing if preferred!
