Crafting a memorable **Heart-Shaped Valentine’s Day cake** doesn’t have to be a daunting task. This guide will show you how to effortlessly bake and decorate a stunning and delicious cake that will truly impress your special someone. Forget complicated recipes; with a few simple steps, you can create a unique, heartfelt treat that speaks volumes of your affection. Imagine the delight on their face when they see this beautiful, homemade creation!
Valentine’s Day is the perfect occasion to celebrate love, and what better way to do so than with a personalized dessert? This romantic heart cake is an undeniable showstopper, perfect for a cozy dinner for two, a family gathering, or even to share with colleagues and friends. It’s a versatile dessert that spreads joy and sweetness wherever it goes.
If you’re looking for more delightful treats to complement your celebration, be sure to explore our collection of 25 Drool-Worthy Red Velvet Dessert Recipes, these tempting Valentine Milk Chocolate Brownie Bites, and our Easy Valentine Chocolate Bark. Each offers a unique way to express your love through delicious baking.
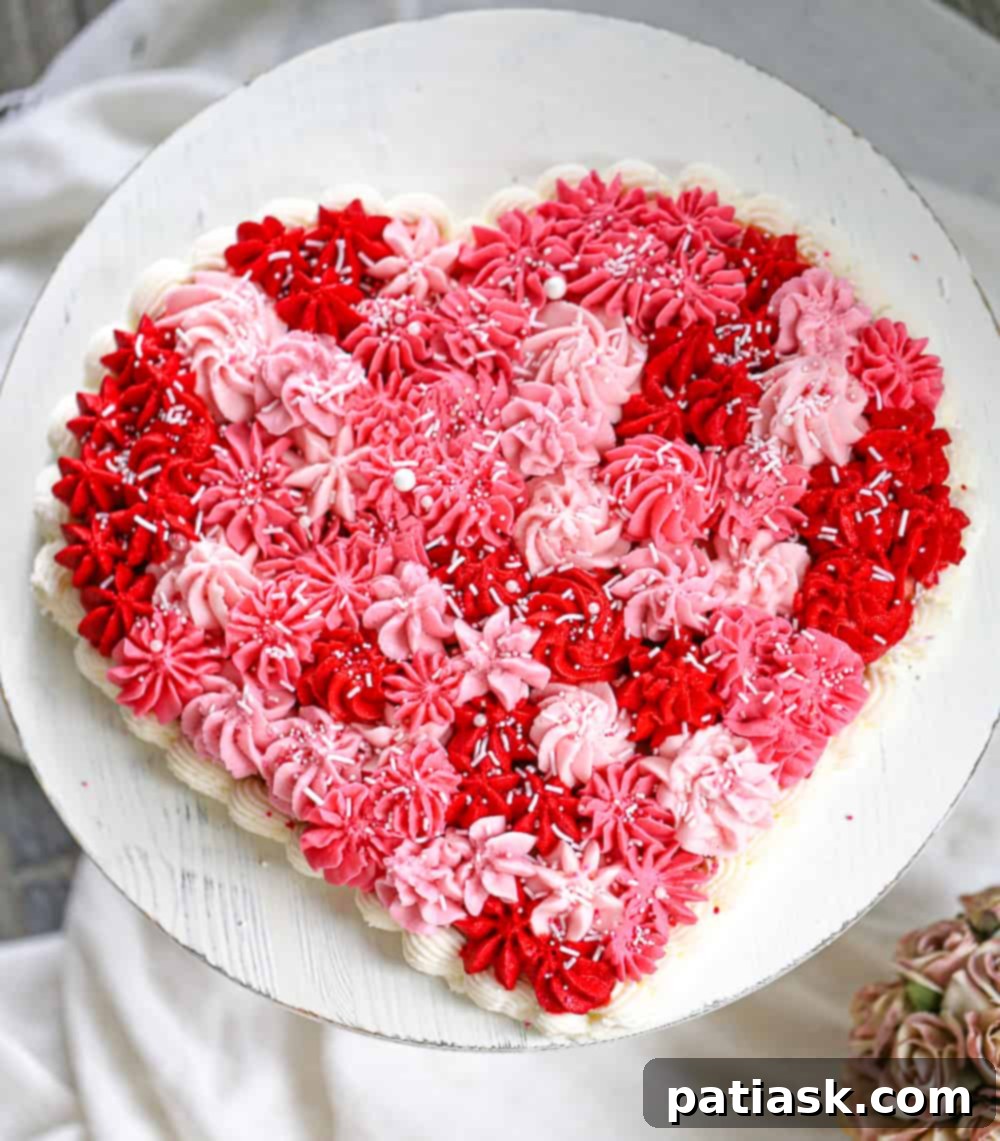
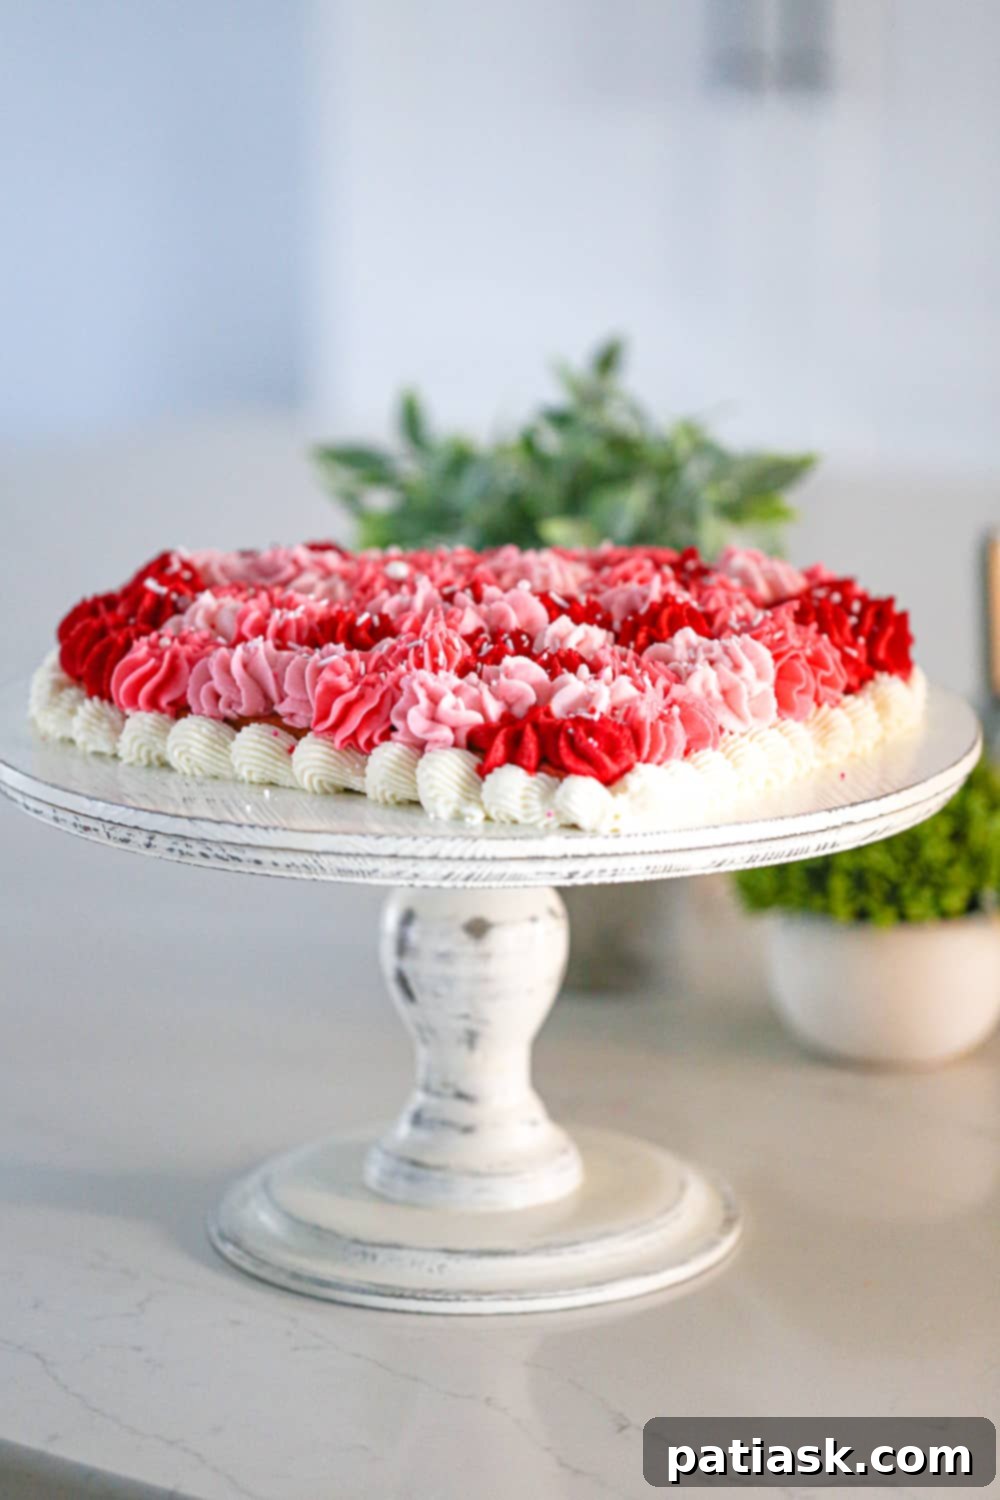
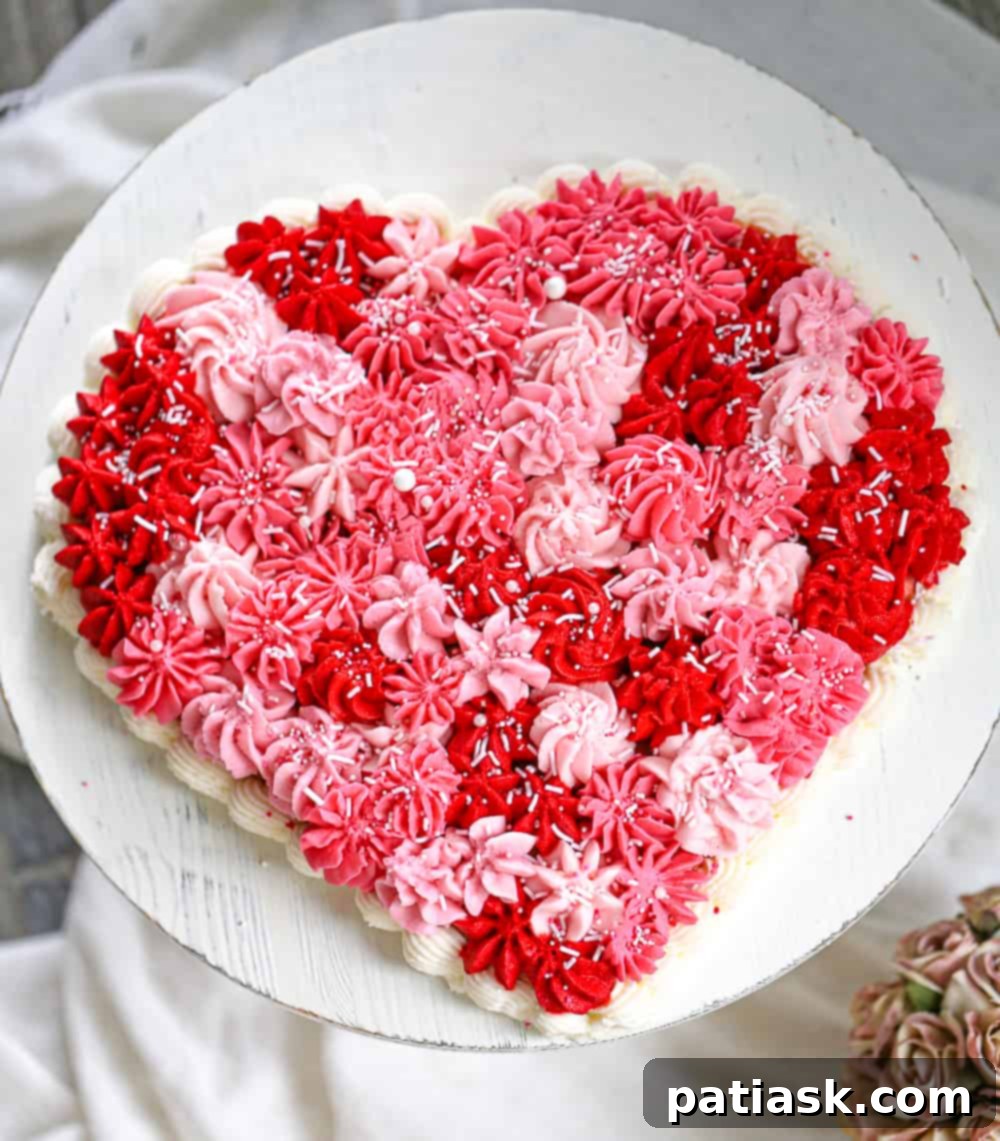
The beauty of this **Valentine’s Day heart cake** lies in its vibrant, inviting appearance. We’ll guide you through creating a visually appealing masterpiece using randomly placed pastel and vivid rich colors of pinks, red, and white frosting, which beautifully complement the cake’s romantic theme. The entire process, from baking the two simple cake shapes to assembling them into a heart and applying the artistic frosting, is surprisingly straightforward and incredibly rewarding.
Once the cakes are baked and cooled, we’ll dive into the fun part: making and coloring the creamy buttercream frosting. We’ll then place these delightful hues into pastry bags, ready for decoration. Using an assortment of large star tips, you can transform your cake into a lovely piece of edible art, creating delicate rosettes and decorative flourishes that look professional yet are simple to achieve. Are you ready to embark on this sweet baking adventure and create a truly unforgettable **homemade Valentine’s cake**?
Essential Equipment for Your Heart-Shaped Cake
Having the right tools makes all the difference when baking and decorating a special occasion cake. Here’s a list of the equipment you’ll need to create your beautiful **Valentine’s Day dessert**:
- 1 8-inch round baking pan: This will form the curved top of your heart.
- 1 8-inch square baking pan: This will create the base of your heart shape.
- Star piping tips and pastry bags: An assortment of large star tips will help you create beautiful, varied frosting designs. Disposable pastry bags make cleanup easy.
- 3-4 Gel food coloring choices: Gel colors provide vibrant hues without thinning your frosting, allowing you to create beautiful pinks, reds, and whites that truly pop.
- Electric mixer (stand or hand-held): Essential for whipping up fluffy buttercream frosting.
- Rubber spatula: For scraping bowls and folding ingredients.
- Cooling rack: To ensure your cakes cool evenly and prevent them from becoming soggy.
- Serrated knife: For easily leveling cakes and cutting the round cake in half.
- Cake board or large serving plate: To assemble and present your finished heart-shaped cake.
Gather Your Ingredients for a Perfect Valentine’s Treat
The beauty of this recipe is its flexibility. You can choose your favorite cake flavor and frosting, making it truly your own. Here’s what you’ll need for your **romantic heart cake**:
For the Heart-Shaped Cake
- 1 box cake mix of your choice: Opt for flavors like strawberry, red velvet, chocolate, or vanilla. A good quality cake mix simplifies the baking process while still delivering excellent flavor.
- Ingredients as directed on the cake mix box: This typically includes eggs, oil, and water. Follow the package instructions carefully for best results, or use your preferred homemade recipe. Ensure your recipe yields enough batter for a two-layer cake to create the desired heart shape.
For the Buttercream Frosting (or Your Favorite Frosting Recipe)
This creamy, dreamy buttercream is perfect for piping and holds its shape beautifully. If you prefer, you can use your go-to frosting recipe, just make sure you have enough to generously frost a two-layer cake.
- 1 ½ cups (or 2 ½ sticks) unsalted or salted butter: Ensure it’s softened to room temperature for a smooth, lump-free frosting. If using unsalted butter, you’ll add salt separately.
- ½ teaspoon salt: Only if using unsalted butter. Salt helps balance the sweetness and enhances the flavor of the buttercream.
- 5-7 cups powdered sugar (confectioners’ sugar): Sifted powdered sugar is key for a silky smooth frosting. Adjust the amount to achieve your desired consistency and sweetness.
- 1 tablespoon vanilla extract: Pure vanilla extract adds depth and classic flavor to the buttercream.
- 3 tablespoons to ¼ cup milk of choice: Start with less and add more as needed to reach your desired frosting consistency. Whole milk or heavy cream will yield a richer frosting.
- 3-4 Food color gels of choice: Gel colors are concentrated and create vibrant hues without adding excess liquid, which could alter the frosting’s texture.
Baking the Foundation: Your Heart-Shaped Cake Layers
The secret to our heart-shaped cake is in baking two simple, complementary shapes that combine to form the perfect heart. This method is incredibly easy and eliminates the need for a specialized heart-shaped pan.
Choose Your Cake: Begin by selecting your favorite cake mix or homemade recipe. While I opted for a delightful strawberry cake mix, feel free to use classic white, rich chocolate, or indulgent red velvet cake recipes. The key is to ensure your chosen recipe yields enough batter for a substantial single-layer cake. If you desire a taller, more impressive double-layer cake, simply double the ingredients of your chosen cake recipe. Our method here creates a generous single-layer heart.
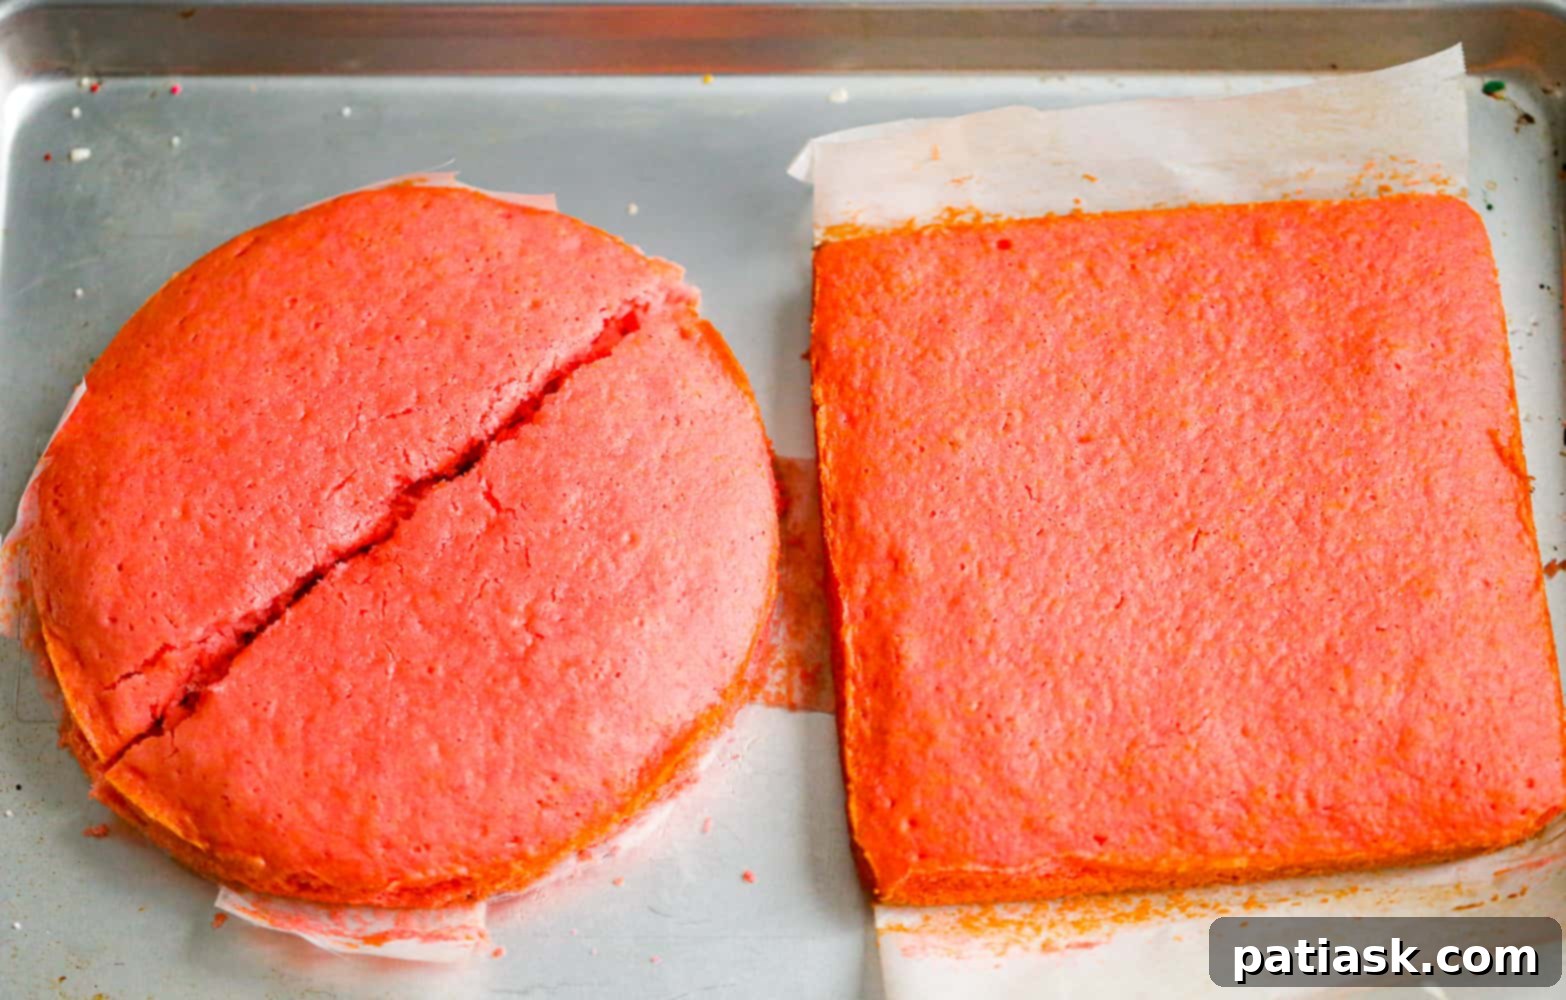
Prepare and Pour the Batter: Follow the instructions on your cake mix box precisely, or prepare your chosen homemade cake batter. Once ready, divide the batter evenly. Pour half of the batter into your greased and floured 8-inch square pan, and the other half into your greased and floured 8-inch round pan. It’s helpful to eye-ball the batter to ensure similar thickness in both pans, promoting even baking. (Pro-tip: If you happen to own a heart-shaped pan and prefer to use it, by all means, go for it! This guide offers a creative alternative.)
Bake to Perfection: Place both pans in a preheated oven and bake for approximately 26 to 31 minutes. Baking times can vary depending on your oven and cake mix, so always keep an eye on them. The cakes are done when a wooden skewer or toothpick inserted into the center comes out clean, with no wet batter attached.
Cooling is Key: Once baked, remove the cakes from the oven. Allow them to cool in their pans on a wire rack for 15-20 minutes. This crucial step helps the cakes firm up, making them easier to handle and less likely to crumble. After this initial cooling, carefully invert the cakes onto the wire rack to cool completely. For best results and to prevent dryness, once completely cool, you can wrap them tightly in plastic wrap and refrigerate until you’re ready to frost. This also makes them easier to cut and assemble.
Assembling Your Romantic Heart Shape
Now comes the magical part: transforming two basic cake shapes into a charming heart! This step is surprisingly simple and creates a beautifully defined outline for your **homemade Valentine’s cake**.
Prepare for Assembly: Once your square and round cakes are completely cooled, you’re ready to assemble. Ensure they are cool to the touch to prevent frosting from melting.
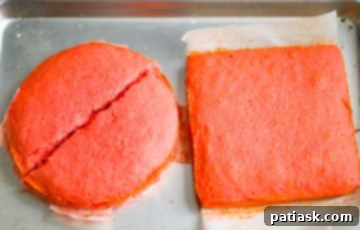
Halve the Circle: Carefully cut the round cake precisely in half. A long serrated knife works best for a clean cut.
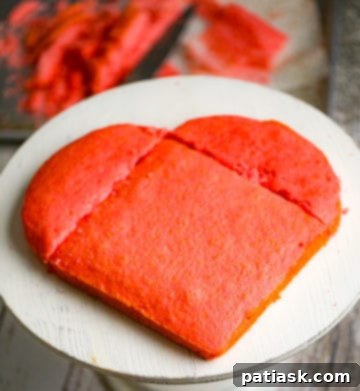
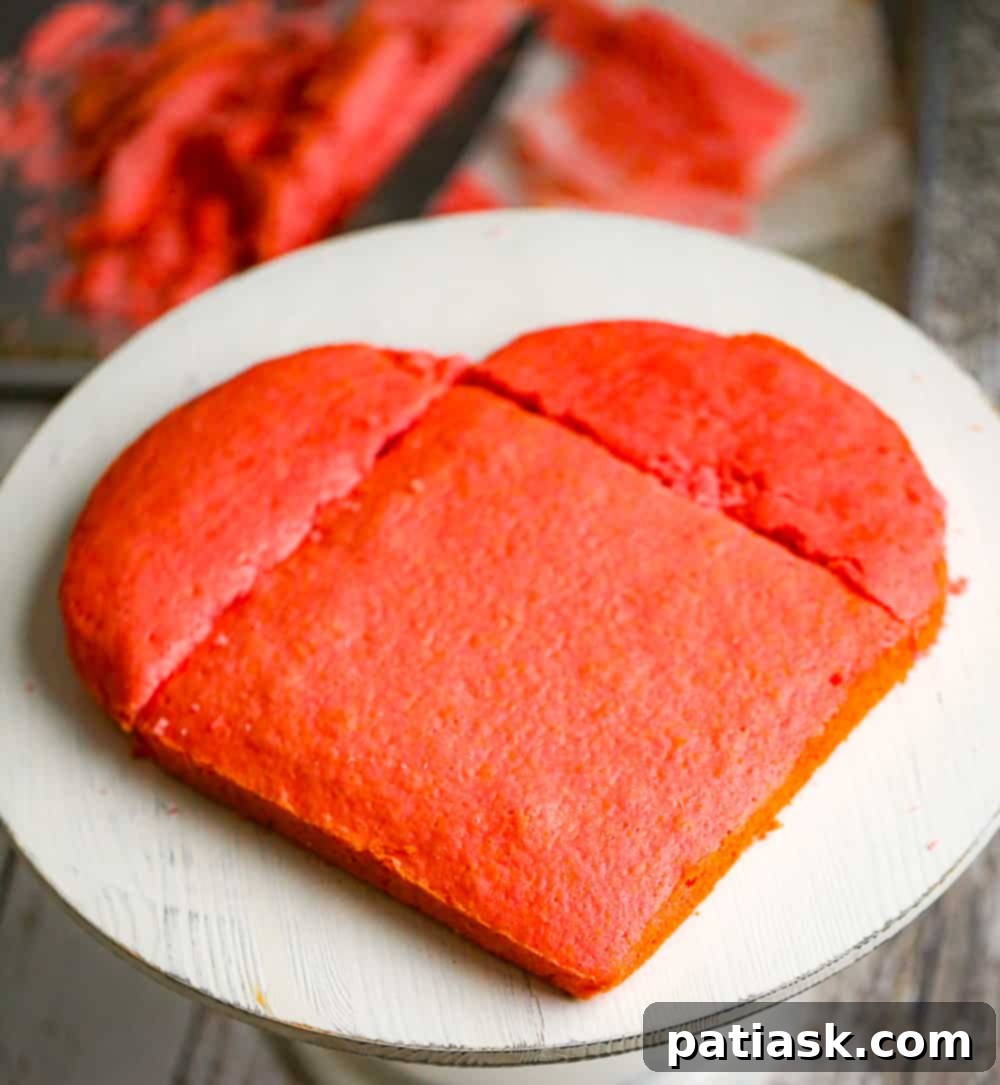
Position the Square: Place the square cake on your chosen large plate or cake board. Rotate it so it resembles a diamond shape, with one corner pointing towards you. This will form the bottom point of your heart.
Add the Curves: Take each half of the circular cake and position them against the top two sides of the square cake. Align the flat, cut edges of the half-circles with the two upper sides of the diamond-shaped square. These curved halves will create the distinctive rounded top of the heart. Gently press them together to form a cohesive heart shape.
Stabilize Your Creation: Once assembled, ensure the cake is centered and stable on your large plate or cake board. You can add a thin layer of buttercream between the cake pieces to help “glue” them together, creating a more stable foundation for frosting.
Decorating Your Heart: Making and Frosting Your Valentine’s Day Cake
Now for the most exciting part: bringing your heart-shaped canvas to life with vibrant, delicious buttercream! This step allows for immense creativity, making your **Valentine’s Day dessert** truly unique.
Prepare Your Frosting Tools: Before you start, gather your chosen piping tips and pastry bags. If you’re going for a stunning star pattern, large star tips are perfect. I personally love using Star Tips from Suuker for their defined shapes. Ensure your tips are clean and ready to go.
Whip Up the Buttercream: In a large mixing bowl, using an electric mixer, beat the softened butter on medium speed until it’s light and creamy. This can take a few minutes. Gradually add the salt (if using unsalted butter), powdered sugar, and vanilla extract. Start with a few tablespoons of milk and beat on medium to high speed until the frosting is smooth, light, and fluffy. If it’s too thick, add more milk, one teaspoon at a time, until you reach a pipeable consistency. If it’s too thin, add more powdered sugar.
Color Your World: Divide your freshly made buttercream into 3 or 4 separate bowls. Now, it’s time to add your food color gels. Add a small amount of gel to each bowl and mix thoroughly until the color is evenly distributed. You can create vibrant, bold hues or soft, romantic pastels – whatever suits your vision for this **romantic heart cake**. Add more gel as needed to achieve your desired intensity. Remember, a little goes a long way with gel colors.
Fill Your Pastry Bags: Fit your pastry bags with your chosen large star tips or flower tips. Spoon each colored frosting into its own pastry bag. Push the frosting down towards the tip, twisting the top of the bag to seal it. Having different colors ready in separate bags will make the decorating process smooth and efficient.
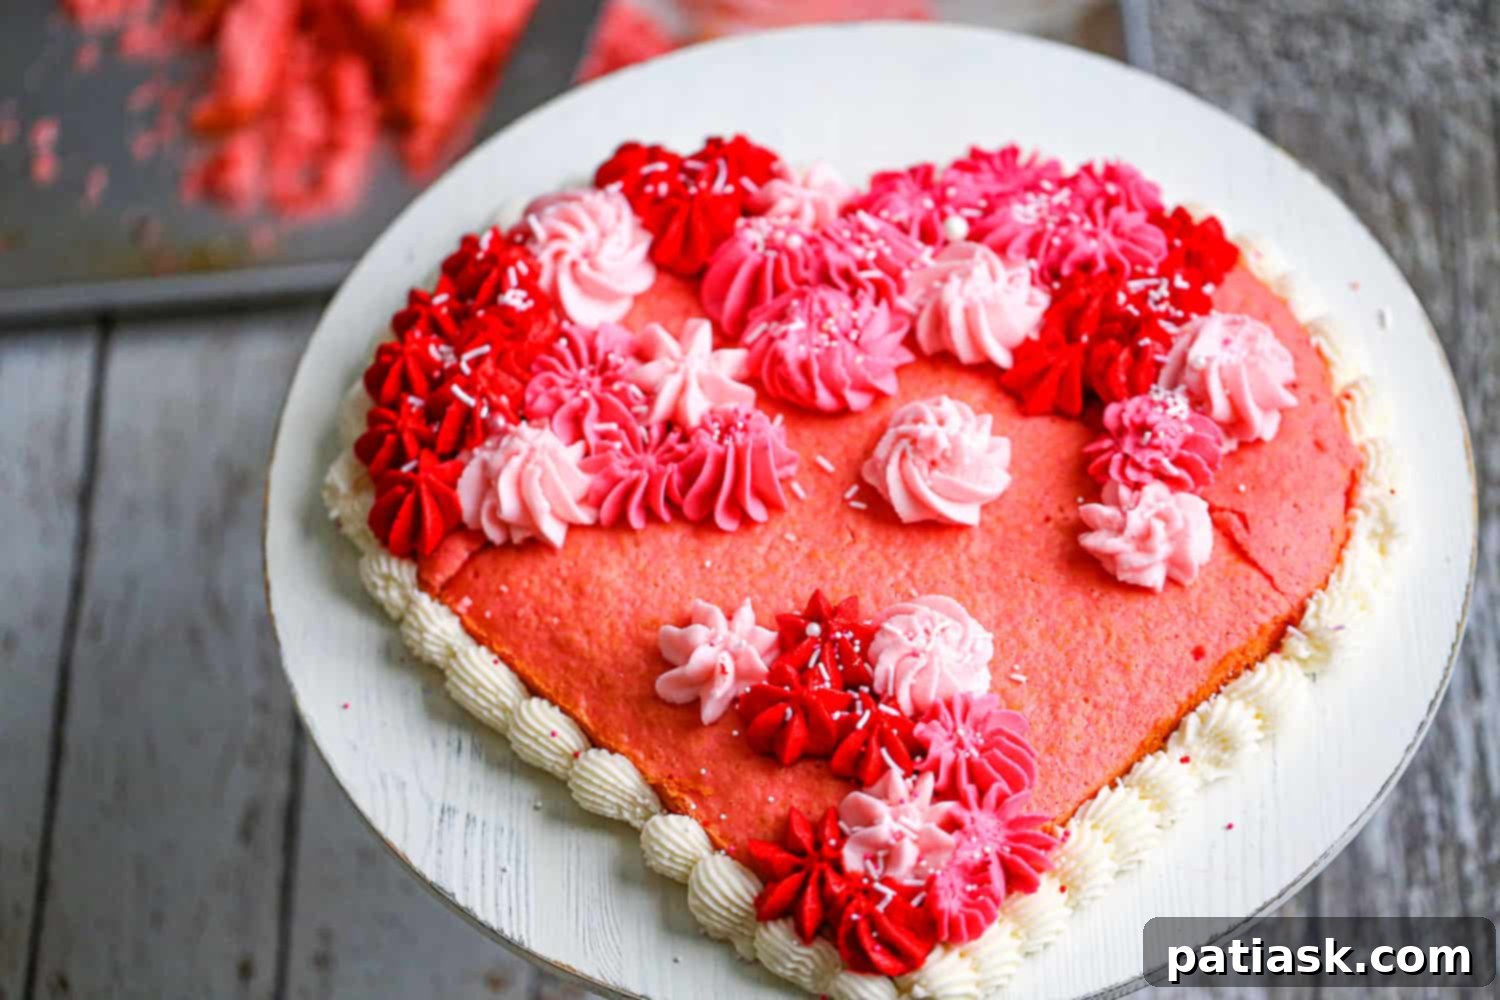
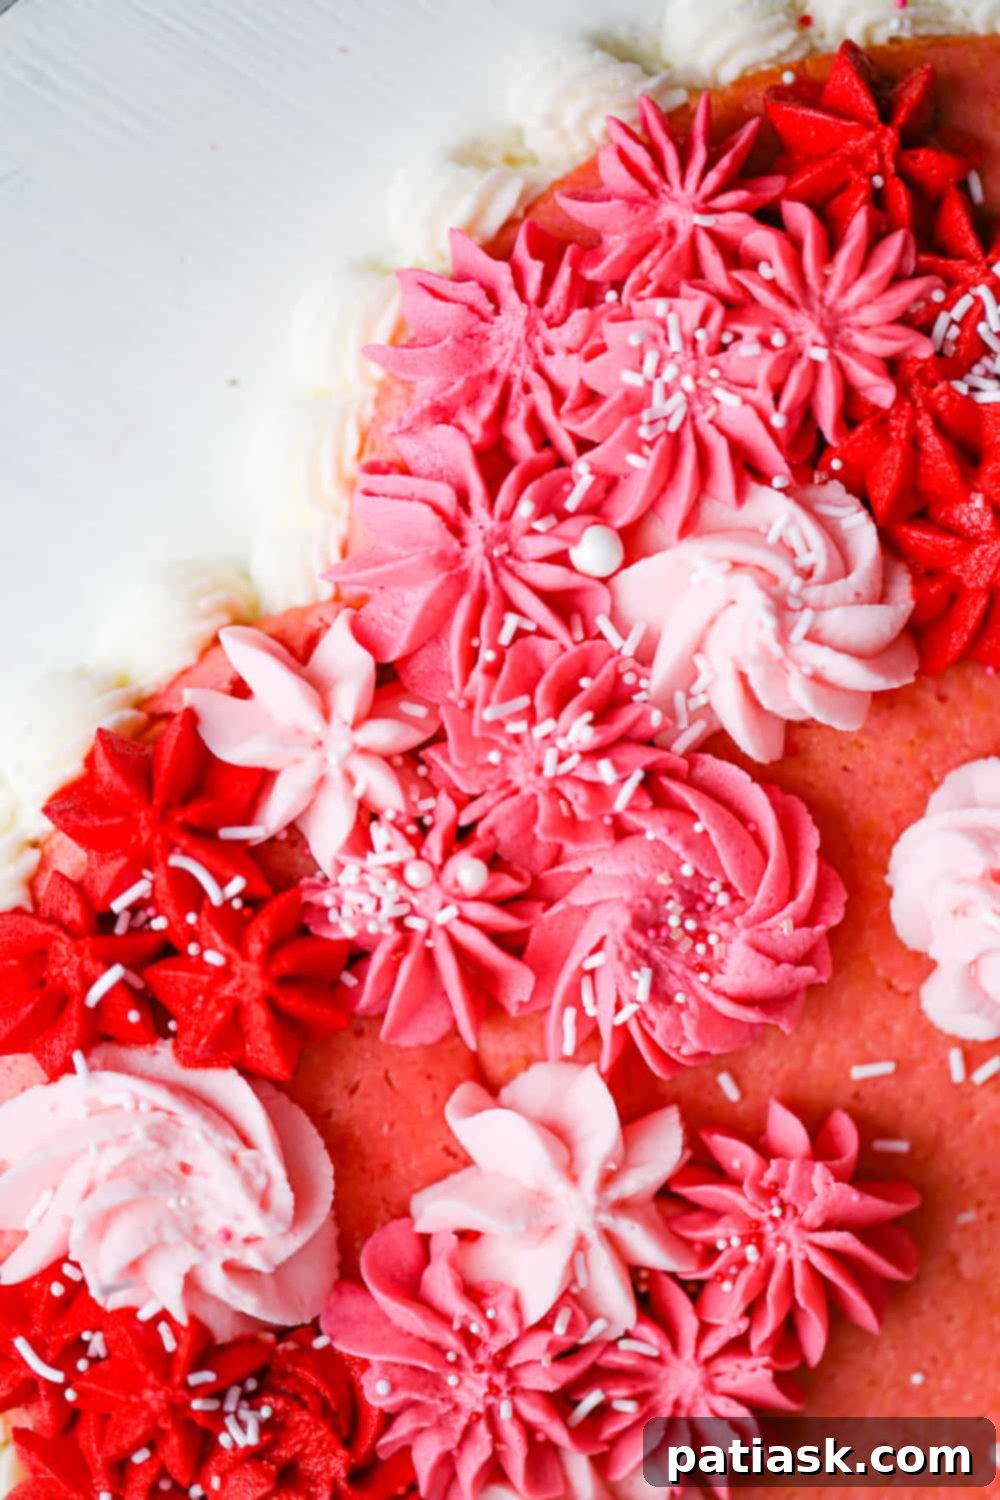
Pipe Your Masterpiece: Start by piping a decorative border around the entire edge of your heart-shaped cake. This creates a neat frame and helps contain the rest of the frosting. Then, begin filling in the top surface of the cake. Using one frosting color at a time, pipe stars or small rosettes randomly across the top. Continue alternating between your colored frostings, filling in any gaps, until the entire top surface is covered with a beautiful, textured design. Don’t worry about perfection; the random placement adds to the charm! Once the top is filled, you can pipe a simple design or more stars along the sides of the cake as well. For an extra touch of elegance, consider using Russian Piping Tips to create intricate, easy-to-pipe flowers directly onto your cake.
Add Final Touches: To make your cake even more festive and appealing, sprinkle some edible glitter, decorative sprinkles, chocolate shavings, or fresh berries like strawberries or raspberries over the frosted surface. These embellishments add texture, shine, and extra flavor, elevating your **DIY Valentine’s cake** to a professional level.
A Sweet Conclusion: Your Homemade Heart Cake Awaits!
There you have it! With just a few simple ingredients and clear directions, anyone can create their very own spectacular **Heart-Shaped Valentine’s Day cake**. This delightful baking project proves that creating impressive, heartfelt desserts doesn’t require advanced skills or elaborate equipment. The joy of baking something special for a loved one is truly unparalleled, and this cake is designed to deliver just that.
Show your appreciation and affection with this semi-homemade heart-shaped Valentine’s Day cake. It’s more than just a dessert; it’s a tangible expression of love and thoughtfulness. Imagine presenting this beautiful cake, alongside a thoughtful card, a bottle of champagne, some gourmet Valentine candies, or a gorgeous bouquet of flowers. Together, these elements will create an absolutely perfect Valentine’s Day celebration, filled with sweetness and cherished moments.
And remember, this charming heart cake isn’t just for Valentine’s Day! It’s a wonderful way to express love and appreciation on Mother’s Day, anniversaries, birthdays, or any day you simply want to make someone feel special. Its ‘wow’ factor is guaranteed to impress, making any occasion extraordinary. If you enjoy creative baking and decorating, you’ll also love making our Easy Melted Snowman Cookies for another fun project!
More Sweet Inspirations: Valentine’s Day Desserts
Looking for even more ways to sweeten your celebration? Explore these delicious **Valentine’s Day dessert recipes** that are sure to win hearts:
- Red Velvet Levain Cookies
- Valentine’s Day Roundup of Desserts
- Chocolate Heart Peanut Butter Cookies
- 10 Dreamy Valentine Desserts
- Fudgy Brownie Cookies
- 17 Valentine Treats to Swoon Over
- Chocolate Covered Strawberry Cheesecake Bites
- Valentine Chocolate Peanut Butter Hearts
- Valentine Cupcakes with Brach’s Candies
How to Make a Heart-Shaped Valentine’s Day Cake
By: Kim Lange
Nothing completes Valentine’s Day desserts more than a beautiful heart-shaped cake. It’s a romantic dessert that no one will be able to resist!
Course: Dessert
Servings: 12 Servings
Print Recipe
Pin Recipe
Equipment
- 1 8″ round pan
- 1 8″ square pan
- Star piping tips with pastry bags
- 3-4 Gel food coloring choices
Ingredients
Heart Shaped Cake
- 1 box cake mix of choice (like strawberry, red velvet, chocolate, vanilla, etc.)
- Use ingredients called out by cake mix directions or your own recipe (enough for a two-layer cake).
Buttercream Frosting (or if using your own frosting, have enough for a 2 layer cake)
- 1 ½ cups or 2 ½ sticks of butter, softened or room temperature
- ½ teaspoon salt, if using unsalted butter
- 5-7 cups of powdered sugar
- 1 tablespoon vanilla
- 3 tablespoons to ¼ cup milk of choice
- 3-4 Food color gels of choice
Instructions
Heart Shaped Cake
- Use your favorite cake mix or recipe for this cake. I used a strawberry cake mix, but you could use homemade white, chocolate or red velvet cakes. Just be sure to use a recipe that yields enough for a two-layer cake. If you want a double layer cake, double the ingredients. This cake yields a large 1 layer cake.
- Prepare the cake mix as directed on the box or your chosen recipe. Pour half of the batter into an 8-inch square pan and the other half into an 8-inch round pan. Eyeball the batter to ensure similar thickness.
- Bake for 26 to 31 minutes or until a toothpick inserted in the center of the cakes comes out clean.
- Once baked, let the cakes cool in their pans on a rack for 15-20 minutes before removing. After removing, let them cool completely or refrigerate (sealed tightly in plastic wrap) until ready to frost.

- Once cooled, you can easily assemble the cakes into the shape of a heart.
- Cut the round cake in half evenly.
- Position the square cake so it looks like a diamond, then place each half of the circle cake against its top two sides.

- Place the assembled cake on a large plate or cake board.
Buttercream Frosting
- Frost the cake using any tips you want to fill in the top and sides. I used Star Tips from Suuker.
- Using a mixer, beat the butter until creamy. Add salt, powdered sugar, vanilla, and some milk. Whip together on medium to high speed until smooth and creamy.
- Take 4 bowls and divide the frosting evenly. Add food color gels of choice to each bowl to create vibrant, pastel, or desired colors. Mix the gel into the frosting, adding more as needed.
- Spoon the colored frostings into 3-4 pastry bags, each fitted with a large star tip or flower tip of choice. Russian Piping Tips are also beautiful for easy pipeable flowers.
- Start frosting the border of the cake first. Then, randomly pipe stars or rosettes with different frosting colors to fill in the entire top surface. Once covered, add sprinkles, candies, strawberries, or raspberries if desired.
Notes
Food coloring in frosting may bleed after a day or two. It’s best to frost the cake the same day you plan to serve it, after allowing the frosting to firm up slightly.
Keywords
buttercream frosting, cake, heart-shaped, valentine’s day, romantic cake, homemade cake, dessert
Tried This Recipe?
Let us know how it was by commenting below!

