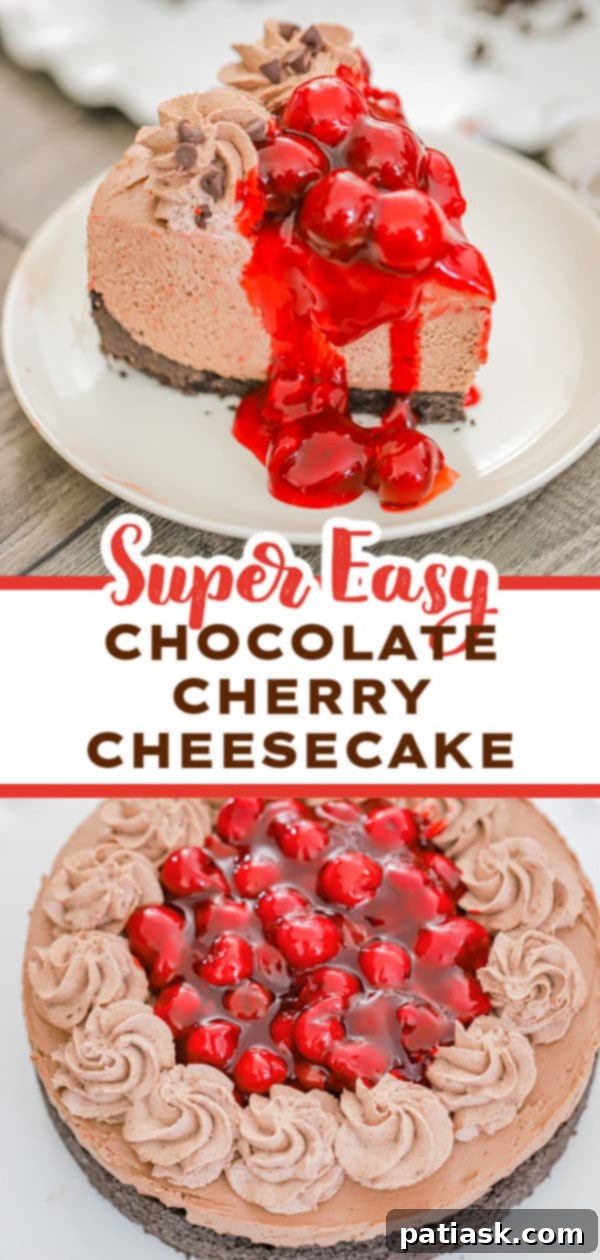
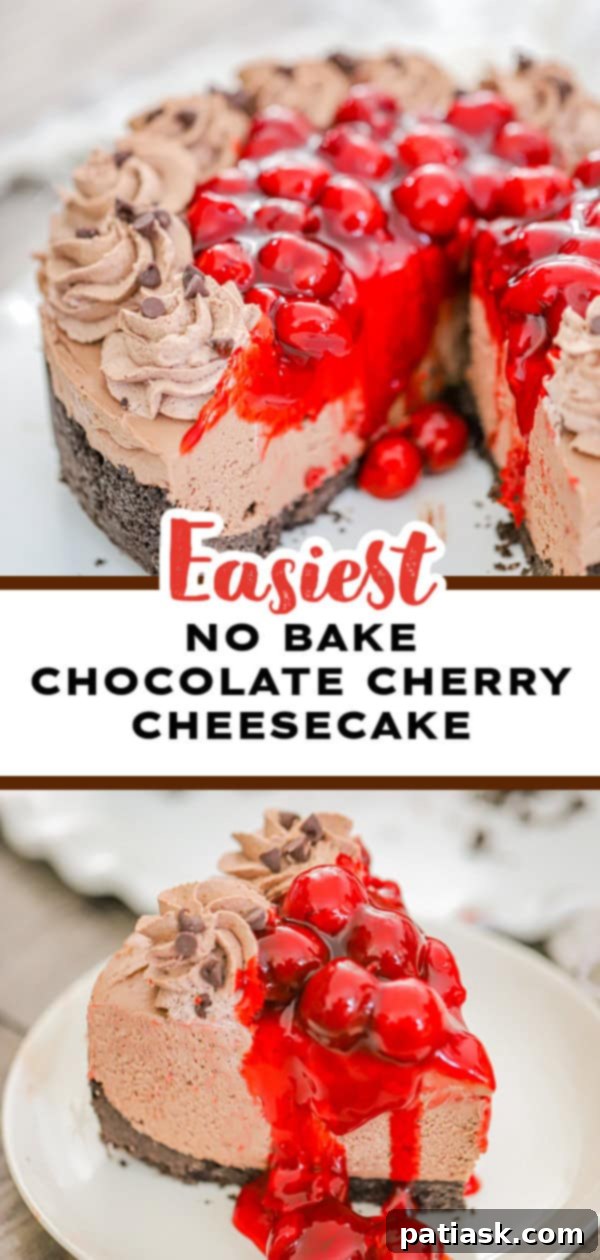
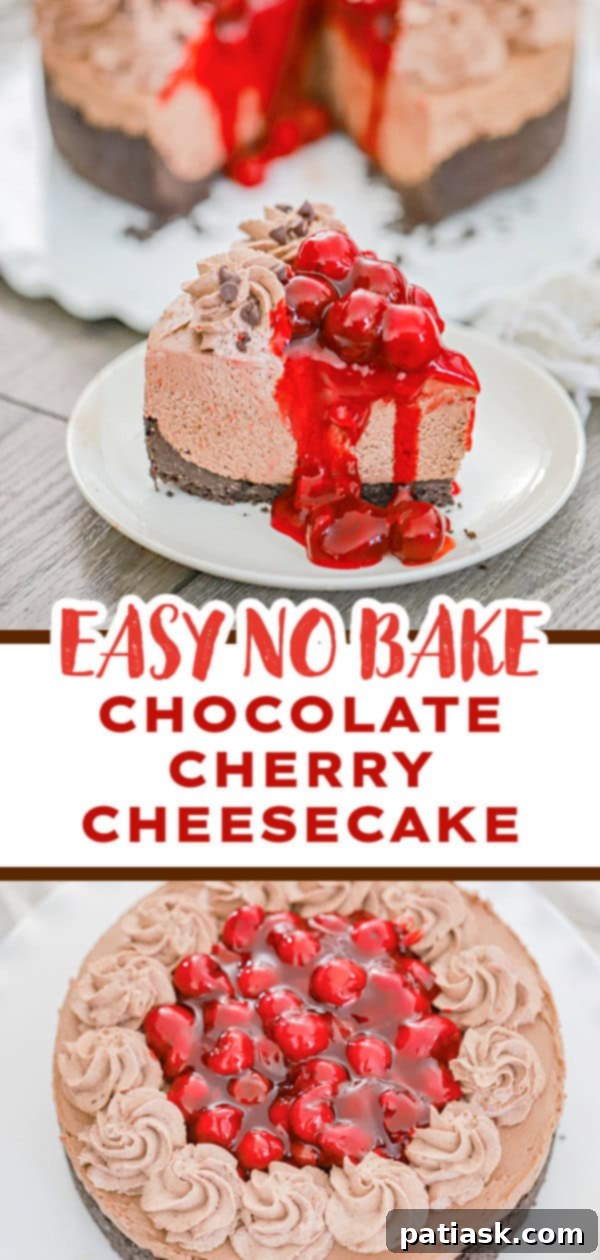
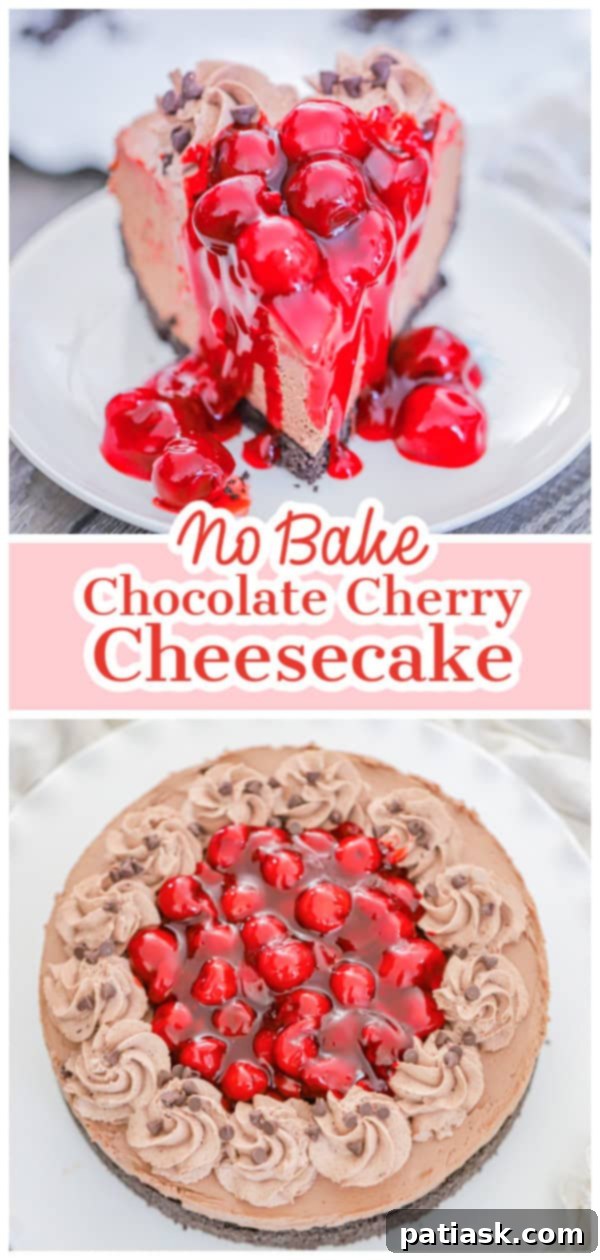
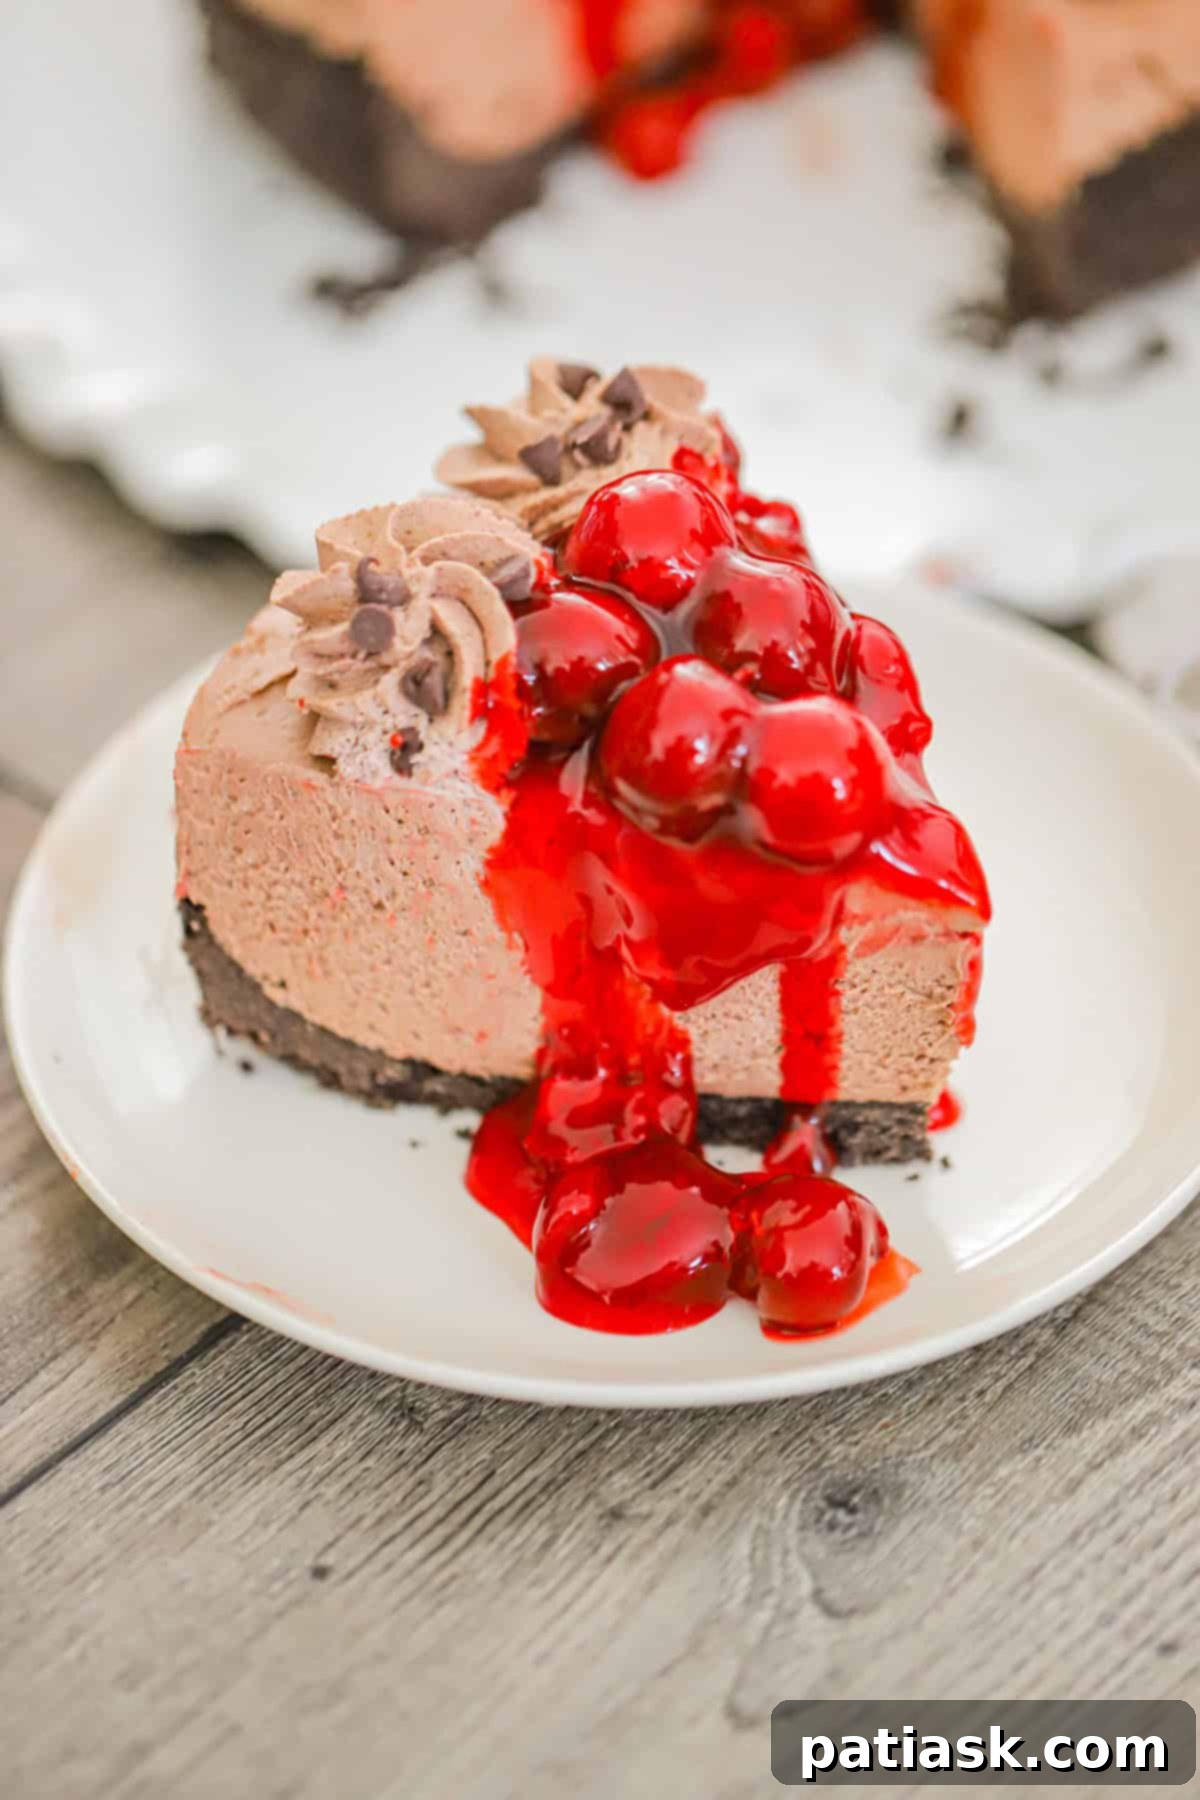
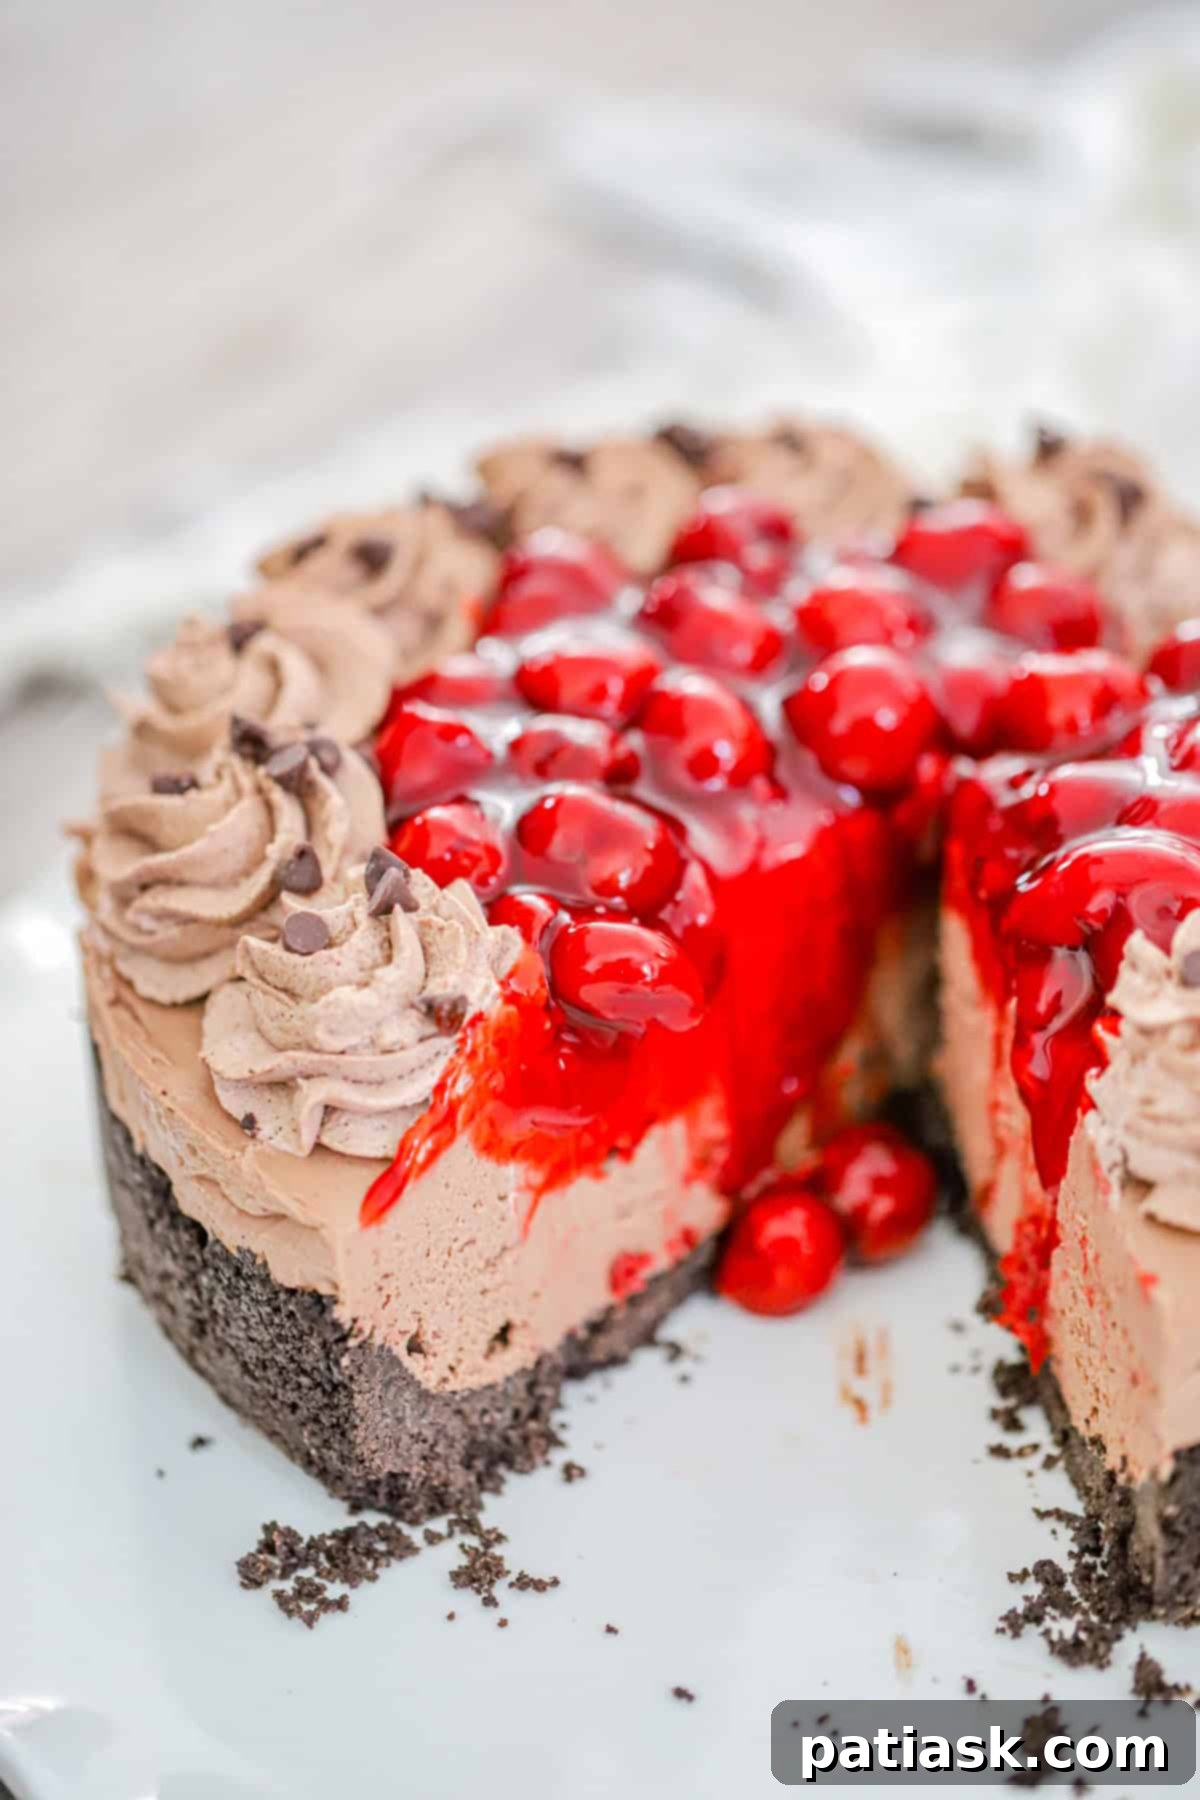
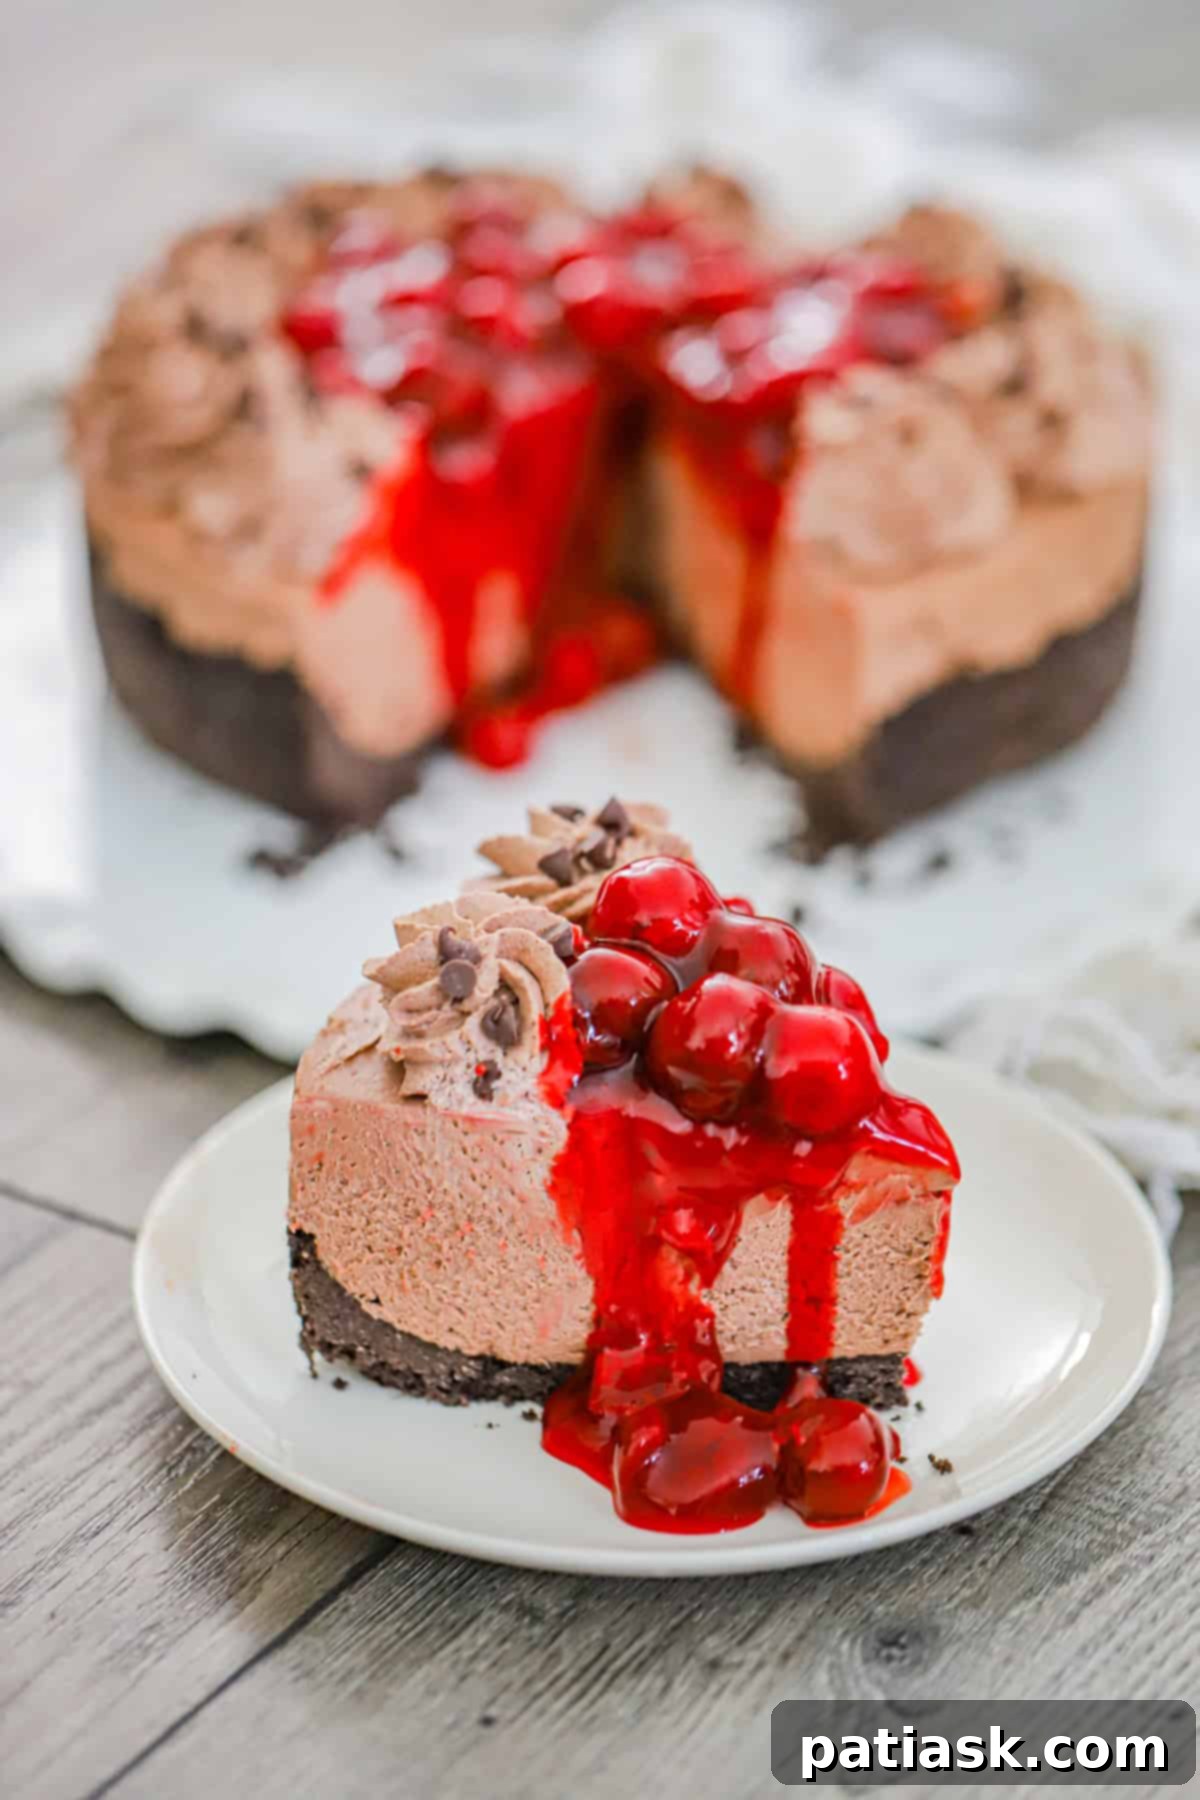
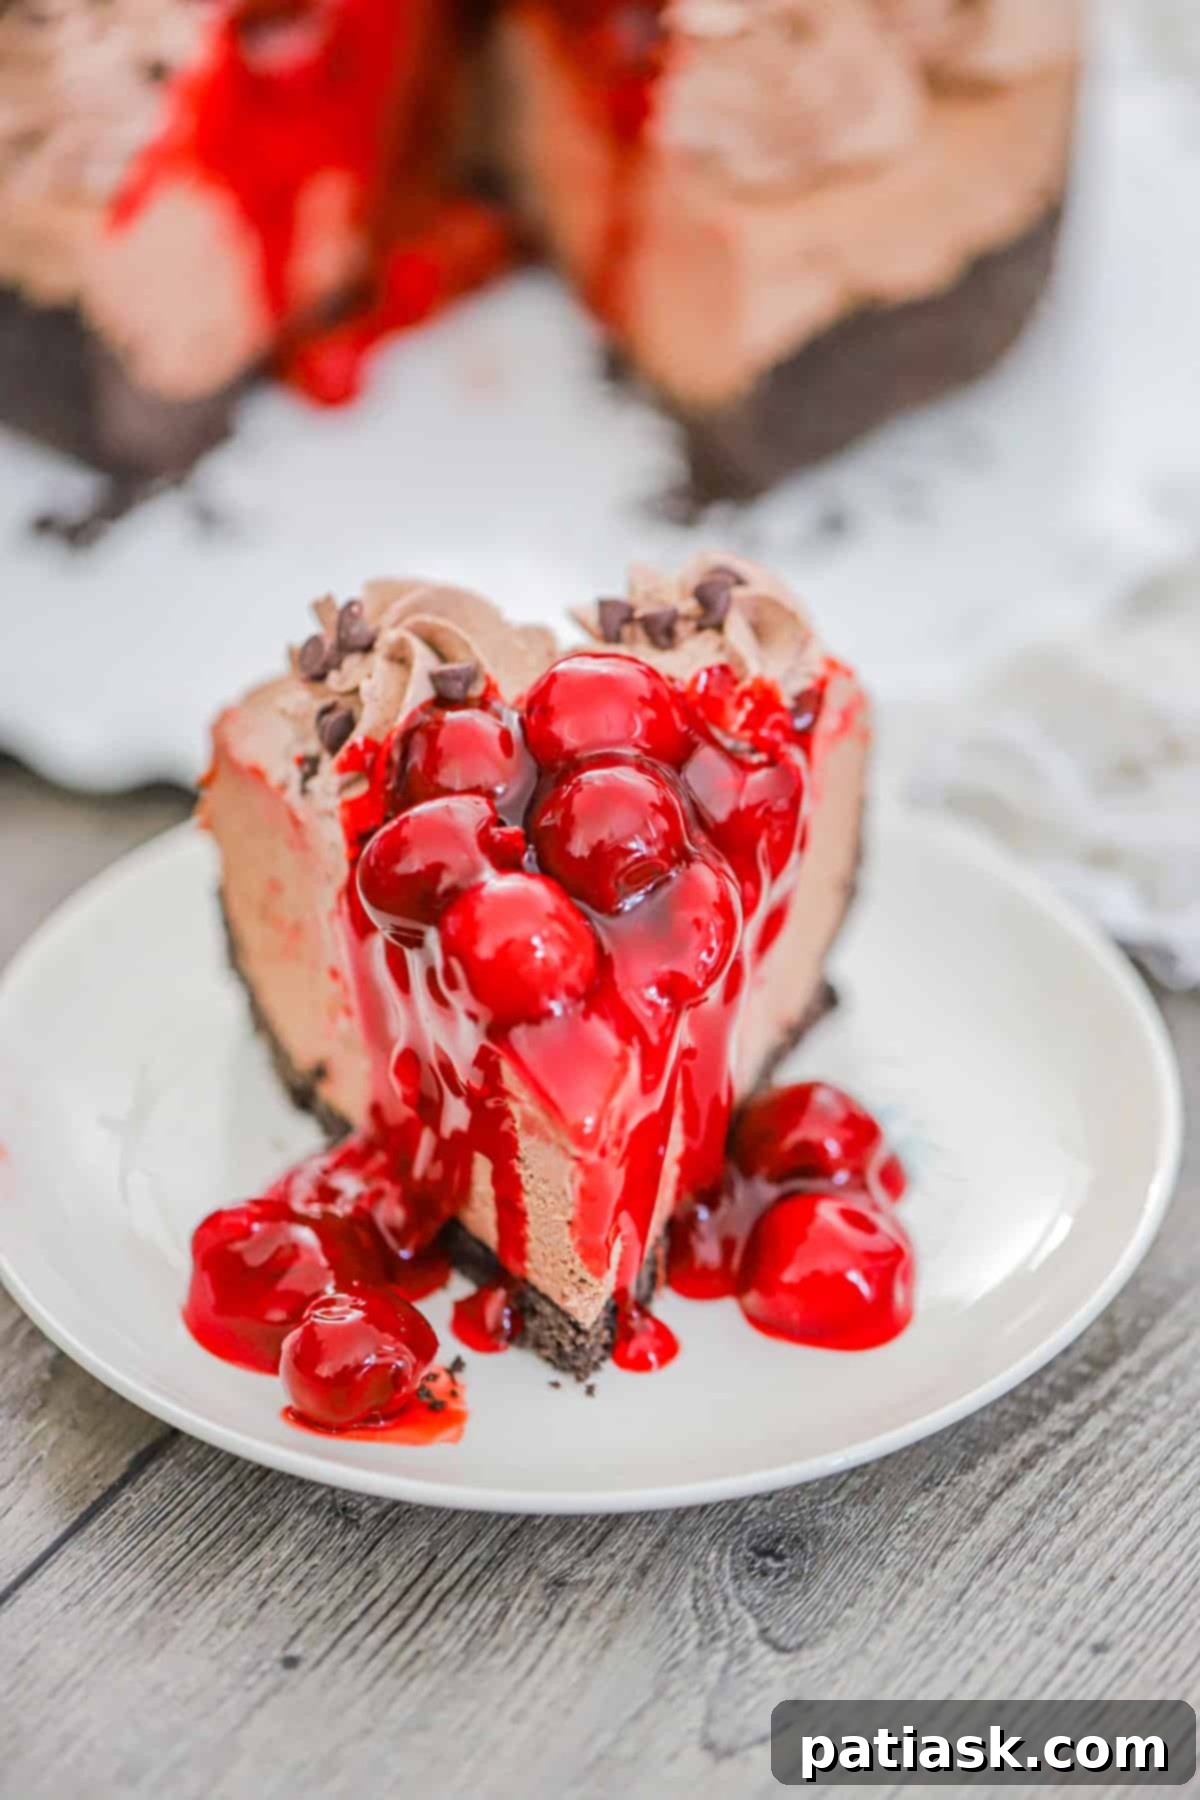
This incredibly easy and utterly dreamy No Bake Chocolate Cherry Cheesecake recipe is a masterpiece of indulgence. Imagine a rich, creamy chocolate cheesecake, generously studded with succulent, juicy cherries, all crowned with a luscious chocolate whipped cream, and resting on a perfectly crunchy cookie crust. It sounds like a dessert fantasy, but it’s deliciously real and surprisingly simple to create!
Craving more delightful no-bake cheesecakes? You’re in for a treat with our No Bake Banoffee Peanut Butter Cheesecake, the delightful Easy No Bake Biscoff Cheesecake, and this crowd-pleasing Easy Oreo Cheesecake Pie!
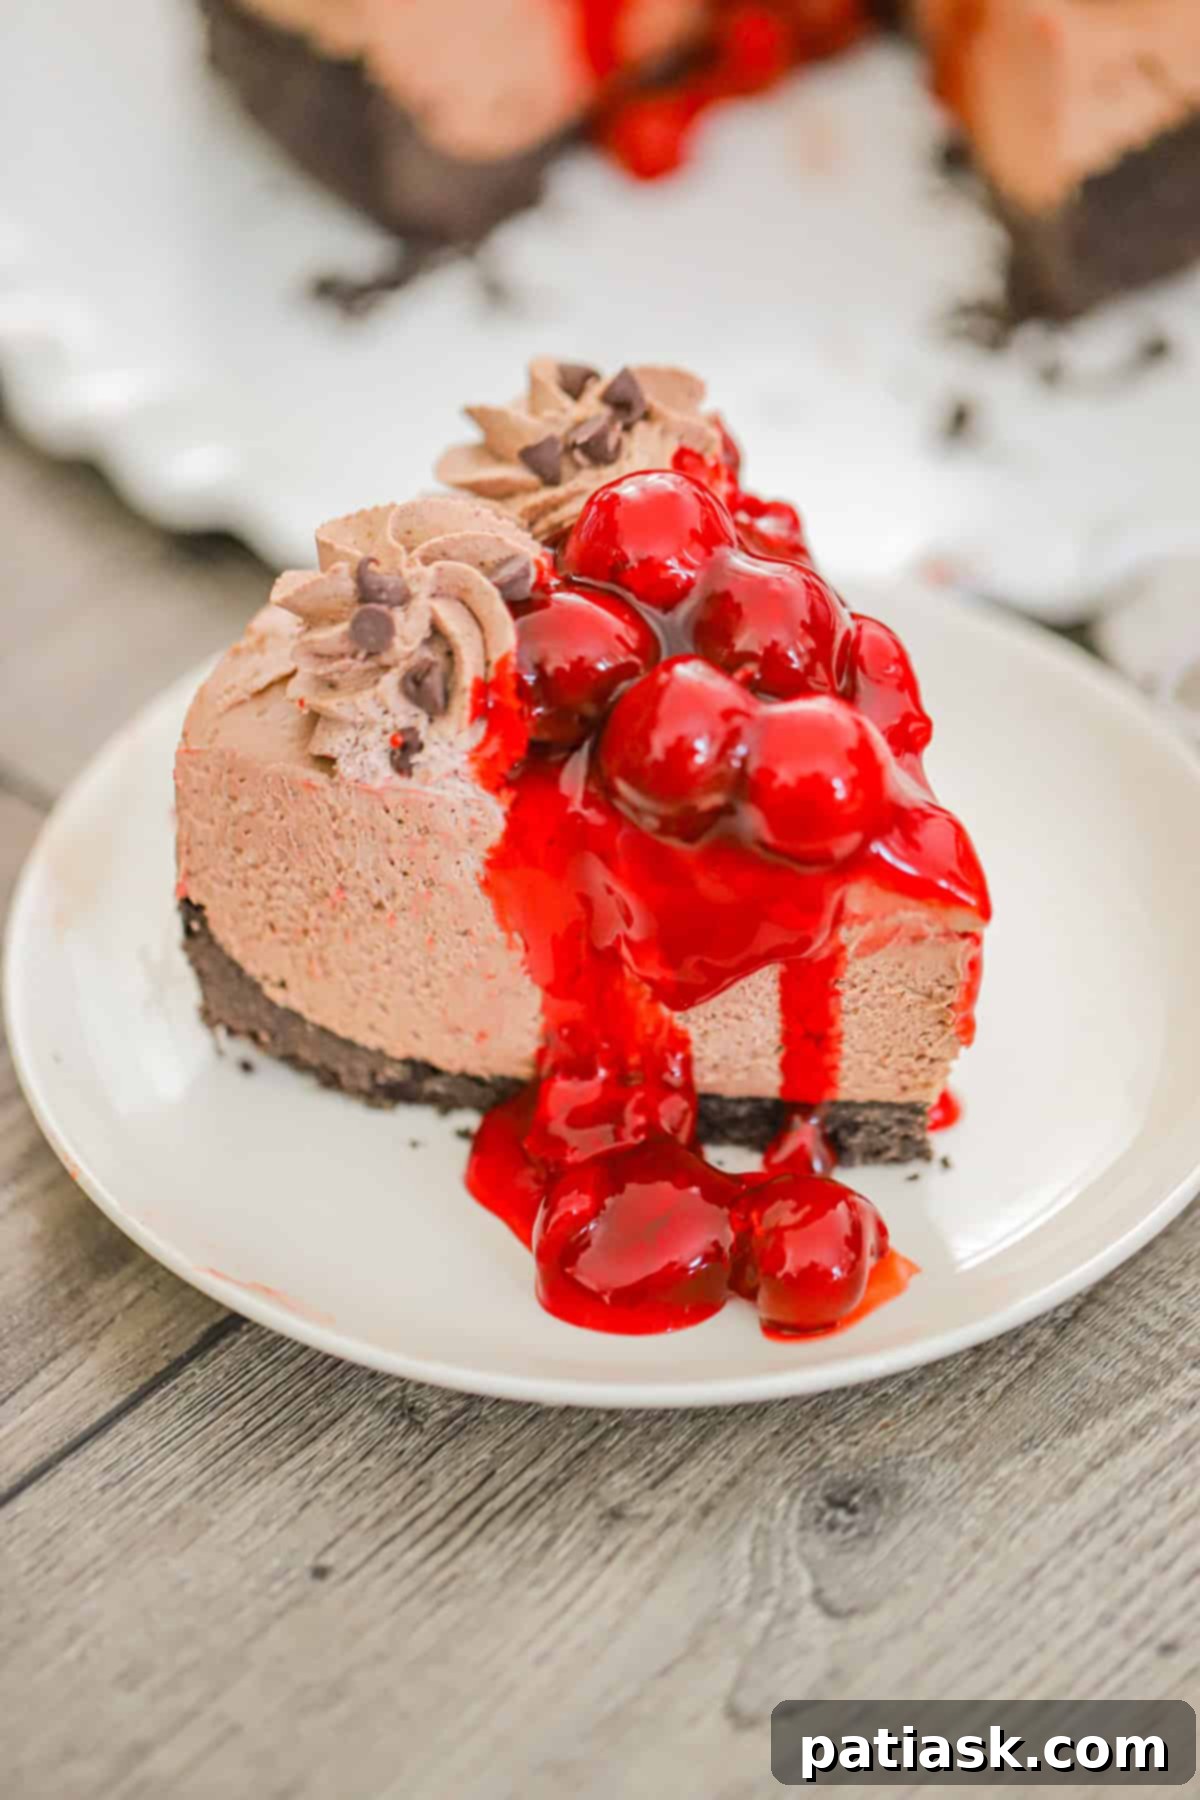
Why You’ll Adore This No Bake Chocolate Cherry Cheesecake
Prepare to fall in love with this extraordinary dessert that combines convenience with irresistible flavor. Our No Bake Chocolate Cherry Cheesecake is more than just a treat; it’s a celebration of classic flavors in a refreshingly simple format. Here’s why this recipe will quickly become a favorite in your kitchen:
- Irresistible Flavor Combination: Who could possibly resist the harmonious and decadent pairing of rich chocolate and vibrant, tart cherries? This timeless duo creates a flavor profile that is both comforting and exciting, making every bite a delightful experience. We truly believe chocolate and cherry are a match made in heaven, perfect for any occasion.
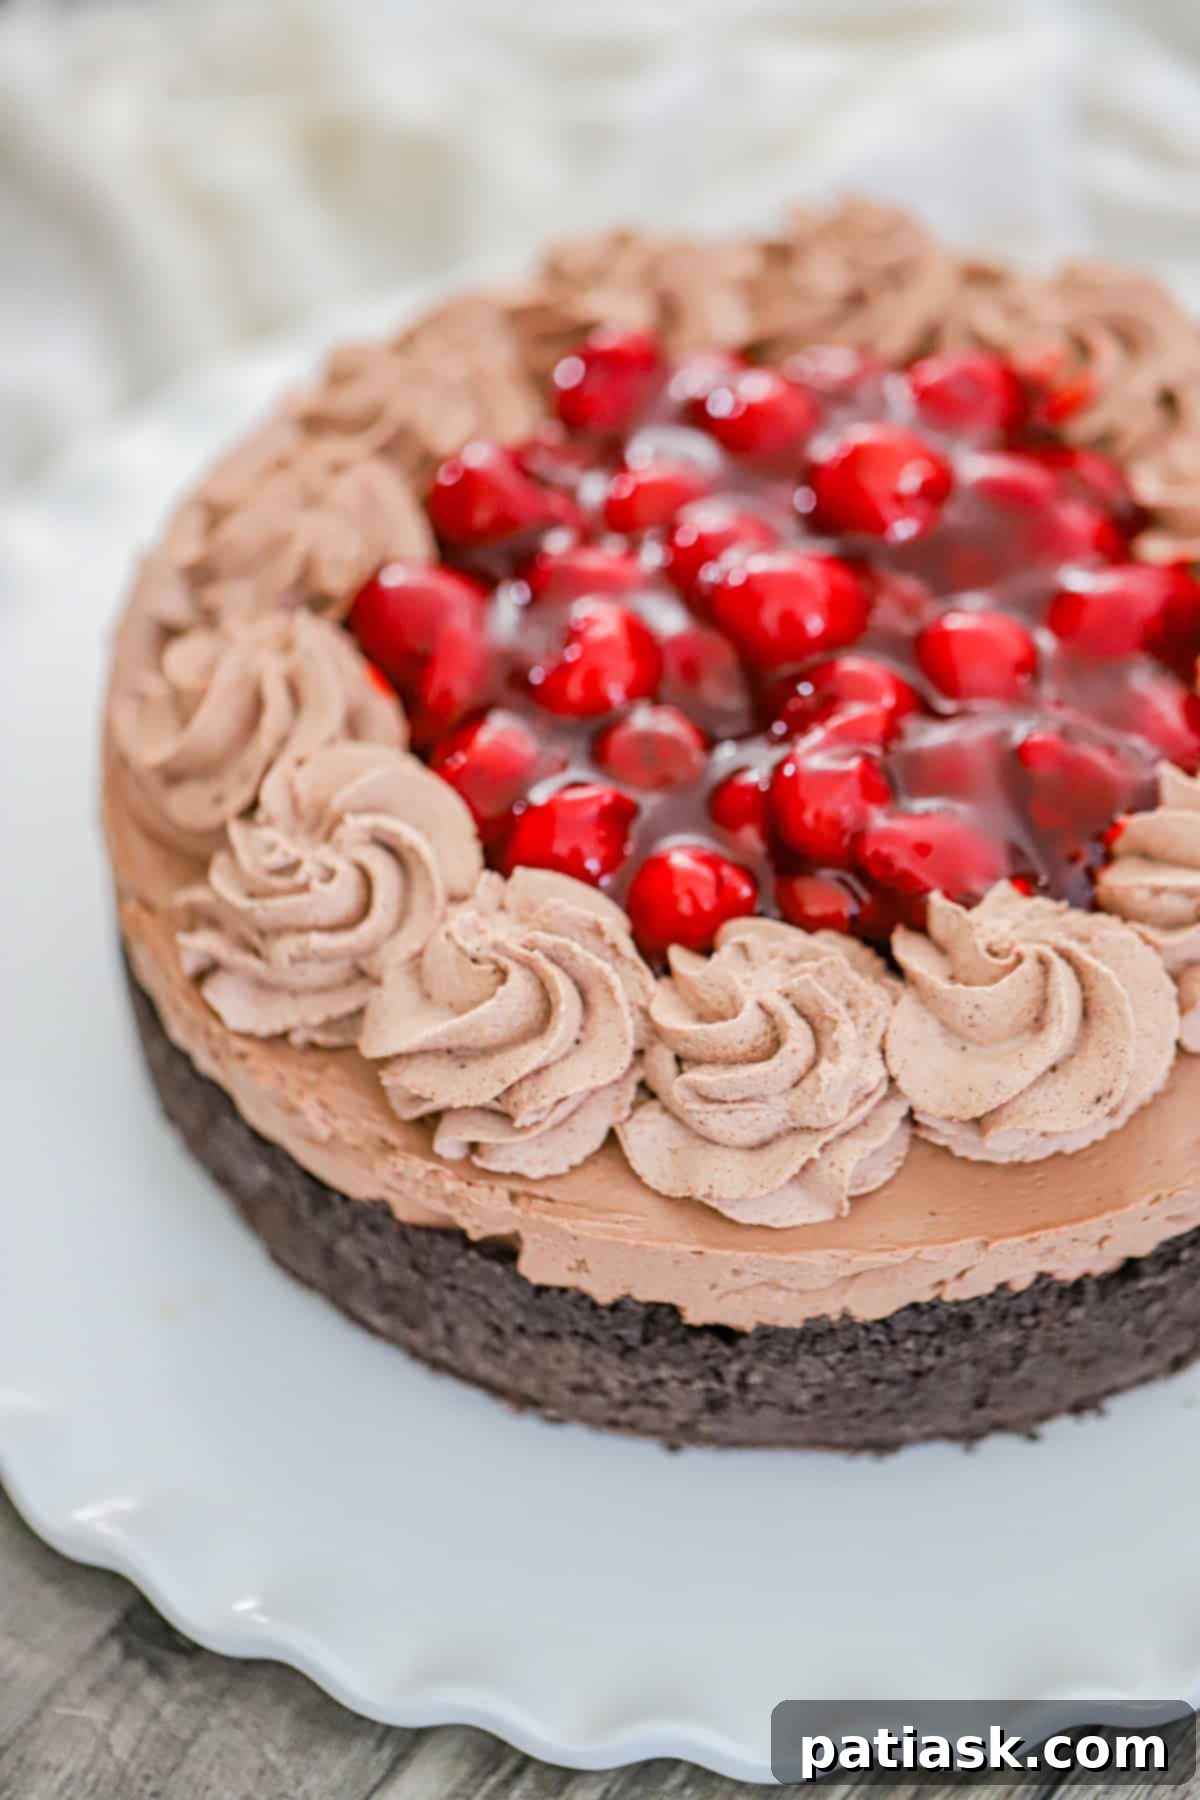
- A Showstopper Dessert: This chocolate cherry cheesecake isn’t just delicious; it’s visually stunning. With its vibrant cherry topping and swirls of chocolate whipped cream, it’s guaranteed to impress your guests and become the centerpiece of any dessert table. It truly is a perfect choice for all dessert lovers looking for that “wow” factor without the usual effort.
- Effortless Preparation: Say goodbye to complicated baking techniques! This no-bake recipe is incredibly easy to whip up, requiring minimal culinary skills and making it far simpler to create than you might imagine. It’s the ideal solution for those busy days when you crave something extraordinary without spending hours in the kitchen.
- No Oven Required: For anyone who dreads turning on the oven, especially during warmer months, this recipe is a dream come true. You can enjoy a perfectly set, creamy cheesecake without any of the “baked cheesecake drama” – no cracks, no water baths, just pure, chilled perfection. It’s a fantastic alternative to traditional baked cheesecakes, providing equally impressive results with less stress.
- Perfect for Any Occasion: Whether you’re celebrating a special holiday like Valentine’s Day, Christmas, or Thanksgiving, or simply want to treat yourself and your loved ones, this cheesecake fits the bill. It’s elegant enough to serve at festive gatherings but also simple enough for a casual weekend treat. You can impress everyone without a lot of fuss or intricate preparations.
- Make-Ahead Friendly: One of the best aspects of a no-bake cheesecake is its make-ahead potential. You can prepare this dessert a day or two in advance, allowing the flavors to meld beautifully and freeing up your time on the day of your event. This ensures a stress-free dessert presentation every time.
- Creamy, Dreamy Texture: The filling is unbelievably smooth and velvety, melting in your mouth with every spoonful. The combination of cream cheese and chocolate whipped cream creates a light yet rich texture that is absolutely irresistible.
Essential Ingredients for Your No Bake Chocolate Cherry Cheesecake
Crafting this delightful cheesecake requires a selection of fresh, high-quality ingredients that come together to create its signature creamy texture and rich flavor. Here’s a detailed look at what you’ll need:
For the Oreo Crust:
The foundation of our cheesecake is a simple yet incredibly flavorful Oreo crust. This crunchy base provides the perfect contrast to the creamy filling.
- 30 Oreo Chocolate Cookies: Use classic Oreos, including their creamy filling, for the best flavor and texture. They crush easily and hold together wonderfully.
- 6 Tablespoons unsalted butter, melted: Butter binds the cookie crumbs together, creating a sturdy and delicious crust.
For the Chocolate Whipped Cream (Divided for Filling & Topping):
This versatile component serves a dual purpose: it lightens the cheesecake filling and creates a beautiful, airy topping.
- 2 ¼ cups cold heavy whipping cream: Ensure your cream is very cold for optimal whipping results, yielding stiff peaks.
- ½ cup powdered sugar: Also known as confectioners’ sugar, this sweetens the whipped cream without adding a grainy texture. Adjust to your desired sweetness level.
- ¼ cup unsweetened cocoa powder: This adds a rich chocolate flavor. Feel free to add a little more if you prefer an intensified chocolate taste.
For the Decadent Chocolate Cheesecake Filling:
This is where the magic happens, combining creamy, tangy, and sweet elements into a smooth, irresistible filling.
- 1 cup semi-sweet chocolate chips: These will be melted and incorporated into the cream cheese mixture, providing a deep, luxurious chocolate flavor.
- 24 oz cream cheese, softened (3 packages): It’s crucial for the cream cheese to be at room temperature to ensure a lump-free, silky-smooth filling.
- ½ cup granulated sugar: For sweetness and to balance the tanginess of the cream cheese.
- 2 tablespoons unsweetened cocoa powder: Enhances the chocolate flavor in the filling, complementing the melted chocolate chips.
- 1 teaspoon vanilla extract: A touch of vanilla brightens all the flavors and adds a hint of warmth.
- 3 cups of chocolate whipped topping: This portion of your freshly made chocolate whipped cream will be folded into the cream cheese mixture, contributing to the cheesecake’s light and airy texture.
For the Beautiful Topping:
The final flourishes that make this cheesecake truly special and visually appealing.
- Remaining chocolate whipping cream (about 1 ½ cups worth): Reserved from the batch made earlier, this will create a decorative border or a delightful layer on top.
- 1 can cherry pie filling: A vibrant and fruity topping that provides a perfect contrast to the rich chocolate. Choose a high-quality brand for the best results.
- Optional: semi-sweet chocolate chips for sprinkling on top of chocolate whipped cream swirls: Adds an extra layer of chocolate texture and visual appeal.
Step-by-Step Instructions: Crafting Your No Bake Chocolate Cherry Cheesecake
Follow these simple steps to assemble your stunning no-bake cheesecake. The process is straightforward, allowing you to create a professional-looking dessert with ease.
Prepare the Oreo Crust:
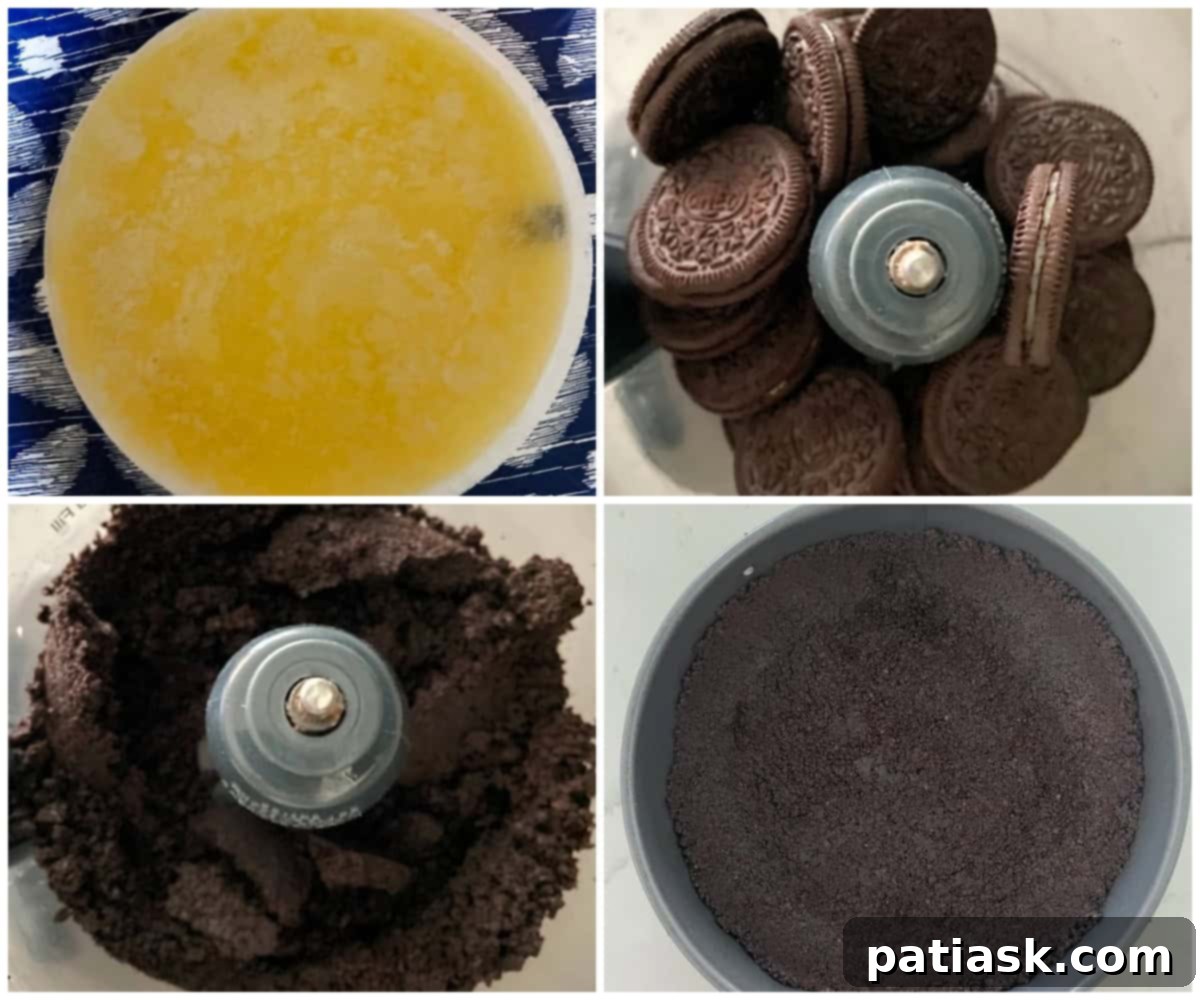
- Crush the Oreos: Begin by placing all 30 Oreo cookies, including their cream filling, into a food processor. Pulse until you achieve fine, even crumbs. If you don’t have a food processor, place the cookies in a sturdy Ziploc bag and use a rolling pin to crush them into fine crumbs. Ensure there are no large chunks remaining for a smooth crust.
- Combine with Butter: Add the six tablespoons of melted unsalted butter to the cookie crumbs. Mix thoroughly until the crumbs are evenly moistened and resemble wet sand. This butter acts as a binder, ensuring your crust holds its shape beautifully.
- Form the Crust: Press the buttered crumbs firmly and evenly into the bottom of an 8-inch springform pan. For an extra touch, you can also press the crumbs partially up the sides of the pan to create a lovely border. Use the back of a spoon or the bottom of a glass to compact the crust well.
- Chill the Crust: Place the prepared crust in the refrigerator while you prepare the filling. Chilling allows the butter to solidify, setting the crust and preventing it from crumbling when sliced.
Whip the Chocolate Cream:
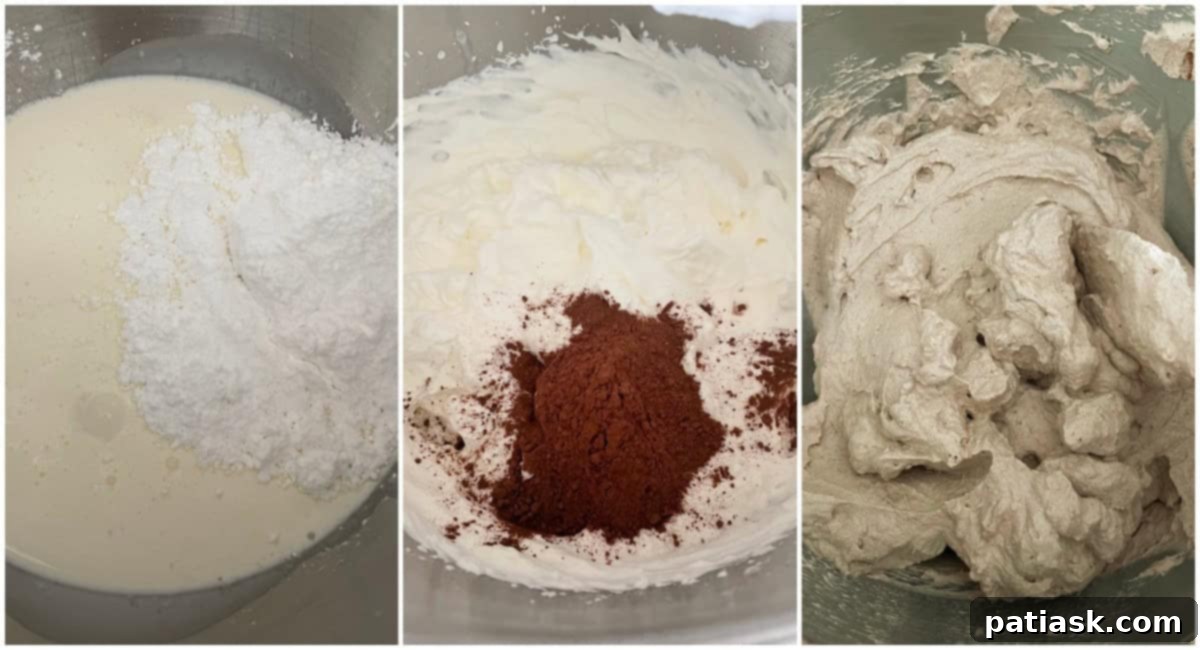
- Whip Cream and Sugar: In a large mixing bowl, combine the cold heavy whipping cream and powdered sugar. Using an electric mixer, whip the mixture on medium-high speed until it forms stiff peaks. Be careful not to over-whip, as it can become grainy.
- Incorporate Cocoa: Gently mix or fold in the unsweetened cocoa powder until all chocolate streaks disappear and the whipped cream is uniformly chocolate-colored. Once mixed, measure out exactly 3 cups of this luscious chocolate whipped cream for the cheesecake filling.
- Prepare Topping Cream: Transfer the remaining chocolate whipped cream (approximately 1 ½ cups) into a separate bowl or, for decorative piping, into a pastry bag fitted with a large star tip. Store this in the refrigerator until ready to use for the topping.
Create the Chocolate Cheesecake Filling:
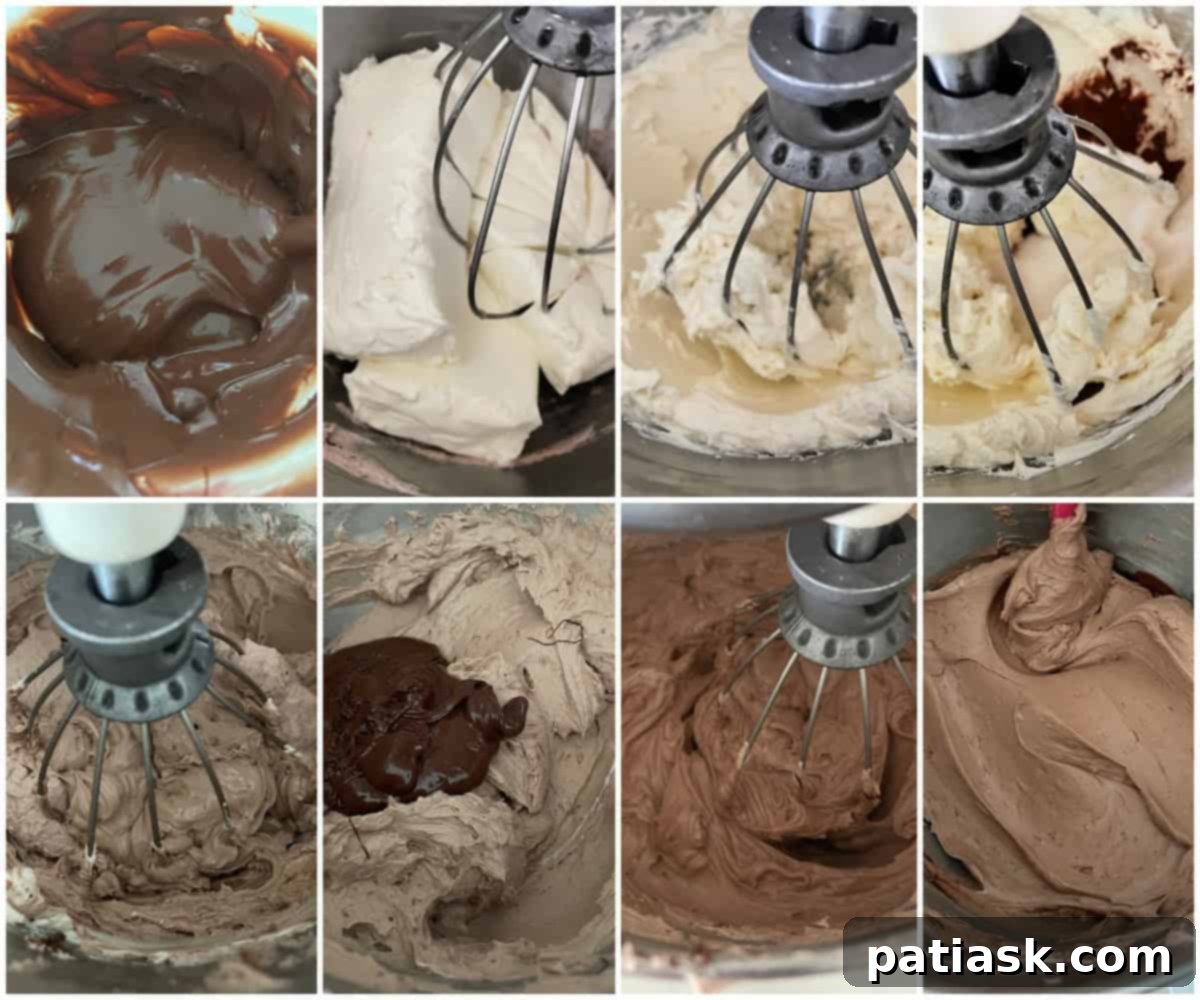
- Melt Chocolate Chips: Place the semi-sweet chocolate chips in a microwave-safe bowl. Microwave on high for 1 minute, then stir. If necessary, continue heating in additional 15-30 second increments, stirring well after each, until the chocolate is completely melted and smooth. Set aside to cool slightly.
- Cream Cheese Mixture: In a separate large mixing bowl, use an electric mixer to beat the softened cream cheese with the granulated sugar, vanilla extract, and two tablespoons of cocoa powder. Beat until the mixture is light, fluffy, and well combined, ensuring no lumps of cream cheese remain.
- Add Melted Chocolate: Pour the slightly cooled melted chocolate into the cream cheese mixture. Mix again until everything is smoothly incorporated and the filling has a consistent chocolate color.
- Fold in Whipped Cream: Gently fold in the 3 cups of reserved chocolate whipped cream. Use a spatula to carefully combine the mixtures, preserving the airy texture of the whipped cream. Mix just until no white streaks remain.
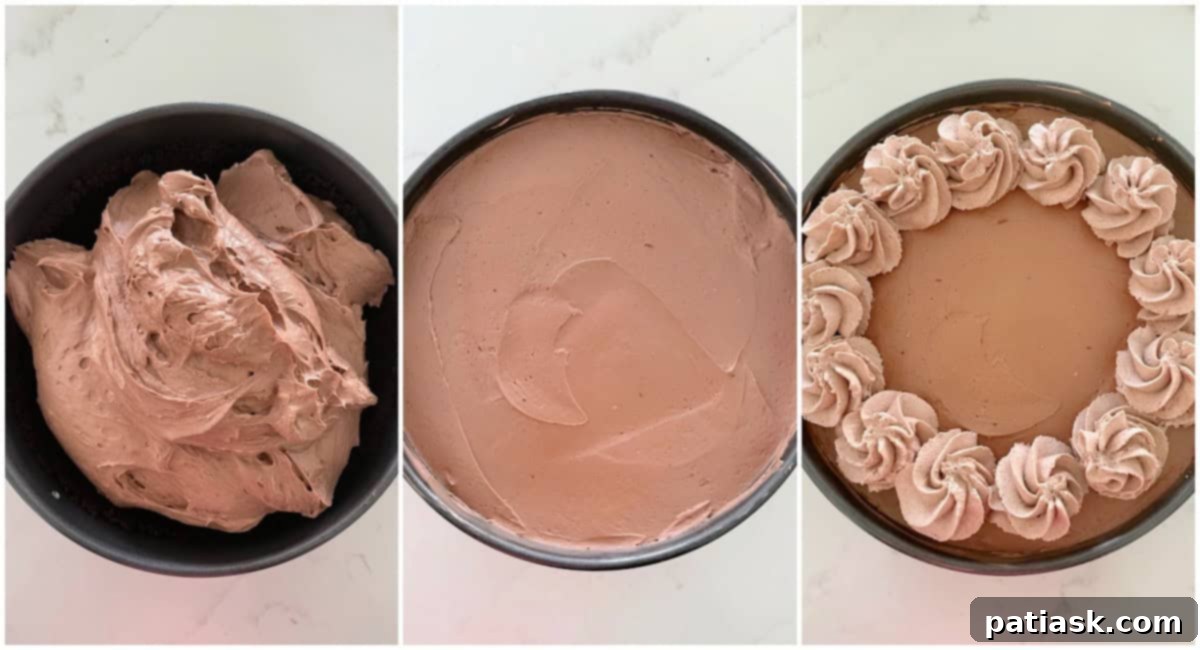
- Fill the Crust: Pour the prepared cheesecake filling evenly over the chilled Oreo crust in the springform pan. Use a spatula to smooth the top surface.
- Refrigerate: Place the cheesecake in the refrigerator and allow it to chill for a minimum of 4 hours, or ideally, overnight. This crucial step ensures the cheesecake sets properly and achieves its firm, sliceable consistency.
Apply the Topping:
- Add Whipped Cream Topping: Once the cheesecake is fully chilled and set, retrieve the remaining chocolate whipped cream from the refrigerator. You can either pipe it decoratively around the edge of the cheesecake using a star tip for an elegant border or simply spread it evenly over the entire top surface, as you prefer.
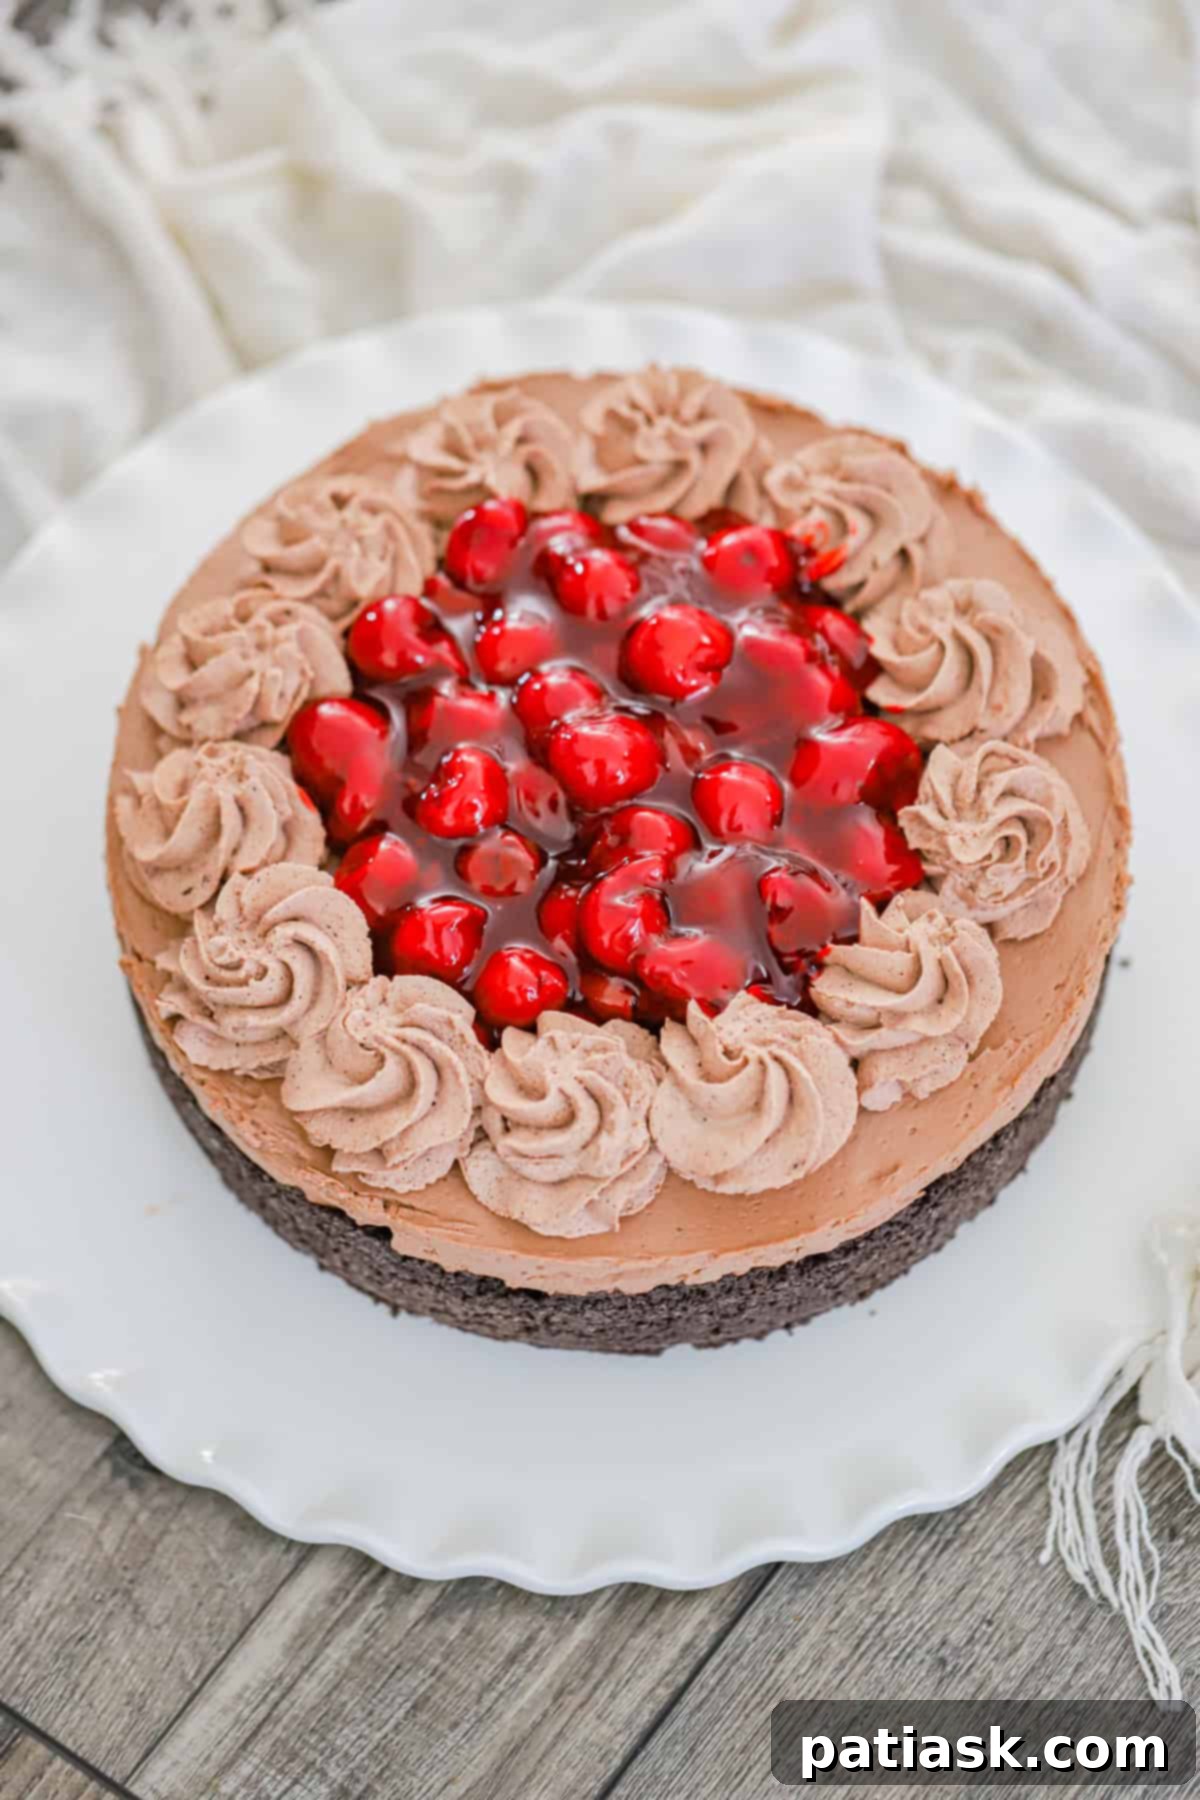
- Decorate with Cherries and Chips: Carefully spoon the cherry pie filling into the middle of the cheesecake, creating a vibrant center. For an extra touch of decadence, sprinkle semi-sweet chocolate chips on top of the chocolate whipped cream swirls.
Serving Your Cheesecake:
- Unmold and Slice: To remove the chocolate cherry cheesecake from the springform pan, first slide a thin butter knife carefully around the edge of the pan to loosen the cheesecake. Then, release the spring and gently lift the pan ring off. Slice the cheesecake into generous portions using a sharp, warm knife for clean cuts, and serve immediately.
Storing Your Chocolate Cherry Cheesecake
Proper storage is key to maintaining the freshness and deliciousness of your homemade cheesecake. Cheesecake can easily absorb odors from the refrigerator, so taking a few simple precautions will ensure it tastes as good as the day it was made.
- Airtight Protection: Always store your cheesecake in an airtight container or wrap it tightly with plastic wrap. This prevents it from drying out and absorbing unwanted flavors or odors from other foods in your fridge.
- Refrigeration Lifespan: When properly stored, this no-bake chocolate cherry cheesecake can be enjoyed for up to 5-6 days in the refrigerator. However, it’s so delicious, it might not last that long!
- Freezing Option: For longer storage, you can freeze individual slices or the entire cheesecake (without the cherry topping, which is best added fresh). Wrap slices tightly in plastic wrap, then aluminum foil, and store in a freezer-safe bag or container for up to 1-2 months. Thaw in the refrigerator overnight before serving and add fresh cherry topping.
Expert Tips for a Flawless Cheesecake
Achieving a perfect no-bake cheesecake is simple with these helpful tips and tricks. These insights will ensure your dessert turns out beautifully every time, from the creamy filling to the vibrant topping.
- Avoid Over-Whipping the Cream: When making the chocolate whipped cream, be mindful not to over-whip. Over-whipped cream can become dense, grainy, and difficult to pipe smoothly, compromising the light texture of your cheesecake and its topping. Whip until just stiff peaks form.
- Room Temperature Cream Cheese: Always start with softened cream cheese for the filling. Cold cream cheese will result in a lumpy mixture, making it impossible to achieve that desired silky-smooth consistency. Take it out of the fridge at least 30-60 minutes before you begin.
- Enhance Cherry Color: If you desire a more vivid, vibrant red color for your cherry topping, consider adding a tiny drop of red food coloring to your cherry pie filling. The intensity of cherry color can vary between brands, and this trick ensures your cheesecake looks as stunning as it tastes. We recommend Lucky Leaf cherry pie filling for its consistent quality.
- Chill Thoroughly: The most important rule for any no-bake cheesecake is adequate chilling time. Do not rush this step! A minimum of 4 hours, or ideally overnight, ensures the cheesecake sets firm enough to slice cleanly and hold its shape.
- Clean Slices: For perfectly clean slices, dip your knife in hot water and wipe it clean between each cut. This creates sharp, appealing edges for serving.
Creative Variations to Customize Your Cheesecake
While our classic No Bake Chocolate Cherry Cheesecake is undeniably perfect, don’t hesitate to experiment with these exciting variations to tailor it to your preferences or explore new flavor combinations.
- Crust Alternatives: Easily swap out the Oreo cookie crust for a different base. A Biscoff cookie crust offers a delightful spiced flavor, or opt for a traditional graham cracker crust for a classic twist. You can also experiment with any flavor of sandwich cookies you enjoy!
- Fruit Swaps: Not a fan of cherries, or simply want to try something new? Strawberries are another fantastic pairing with chocolate! Easily replace the cherry pie filling with strawberry pie filling for a different fruity dimension. Raspberries or mixed berry fillings would also be delicious choices.
- Chocolate Enhancements: Instead of mini chocolate chips, consider garnishing your cheesecake with elegant chocolate shavings or curls for a more sophisticated and decadent touch. A sprinkle of high-quality sea salt flakes can also enhance the chocolate flavor.
- Boozy Infusion: For an adult-friendly version, add a tablespoon or two of cherry liqueur (like Kirsch) or a coffee liqueur (like Kahlua) to the chocolate cheesecake filling for an extra layer of flavor complexity.
- White Chocolate Dream: Swap the semi-sweet chocolate chips for white chocolate chips and use white chocolate shavings for the garnish. This creates a beautiful contrast and a sweeter, milder chocolate experience.
Frequently Asked Questions About No Bake Cheesecake
Here are some common questions about making and enjoying this delicious no-bake chocolate cherry cheesecake:
- Can I use fresh cherries instead of pie filling? Yes, you can! If using fresh cherries, you’ll need to cook them down with a bit of sugar and cornstarch to create a similar thickened consistency as pie filling. Pit and halve about 2-3 cups of fresh cherries, combine with 1/4 to 1/2 cup sugar (to taste), and 1-2 tablespoons cornstarch dissolved in a little water. Cook over medium heat until thickened, then cool completely before using.
- How far in advance can I make this cheesecake? You can prepare this no-bake cheesecake up to 2-3 days in advance. In fact, chilling it overnight often enhances the flavors and ensures a perfectly set consistency. Just be sure to keep it well-covered in the refrigerator.
- My whipped cream isn’t getting stiff peaks. What went wrong? The most common reasons for whipped cream not stiffening are using warm cream or warm equipment (bowl/beaters). Ensure all your tools and the heavy cream are thoroughly chilled before you start. Also, avoid opening the lid of your mixer too often, as this lets in warm air.
- Can I use a different type of cookie for the crust? Absolutely! While Oreos provide a classic chocolate flavor, you can easily substitute them with graham crackers, digestive biscuits, shortbread, or even vanilla wafers. Adjust the amount of melted butter slightly if needed to achieve a moist, pressable crumb.
- How do I prevent my cheesecake from sticking to the springform pan? For easy removal, you can lightly grease the sides of the springform pan or line them with a strip of parchment paper before adding the crust. Sliding a thin, warm knife around the edge before releasing the spring also helps.
So, the next time you’re dreaming of a show-stopping dessert, remember that you don’t need an oven to create a mouthwatering masterpiece. Just gather some cream cheese, chocolate, and cherries, and let this incredible no-bake cheesecake recipe steal the spotlight.
In conclusion, this no-bake chocolate cherry cheesecake is a truly delicious and effortless dessert that is perfect for any celebration or a simple indulgence. We encourage you to try it out for yourself and discover the joy of creating such a magnificent treat. Happy baking (or should we say, happy no-baking)!
Share your delightful creations on Pinterest, Instagram, and Facebook!
More Decadent Desserts to Explore!
- Easy Cherry Cheesecake Dessert
- 50 Delightful Cherry Desserts
- Cherry Cheesecake Poke Cake
- White Chocolate Cherry Vanilla Cheesecake
- 75 Heavenly Chocolate Dessert Recipes
- Cherry Cheesecake Swirl Brownies
- Easy Cherry Cheesecake Cookie Cups
- No Bake Berry Cheesecake
No Bake Chocolate Cherry Cheesecake Recipe Card
No Bake Chocolate Cherry Cheesecake
Author: Kim Lange
Summary: Try this easy, dreamy no-bake chocolate cherry cheesecake recipe! Creamy, chocolaty & loaded with juicy cherries for a show-stopping dessert!
No ratings yet
Print Recipe |
Pin Recipe
Recipe Details
- Prep Time: 30 mins
- Refrigerate: 4 hrs
- Course: Dessert
- Servings: 8 Servings
Ingredients
Oreo Crust
- 30 Oreo Cookies
- 6 Tablespoons unsalted butter, melted
Chocolate Whipped Cream (to be divided cheesecake and topping)
- 2 ¼ cups cold heavy whipping cream
- ½ cup powdered sugar (add more if needed to make sweeter)
- ¼ cup unsweetened cocoa powder (add more if needed to make more chocolatey)
Chocolate Cheesecake Filling
- 1 cup semi-sweet chocolate chips
- 24 oz cream cheese, softened (3 packages)
- ½ cup granulated sugar
- 2 tablespoons unsweetened cocoa powder
- 1 teaspoon vanilla extract
- 3 cups chocolate whipped topping (remaining will be used for topping)
Topping
- Remaining chocolate whipping cream (about 1 ½ cups worth)
- 1 can cherry pie filling (I used Lucky Leaf)
- Optional: semi-sweet chocolate chips for sprinkling on top of chocolate whipped cream swirls
Instructions
Oreo Crust
- To start, place Oreo cookies with the cream filling in a food processor and pulse to get fine crumbs. If you do not have a food processor, place cookies in a sturdy Ziploc bag and beat with a rolling pin to get your Oreo cookie crumbs.
- Add melted butter to the crumbs, mix together, and press into an 8-inch springform pan, pressing the crumbs partly up the sides of the pan too.
- Place crust in the fridge until the filling is ready.
Chocolate Whipped Cream
- Whip together the whipping cream and powdered sugar together until you start to get stiff peaks.
- Mix or fold in the unsweetened chocolate powder until the chocolate streaks disappear, and measure out 3 cups of chocolate whipped cream for the chocolate cheesecake filling.
- Add the remaining chocolate whipped cream into a bowl or pastry bag with a large star tip for the swirly border on top.
Chocolate Cheesecake Filling
- Melt semi-sweet chocolate chips in a microwave-safe bowl for 1 minute. Stir, and if needed, heat in additional 15-30 second increments until chocolate is melted and smooth. Set aside.
- In a large mixing bowl, using a mixer, beat the softened cream cheese with granulated sugar, vanilla extract, and cocoa powder until combined well.
- Add in melted chocolate and mix into the mixture until smooth.
- Fold in chocolate whipped cream and mix together.
- Pour cheesecake filling into the prepared cookie crust.
- Refrigerate cheesecake for 4 hours, or overnight.
Topping
- Pipe the remaining chocolate whipped cream onto the top of the cheesecake or spread it evenly on top however you like.
- Add Lucky Leaf cherry pie filling in the middle and sprinkle with chocolate chips on top of the whipped cream swirls.
Serve
- Remove cheesecake from the springform pan by sliding a butter knife around the edge of the pan first. Slide the pan off and slice and serve.
Keywords:
cherry, chocolate, no bake, Oreos, cheesecake, dessert, easy recipe
Tried This Recipe? Let us know how it was by commenting below!
