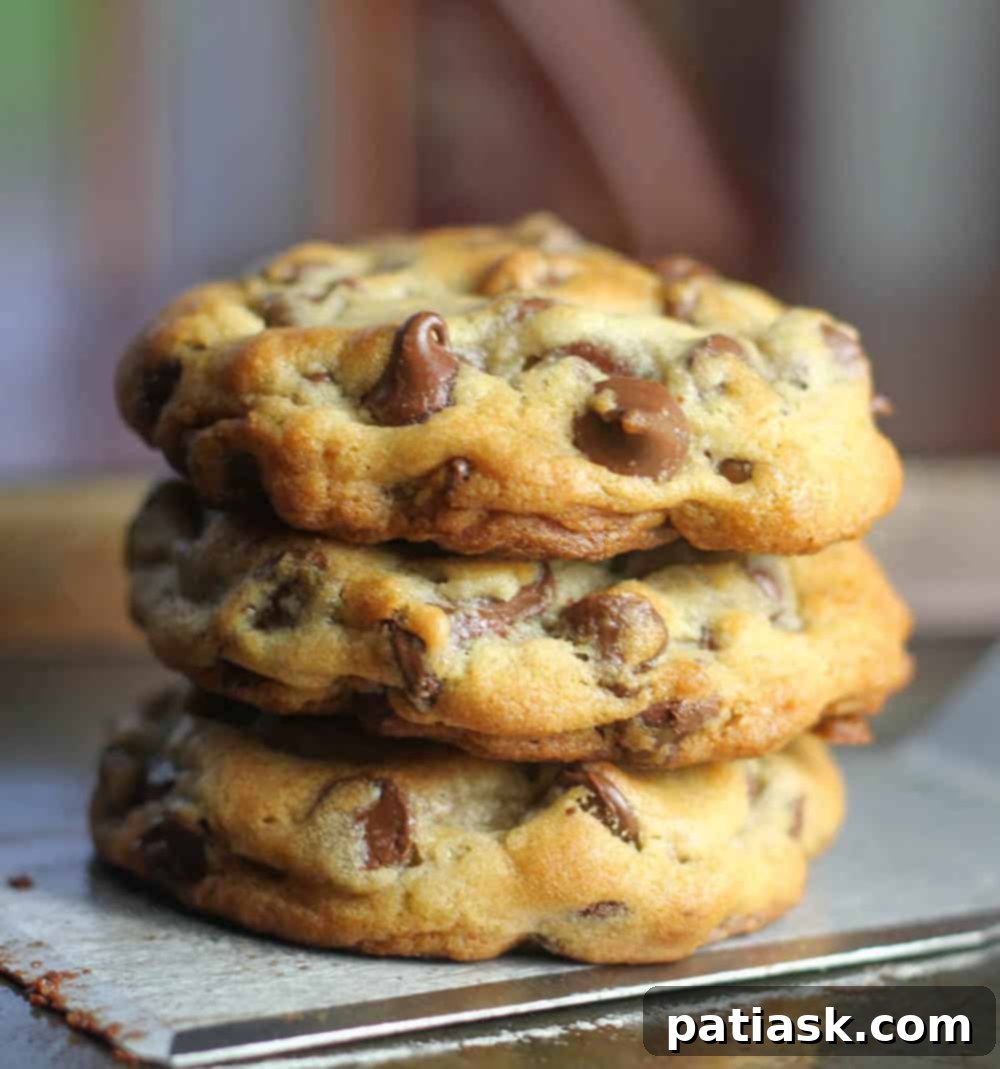
Unlock the secrets to baking truly exceptional cookies every single time with our ultimate guide. Whether you’re a novice baker eager to learn, an experienced home cook looking to refine your techniques, or simply seeking a refresher, these comprehensive perfect cookie baking tips are designed to boost your confidence and elevate your results. Baking cookies is more than just a culinary task; it’s a delightful blend of art and science, a journey that transforms simple ingredients into irresistible treats. From the timeless appeal of a classic chocolate chip cookie to the delicate charm of a lemon-glazed sugar cookie, the satisfaction of creating homemade perfection is unmatched.
Dive into our collection of beloved cookie recipes to inspire your baking adventures. You’ll find irresistible options like our Perfect Chocolate Chip Cookies, the wonderfully Super Soft Lemon Glazed Sugar Cookies, decadent Double Chocolate Peanut Butter Chocolate Chip Cookies, comforting Soft and Chewy Ginger Spiced Molasses Cookies, and beautifully simple Soft Sugar Cookies. These are recipes designed for indulgence, guaranteed to disappear quickly!
Mastering the Art of Perfect Cookies: Essential Baking Tips
Essential Cookie Baking Tip #1
Always Read Through the Entire Cookie Recipe Before You Begin
- Preparation is paramount for successful baking. Before you even think about grabbing your mixing bowl, take the time to read the entire recipe from start to finish. This crucial step allows you to understand the process, identify all necessary ingredients, and confirm you have the right tools on hand. Knowing what to expect prevents surprises and ensures a smooth baking experience.
- Familiarize yourself with the flow and requirements. Reading the recipe two or even three times can help you internalize the instructions, ensuring every step makes sense and flows logically. It’s vital to confirm you have all ingredients and equipment before beginning. Imagine being halfway through a recipe only to discover you’re missing a key component! This foresight can save you from last-minute substitutions or a ruined batch. As many seasoned bakers will attest, skipping this step often leads to frustrating mishaps.
- For a deeper understanding of effective recipe reading, consider articles like Joy The Baker’s insightful guide on Baking 101: How to Read a Recipe.
Essential Cookie Baking Tip #2
Equip Your Kitchen with Good Quality Utensils and Baking Tools
- Baking doesn’t have to be a complicated affair, especially when you have the right equipment. Investing in proper baking tools and utensils can significantly simplify the process, making it more enjoyable and efficient. Quality tools ensure consistency and accuracy, which are cornerstones of successful baking.
- Gather all your essentials beforehand. Prior to starting, make sure to round up everything you’ll need: mixing bowls, baking pans, accurate measuring cups and spoons, a hand or stand mixer, a food processor (if required), a rolling pin, wooden spoons, spatulas, and any other specific items mentioned in your recipe. Laying them out on your countertop creates an organized workflow, reducing stress and allowing you to focus on the magic of baking. Utilizing a comprehensive list, such as 21 Essential Baking Tools Every Home Cook Needs (Plus 16 That Are Nice to Have), can help you stock your kitchen effectively.
Essential Cookie Baking Tip #3
Prioritize High-Quality Ingredients for Superior Cookies
- The quality of your ingredients directly impacts the quality of your baked goods. While it’s possible to bake with lower-quality ingredients, the difference in flavor, texture, and overall appeal when using premium components is undeniable. Think of it as building a house – a strong foundation and superior materials lead to a much better outcome.
- Understand the role of each ingredient. From the richness of butter and the precise sweetness of sugar to the protein content of flour, the intensity of chocolate, fresh spices, pure extracts, and perfectly proportioned leavening agents – every ingredient plays a vital role. Subpar items can drastically alter the outcome, leading to cookies that fall flat, taste bland, or have an undesirable texture. Choosing quality ensures your efforts in the kitchen truly shine.
- For a deeper dive into how individual ingredients affect your cookie’s final form, explore resources like Crafty Baking’s guide on Basic Cookie Ingredients.
Essential Cookie Baking Tip #4
Always Bring Ingredients to Room Temperature for Optimal Baking Results
- The secret to smooth, consistent cookie dough lies in room temperature ingredients. When butter, eggs, and other dairy items are at a consistent, moderate temperature, they emulsify and combine much more effectively with dry ingredients. Cold ingredients, on the other hand, are resistant to mixing, often resulting in a lumpy, curdled, or unevenly textured dough. This can lead to cookies with a less desirable structure and an inconsistent bake.
- Plan ahead for perfect consistency. Ingredients such as butter, shortening, and eggs should typically be brought to room temperature. This usually means allowing them to sit on your counter for several hours before you plan to bake. For other dairy products like yogurt, cream cheese, or buttermilk, the same principle often applies. If you’re pressed for time, a quick trick for butter is to cut it into smaller pieces or even grate it, letting it sit for about 30 minutes. For eggs, placing them in a bowl of warm (not hot) water for 5-10 minutes can speed up the process.
- Achieving the ideal butter temperature. Room temperature butter should be around 65°F (18°C) – it should yield slightly when pressed with a fingertip but still feel cool to the touch and hold its shape. It should be pliable enough to cream easily but not melted or greasy, which can lead to flat, oily cookies. Unless your recipe specifically calls for chilled, very soft, or melted butter, prioritize this room-temperature state for superior results.
- Discover more about the nuances of Baking with Room Temperature Ingredients at Always Eat Dessert.
Essential Cookie Baking Tip #5
Understanding Butter: Your Guide to a Flawless Bake
- Butter is truly the backbone of most incredible cookies. When baking, always refer to your recipe for whether to use salted or unsalted butter. If not specified, unsalted butter is generally preferred, as it gives you control over the salt content, allowing you to add salt separately to balance sweetness and enhance flavors. Butter is a complex emulsion of water, fat, and dairy solids, and maintaining its integrity is key to contributing to the perfect texture and aeration of your baked goods.
- Mastering butter consistency:
- Cold Butter: Straight from the fridge, firm to the touch. Often used in pastries or for cutting into flour to create flaky textures.
- Room Temperature Butter: The most common requirement for cookie recipes. This butter is pliable, leaves a slight indentation when pressed with a finger, but still holds its shape. It’s ideal for creaming with sugar. To achieve this, let cold butter sit out for at least one hour (or longer in cooler environments). Avoid the microwave, as it can quickly melt butter internally, even if it appears solid, leading to greasy results unless the recipe specifically calls for melted butter, such as in these Soft Batch Chocolate Chip Cookies! Pure Nirvana!
- Softened Butter: A step softer than room temperature, it might feel a bit greasy but still has some structure. This is often achieved by leaving it out for a longer period.
- Soft Butter: Too soft to handle easily, but not fully melted. This consistency is less common in cookies that require creaming.
- Melted Butter: Achieved in the microwave or on the stovetop. If a recipe calls for melted butter (or browned butter), ensure it cools slightly before incorporating it into other ingredients, unless the recipe states otherwise.
- For more expert insights and clever hacks, explore Grandma’s Best Tricks for Baking with Butter from Taste of Home.
Essential Cookie Baking Tip #6
Perfecting the Creaming of Butter and Sugar
- The creaming method is a foundational technique in cookie baking. It involves thoroughly mixing softened butter with sugars (granulated, brown, or both) on a moderate to high speed until the mixture becomes light, fluffy, and visibly pale yellow. This process isn’t just about combining ingredients; it’s about aeration – incorporating tiny pockets of air into the butter. These air pockets are essential for creating cookies that rise beautifully and have a tender, airy texture in the oven.
- Achieving the ideal creamed mixture. For softened butter, typically cream the butter and sugar for 2 to 3 minutes with a stand or hand mixer. The goal is a light, voluminous texture. Be careful not to overmix, as this can cause the butter to separate from the sugar, leading to a grainy or soupy mixture. Conversely, undermixed butter and sugar will appear gritty and chunky, resulting in dense, flat cookies lacking the desired lift.
- Tools for perfect creaming. While stand mixers are ideal for their power and consistency, a good hand mixer can also achieve excellent results. If you don’t have a mixer, you can start by mashing softened butter and sugar together with a fork, then switch to a wooden spoon and stir vigorously until the mixture is light and fluffy. It’s a fantastic arm workout and proof that delicious cookies are achievable with basic tools.
- Deepen your understanding of this critical step with Nellie’s Free Range’s guide on How to Cream Butter and Sugar Perfectly Every Time.
Essential Cookie Baking Tip #7
Incorporating Eggs: One at a Time for Uniformity
- Precision in egg addition is key to a consistent cookie dough. When adding eggs to your creamed butter and sugar mixture, it’s crucial to do so one at a time. After each egg is added, mix thoroughly until it is fully incorporated into the mixture before adding the next. This ensures that the egg’s emulsifying properties are effectively distributed, leading to a more cohesive and stable dough.
- Addressing curdled mixtures. Occasionally, especially if the eggs are on the colder side, the mixture might appear slightly curdled after adding an egg. Don’t panic! Simply continue mixing; the mixture will usually come back together as the egg warms and emulsifies. Using room-temperature eggs makes this step even easier, promoting smoother incorporation and contributing to a uniform texture throughout your batch of perfect cookies. Taking this extra moment will pay dividends in the final texture of your baked treats.
Essential Cookie Baking Tip #8
Avoid Overmixing Your Cookie Dough for Tender Results
- The moment dry ingredients meet wet ingredients is a critical juncture in cookie baking. Once you’ve added your flour mixture to the wet butter, sugar, and egg combination, mix the cookie dough only until the dry ingredients are just combined and no streaks of flour remain. Resist the urge to keep mixing!
- Understanding gluten development. Overmixing develops the gluten in the flour excessively, leading to tough, chewy cookies – not the tender, melt-in-your-mouth texture most cookie recipes aim for. The goal is to gently bring the dough together, ensuring uniformity without overworking it. This simple rule is fundamental to achieving delicate, delicious cookies every time. No one wants a hard, dense cookie when they’re expecting a tender treat!
Essential Cookie Baking Tip #9
Thoroughly Whisk Your Dry Ingredients for Even Distribution
- Achieving uniform cookies starts with well-prepared dry ingredients. Most cookie recipes instruct you to whisk together dry components like all-purpose flour, salt, baking powder, and baking soda before incorporating them into your wet mixture. This step is far more important than it might seem!
- Ensuring consistent leavening and texture. Whisking these dry ingredients thoroughly serves multiple purposes: it breaks up any clumps in the flour, preventing dry pockets in your final cookies, and more critically, it evenly distributes the leavening agents (baking powder and baking soda) and salt. When leaveners are uniformly spread, your cookies will rise evenly and consistently. Salt, too, needs to be well-distributed to properly balance the sweetness and enhance the overall flavor. A minute or two of whisking can make a significant difference in the success of your cookies.
Essential Cookie Baking Tip #10
Mastering Flour Measurement for Perfect Cookie Consistency
- Accurate flour measurement is perhaps one of the most vital tips for any baker. Too much flour can drastically alter the texture of your baked goods, making them dry, crumbly, dense, and hard. Conversely, too little flour can lead to overly thin or greasy cookies that spread too much. When in doubt, it’s often better to start with slightly less flour and add more gradually if the dough consistency requires it, referencing the recipe’s visual cues. The key is to incorporate all ingredients just until the flour disappears, without overworking the dough.
- The “spoon and level” method. For dry measuring cups, the most accurate technique is the “spoon and level” method. First, lightly stir or fluff your flour in its container, as it often settles and becomes compacted. Then, use a spoon to gently scoop the flour into your measuring cup, overfilling it slightly. Do not pack it down or tap the cup. Finally, use a straight edge (like the back of a knife or a ruler) to level off the top, removing any excess flour. Repeating this ensures a consistent and accurate measurement.
- For ultimate precision, use a digital scale. The most precise way to measure flour and other dry ingredients is by weight, using a digital kitchen scale. This eliminates the variability that comes with volume measurements and ensures consistent results every time. Many professional recipes now provide ingredient weights for this reason.
- Avoid the common mistake of “scooping” the measuring cup directly into the flour bag, as this compacts the flour significantly, leading to an over-measurement.
- For an in-depth guide on this crucial technique, you’ll find great insights in AllRecipes’ article on How to Measure Flour Correctly.
Advanced Cookie Baking Techniques & FAQs
Oven Temperature Control for Consistent Baking
- Preheating is non-negotiable for superior cookies. Always preheat your oven for at least 10-15 minutes *before* placing your cookies inside. This is particularly important in baking because leavening agents like yeast, baking soda, and baking powder react directly to heat. Placing cookies into an oven that hasn’t reached its target temperature will extend baking time, allowing butter to melt and spread excessively, resulting in thin, flat, and often greasy cookies. A properly preheated oven ensures an immediate, even rise and consistent texture.
- Verify your oven’s accuracy. Ovens can be notoriously unreliable, often running hotter or cooler than their display indicates. Investing in an inexpensive oven thermometer is a simple yet powerful step towards baking perfection. Knowing your oven’s true temperature allows you to make necessary adjustments to baking times, ensuring your cookies achieve that perfect texture and appearance every single time. The difference between an “awesomely baked” cookie and a disappointing one often comes down to precise temperature control.
Avoiding the Pitfall of Over-Baked Cookies
- Timing is everything when it comes to cookie doneness. Most cookie recipes provide visual cues and approximate baking times. On your first batch, set your timer for the lowest suggested time. Look for subtle indicators: lightly golden-brown edges, centers that still appear slightly soft or underdone (they will continue to cook on the hot baking sheet).
- Consider cookie size and oven variations. Remember that cookies come in various sizes, so your baking time will vary. If the edges begin to brown too quickly, your cookies are likely over-baking and will become dry, crumbly, and hard. It’s always better to err on the side of slightly underdone, as cookies continue to set as they cool. This nuanced approach ensures a chewy center and perfect edges.
Selecting and Preparing the Best Baking Sheets for Cookies
- Choose the right baking sheet. For optimal airflow and even baking, use light-colored baking sheets without sides, or with very low sides. Darker sheets can absorb too much heat and lead to over-browning on the bottom.
- The parchment paper advantage. Always line your baking pans with parchment paper or a silicone baking mat. This prevents sticking, promotes even browning, and makes cleanup a breeze. While some recipes suggest lightly greasing the pan, too much grease can cause cookies to spread excessively, leading to thin, crisp, and potentially burnt edges. Parchment paper provides a non-stick, consistent surface that helps cookies maintain their shape.
- Bake one sheet at a time. For proper heat circulation and consistent results, bake only one sheet of cookies at a time, positioned on the center rack of your oven. This ensures even heat distribution around all cookies.
- Cool baking sheets between batches. Crucially, always use a cool or room-temperature baking sheet for each new batch of cookie dough. Placing dough on a hot sheet will cause the butter to melt immediately, leading to cookies that spread excessively, lose their shape, and often bake unevenly. Allow sheets to cool completely or run them under cold water and dry thoroughly before reuse.
The Art of Cooling Cookies for Perfect Firmness
- Patience is a virtue in cookie cooling. For most cookie varieties, unless explicitly instructed otherwise, allow them to rest on the hot baking sheet for a full two minutes after removing them from the oven. This brief period is essential; the residual heat helps the centers finish cooking and gives the cookies time to firm up enough to be safely moved without breaking apart.
- Transition to a wire rack. After the initial two minutes on the baking sheet, carefully transfer the cookies to a wire cooling rack. This allows air to circulate around them, preventing condensation on the bottom and ensuring they cool evenly to their desired texture – whether it’s chewy, crispy, or soft. Rushing this step can lead to misshapen or broken cookies.
Tips for Shaping and Baking Perfectly Formed Cookies
- Achieve uniform cookies with a scoop. For beautifully uniform, picture-perfect cookies, a cookie scoop or ice cream scoop is an invaluable tool. It ensures each cookie is the same size, promoting even baking. For extra-thick, fudgy cookies, try stacking two smaller scoops or forming taller, cylindrical dough balls instead of perfectly round ones.
- Proper spacing is crucial. Always leave at least 2 inches of space between cookie dough balls on the baking sheet. If your cookies are larger or known to spread considerably, allow even more room. Overcrowding can lead to uneven baking and cookies merging into one giant blob.
- Monitor baking closely. Even with the most precise recipe, ovens vary. Set your timer for 2-3 minutes before the minimum bake time suggested. This allows you to check for doneness, observe browning, and adjust the remaining time for subsequent batches. Accurate timing is the difference between a perfectly baked cookie and one that’s either underdone or over-baked.
- Immediate transfer (unless specified). Unless your recipe explicitly instructs otherwise, remove baked cookies from the hot baking sheet to a wire rack immediately after their initial cool-down period on the sheet. This prevents residual heat from over-baking the bottoms and makes them easier to remove without breakage.
- Chilling for shape retention. For cookies that hold their shape beautifully and have defined edges, consider chilling or even briefly freezing the formed dough balls before baking. This solidifies the butter, preventing excessive spread.
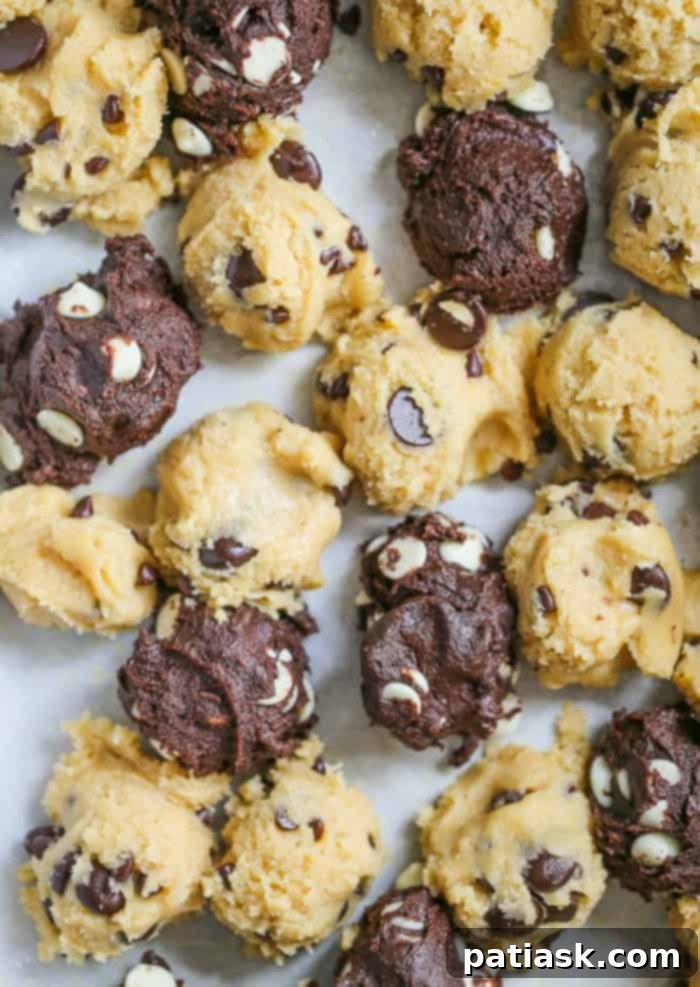
The Power of Chilling Dough for Thicker, Flavorful Cookies
While instant gratification is tempting – who doesn’t want cookies *now*? – chilling your cookie dough, even for a short period, can dramatically improve both texture and flavor. Dough that’s a little warm tends to spread more, resulting in thinner cookies. Chilling solidifies the butter, slowing its melt rate in the oven and promoting less spread and a thicker final product. It also allows the flour to fully hydrate, enhancing the flavor and making the cookies chewier.
- Achieving thicker cookies:
- Strategic add-ins: Incorporating substantial add-ins like nuts, chocolate chips, or dried fruits helps to “thicken” the cookie dough, preventing excessive spread.
- Sugar-to-flour ratio: Recipes with a lower proportion of sugar relative to flour generally result in less spread and thicker cookies, as sugar promotes spreading during baking.
- Dough relaxation and hydration: Many recipes call for chilling dough because it allows the gluten to relax and the flour to fully hydrate, resulting in a more complex flavor profile and a better texture. It also helps the cookies maintain their shape during baking.
- Shape your dough strategically: Instead of perfectly round balls, roll or scoop your cookie dough into taller, more cylindrical shapes, or even stack two smaller scoops on top of each other. This extra height will ensure a thicker cookie. Be prepared to add an extra minute or two to the baking time for these thicker creations.
- Ideal baking surface: Always line your baking sheet with a silicone baking mat or parchment paper. Coating the baking sheet directly with nonstick spray or butter can create an overly greasy foundation, which encourages cookies to spread more thinly.
- Cold dough, cold sheets: Never place cookie dough balls onto hot baking sheets. Always use cool or room temperature sheets to prevent immediate butter melt and excessive spreading.
- Pre-bake freezing boost: For an extra boost of thickness, freeze your individual cookie dough balls or scoops for 10-15 minutes just before baking. Place them on a plate or baking sheet in the freezer while your oven preheats. The colder the dough, the less it will spread, resulting in a delightfully thicker cookie. Remember to scoop or roll the dough *before* chilling, as cold dough becomes as hard as rock-solid ice cream and can be tough on your scoop!
- Reshaping over-spreading cookies: If you notice your cookies spreading more than desired during baking, gently remove the baking sheet from the oven. Using a spoon or the back of a knife, carefully push the edges of the cookie back towards its center. Return to the oven and repeat if necessary. A final reshaping once they’re out of the oven can also help.
Smart Strategies for Freezing Cookie Dough
- Prep ahead and save time. Freezing cookie dough is a fantastic time-saving hack that also often improves the texture of the final cookies. You can prepare large batches of dough and bake fresh cookies whenever a craving strikes!
- Methods for freezing:
- “Slice & Bake” style: For recipes like our Holiday Cranberry Orange Chocolate Chip Shortbread Cookies, shape the dough into logs, wrap them tightly in plastic wrap, and then chill or freeze. When ready to bake, simply slice and bake from frozen (adding a minute or two to the baking time).
- Individual dough balls: For drop cookies, form the dough into individual balls or scoops and place them on a parchment-lined baking sheet. Freeze until solid, then transfer the frozen dough balls to an airtight freezer bag or container. This allows you to bake just a few cookies at a time. When ready, place them frozen directly onto your baking sheet and bake, extending the baking time slightly.
- Freezing allows for a flexible baking schedule – dedicate one day to dough preparation and another, more relaxed day to the joyful process of baking, decorating, and, of course, eating your delicious creations!
- For more detailed advice on preservation, check out our guide on Storing and Freezing Cookies.
Discover Your Perfect Cookie Preference
The world of cookies offers endless possibilities! Do you crave a chewy interior with crispy edges, or a uniformly soft and tender bite? Are you Team Chocolate Chunks or Chocolate Chips? Do you prefer the intensity of dark chocolate, the classic sweetness of milk chocolate, or the balanced profile of semi-sweet? Your preferences truly dictate your perfect cookie.
If you’re a fan of thin and crispy textures, you’ll adore our Perfect Thin & Crispy Chocolate Chip Cookies. For an irresistible combination, our OMG! Ultimate Milk Chocolate Cashew Cookies are a must-try, especially if you love cashews and milk chocolate. And when you’re torn between a rich brownie and a classic cookie, these delightful Cookie Dough Brownie Cookies offer the best of both worlds! The options for creative add-ins and flavor variations are truly boundless. For a fun no-bake twist, explore Mini Cupcake Golden Oreo Cookie Balls, which transform store-bought cookies into delightful truffles, or these equally enticing cookie truffles!

Deep Dive into Chocolate Chip Cookies & Expert Resources
The chocolate chip cookie holds a special place in the hearts of bakers everywhere, and mastering it is a badge of honor. To truly perfect your chocolate chip cookie game, we recommend exploring these fantastic resources:
- Handle the Heat offers an incredibly comprehensive Ultimate Guide to Chocolate Chip Cookies, delving into every variable. They even provide an invaluable Ultimate Cookie Troubleshooting Guide, which is a lifesaver for any baking dilemma!
- And don’t forget our very own detailed guide: How to Bake Perfect Cookie Tips! Because, honestly, what could be better than our truly Perfect Chocolate Chip Cookies? (Seriously, take a look and you’ll understand why they earn that title!)
- Pinch of Yum also provides an excellent read on ‘Tips for Perfect Chocolate Chip Cookies’, offering winning strategies for delightful results.
Armed with these expert cookie baking tips, you are now well-equipped to conquer your kitchen and bake perfect cookies every single time. The journey from ingredients to delicious homemade cookies is incredibly rewarding, and with this knowledge, you’re set for success. Don’t hesitate to explore the myriad of cookie recipes available right here on our blog – simply use the search bar or browse our category selection to find all the cookies your heart desires!
We absolutely love seeing your creations! If you whip up any of our recipes or put these tips into practice, be sure to tag us on Pinterest, Instagram, and Facebook. Happy baking!
Our Irresistible Collection of Favorite Cookie Recipes!
- S’more Chocolate Chip Gooey Bliss Cookies
- Holiday Oreo Cream Cheese Cookies
- Ultimate Dark Chocolate Chip Toffee Walnut Cookies
- ‘Thick ‘n Fudgy’ Chocolate Explosion Cookies
- 3 Ingredient Peanut Butter Cookies
- Soft-Batch Oatmeal Raisin Cookies
- “Phenomenal” Milk Chocolate Chip Peanut Butter Cookies
- Thick & Chewy Chocolate M&M Cookies
- Best-Ever White Chocolate Macadamia Nut Cookies
- Reese’s Peanut Butter Cup Chocolate Chip Oatmeal Cookies
- M&M Chocolate Chip Candy Cookies
More Expert Baking Tips You’ll Love!
- The Perfect Cheesecake Experience
- Top Baking Tips for Quick Breads
- Easy Pie Crust Tips
- Conversion Charts & Essential Kitchen Tips
- 16 Hacks to Make Your Boxed Cake Taste Better @ MSN (Featuring our #9 hack!)
- 5 Expert Tips: How to Tell Your Cake Is Done
- Essential Tips for Perfect Muffin Baking!
- Quickest Ways to Soften Butter
- Freezing & Thawing Bananas for Baking Bliss
