Get ready to celebrate the summer holidays with a bang! This festive Retro Red, White, and Blue Explosion Cake recipe is your ultimate showstopper for any patriotic gathering, especially the 4th of July. With its vibrant tie-dye layers and creamy vanilla buttercream, this cake isn’t just a dessert; it’s an edible celebration of freedom and fun!
Looking for more festive treats to light up your patriotic celebrations? Be sure to explore these delightful options:
- Red, White & Blue Puppy Chow
- 4th of July Cherry Bomb Cupcakes
- Red, White & Blue M&M Chocolate Chip Cookies
The Ultimate Retro Red, White, and Blue Explosion Cake for Your 4th of July Celebration
Prepare to impress your guests with a dessert that’s as dazzling as a fireworks display – our Retro Red, White, and Blue Explosion Cake! This recipe combines simplicity with stunning visual appeal, making it the perfect centerpiece for your 4th of July party, Memorial Day barbecue, or any event where you want to showcase your patriotic spirit. Forget complicated baking; we’re using clever shortcuts and straightforward techniques to create a moist, flavorful cake that looks professionally made.
Why This Patriotic Tie-Dye Cake is a Must-Bake
This isn’t just another cake; it’s an experience! There are so many reasons why our Retro Red, White, and Blue Explosion Cake will become your go-to patriotic dessert:
- Effortlessly Festive: This retro-style dessert is remarkably easy to assemble, allowing you to spend less time fussing in the kitchen and more time enjoying the sunshine and company of your loved ones. We’re talking about simple steps for maximum impact.
- A Feast for Both Eyes and Palate: Featuring a moist and tender vanilla cake base, enveloped in a rich, creamy vanilla buttercream frosting, this cake promises to delight every sense. The classic red, white, and blue colors aren’t just for show; they’re baked into a delicious vanilla canvas that tastes as good as it looks.
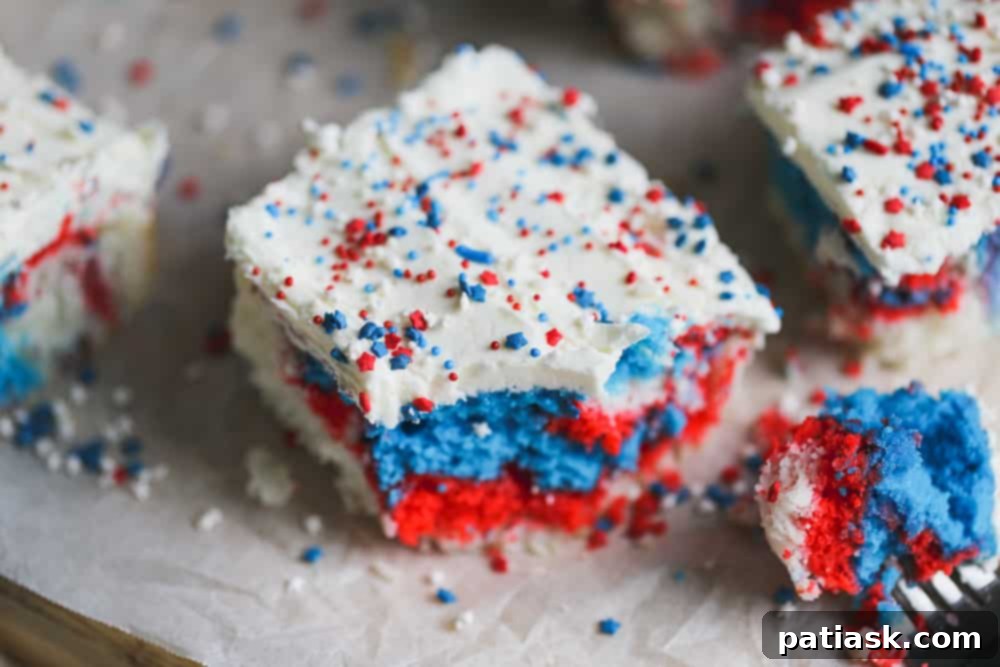
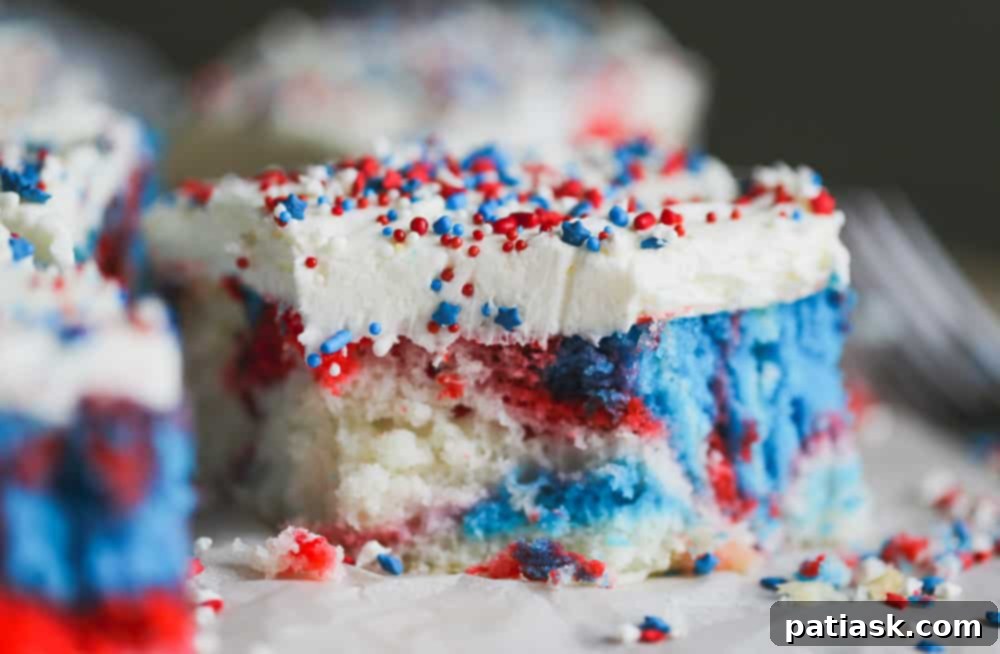
- The Captivating Tie-Dye Effect: The true magic of this cake lies in its vibrant, exploding tie-dye effect. Marbled perfectly within a light and fluffy vanilla white cake, these colors create a stunning visual surprise with every slice. Achieving this dazzling effect is surprisingly simple, especially when starting with your favorite cake box mix.
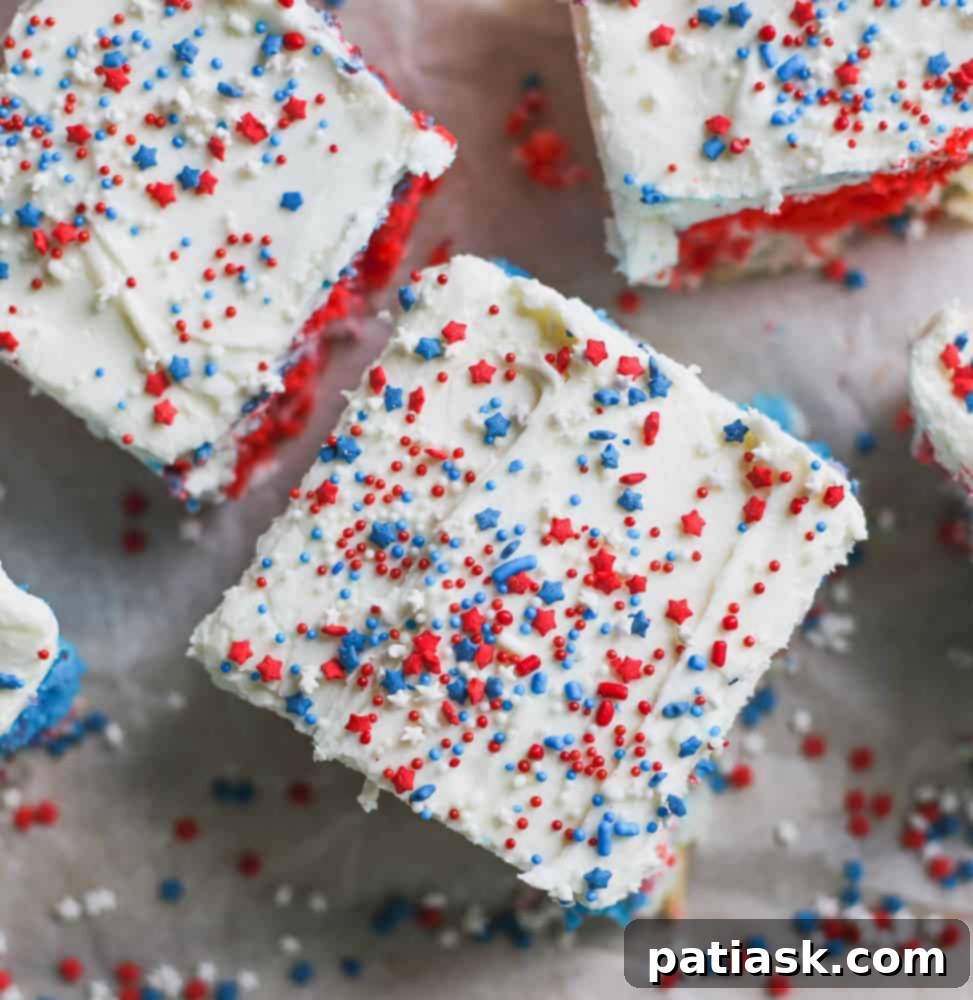
- Adorned with Patriotic Perfection: Crowned with a super creamy vanilla buttercream frosting and sprinkled generously with festive patriotic stars and sprinkles, this cake is ready for its close-up. It’s the ideal way to add that extra spark to your holiday table.
For even more inspiration, check out our collections of 10 Easy Patriotic Desserts and 20 Red, White & Blue Patriotic Desserts to Proudly Hail! You’ll find plenty of delicious ideas to make your celebration memorable.
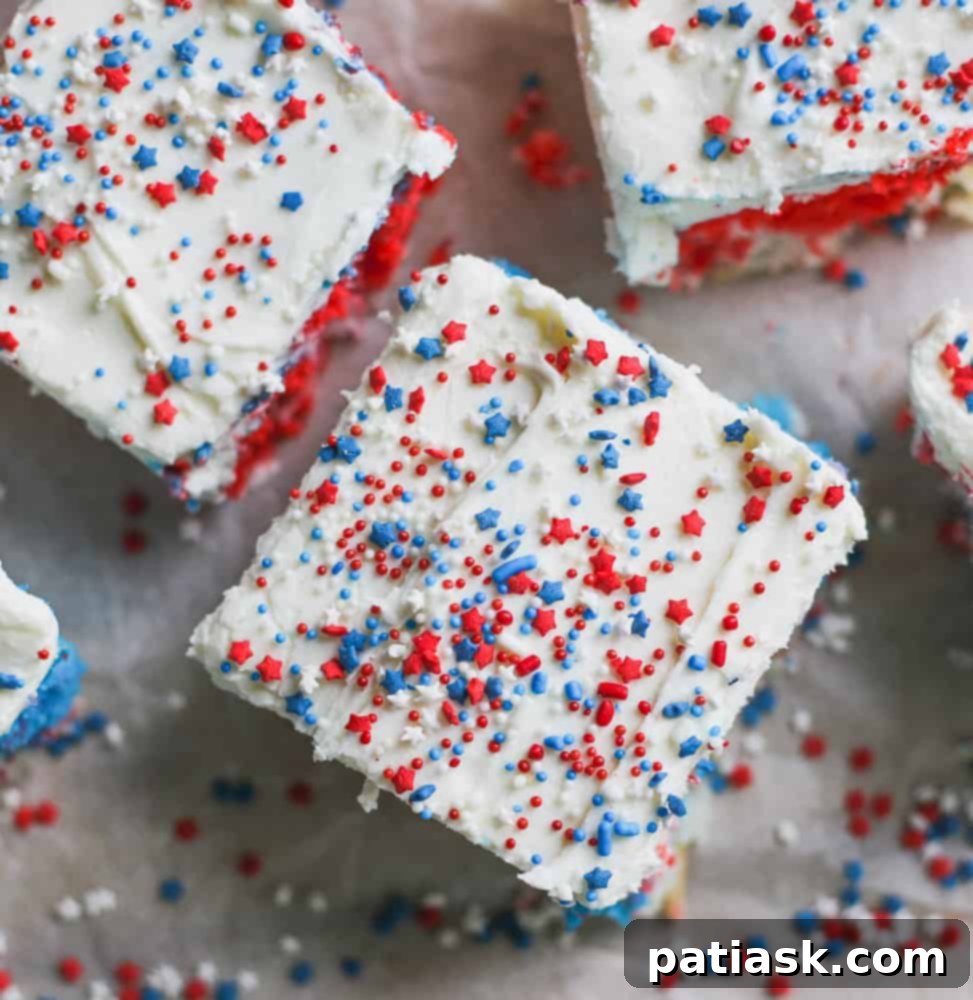
Embrace the Spirit of Tie-Dye for Your 4th of July Celebration!
There’s something inherently joyful about tie-dye. It evokes images of peace, love, freedom, and a free-spirited attitude, often associated with the mellow vibes of the 60s and 70s. This nostalgic aesthetic perfectly complements the retro American theme of our cake, making it not just a dessert, but a statement piece that celebrates the vibrant history and enduring spirit of the nation. The swirling colors are a visual metaphor for the diversity and unity that define the holiday, inviting everyone to partake in a truly unique culinary experience.
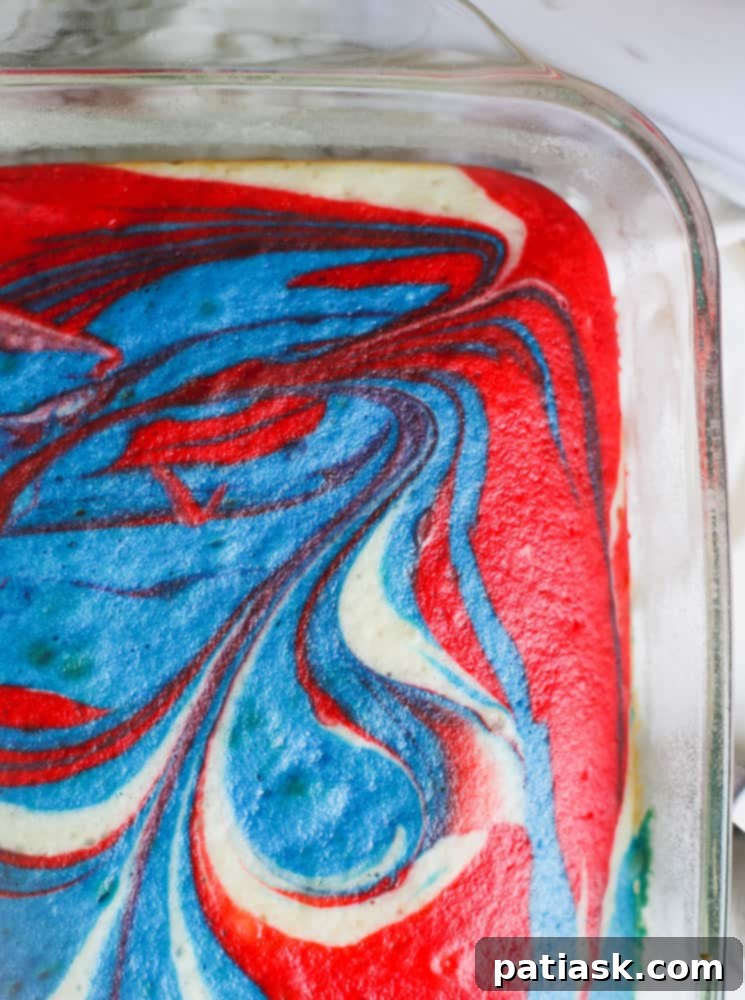
Mastering Vibrant Colors with Gel Food Pastes
Have you ever attempted a multi-colored cake? It might seem intimidating, but achieving those bright, eye-catching hues is simpler than you think. The secret lies in using high-quality gel food coloring. Unlike liquid food colorings, gel pastes are highly concentrated, meaning you need only a small amount to achieve intensely vivid colors without altering the cake batter’s consistency. This ensures your red, white, and blue layers pop brilliantly, just like a summer fireworks display.
Choosing the Right Food Coloring
For the best results, invest in a good set of gel food pastes. They offer superior color intensity and are more stable during baking. A comprehensive set, such as a 12-color liqua-gel decorating and baking set, is an excellent and affordable option that will last through many baking projects, guaranteeing awesome, consistent results every time. Remember, a little goes a long way!
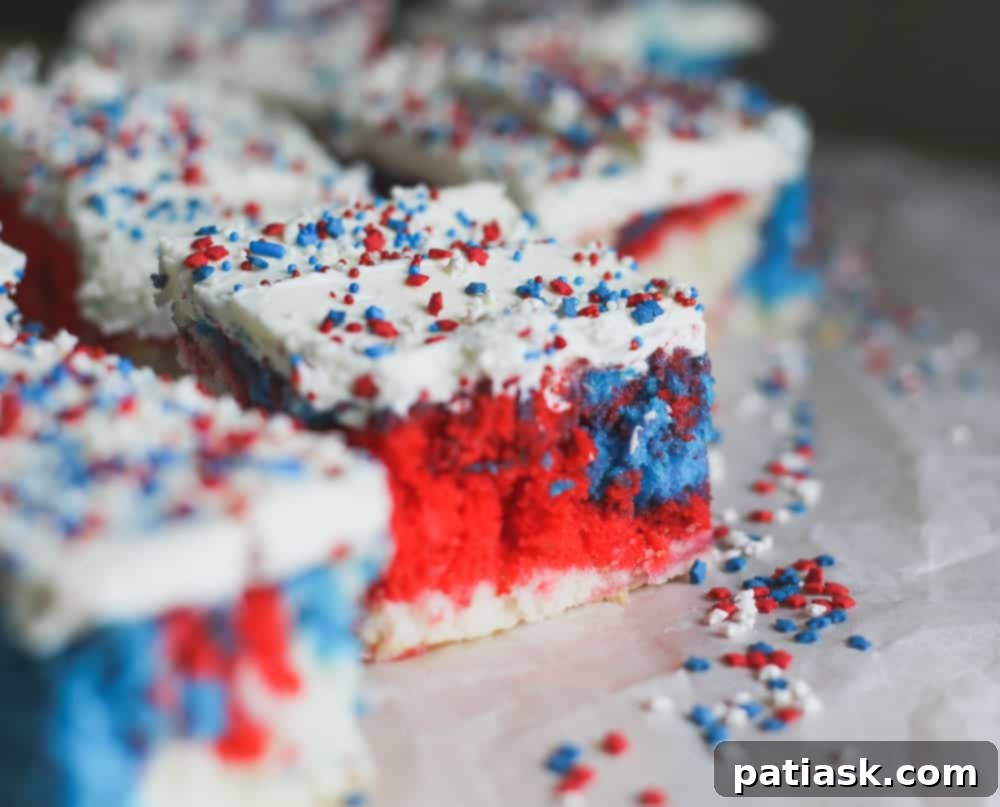
Ingredients for Your Patriotic Masterpiece
Crafting this stunning Retro Red, White, and Blue Explosion Cake requires a few simple ingredients, easily found at your local grocery store. We’re keeping things convenient by starting with a quality cake mix, but feel free to use your favorite homemade vanilla cake recipe if you prefer.
For the Red, White & Blue Cake:
- 1 box vanilla white cake mix, plus ingredients required for a 9×13 inch pan (ensure you use the egg white version on the box for a brighter white batter)
- Red gel food paste
- Blue gel food paste
Essential Tools You’ll Need:
- 9×13 inch baking pan
- Large mixing bowl
- 2 small mixing bowls
- Whisk or electric mixer
- Spatula
- Sharp knife or skewer for swirling
- Non-stick cooking spray
Step-by-Step Guide to Baking Your Explosion Cake
This recipe is designed for ease without compromising on visual impact or taste. We’ll take a shortcut with a quality cake mix, making the process quick and enjoyable. Pillsbury’s Vanilla cake mix is often a favorite for its consistently moist and delicious results, but any preferred brand works wonderfully. The real fun begins when we introduce the colors!
Preparing the Cake Batter and Coloring
- First, prepare your vanilla cake batter according to the package instructions. Pay attention to using the egg white version if available, as this helps keep the “white” portion of your cake truly bright.
- Once your batter is mixed, evenly divide it into three portions. Keep one portion in your original mixing bowl (this will be your white layer). Pour the other two portions into separate small bowls.
- Add a small amount of red gel food paste to one of the small bowls and blue gel food paste to the other. Mix each bowl gently until you achieve your desired vibrant red and blue colors. Remember, gel pastes are concentrated, so start with a tiny bit and add more if needed.
Achieving the Iconic Tie-Dye Swirl
- Prepare a 9×13 inch baking pan by spraying it generously with non-stick cooking spray. Pour the uncolored (white) cake batter into the prepared pan, spreading it evenly across the bottom.
- Now, it’s time for the “explosion” effect! Randomly spoon or pour dollops of the red and blue batters over the white batter. You can alternate colors or place them however you like – there’s no wrong way to create your unique design.
- Using a knife or a skewer, gently swirl the colored batters into the white. The key here is to swirl just a few times. Over-swirling can cause the colors to blend too much, resulting in muted tones rather than distinct red, white, and blue swirls. A light touch creates those beautiful, marbled patterns.
- Bake the cake according to your cake mix instructions, or until a toothpick inserted into the center comes out clean.
- Once baked, let the cake cool completely in the pan on a wire rack before attempting to frost it. A warm cake will melt your frosting, leading to a messy finish.
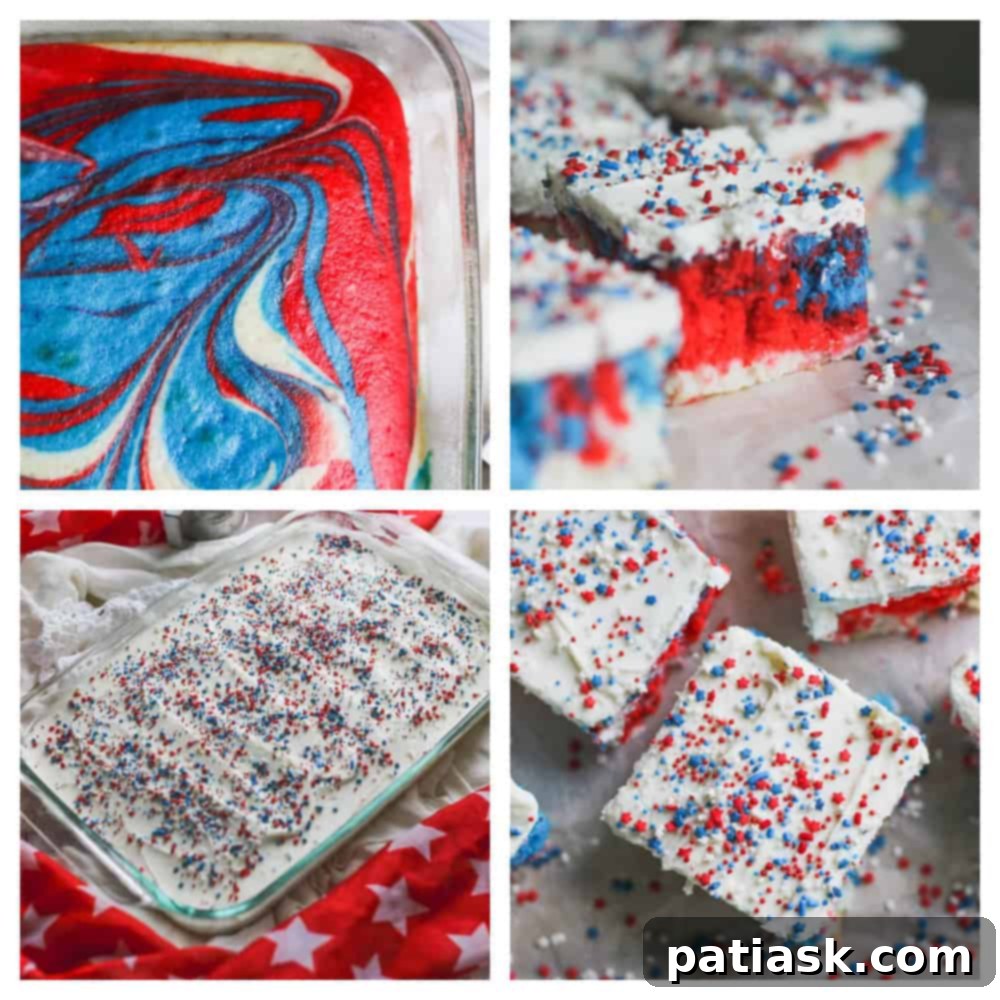
Tips for Success: Ensuring a Stunning Patriotic Cake
To ensure your red, white, and blue swirls turn out as psychedelic and patriotic as you envision, keep these essential tips in mind:
- Color Concentration is Key: For the best tie-dye effect, using gel food pastes is crucial. They provide intense color without adding excess liquid, which could thin your batter and affect the cake’s texture.
- Gentle Swirling: After pouring your white, red, and blue batters into the pan, resist the urge to over-mix. A few gentle swirls with a knife or skewer are all it takes to create beautiful marbling. Too much swirling will cause the colors to become muddy or blend into purple and pink, losing the distinct red, white, and blue effect.
- True Colors: The color of your batter before baking is a good indicator of how it will look once baked. Gel pastes hold their vibrancy well through the baking process.
- Even Distribution: Try to distribute your colored batters randomly but somewhat evenly over the white base. This helps ensure a good mix of all three colors throughout the cake.
- Cool Completely: Always allow your cake to cool entirely before applying frosting. This prevents the frosting from melting and sliding off, ensuring a smooth and beautiful finish.
Crafting the Perfect Vanilla Buttercream Frosting
While you could certainly opt for your favorite store-bought frosting, whipping up a batch of homemade vanilla buttercream takes this cake to an entirely new level. It’s surprisingly easy and quick to make, yielding a super creamy texture and an amazing flavor that complements virtually any dessert. This simple recipe, consisting of softened butter, powdered sugar, vanilla extract, a touch of milk, and a pinch of salt, comes together in minutes.
Ingredients for Irresistible Buttercream:
Vanilla Frosting Recipe
- ½ cup unsalted butter, softened
- 3 cups powdered sugar
- 2 tablespoons almond milk or milk of choice
- 1 teaspoon vanilla extract
- ⅛ teaspoon salt
Whipping Up Your Creamy Frosting:
- In a large mixing bowl, cream the softened butter for a couple of minutes until it’s light and fluffy.
- Gradually add the powdered sugar, milk, vanilla extract, and salt. Beat on low speed until combined, then increase to medium-high and beat until the frosting is smooth, creamy, and spreadable.
- Once your cake has completely cooled, generously frost it with this luscious vanilla buttercream.
Assembling and Decorating Your Festive Cake
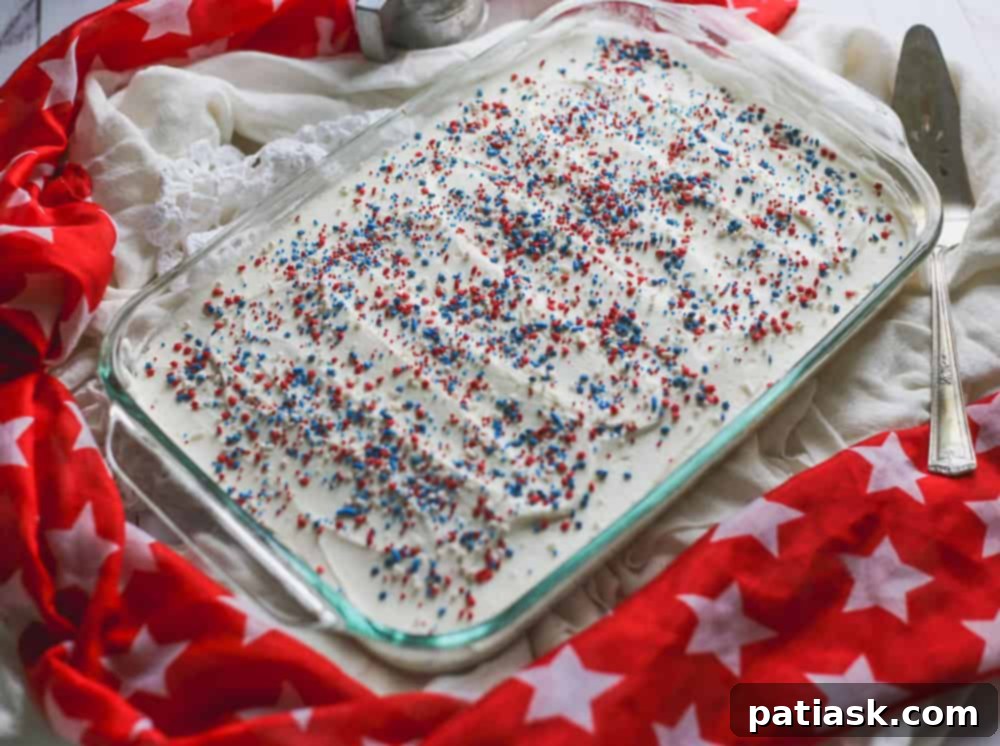
With your perfectly baked and cooled cake, and a bowl of velvety vanilla buttercream ready, the final step is to bring it all together. Spread the frosting evenly over the top and sides of the cake, creating a smooth canvas. Then comes the fun part: decorating! Sprinkle generously with patriotic red, white, and blue sprinkles, stars, or even small edible glitter for extra sparkle. These festive toppings are the perfect finishing touch, transforming your cake into a true celebration.
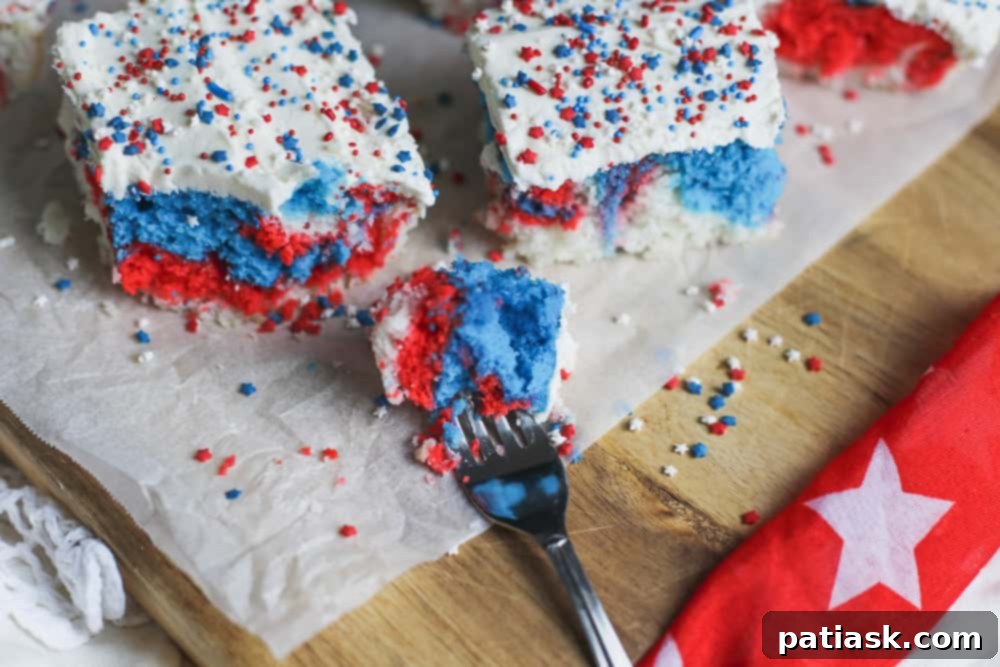
Serving Suggestions and Storage
This Retro Red, White, and Blue Explosion Cake is best served at room temperature to ensure the frosting is at its creamiest and the cake remains moist. Pair it with fresh berries, a scoop of vanilla ice cream, or a glass of iced tea for a refreshing summer treat.
Leftovers (if there are any!) can be stored in an airtight container at room temperature for up to 2-3 days, or in the refrigerator for up to a week. For longer storage, slices can be individually wrapped and frozen for up to a month, then thawed overnight in the refrigerator before serving.
Beyond the 4th: Other Occasions for Your Red, White, and Blue Cake
While perfectly suited for the Fourth of July, this versatile cake isn’t limited to just one holiday. Its vibrant colors and joyful spirit make it ideal for a variety of patriotic celebrations throughout the year. Consider baking it for Memorial Day picnics, Labor Day gatherings, Veterans Day commemorations, or even a themed birthday party. It’s a fantastic way to honor national pride and add a splash of color and fun to any event. This summer, put a delightful twist on the classic red, white, and blue theme with this unforgettable Retro Red, White, and Blue Cake. And remember, don’t forget the sprinkles!
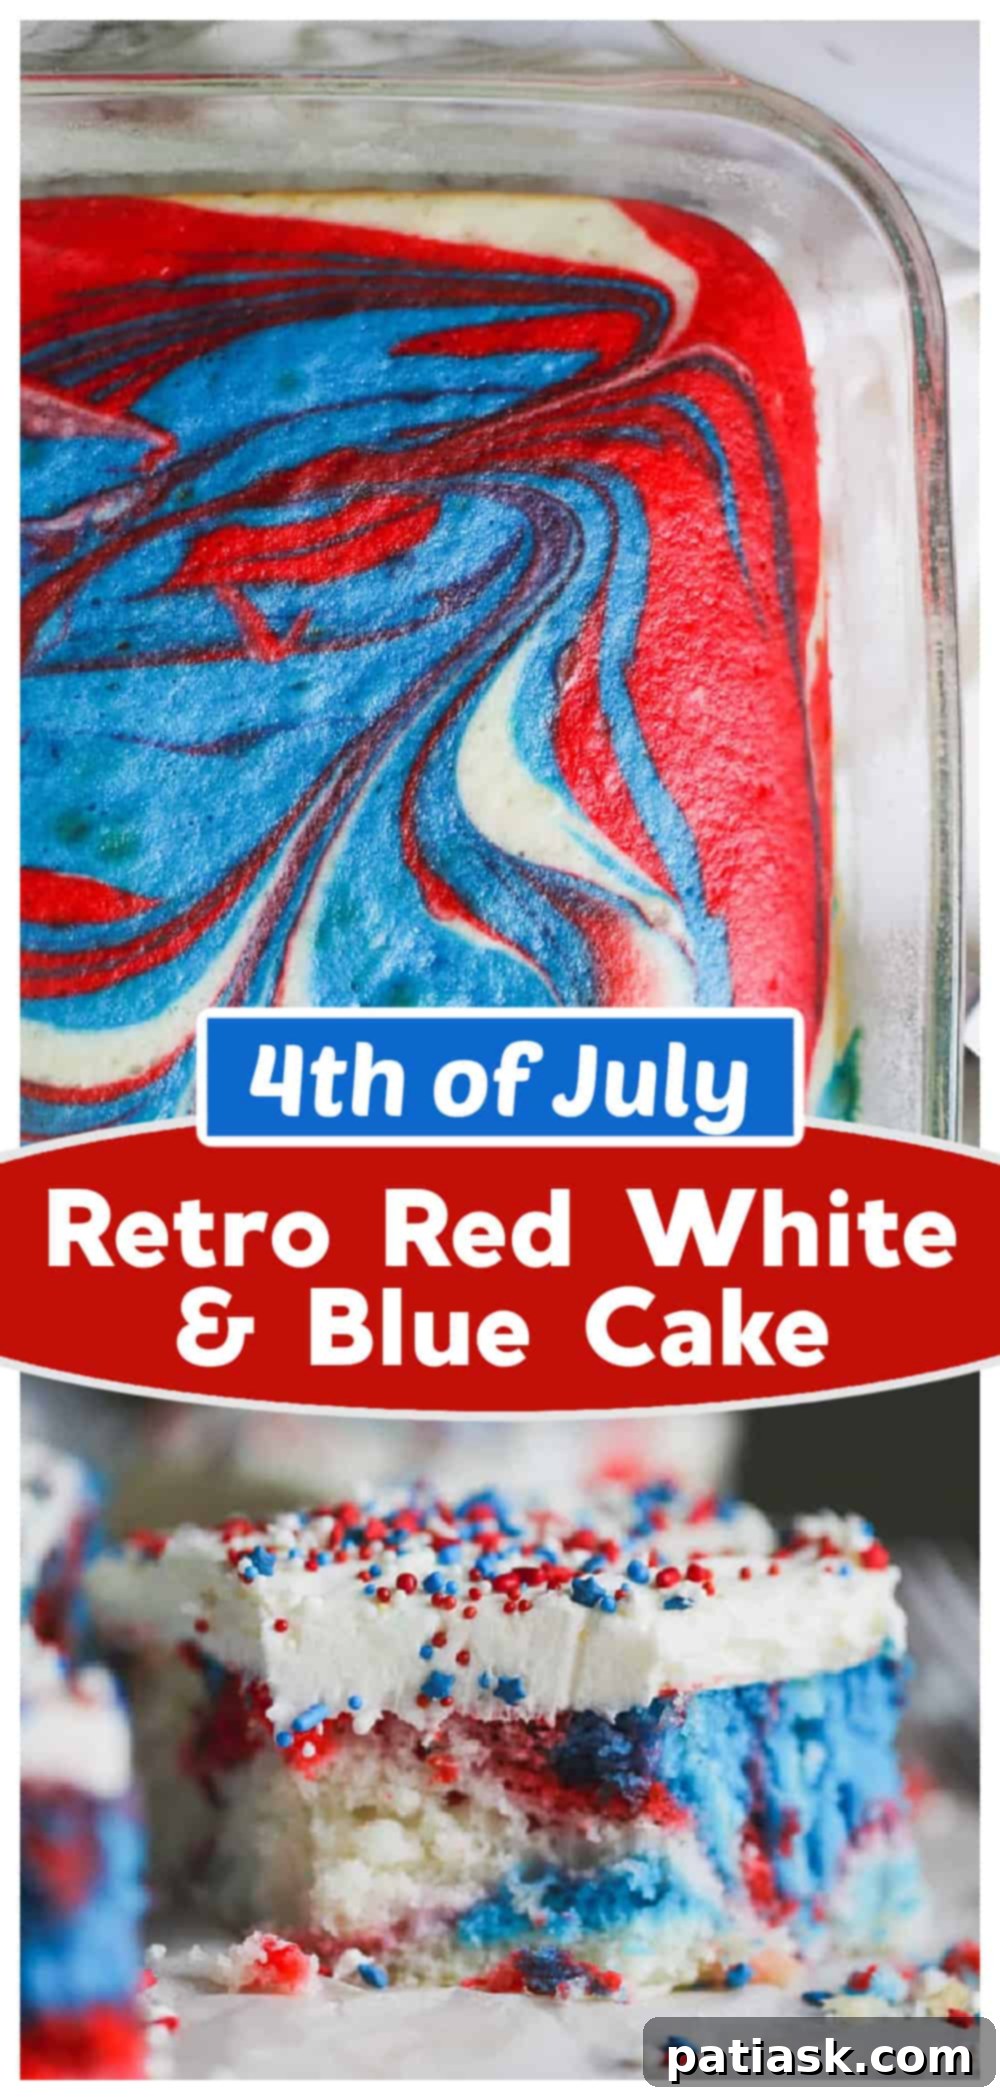
With the Fourth of July quickly approaching, there’s no better way to show your patriotic pride than by serving this classic Retro Red, White, and Blue Explosion Cake. A symbol of national pride and remembrance, this cake is sure to get the party started with a pop of red, white, and blue.
Now Let’s Party, Man!
More Patriotic Desserts You’ll Love!
- 4th of July – Chocolate Dipped Peanut Butter Cup Double Stuffed Oreos
- 4th of July Oreo Truffles
- Red, White and Blue Chocolate Chip Bars!
You may also want to swoon over this amazing Chocolate Cream Layered Dessert! Definitely yummilicious!
Retro Red, White, and Blue Explosion Cake Recipe Card
Recipe Summary
Rock out this 4th of July with this festive, Retro Red, White, and Blue Explosion Cake! The vibrant colors literally explode with the red, white, and blue tie-dye effect, marbled in a light and fluffy vanilla white cake easily by using your favorite cake box mix! It’s topped with a super creamy vanilla buttercream frosting and pretty patriotic sprinkles and stars.
- Author: Kim Lange
- Prep Time: 10 minutes
- Servings: 12 Servings
- Course: Dessert
- Cuisine: American
- Keywords: 4th of July, 9×13 pan, cake, cake box mix, red white and blue
Ingredients
For the Red, White & Blue Cake:
- 1 box vanilla cake mix (plus ingredients required for a 9×13 inch pan, using egg white version on box)
- Red gel paste
- Blue gel paste
For the Vanilla Frosting:
- ½ cup unsalted butter, softened
- 3 cups powdered sugar
- 2 tablespoons almond milk or regular milk
- 1 teaspoon vanilla extract
- ⅛ teaspoon salt
For Decoration:
- Red, white, and blue sprinkles
Instructions
Retro Red, White, and Blue Cake:
- Make vanilla cake batter according to box instructions. Evenly divide the cake batter into two separate small bowls, keeping one portion of vanilla batter in the original mixing bowl.
- Add red gel paste to one small bowl of batter and blue gel paste to the other. Mix each until the desired vibrant color is achieved.
- Pour the uncolored (white) cake batter into a 9×13 inch cake pan that has been sprayed with non-stick spray.
- Then, randomly pour dollops of the blue and red batters on top of the white batter. Gently swirl with a knife a few times to create a tie-dye effect, but do not over-mix, or the colors will blend too much.
- Bake the cake according to the box instructions until a toothpick inserted into the center comes out clean. Let cool completely.
- Once the cake has cooled, proceed to make the frosting.
Vanilla Frosting:
- Cream the softened butter in a bowl for a couple of minutes until light and fluffy.
- Gradually add the powdered sugar, milk, vanilla extract, and salt. Beat until the frosting is smooth and creamy.
- Frost the cooled cake generously with the vanilla buttercream and sprinkle patriotic sprinkles on top before serving.
